You know that feeling when you finally find a Disney tree that looks exactly the way Christmas feels in your head — and then you realize the photo has no source, no links, and no explanation? We spent serious time browsing Hobby Lobby, Etsy, and Target to bring you only what’s actually worth your attention this year, from $6 ornaments to a $249 embroidered tree skirt. Inside you’ll find 18 curated ideas covering plush-character maximalism, vintage Mickey nostalgia, classic red-and-green tradition, and pastel princess pastels — with budget and luxury versions compared side by side. What’s driving 2026 is the shift toward trees that look collected over a decade rather than bought in one afternoon, and resale ornament lots are finally making that realistic. And stay until the end — we break down the most common mistakes that can ruin these looks. 📌 Save this to Pinterest for later — you’ll want to revisit these ideas.
1. Plush Character Tree With a Giant Red Glitter Bow
holding this whole tree together isn’t the plush characters — it’s the oversized red glitter bow parked at the very top. Plush ornaments are soft, round, and heavy, and without a hard sparkly crown above them the tree reads as a pile of toys rather than a styled tree. That bow gives your eye somewhere to land and pulls the red from the wrapped presents at the base all the way up through the branches. Take it away and you don’t just lose a decoration, you lose the entire composition.
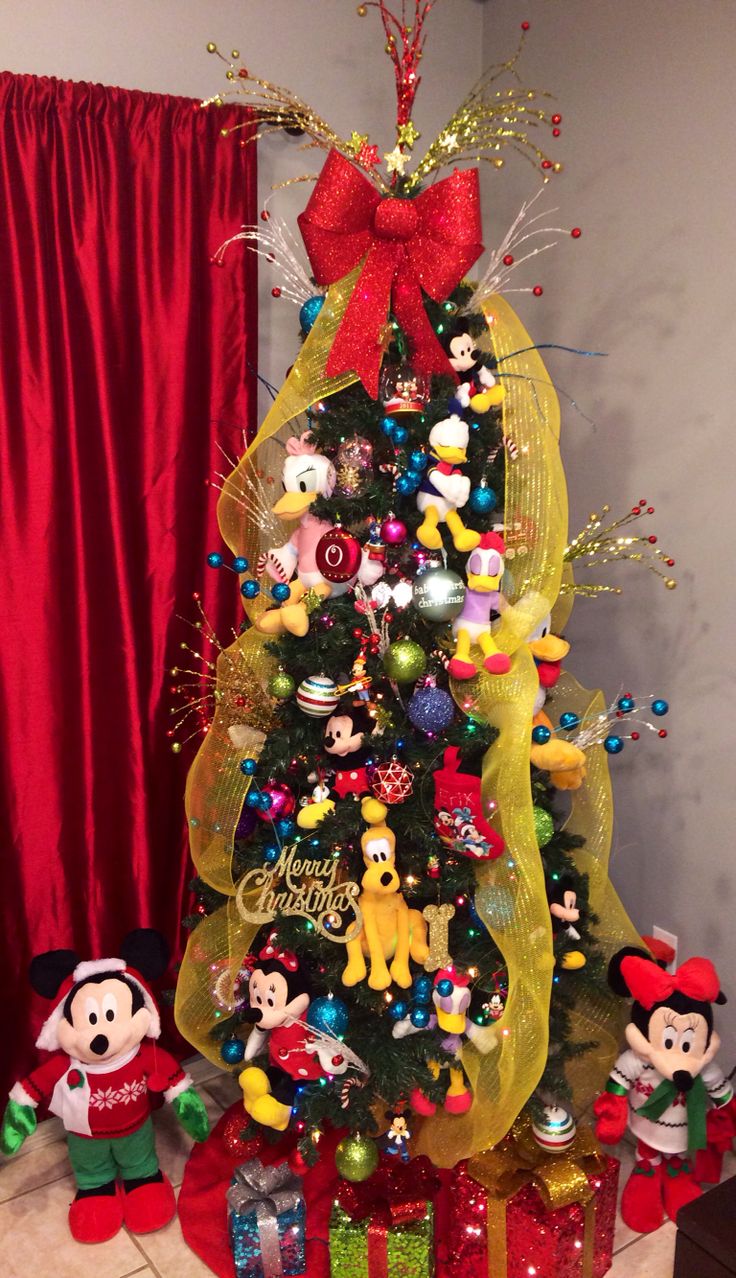
Strip the palette down and the formula is roughly 55% green tree, 35% red-and-yellow play, 10% gold glitter. The yellow mesh ribbon carries that middle layer — it spirals in wide, loose loops instead of tight garland wraps, which keeps the tree from feeling crowded once you start hanging chunky plush characters. To swap the mood while keeping the math: hold the percentages, trade yellow mesh for cobalt blue ribbon and the gold picks for silver, and the exact same formula reads icy instead of carnival.
2. Red Ribbon Hangers and Character Snowglobes
Heavy character ornaments — snowglobes, sleigh figurines, anything resin or glass — should never hang from the tip of a branch. Tuck them two branch nodes in, on the lower third of the tree, and hang them from the ornament cap’s metal ring rather than the glass or the figurine itself. A 6-inch loop of 1.5-inch-wide satin ribbon spreads the weight better than a thin metal hook and gives you that uniform red-ribbon rhythm. Anything over roughly 8 ounces gets two attachment points, not one.
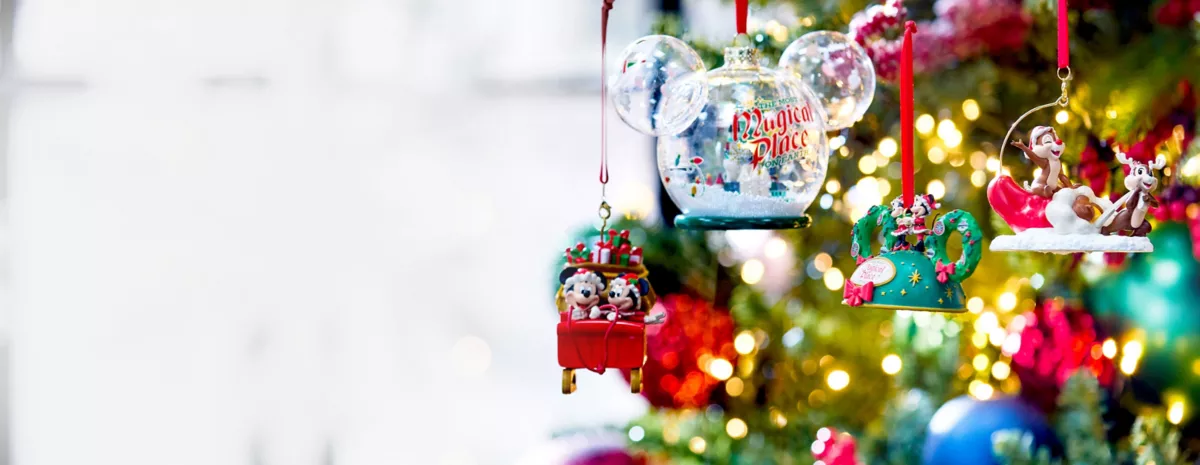
What makes this work is repetition doing the styling so the ornaments don’t have to match. The pieces here are wildly different — a snowglobe, a wreath, a chipmunk in a sleigh — but every single one hangs from the same red ribbon, so your eye reads rhythm instead of chaos. The warm string lights sit deep in the branches rather than on the tips, lighting the tree from the inside out. Compare this with Idea #13, where the same Mickey shapes go glossy and silver-hung and the whole tree reads far more traditional.
3. A Clear Snowflake Topper With Elf-Hatted Chip and Dale
You can build a figurine topper like this in about 25 minutes for $10 to $18.
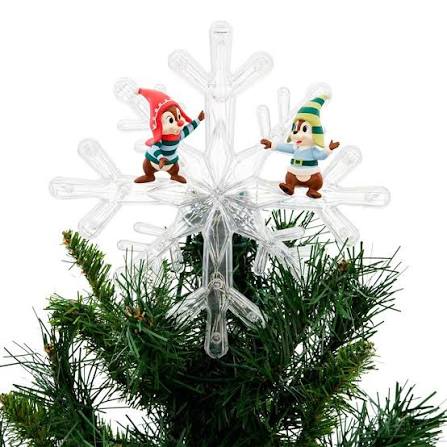
- Start with a clear acrylic snowflake ornament or a craft-store snowflake blank, 5 to 6 inches across ($4-$9).
- Zip-tie or floral-wire two small figurines onto opposite arms of the snowflake so the weight stays centered.
- Keep the whole assembly under 14 ounces, or the leader branch will bend by New Year’s.
- Set the snowflake on the top leader branch and wrap 22-gauge floral wire around the branch and the hanging loop three times.
- Cover the wire with white floral tape so it disappears against the clear plastic.
The detail doing all the charm here is the striped elf hats on the two chipmunks. Take those hats away and you have two brown figurines standing on a snowflake. With them, the topper tells a tiny story — two characters who climbed to the top of the tree in costume. Scale is what makes a novelty topper look designed instead of accidental: the snowflake should be at least three times wider than the widest figurine. Anything smaller and it looks like they’re falling off a cracker.
4. Glossy Red Spheres and a Striped Ribbon Crown
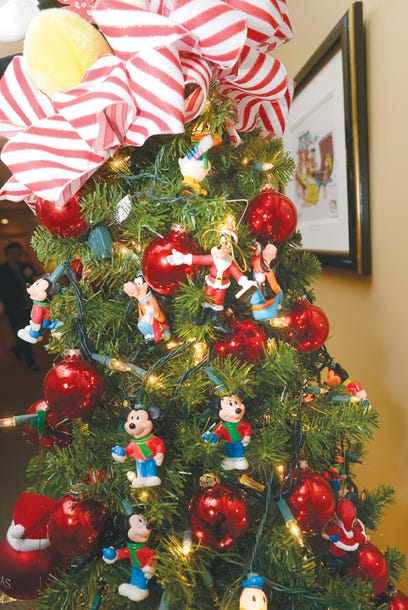
Here’s what a densely packed figurine-and-sphere tree realistically costs to build from scratch.
- 7.5 ft unlit artificial tree: $120-$400
- 600 warm white string lights: $25-$60
- 100 glossy shatterproof red spheres in mixed sizes: $30-$70
- 12-20 Disney character figurine ornaments: $60-$200
- 3 yards of wide red-and-white striped ribbon for the crown: $12-$25
- Tree skirt: $30-$90
Total: roughly $280-$845, depending on how many figurines you already own. Budget alternative: buy the striped ribbon and red spheres new, then fill the rest from a Marketplace ornament lot at $20-$40 and you land closer to $150.
Density is the whole trick, and it’s measurable. Work in a spiral: place an ornament every 4 to 5 inches of branch, and keep the front third of the tree roughly twice as dense as the back. Use three sizes — 2-inch, 3-inch, and 4-inch — in a 3:2:1 ratio. Hang the glossy red spheres first, deep in the branches where they catch the light, then place character figurines last on the outer branches between 40 and 70 inches from the floor. That’s the band people actually look at.
5. The Figural Popcorn Bucket Tree That Started It All
You don’t need the park version to get this energy. A ceramic or plastic figural light-up tree — the kind Target and Walmart roll out every November — runs $22 to $45, and thrift stores hand them over for $4 to $8 any time of year. If you specifically want the sculpted garland and those inset bulb shapes, Mercari and eBay sellers list retired park buckets at $35 to $90 depending on the year. Add a $6 Mickey figurine in a Santa hat at the base and at three feet away on a shelf, nobody can tell. If you’re building a whole tree around this character energy instead, start with Idea #11.
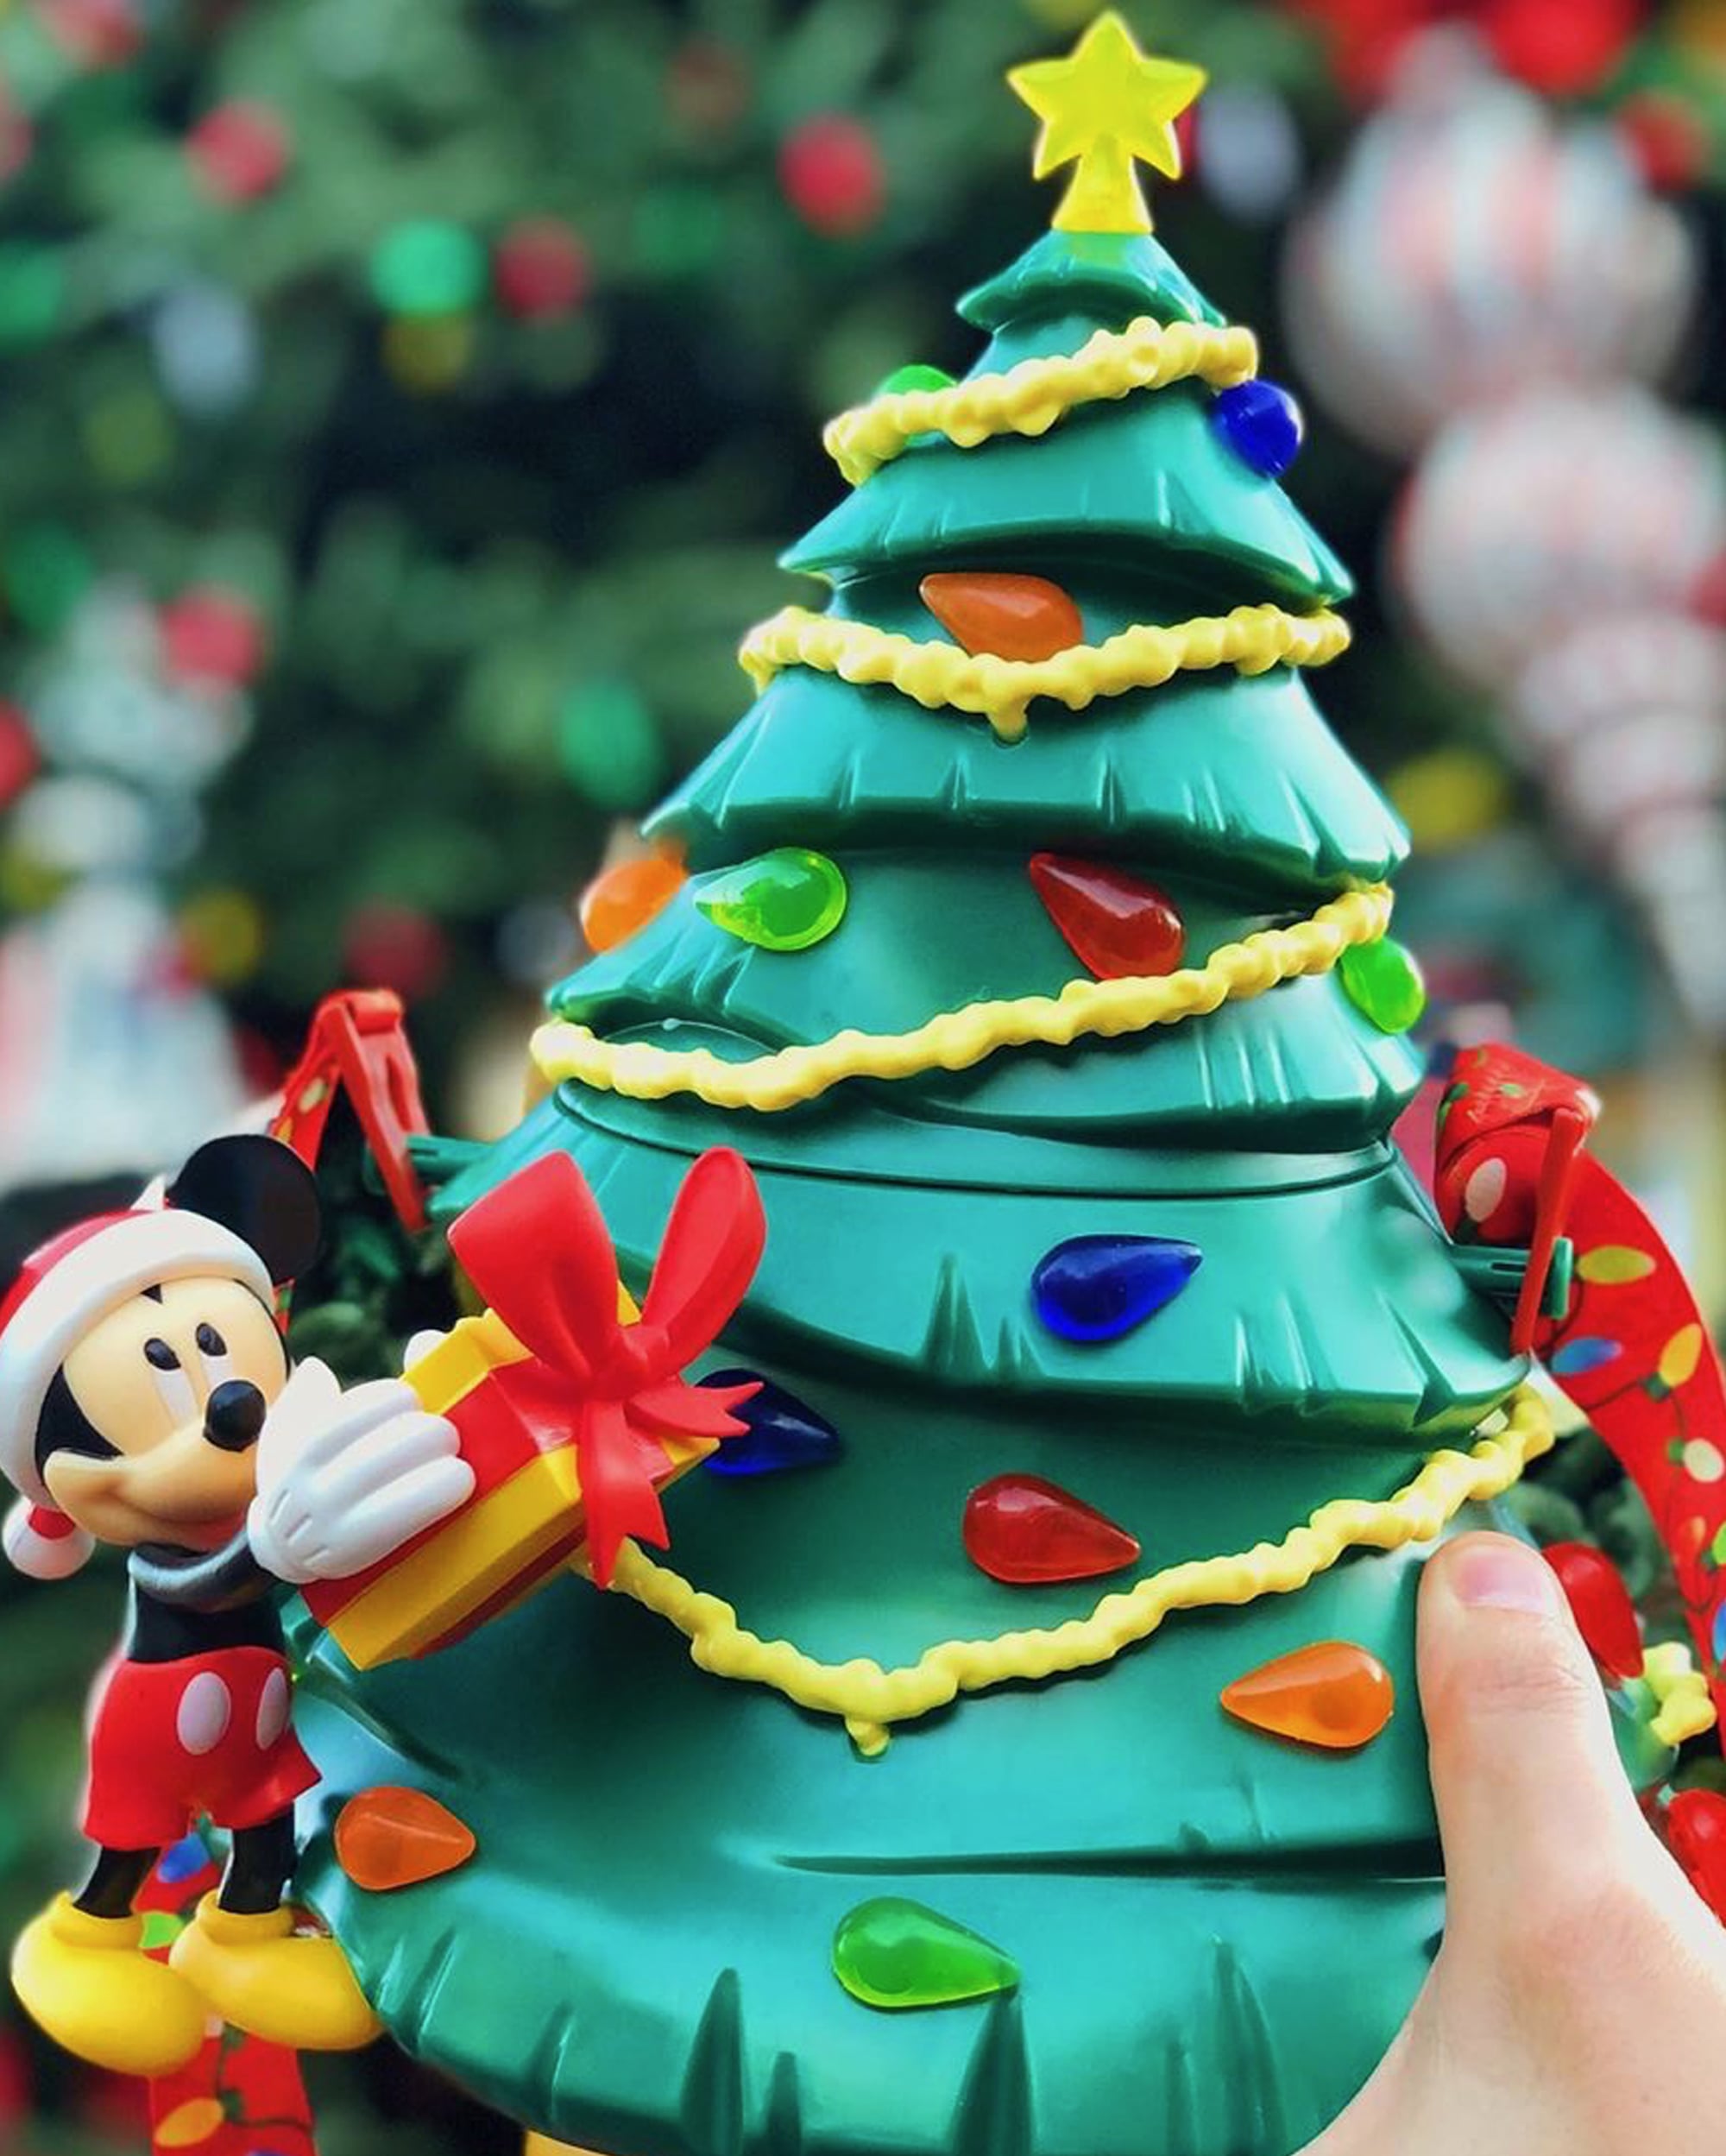
Straight talk: this is shelf décor, not a tree. It’s usually 6 to 10 inches tall, it’s molded plastic, and the sculpted lights don’t actually light anything. It also yellows in direct sun, and the finish scratches if you store it loose in a bin with metal hooks — keep it in a cotton bag or the original box. If you want it to read as a holiday display rather than a novelty, group it with two other small pieces on a shelf instead of leaving it alone in the middle of a mantel.
6. Flocked Mini Tree With Photo Frames and Ear Headbands
A miniature flocked tree like this one wants a surface 30 to 36 inches wide and at least 12 inches deep — a console, an entry table, or the top of a low bookcase. Go bigger and it gets swallowed; go narrower and the flocked branches hang over the edge where people brush them. These read best at 3 to 4 feet tall with the top of the tree landing between 48 and 60 inches off the floor, right in your sightline when you walk past. If you have a full-size room to fill, see Idea #7 instead — same character energy, much bigger footprint.
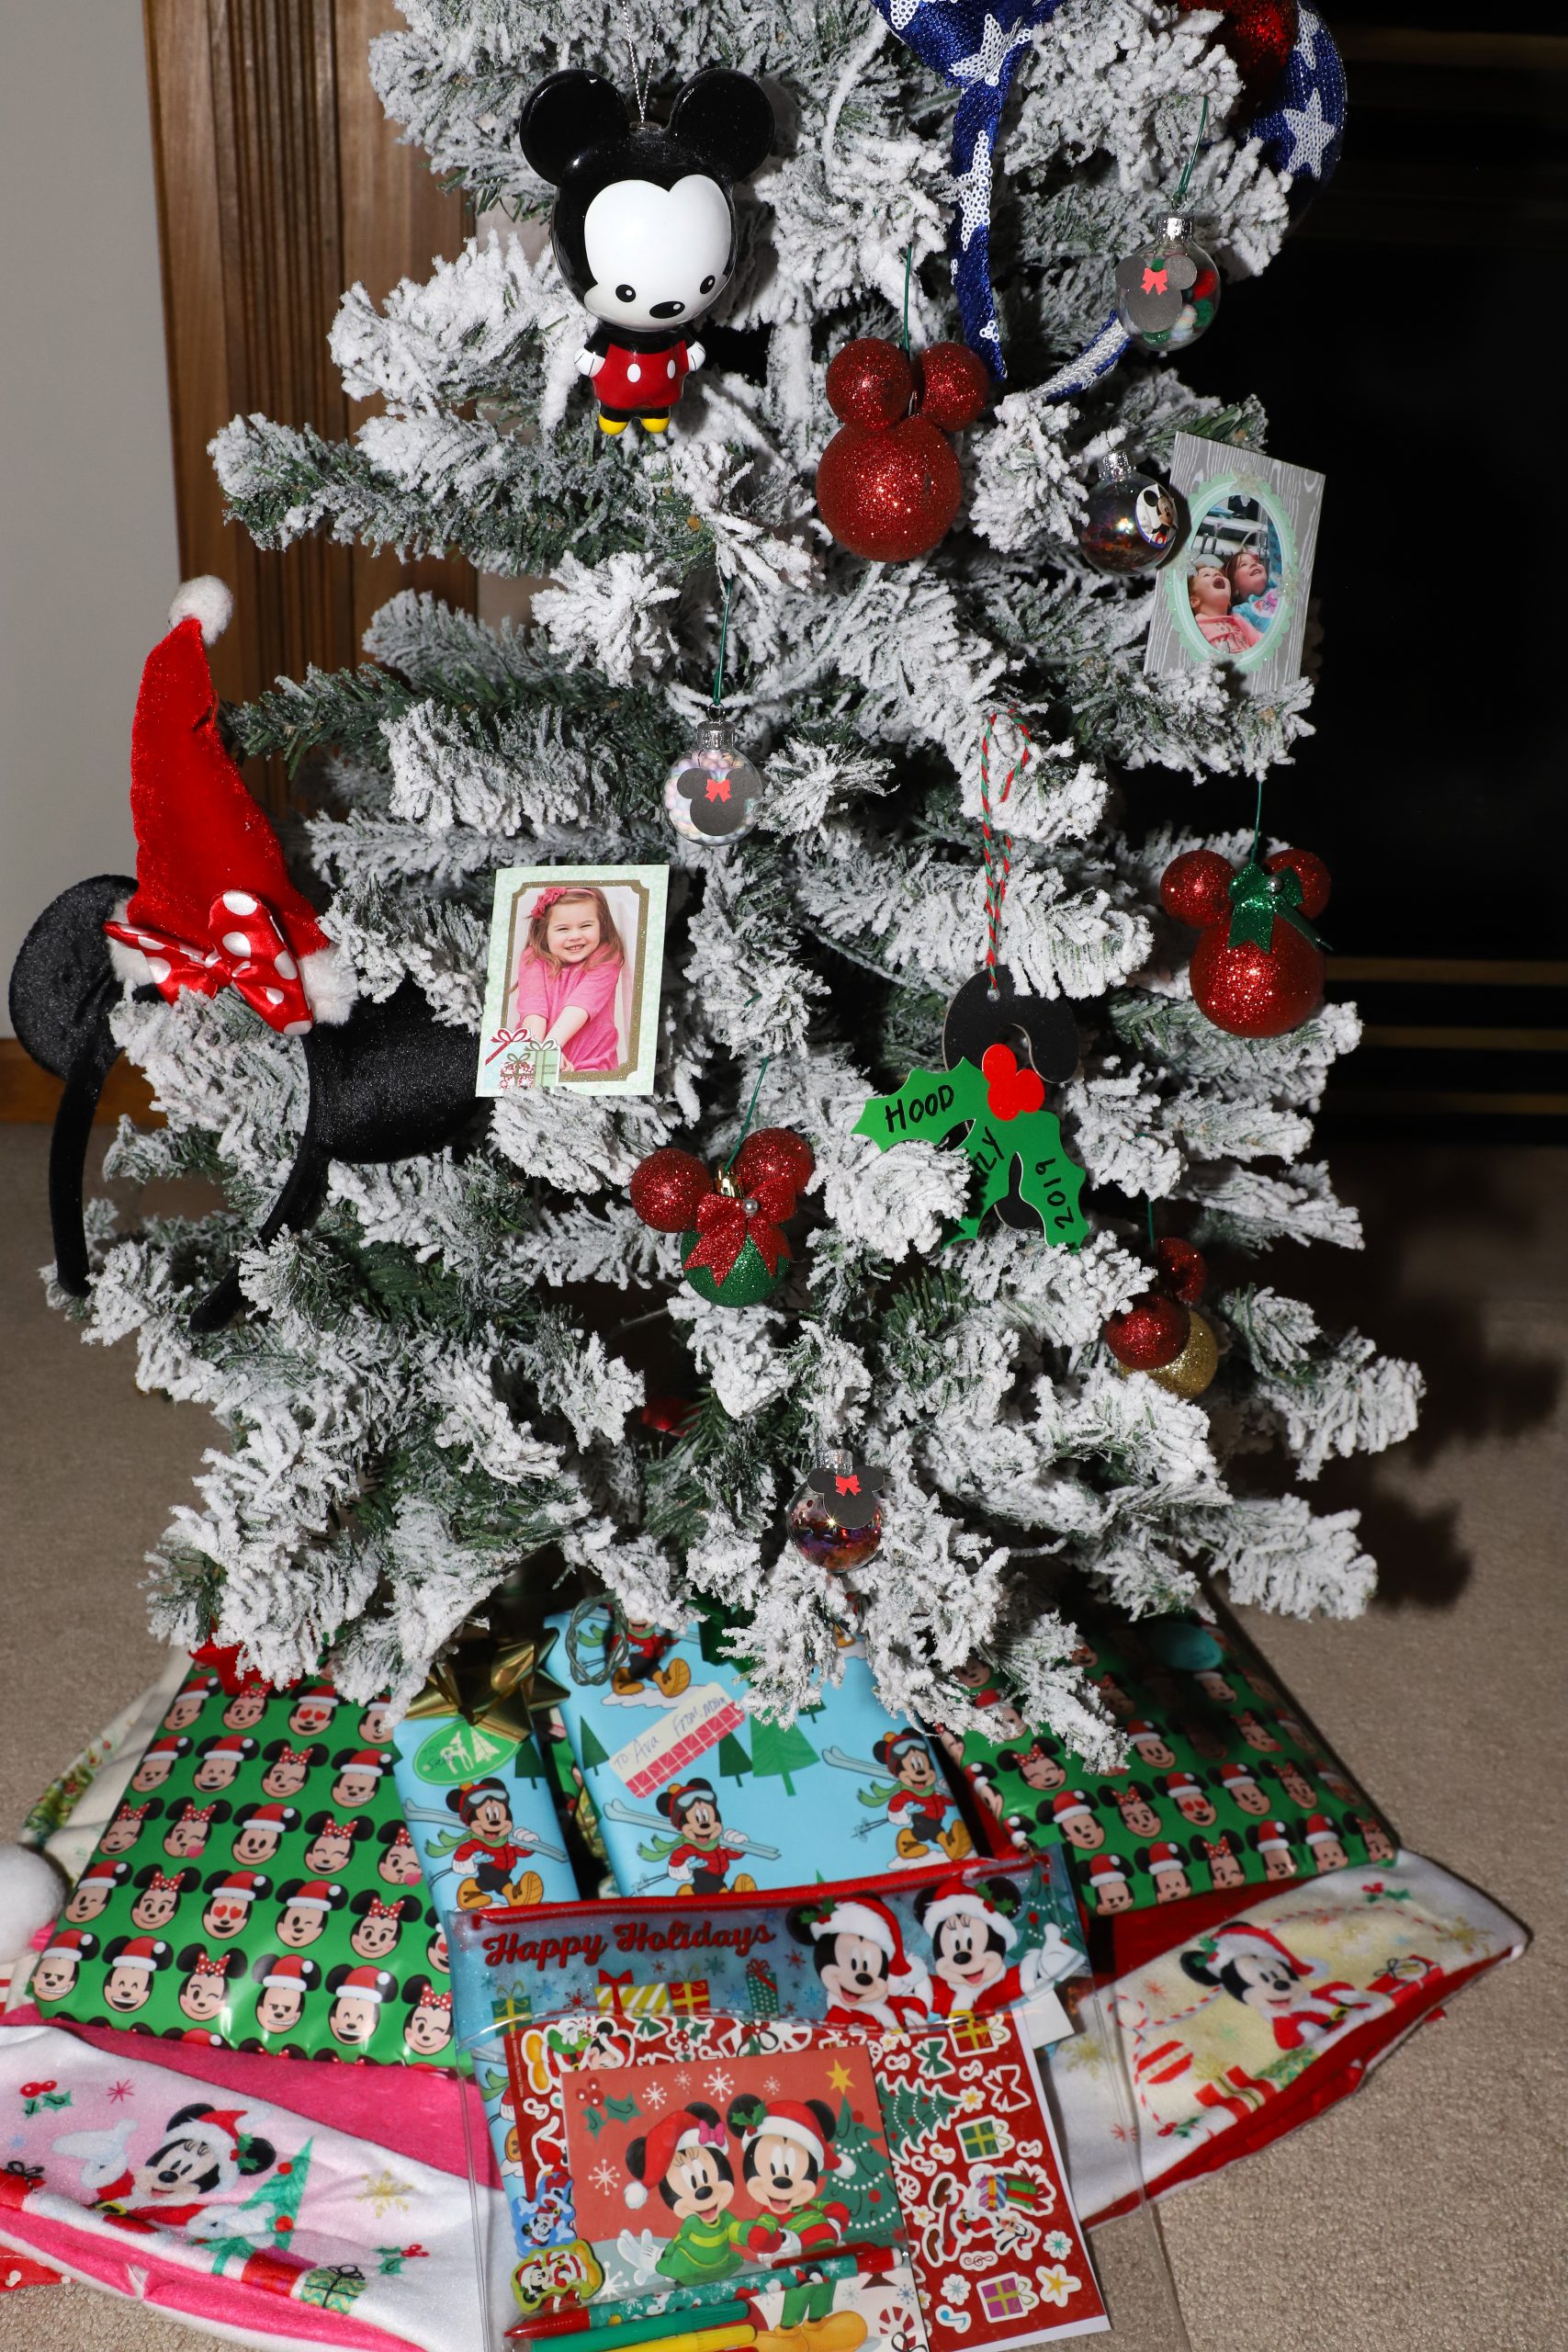
Print photo ornaments at 2.5 by 3.5 inches — standard wallet size — and laminate them two-sided so they don’t curl in a humid room. Punch one hole in the top corner, thread an 8-inch length of 1/8-inch red satin ribbon, and cluster three or four together on a single branch so they read as a group rather than as clutter. For the character ear headbands, hang them from a small clear adhesive hook stuck to the branch’s underside, never from the headband itself, or the ears will stretch out of shape.
7. Four Trees, One Room, and Two Ornament Wreaths
The multiple-tree thing isn’t just for people with a spare ballroom. In 2026 the trend is one big tree plus two to four themed minis, and this room shows the logic: a princess tree, a gingerbread-and-candy tree, plush-heavy trees, all in one space so nobody has to negotiate which theme wins. It’s also why oversized ornament wreaths ended up on the wall above the brick fireplace — once you commit to a character-driven room, empty beige wall reads as a hole in the design. Pinterest searches for multiple Christmas trees have climbed every season since 2022 and they aren’t slowing down.
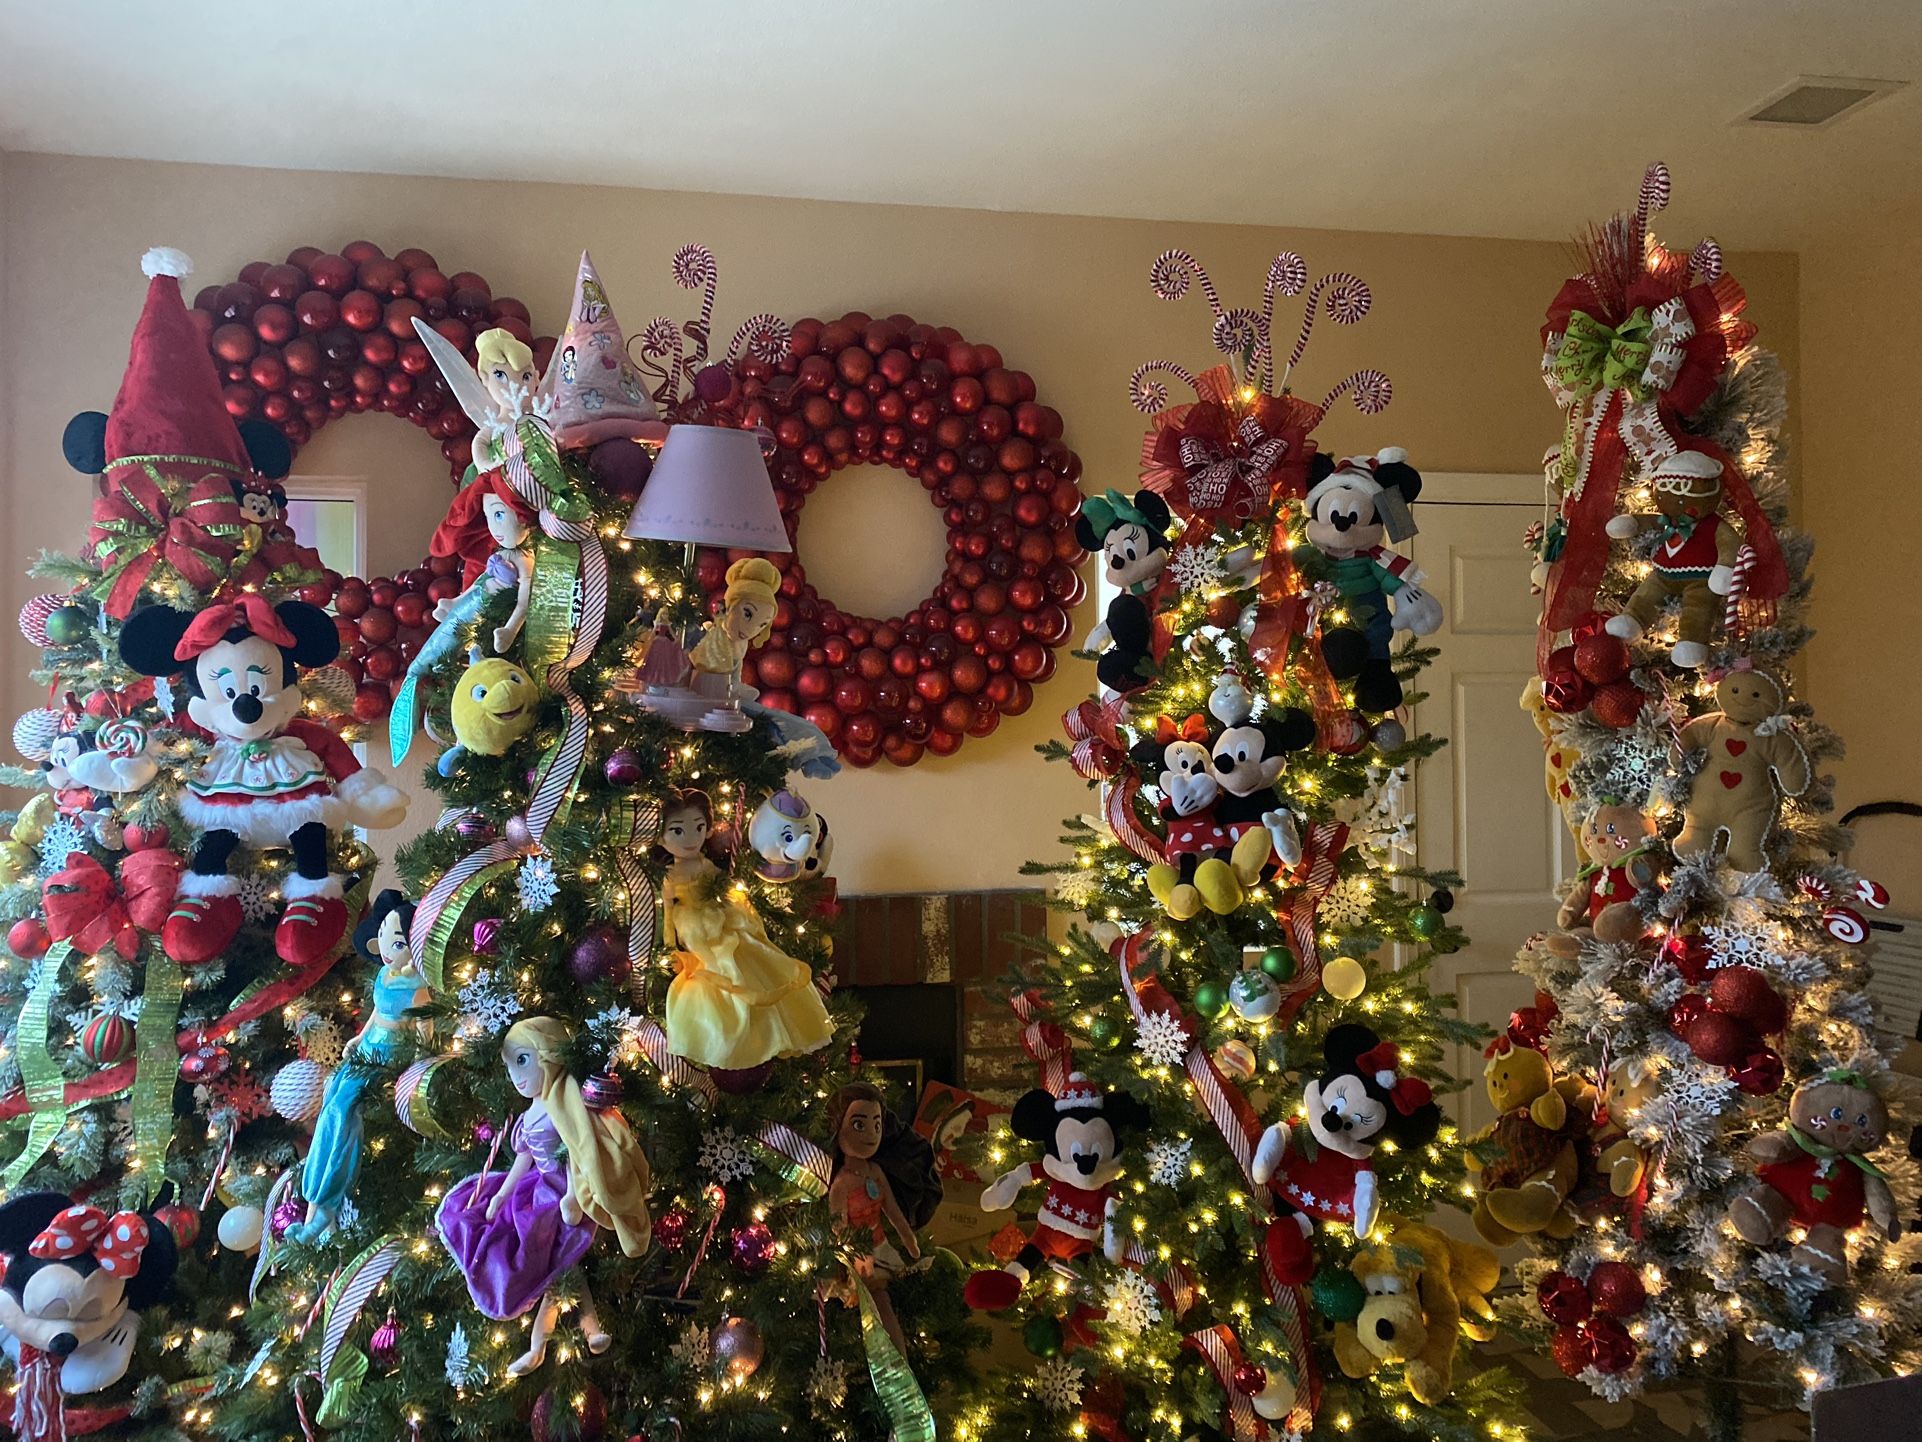
Repetition with variation is the principle. Four trees could easily look like a store display, but each one has a different silhouette, height, and ornament density, so the eye keeps traveling instead of comparing. The beige wall matters more than it looks — a colored or patterned backdrop behind four busy trees would turn that corner into visual static. And notice the wreaths pull the same red as the ornaments, which is what ties four separate vignettes into one room.
8. Tabletop Mickey Tree With Printed Ribbon Bows
Custom printed ribbon bows make a mini tree feel made-for-you for about $18.
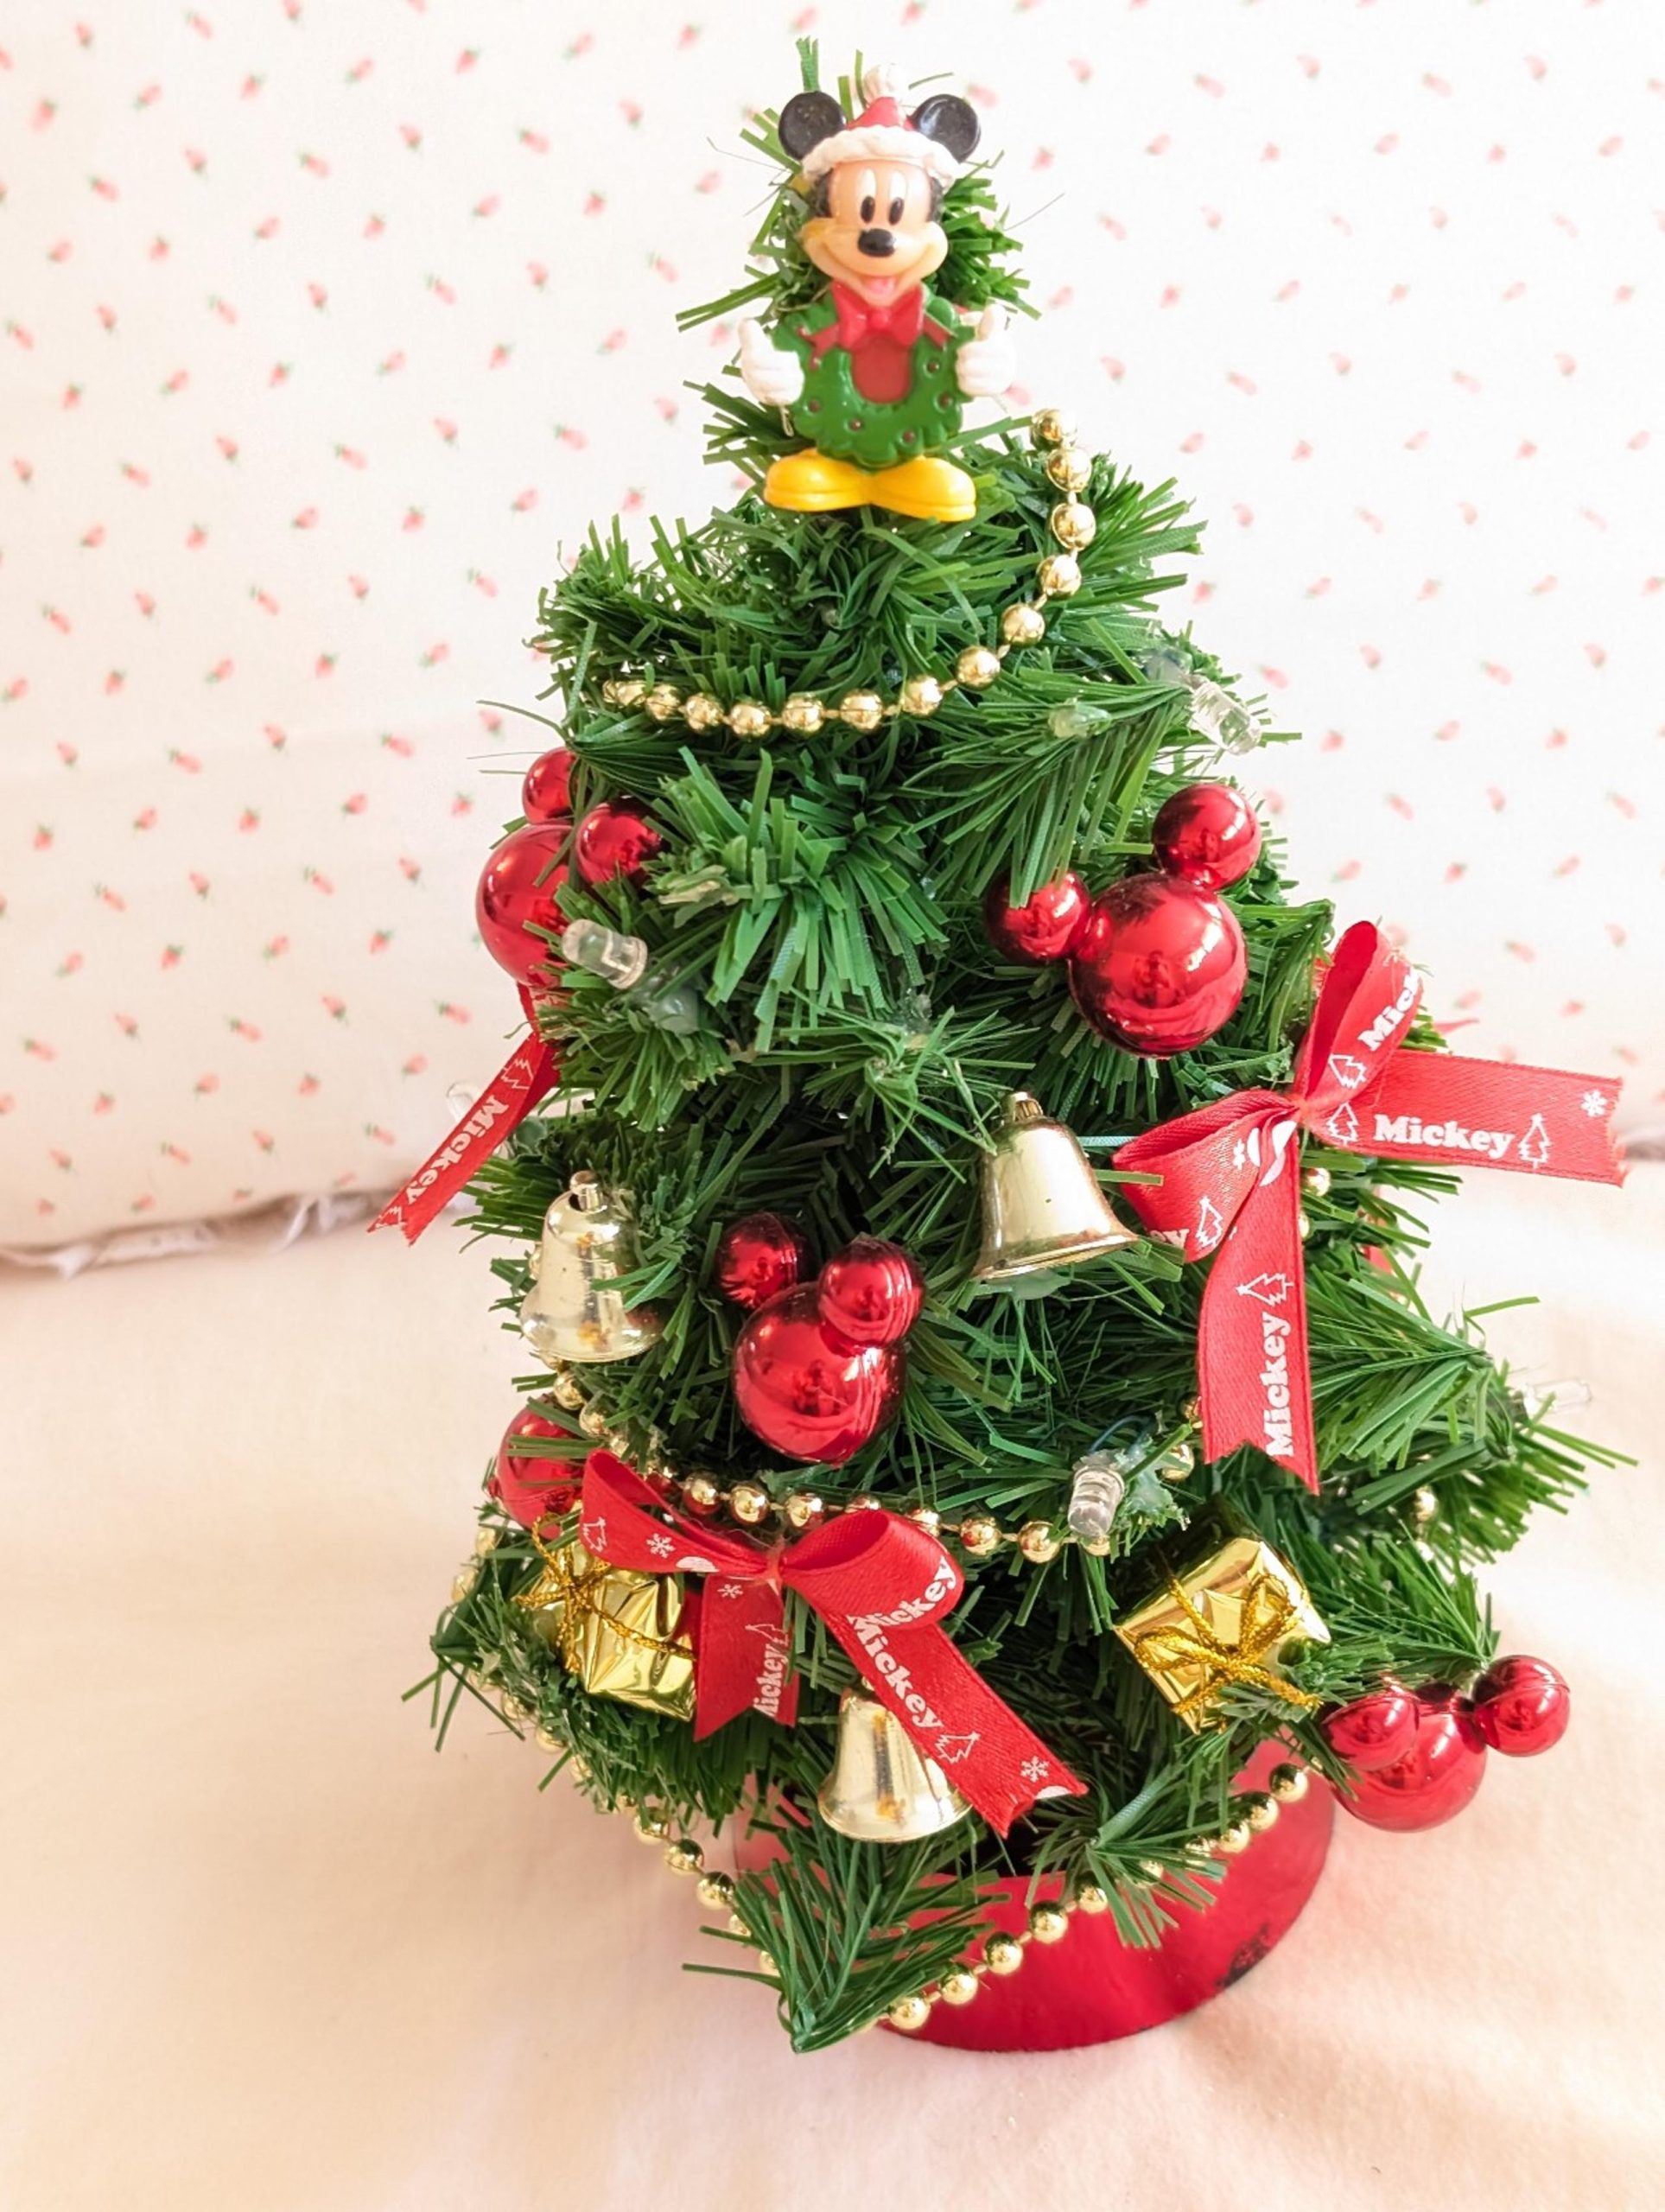
- Buy 3 yards of 1.5-inch red satin ribbon — that’s roughly 12 bows.
- Print names or a single word in a bold serif at 40 pt, mirrored, on inkjet iron-on transfer paper.
- Iron the transfer onto the ribbon at 350°F for 20 seconds using a pressing cloth.
- Cut into 8-inch lengths, fold each into a loop, and cinch the middle with 22-gauge wire.
- Fluff each loop into a bow shape and hang it from a plain ornament hook.
Time: about 45 minutes. Cost: $14-$22, including the transfer paper.
- Measure the tabletop depth and leave 3 inches clear at the back for the cord.
- Confirm an outlet is nearby, or plan on battery-powered lights.
- Weigh the topper figurine — anything over 10 ounces needs a wire wrap, not a hook.
- Decide whether the tree will be seen from one side or all sides before you hang anything.
- Check that the gold bead garland is long enough to wrap twice around the tree.
9. Burlap Base With Matte and Glossy Mickey Heads
Burlap sheds, and it keeps shedding. Expect loose fibers on the table for the first few weeks, so a quick pass with a vacuum brush attachment every couple of weeks keeps it contained. Matte ornaments — the black and gold ones here — show fingerprints and dust much faster than glossy, and they want a dry microfiber cloth once a season rather than a wet wipe, which dulls the finish permanently. The reed diffuser is the sneaky problem: keep it at least 6 inches from the branches, because oil mist settles on ornaments and leaves a film that’s genuinely annoying to remove.
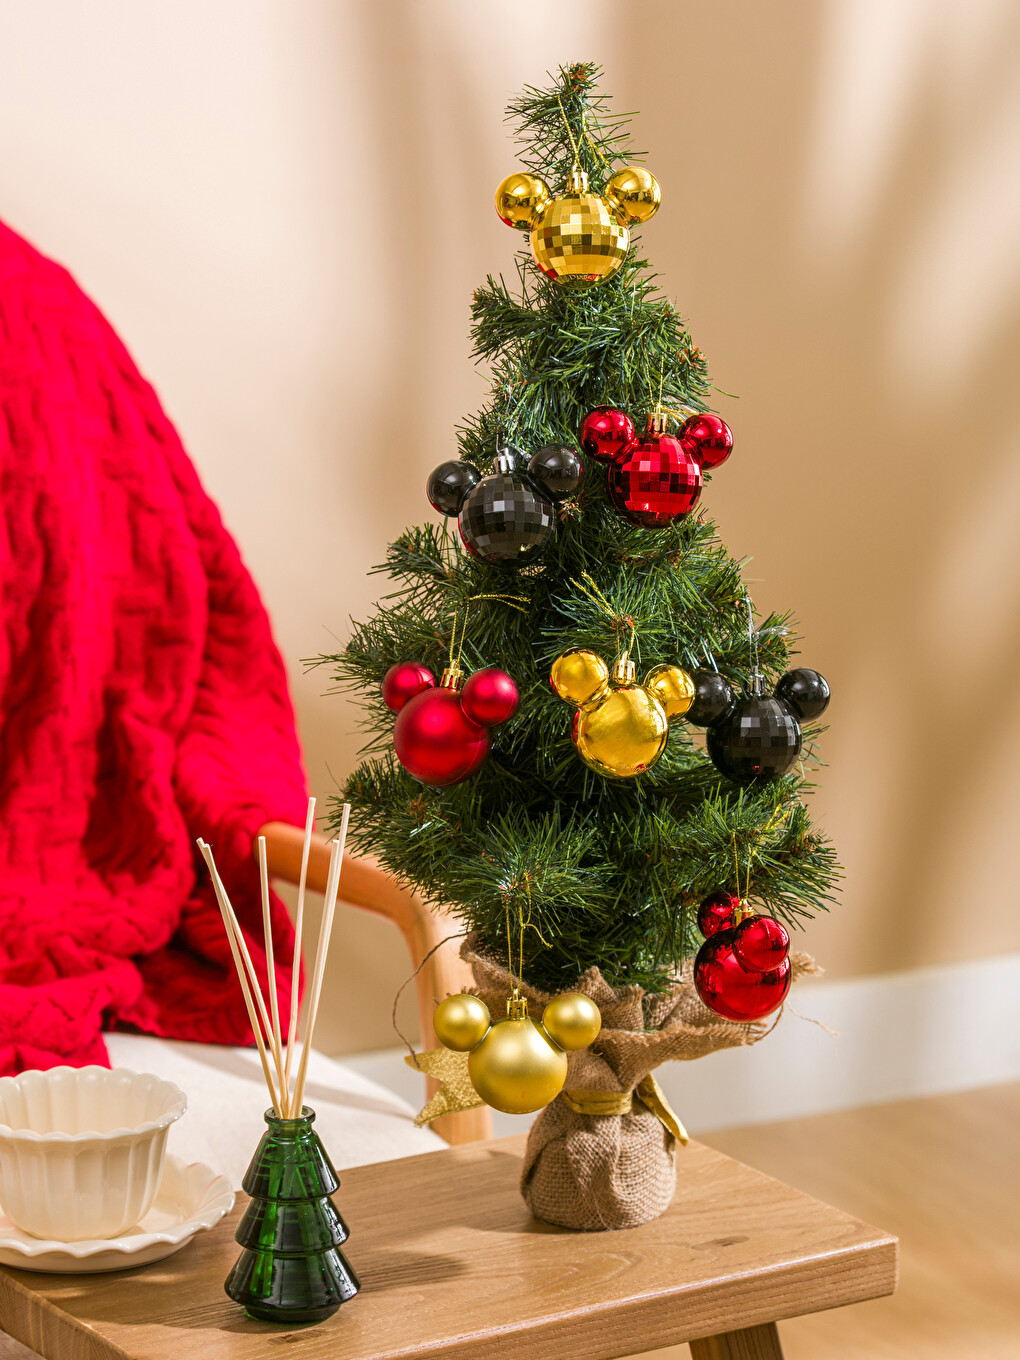
This is the version that fits an apartment. An 18- to 24-inch tree on a 20-inch side table needs about 2 square feet of floor, and a chair pulled up next to it wants another 18 inches of clearance so the red knit throw doesn’t tangle in the branches. Table height matters more than room size: a 26- to 30-inch table puts the top of the tree right at seated eye level, which is why this reads cozy instead of cramped. If your table is lower than 24 inches, go up a tree size. This is the same footprint as Idea #8, just built around a figurine topper instead of ribbon bows.
10. A Little Mermaid Branch With Pearl and Seashell Glass
Theme ornaments want to be clustered, not scattered. Group three to five related pieces — the Stitch, the Ariel, the clam shell with the pearl — into one dense pocket on a single branch area, then leave the next 12 inches of tree relatively plain. That contrast is what makes a theme legible instead of just reading as “lots of ornaments.” Hang glass on interior branches where nobody brushes past them, and keep pink and blue glitter baubles close to the bulbs; frosted glitter throws light back into the tree and makes the whole section glow from within.
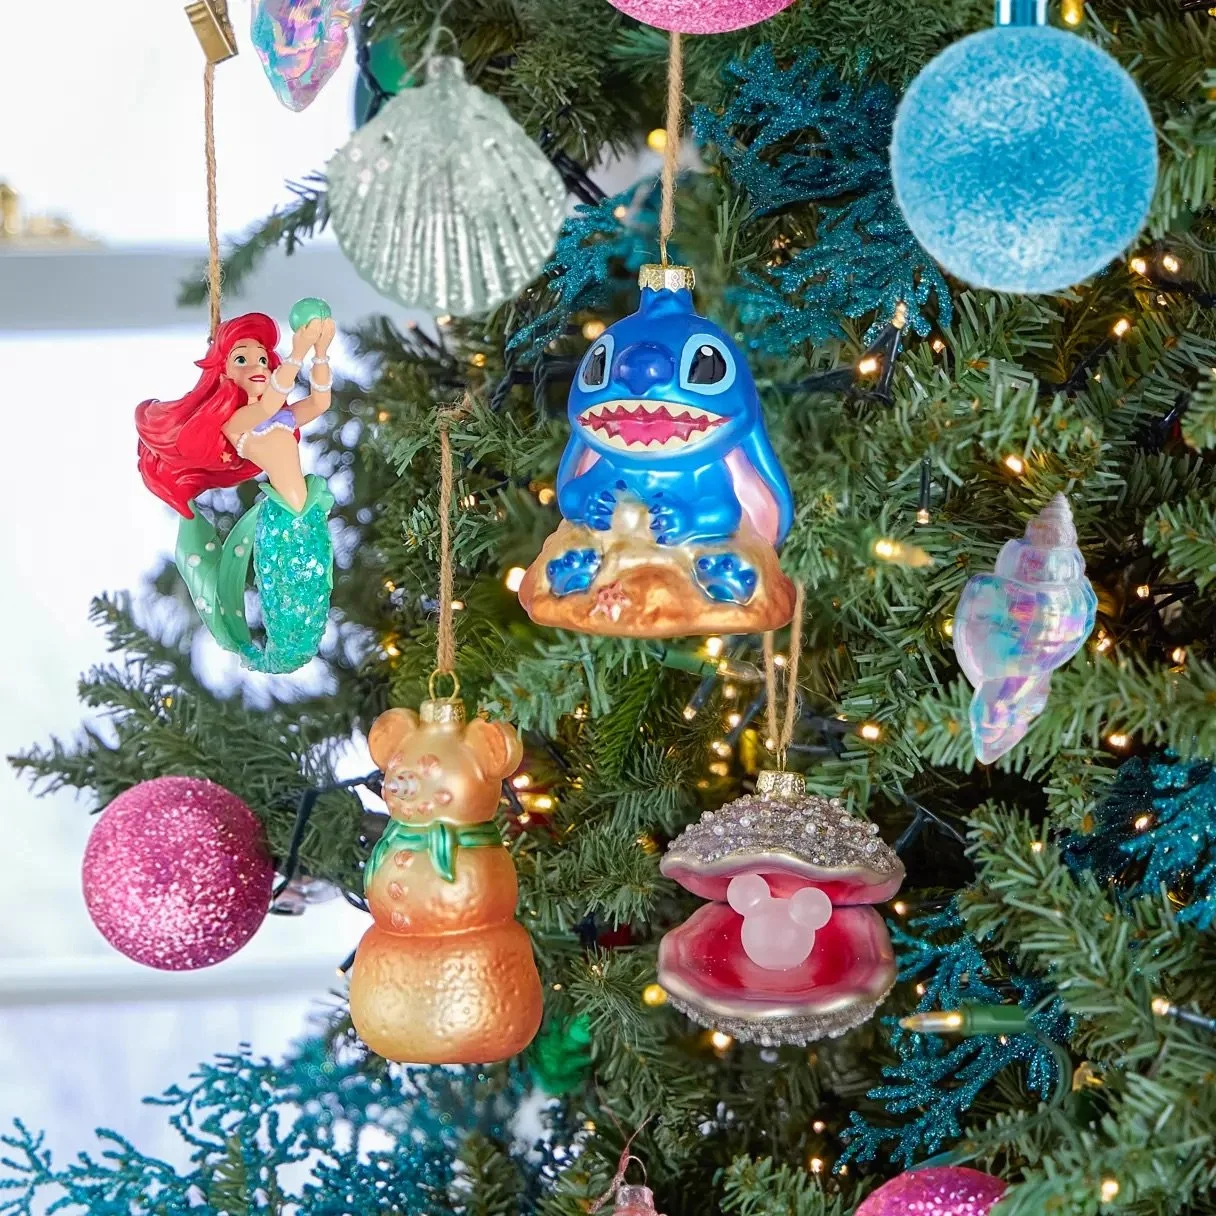
The formula underneath is 70% green tree, 20% blue-and-pink glitter, 10% gold and pearl. Those greens do the boring work of keeping it from looking like a candy store, so don’t skimp on them — that’s the mistake people make when they build a color tree. Swap the 20% layer and you get an entirely different tree without buying a single new ornament: change the pink baubles for icy silver and this becomes an Elsa tree. Same pearl accents, same glass shells, same warm lights.
11. Building a Disney Tree From Zero, One Season at a Time
A collected tree can’t be bought in one afternoon, and that’s the point — but the sources matter more than the budget.
- Thrift stores and estate sales: $0.50-$3 per ornament, best for vintage glass.
- Facebook Marketplace lot listings: $15-$40 for 40 to 60 mixed pieces.
- Target and Walmart licensed sets: $10-$25 for 12 to 20 ornaments.
- Etsy handmade toppers and tree skirts: $18-$60.
Spread that across three seasons and you’re at roughly $60 a year for a tree that looks like it took a decade.
Here’s what actually changed in 2026: the resale ornament market got good. Retired park ornaments, 1990s Hallmark figures, and estate-sale glass now move through Mercari, eBay, and local Marketplace listings in real volume, which means a tree that looks collected is buildable by normal people. The look everyone is chasing — mismatched, sentimental, slightly overstuffed — is the exact opposite of a matching boxed set. Starting from nothing this year? Buy one nice topper and one nice skirt, then let the ornaments accumulate around them.
12. The Embroidered Castle Skirt Under a Red-Only Tree
The trick here is restraint everywhere else in the budget so the skirt can be the splurge.
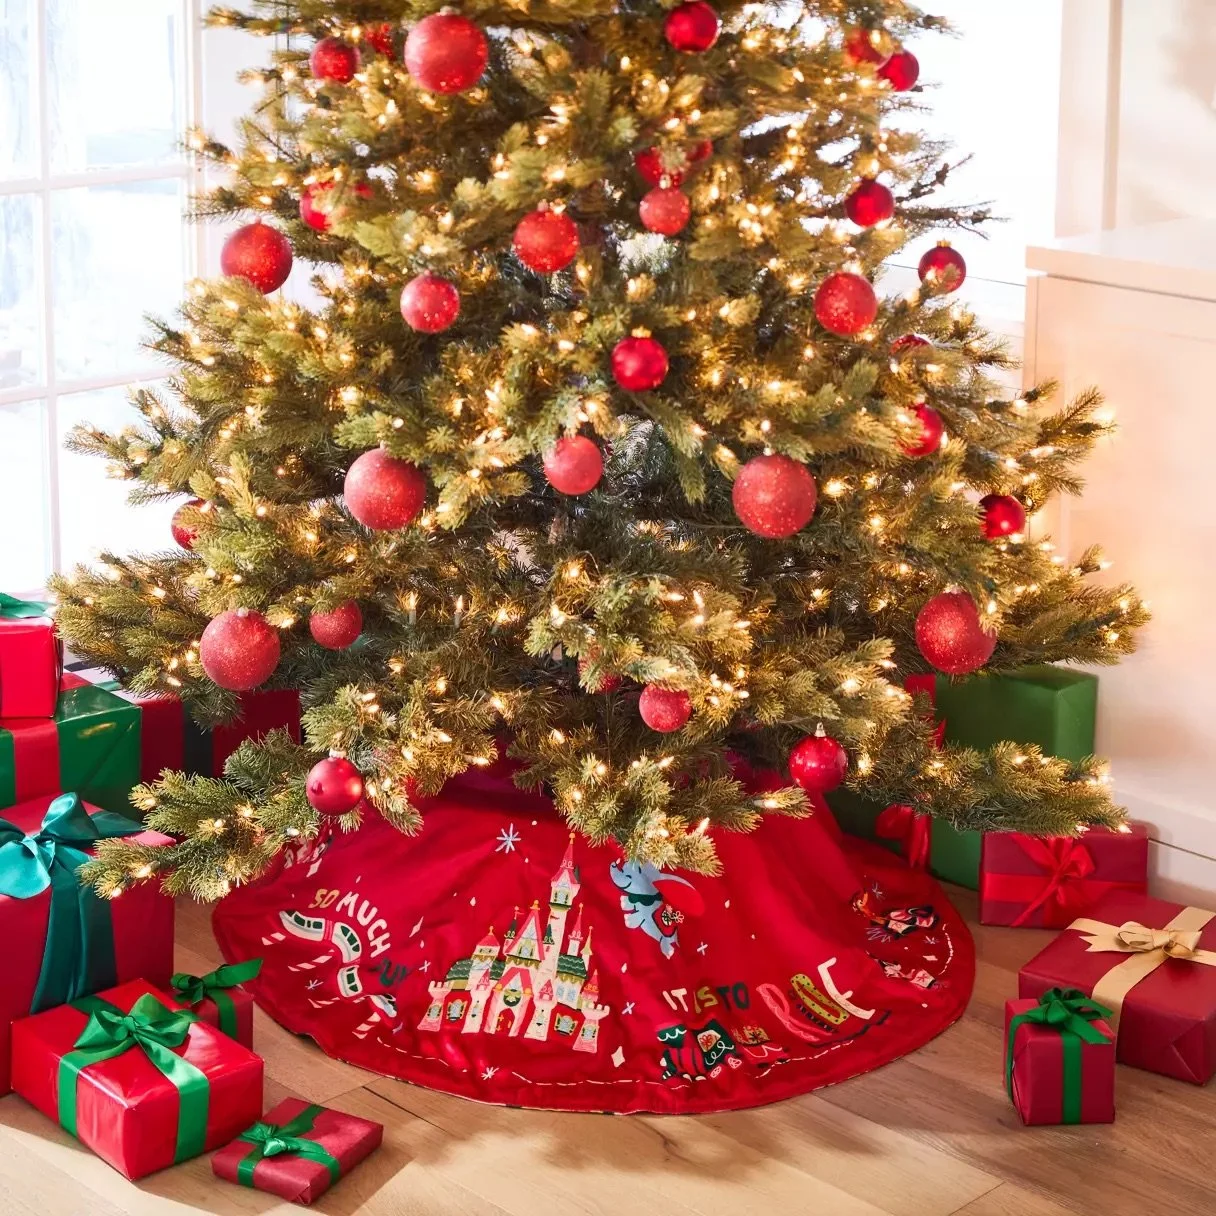
- 7.5 ft artificial tree: $100-$350
- 120-150 matching red round ornaments, one size and one finish: $45-$90
- 800 warm white string lights: $30-$55
- Embroidered castle velvet tree skirt: $79-$199
- Wrapping paper and ribbon: $20-$45
Total: about $275-$740. Budget alternative: a plain solid-red velvet skirt runs $25-$40, and if you keep every ornament identical, the effect still lands at roughly 45% of the cost.
Uniform ornaments are what make a decorated skirt possible. When every bauble is the same size and finish, the tree becomes a backdrop and your eye drops straight to the embroidery at the base — which is where you spent the money. Velvet matters too: it absorbs light instead of bouncing it, so the skirt reads as a soft dark frame around the glow at the bottom. It’s the same logic as a matted picture frame, just applied to the floor.
13. Mickey Heads in Glossy Red, Black, and Polka Dot
Mix finishes on purpose, not by accident. The rule that keeps it from looking messy: never hang two glossy ornaments directly next to each other — put a matte or a clear one between them. That clear polka-dot style should hang closest to the bulbs, because a translucent ornament with light behind it looks lit from within. And ditch the silver hangers on front-facing branches; 6-inch loops of green florist wire vanish against the needles, and nobody notices the ornament is floating.
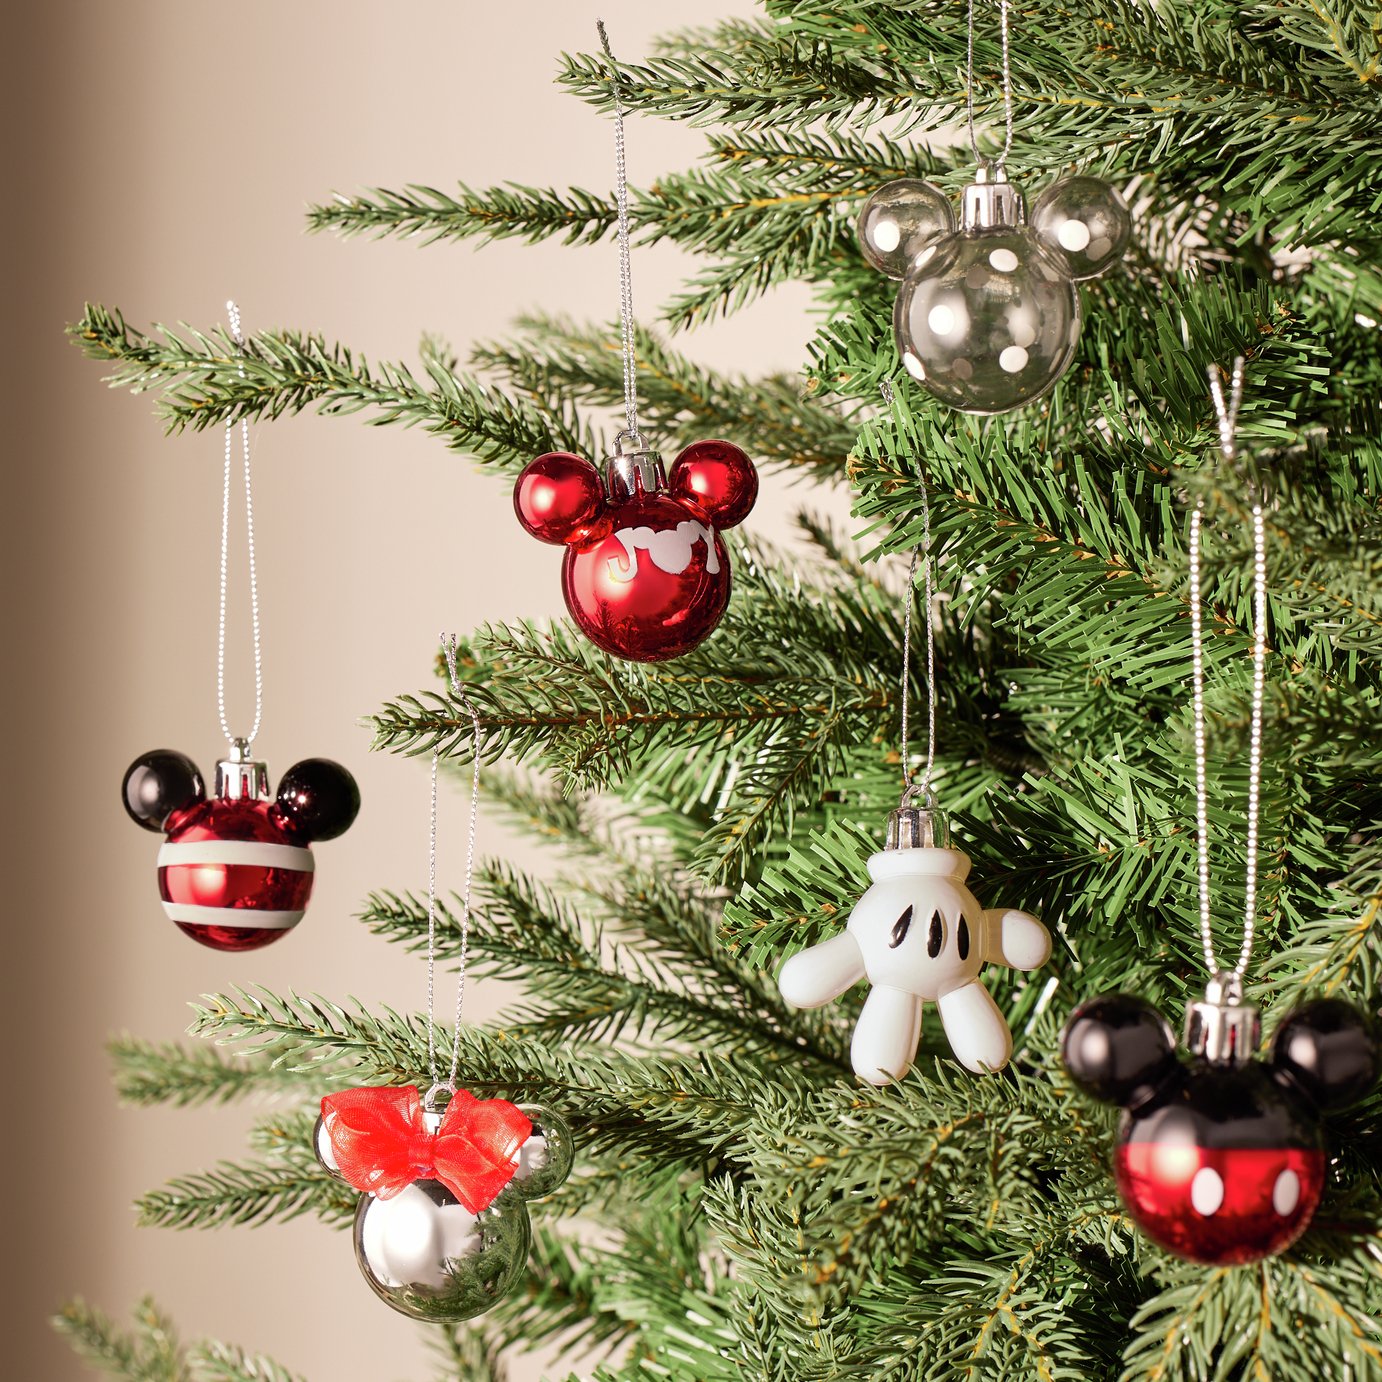
The white gloved-hand ornament is the one detail that turns this from a color scheme into a joke everyone in the family gets. Every other piece here is a head or a ball — this one is Mickey’s hand, and it gives the whole branch a slightly absurd, cartoon-still-frame quality. Remove it and the tree is still perfectly nice, still perfectly themed. What you lose is the wink.
14. Metallic Mickey Against a Stone Fireplace Wall
Two honest warnings. First, multicolored lights next to a stone fireplace wall photograph greenish — the warm tones in the stone and the cool bulbs in the tree fight each other, and your phone camera picks a side. If the tree is going in front of stone, warm white lights make that whole corner calmer. Second, keep any tree at least 3 feet from a working fireplace; heat dries out artificial branches, softens ornament finishes, and one spark is the end of the story. Real trees need that 3 feet too, and more.
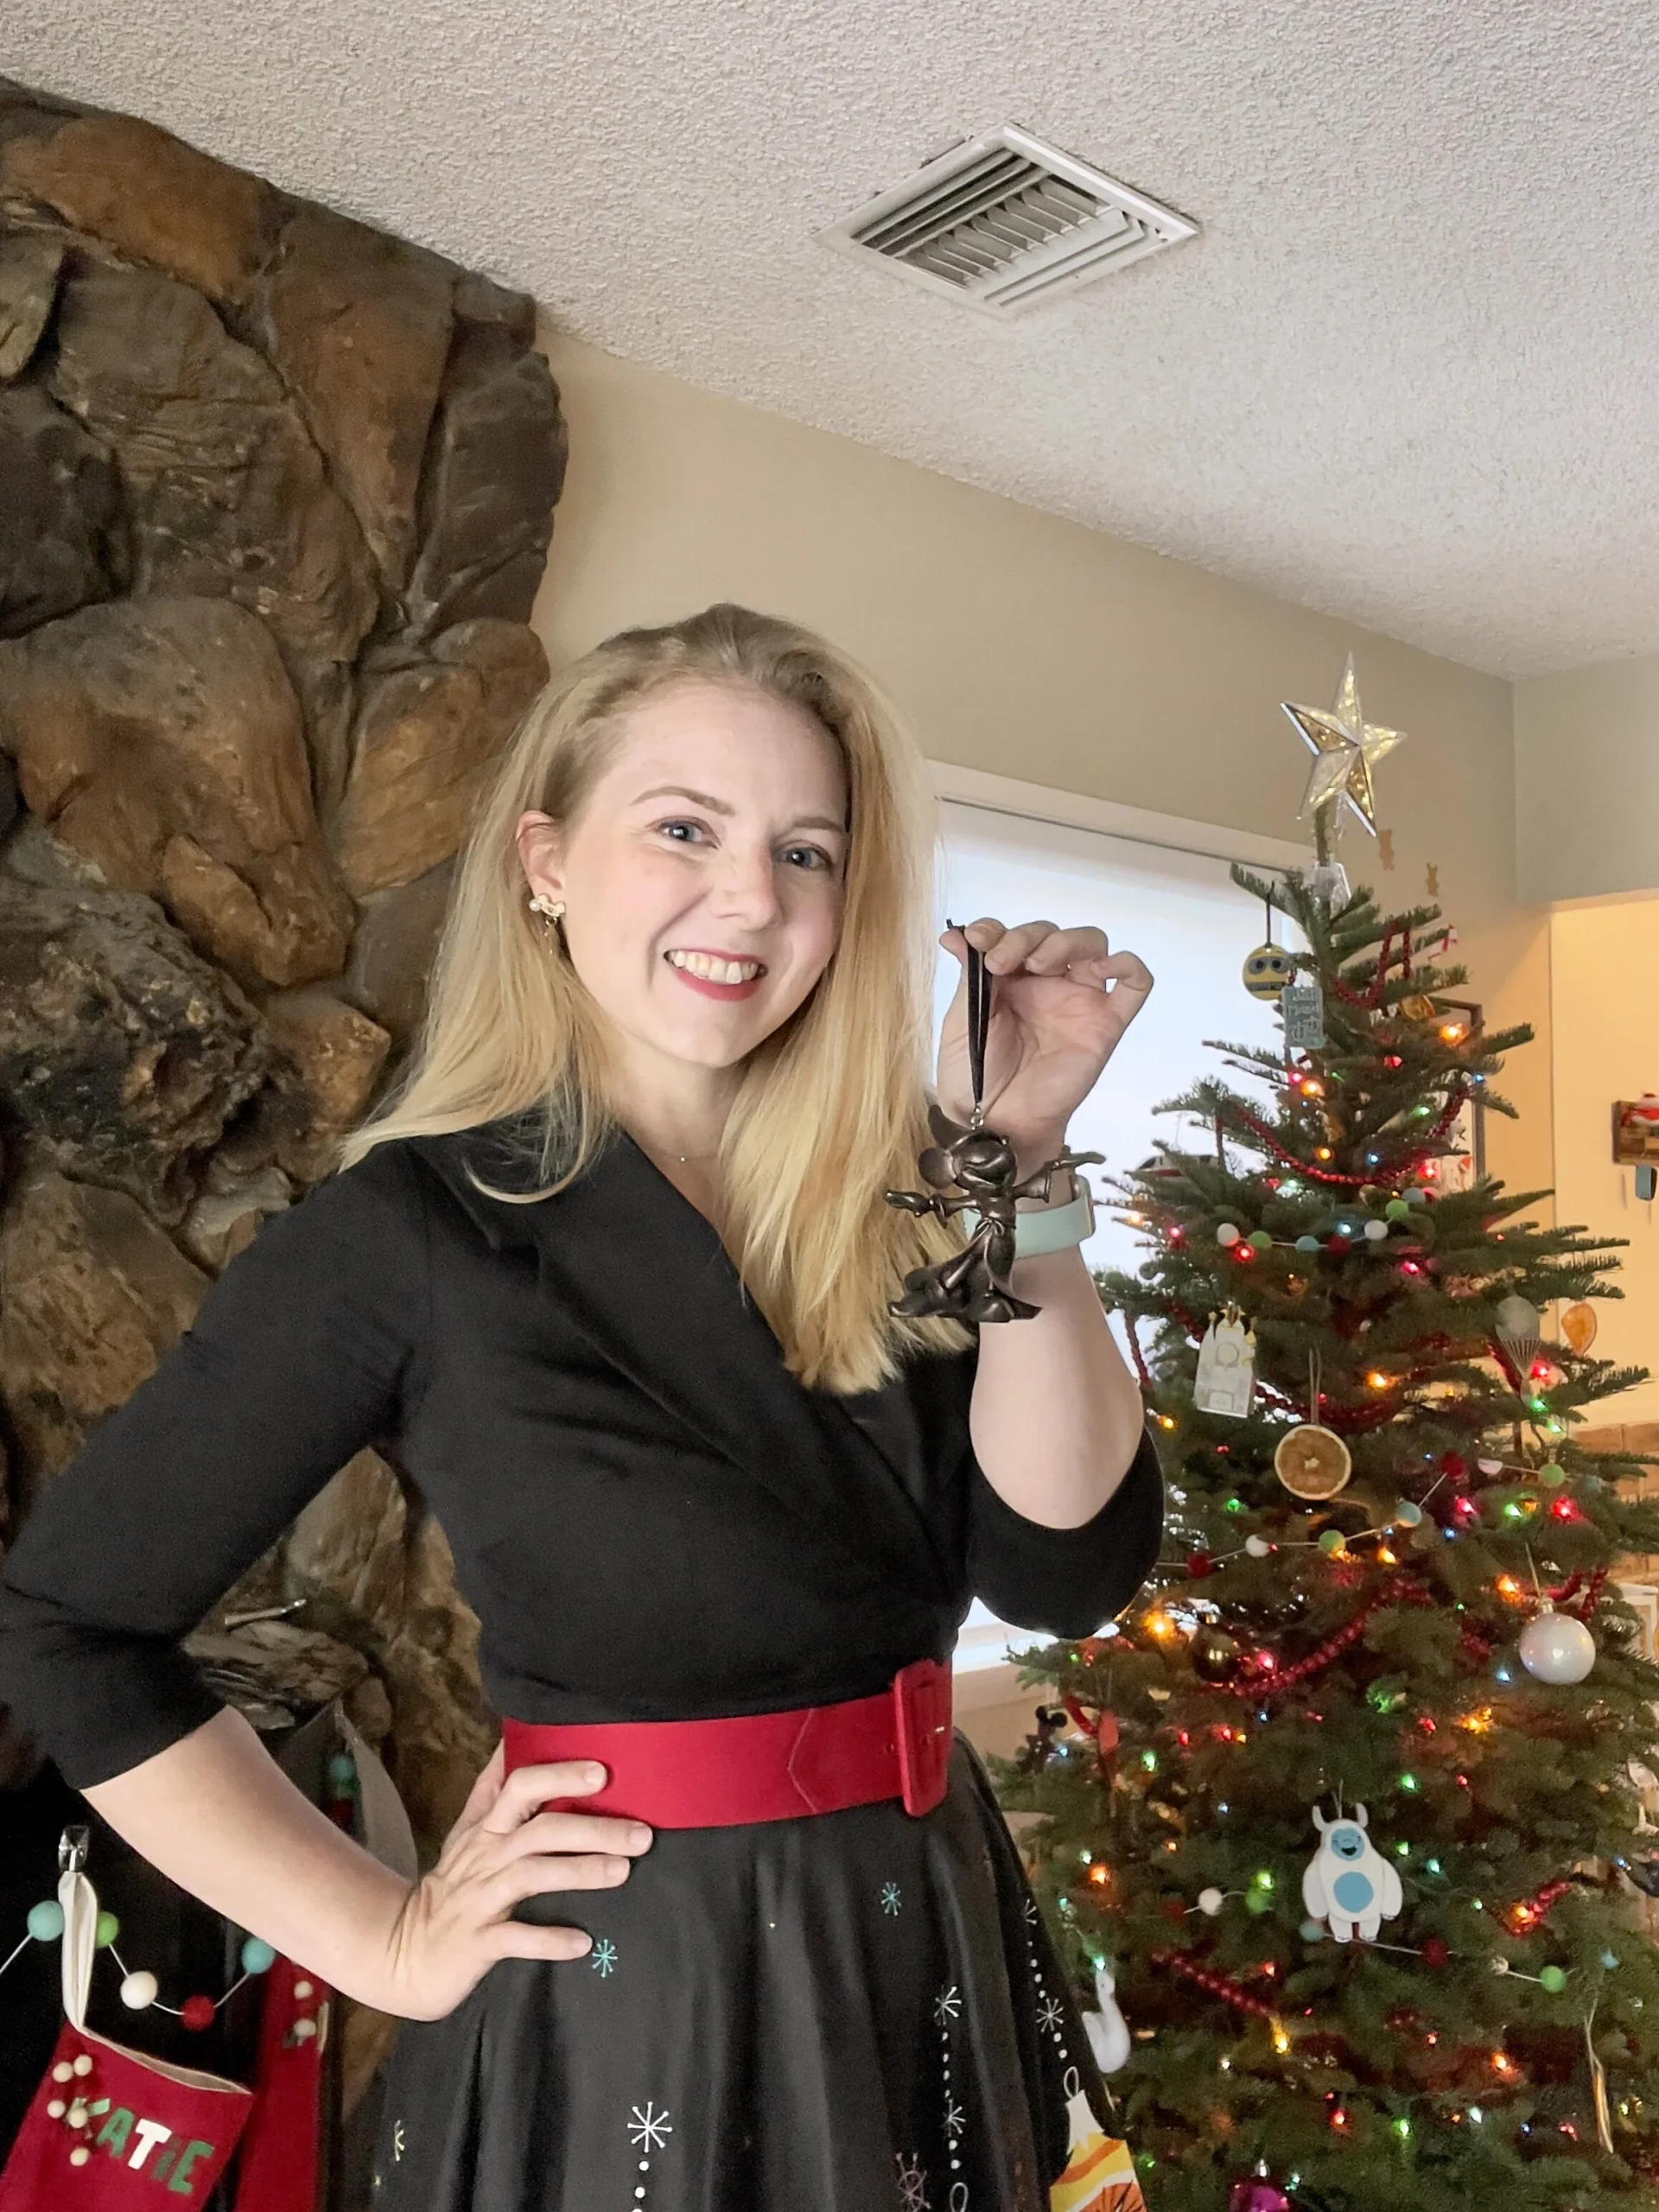
Stone fireplace walls are visually heavy, which changes the math. A tree needs to be at least 7 feet tall to avoid looking like a houseplant next to masonry, and the minimum comfortable room here is around 12 by 14 feet with 9-foot ceilings or higher — anything lower and the stone crowds the tree’s top third. If your fireplace wall is under 8 feet wide, choose a slimmer profile rather than a wide one. Rooms that can’t handle the mass can borrow the strategy from Idea #7 and split the display into smaller trees.
15. Pink Tinsel Princess Tree With a Cinderella Topper
Pink tinsel trees are a formula, not a free-for-all: roughly 50% pink, 30% pale blue, 20% gold. Tinsel takes up more visual weight per branch than needle branches do, so you need fewer ornaments than you think — this tree works because it’s decorated maybe 40% as densely as a green one would be. Want an Elsa version instead? Invert the first two numbers. Sixty percent icy blue tinsel, thirty percent white and silver, ten percent pearl, and the Cinderella topper becomes an Elsa one without touching anything else.
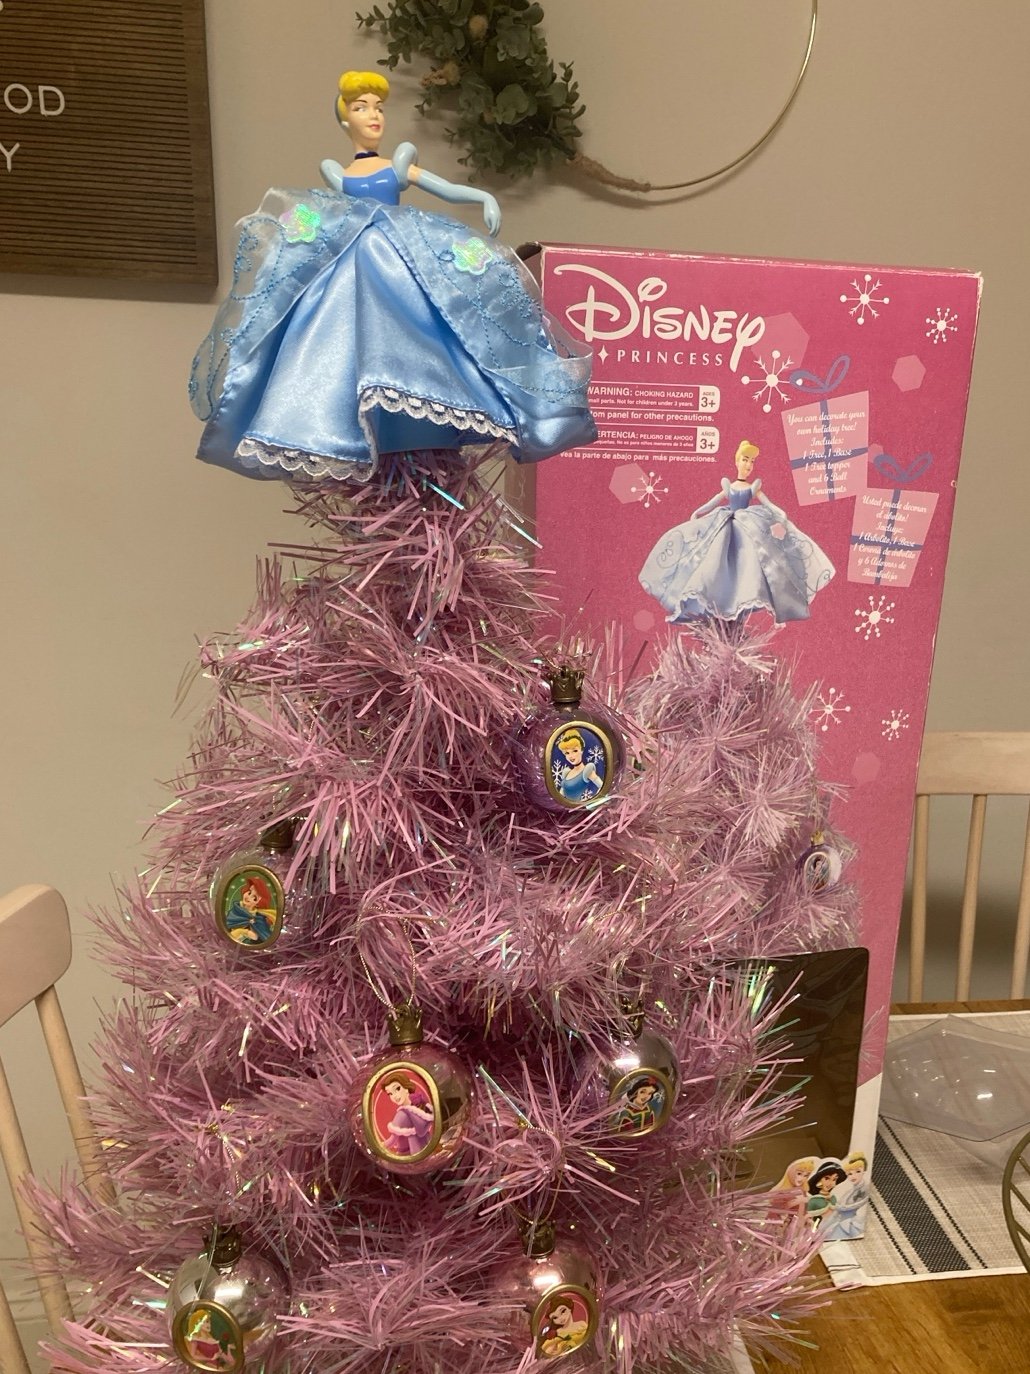
Pink Christmas is one of the fastest-growing color stories on Pinterest, and tinsel specifically has come back hard — partly as 1980s nostalgia, partly because tinsel reflects light in photos better than any other branch material. The princess version is newer: instead of one theme, you build around a single character’s palette and let the merchandise do the rest. It has staying power because the formula is flexible. Swap the princess, keep the pink, and the tree still works next December.
16. The Bronzed Genie Ornament as a Feature Branch
One statement figural ornament deserves its own moment instead of getting lost in the branches. Here’s how to build a feature branch around it.

- Hang the heavy piece at 60 to 66 inches off the floor — dead center of the sightline.
- Clear a 10-inch radius around it so nothing overlaps the arched frame.
- Add two smaller ornaments diagonally below and to the side, never directly above.
- Point one string of lights at it from behind so the metal picks up a rim light.
- Check the placement from your front door, not from the tree itself.
Bronzed figural ornaments like this one resell for $25 to $60 depending on the character and year, and the molded architectural frame is what drives the price — a plain version of the same character costs about half. Cheaper route: a $6 red glass gem pendant hung from a $4 bronze-toned frame ornament gives you the same glow-and-metal contrast for around $10. Check eBay, Mercari, and estate lots in July, when nobody’s bidding. Compare with Idea #10, where a whole theme is spread across the tree instead of concentrated in one spot.
17. Blue Striped Mickey Skirt With a Scalloped Red Edge
Printed and striped cotton skirts are the easiest to live with and the easiest to ruin. Wash them cold and alone, and expect the blue to soften after the third wash — that’s exactly why the care label says spot clean only. Ironing on low with a pressing cloth gets the fold creases out of the package, and a lint roller handles pet hair better than a vacuum, which snags the scalloped edge. If you have a cat, this is the skirt that ends up crumpled into a nest by week two. A quilted option with a stiffer backing holds its shape far better.
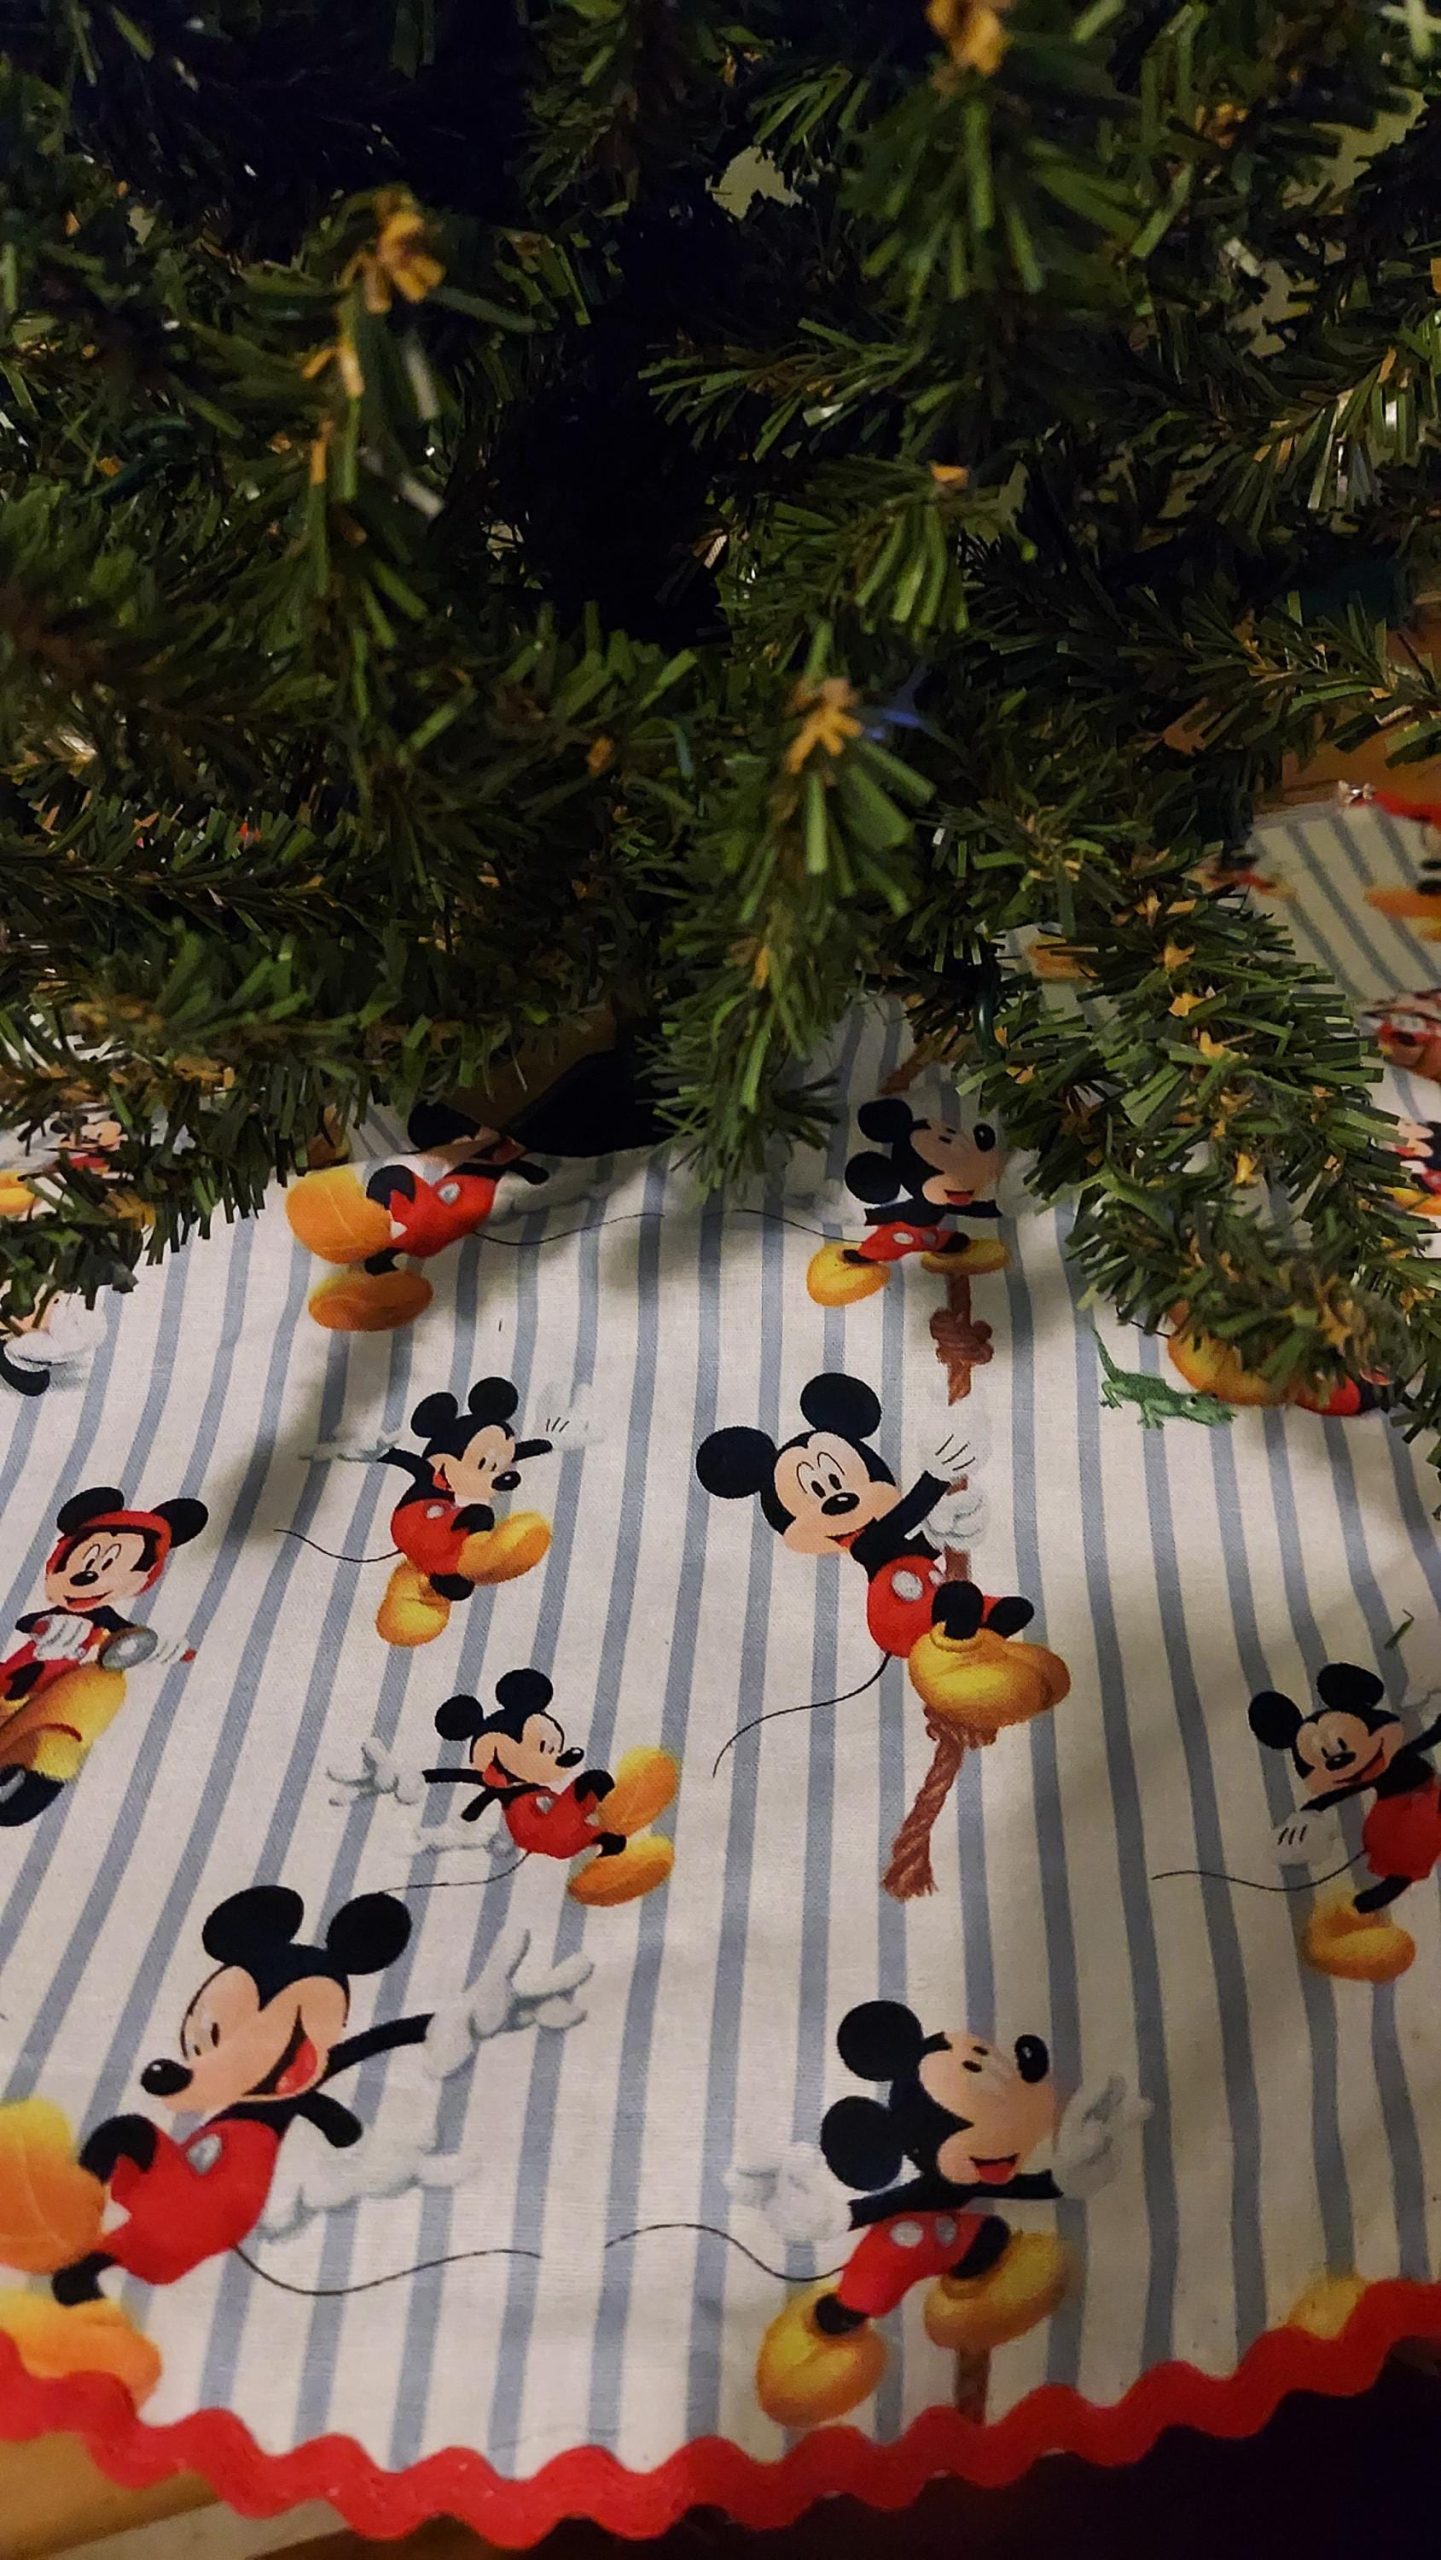
- Measure the stand’s diameter and add 10 to 12 inches for the skirt’s spread.
- Check the closure: ties, hook-and-loop, or a simple slit — ties survive pets best.
- Confirm the Mickey pattern is printed into or embroidered onto the fabric, not a heat-transfer decal that cracks.
- Measure the floor clearance under the tree stand before you commit.
18. Sledding Mickey Skirt With Buffalo Plaid Trim
This is the storybook-lodge version of a Disney tree, and the skirt drives most of the cost.
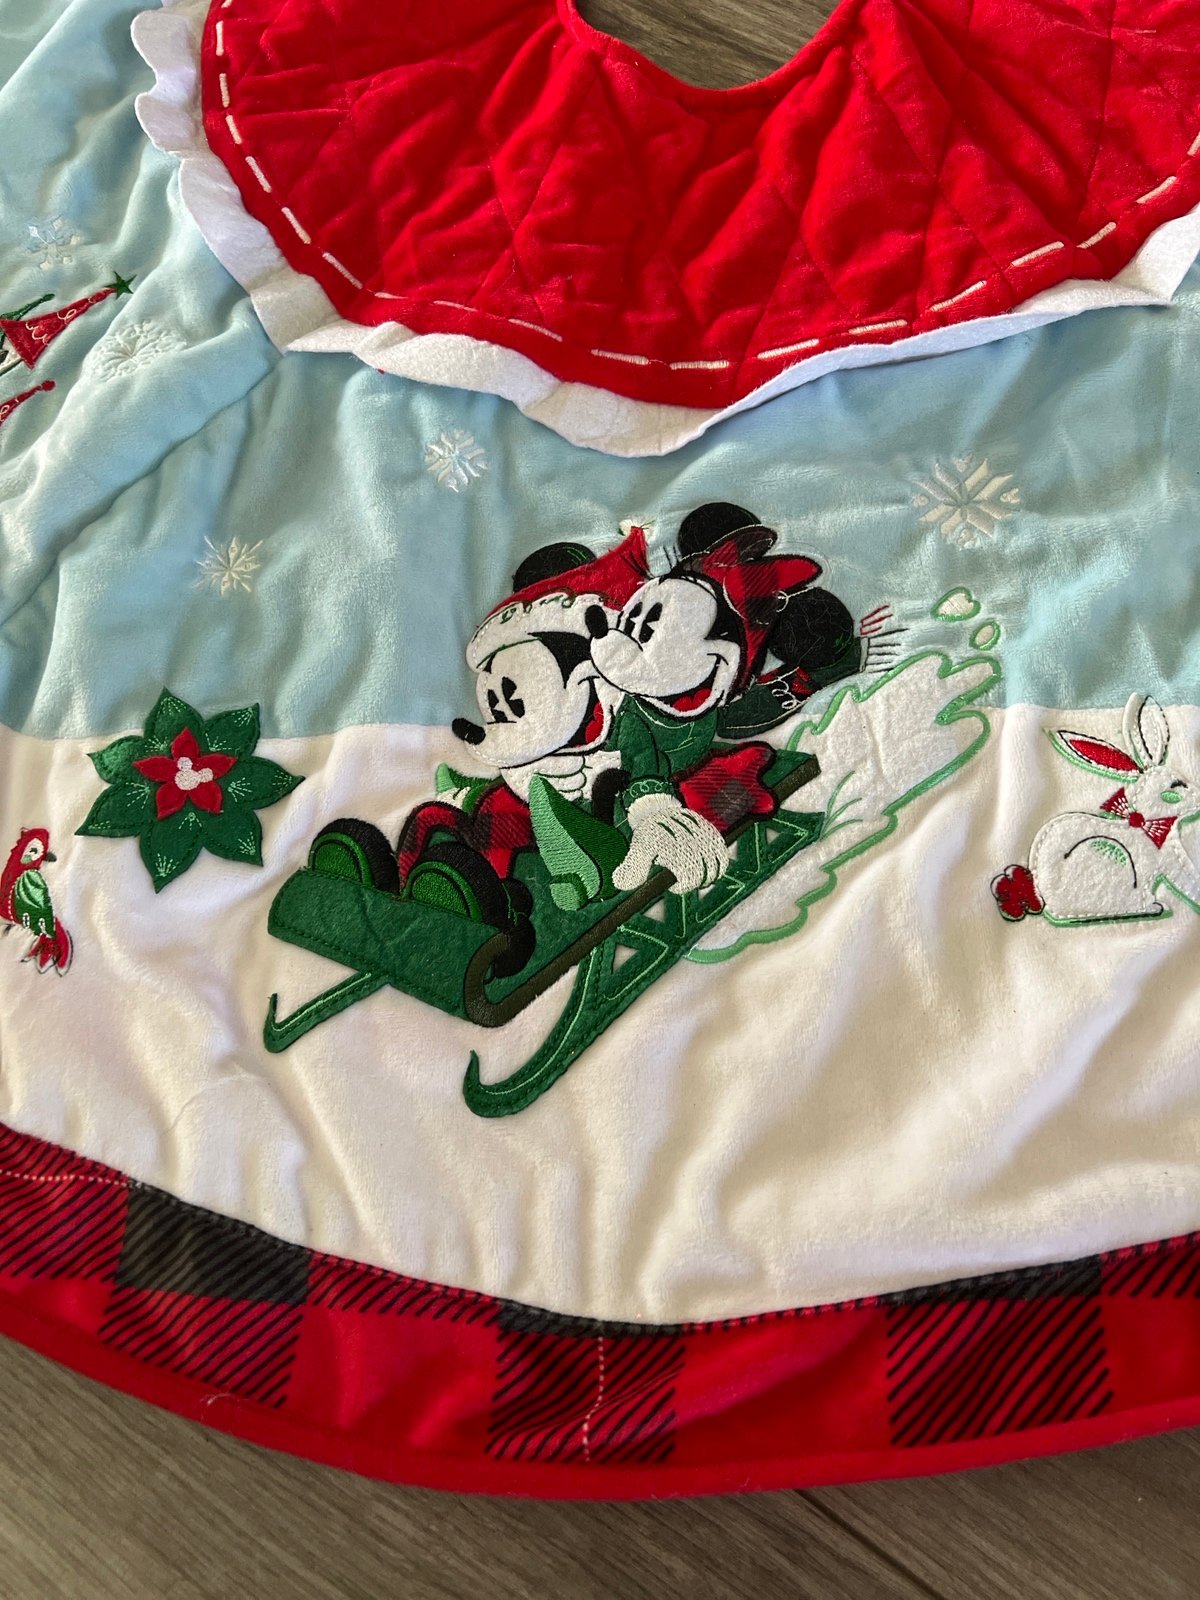
- 7.5 ft tree with a slightly sparse branch structure: $110-$320
- Appliqué embroidered character skirt: $60-$180
- Buffalo plaid ribbon, 4 yards: $12-$30
- Mixed red, white, and natural-wood ornaments: $40-$120
- 600 warm white string lights: $25-$55
Total: roughly $245-$705. Budget alternative: a plain buffalo plaid skirt at $22-$35 plus a $10 embroidered snowflake patch sewn on yourself gets you about 70% of the look.
Appliqué embroidery catches on everything — tree stand bolts, ribbon tails, vacuum brushes, cat claws — so check the stitched edges before you buy and reinforce any loose threads with a dab of clear fabric glue. Thick appliqué also doesn’t fold flat, which means storage eats more closet space than a basic cotton skirt. And a buffalo plaid border with red-and-white ornaments tips into full farmhouse fast; the natural-wood pieces in the mix are what keep it from going full cabin.
Time to Hang the First Ornament
Whether you’re going full plush maximalist or carefully building one perfect branch, the tree that wins is the one that looks like you made it over years instead of in a single Target run. Start with the topper, get the proportions right, and let everything else accumulate around it — Idea #1‘s oversized bow and Idea #12‘s embroidered castle skirt are both good places to begin. Pin this to your Christmas board — future you will be very glad you did. 🎄