21 Jaw-Dropping Wall Christmas Tree Ideas You Need to Try in 2026 for a Chic Holiday

You know that feeling when you finally find a wall tree that looks exactly right for your space — and then you can’t stop thinking about it? That’s why this guide exists. We spent serious time digging through Etsy, Amazon, and IKEA, then narrowed hundreds of options down to the 21 ideas that actually deliver, with looks ranging from about $18 to $480.
Inside you’ll find minimalist branch builds, rustic natural silhouettes, glowing string-light trees, painted wall trees, and full traditional garland displays — with budget and luxury versions compared side by side, so you can see exactly what the extra money buys. Wall trees are having a real moment heading into 2026 for one specific reason: renters and small-space dwellers are done handing an entire corner of the living room to something that gets used five weeks a year.
And stay until the end — we break down the most common mistakes that can ruin these looks. 📌 Save this to Pinterest for later — you’ll want to revisit these ideas.
1. A Pinecone-and-Branch Tree That Glows Off the Wall
You need a free wall, a bag of pinecones, and about three hours.

- Sketch a triangle in chalk, roughly 3 feet wide at the base and 4 to 5 feet tall.
- Collect 25 to 40 pinecones and 6 to 8 straight branches, then dry them somewhere warm for two days so nothing sap-stains your paint.
- Hang the longest branch at the bottom with clear adhesive hooks, then work upward, shortening each one by about 3 inches.
- Run a warm LED strand up the spine in a loose zigzag and nestle pinecones into the joints where the branches meet.
Cost: $25 to $60 if you forage. Time: one afternoon, most of it spent hunting for the good pinecones.
The thing that makes this read as a tree instead of a pile of sticks is the light behind it. The strand sits on the wall side of the branches, so the glow rakes upward and pools behind the pinecones, throwing soft shadows that fill in the triangle for you. Lose that backlighting and the whole thing goes flat and crafty. Keep it, and $30 worth of yard debris looks like something you’d hire a stylist to hang.
2. Flat-Back Trees That Fool Everyone Into Thinking They’re Full
The formula behind a convincing flat-back tree is 60 percent dark green needle, 25 percent warm white glow, and 15 percent metallic or glass accents — no more. The green does the shaping, the light fakes the volume, and the ornaments handle the sparkle. Swap the metallics for wood and dried citrus and it turns rustic. Swap them for pink and yellow glass and it turns playful. The green-to-light ratio is the one part you shouldn’t touch.
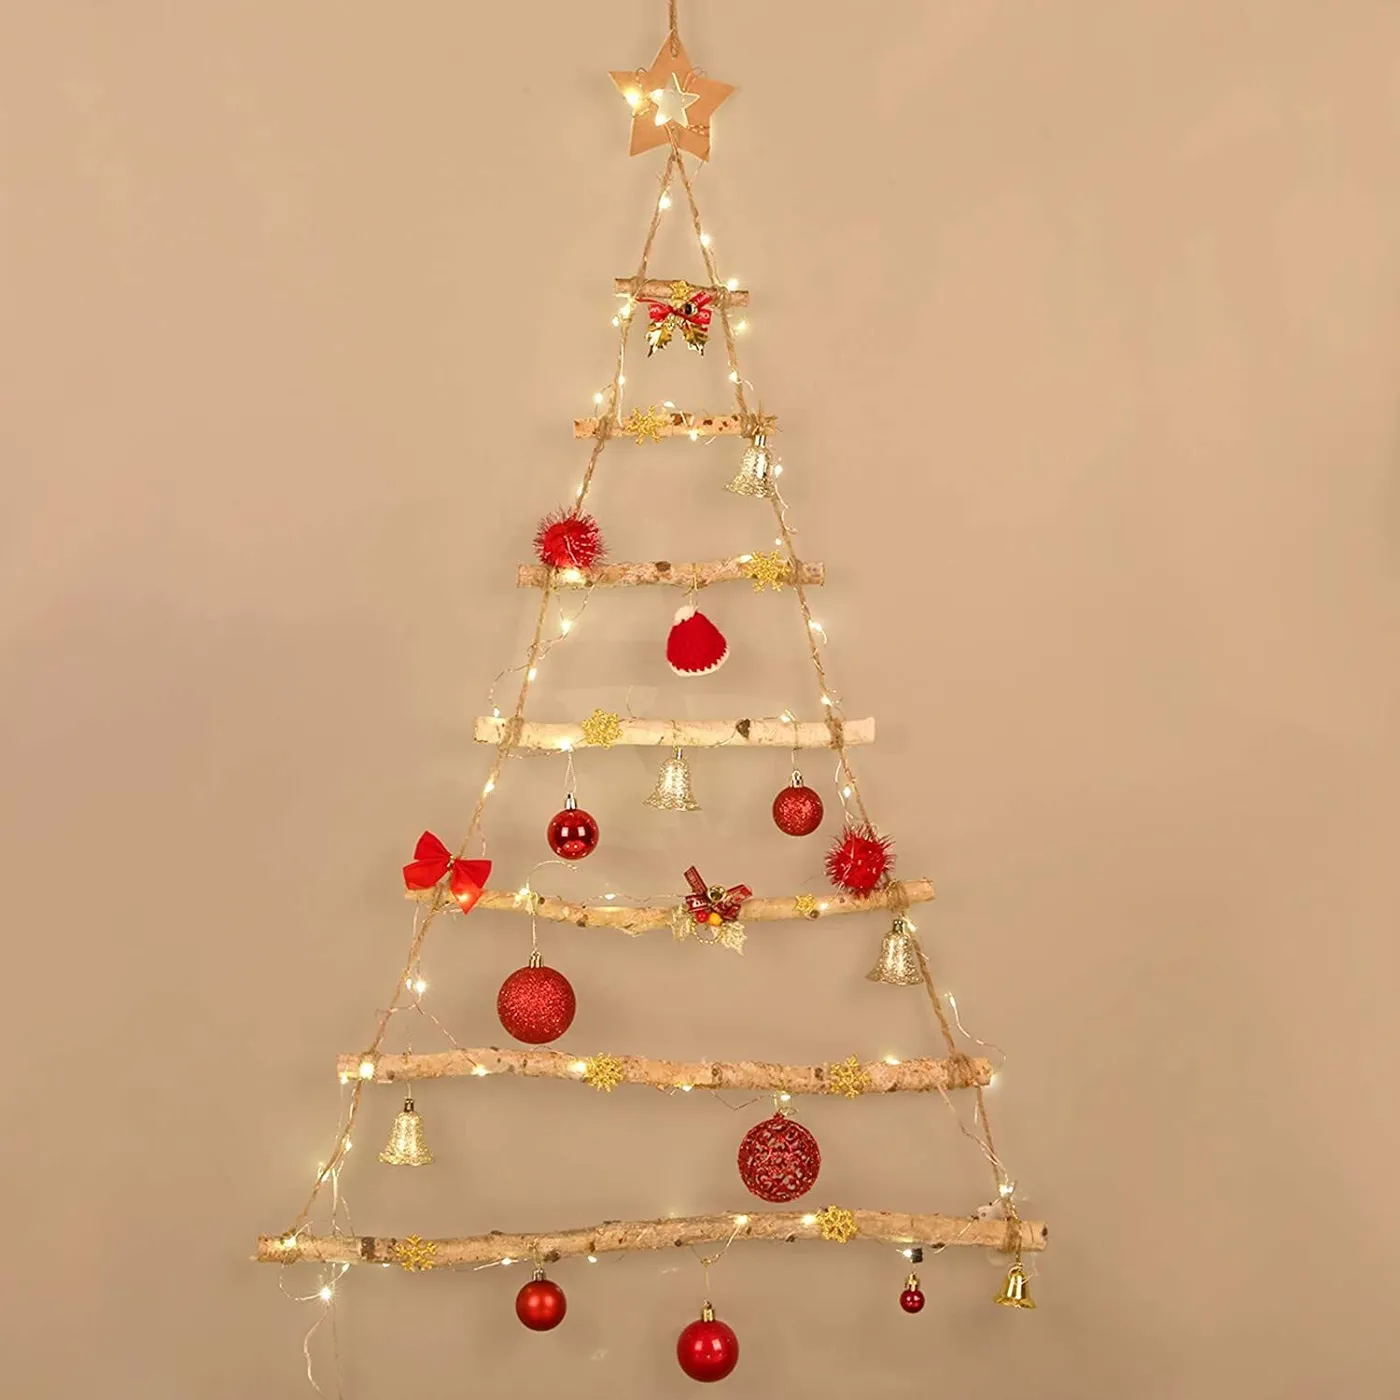
- Flat-back or half tree: $90–$250
- Warm LED strands (2): $20–$45
- Ornaments and topper: $35–$90
- Wall-mount hardware: $12–$30
- Tree collar or woven basket: $25–$70
Total: roughly $180 to $485.
Budget alternative: buy a thrifted full tree for $20 to $40 and snip the back third off with wire cutters. Same silhouette, a third of the price, and nobody standing in your living room will ever know.
3. Pinecones, Lights, and Serious Warmth on One Wall
Three things are doing the work here. First, repetition: pinecones placed at roughly even intervals create a rhythm your eye reads as “fir tree” even though nothing about it is fir. Second, contrast — bumpy matte organic texture against a smooth painted wall. Third, color temperature: the lights sit around 2700K, the warm end of the scale, so the display feels candlelit rather than electric. Drop below that and it starts looking like a store window display instead of a living room.
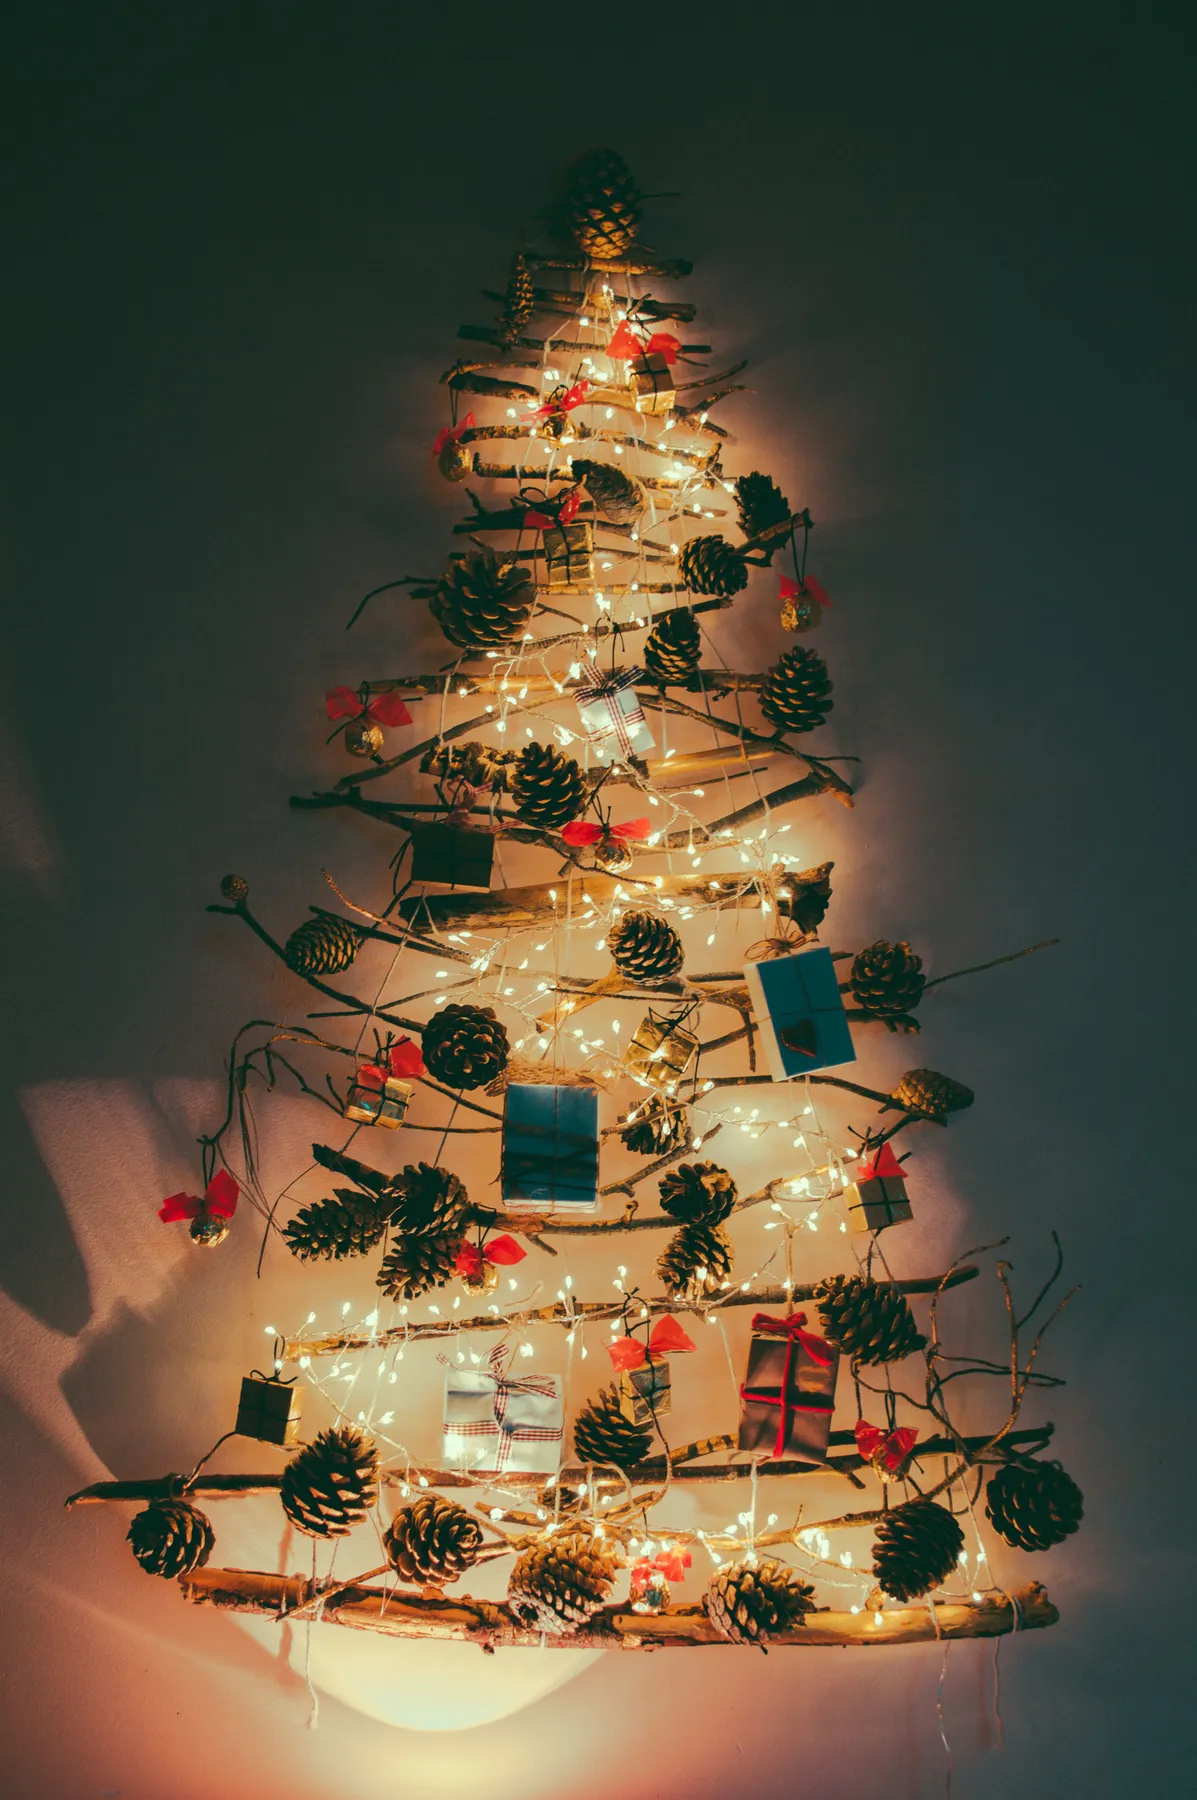
Two honest warnings. Pinecones collected outdoors carry sap that bleeds onto paint once the lights warm them, so bake them at 200°F for 40 minutes on a foil-lined tray and let them cool completely. And they’re heavier than they look — a cluster of six can weigh two pounds, so use hooks rated for 5 pounds each rather than the tiny adhesive squares. If you rent, a tested removable strip beats a nail every time.
If you’d rather build than buy, Idea #1 walks through the pure pinecone version step by step.
4. Star Tinsel, Red Bows, and a Brick Wall That Glows
Tinsel is back, and not ironically. After a decade of restrained Scandinavian minimalism, the pendulum swung hard toward what designers are calling maximalist traditional — a big star with red bows, matching garland on the tree and the mantel, gifts stacked in the foreground like a catalog shoot. Searches for tinsel garland have climbed year over year heading into 2026, largely because millennials are recreating their grandparents’ living rooms on purpose this time. It has staying power because it’s cheap to execute and reads instantly as Christmas.

This setup is a wall hog, so measure before you commit.
- 8-foot ceilings: keep the star garland under 30 inches wide and skip the full tree beside it.
- 9-foot ceilings: a 7-foot tree next to a 36-inch star works comfortably.
- 10-foot-plus: go 42 inches on the star and stack gifts two rows deep.
Working with a narrow or rented wall? A flat-back tree needs about half that width.
5. The Wall Tree as a Real Replacement, Not a Compromise
Here’s the number that convinces most people: a 7-foot floor tree eats a 4-foot circle once you account for branch spread and the gift pile underneath. That’s roughly 12 square feet of your living room, gone for six weeks. A wall tree takes zero. The trick to making it feel like a deliberate design choice rather than a sacrifice is to treat the wall itself as the display surface — style the 18 inches below it the way you’d style a console, not like leftover floor.
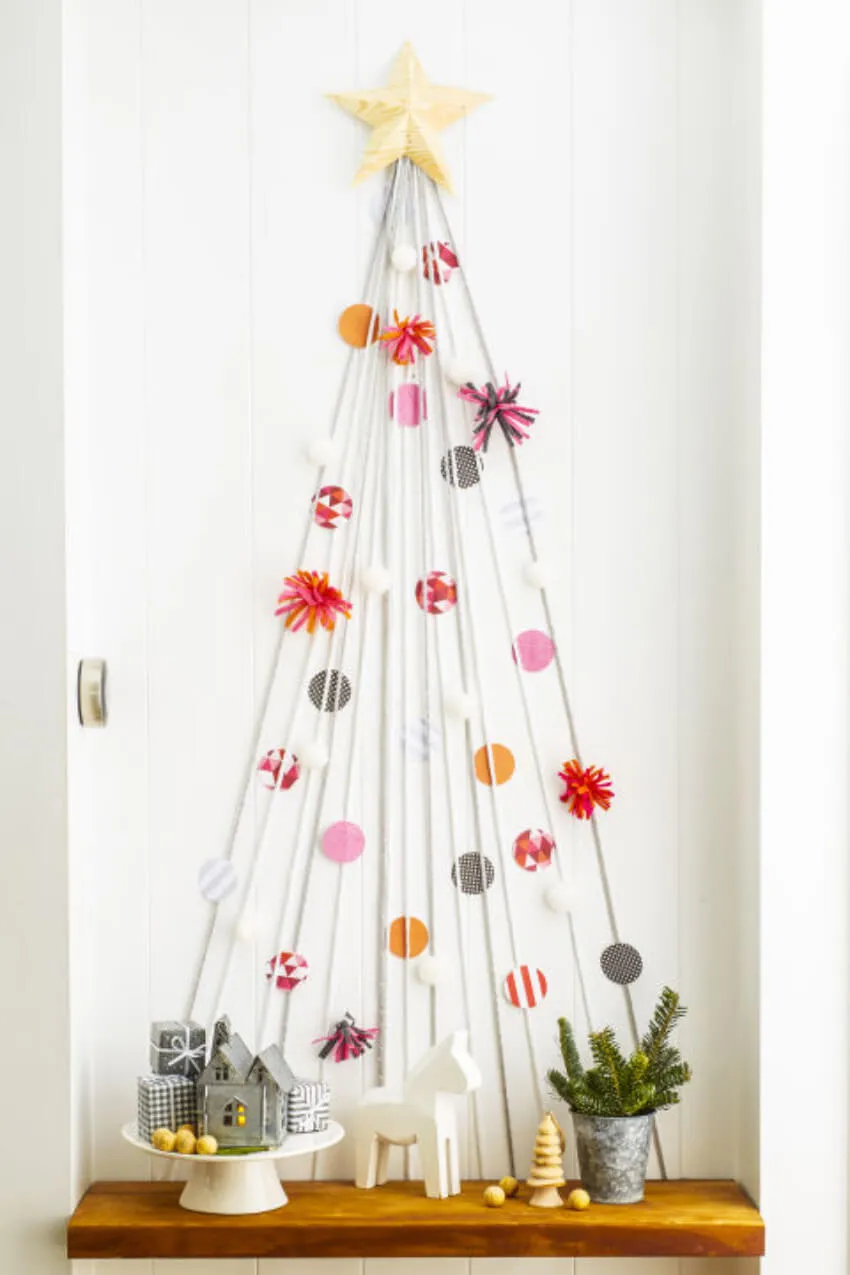
You can absolutely do this for under $70. IKEA sells warm LED strands for about $6, and the mounting can be a Command hook plus a picture frame you already own. Facebook Marketplace is full of gently used half trees in early December for $15 to $30, because people upgrade the second they see something shinier. Thrift stores handle the rest — a bag of 40 glass ornaments for $8 means you’re styling with vintage glass for the price of a sandwich.
6. String Lights on a Bare Wall, Kraft Paper Underneath
This is the fastest wall tree in the whole guide — roughly 45 minutes, start to finish.
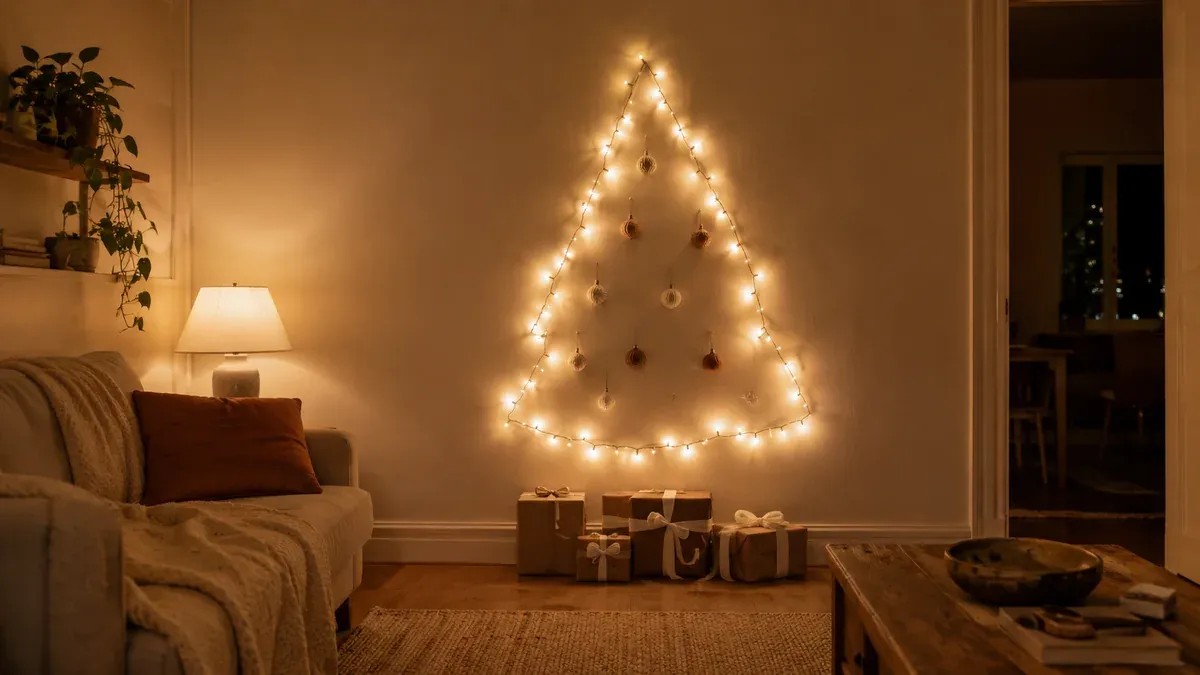
- Map the triangle in painter’s tape first: 34 inches at the base, 5 feet tall.
- Place clear hooks every 6 inches along both tape lines and up the center spine.
- Run two 100-count warm white strands in a continuous zigzag, overlapping at the corners so no bare wire shows.
- Hang lightweight ornaments right on the wire with small hooks — skip anything over 3 ounces.
- Peel the tape, top it with a single star, and style the floor with kraft-wrapped gifts.
The color recipe is 65 percent warm white and cream, 20 percent kraft brown, 10 percent burnt orange, and 5 percent brass. The neutrals carry the wall, the kraft paper grounds the floor, and the burnt orange pillow is the only spot your eye lands on twice. Swap orange for sage and it goes quiet; swap it for deep rust and it turns autumnal. For a lighter twine-and-birch take on the same trick, see Idea #14.
7. Branches and Twine Above a Wooden Console Table
- Foraged branches: $0–$30
- Twine and hanging hardware: $8–$18
- Paper star and pinecone ornaments: $20–$55
- Wooden console table: $120–$380
- Lantern, candle, and woven basket: $45–$110
- Knit throw for the basket: $25–$60
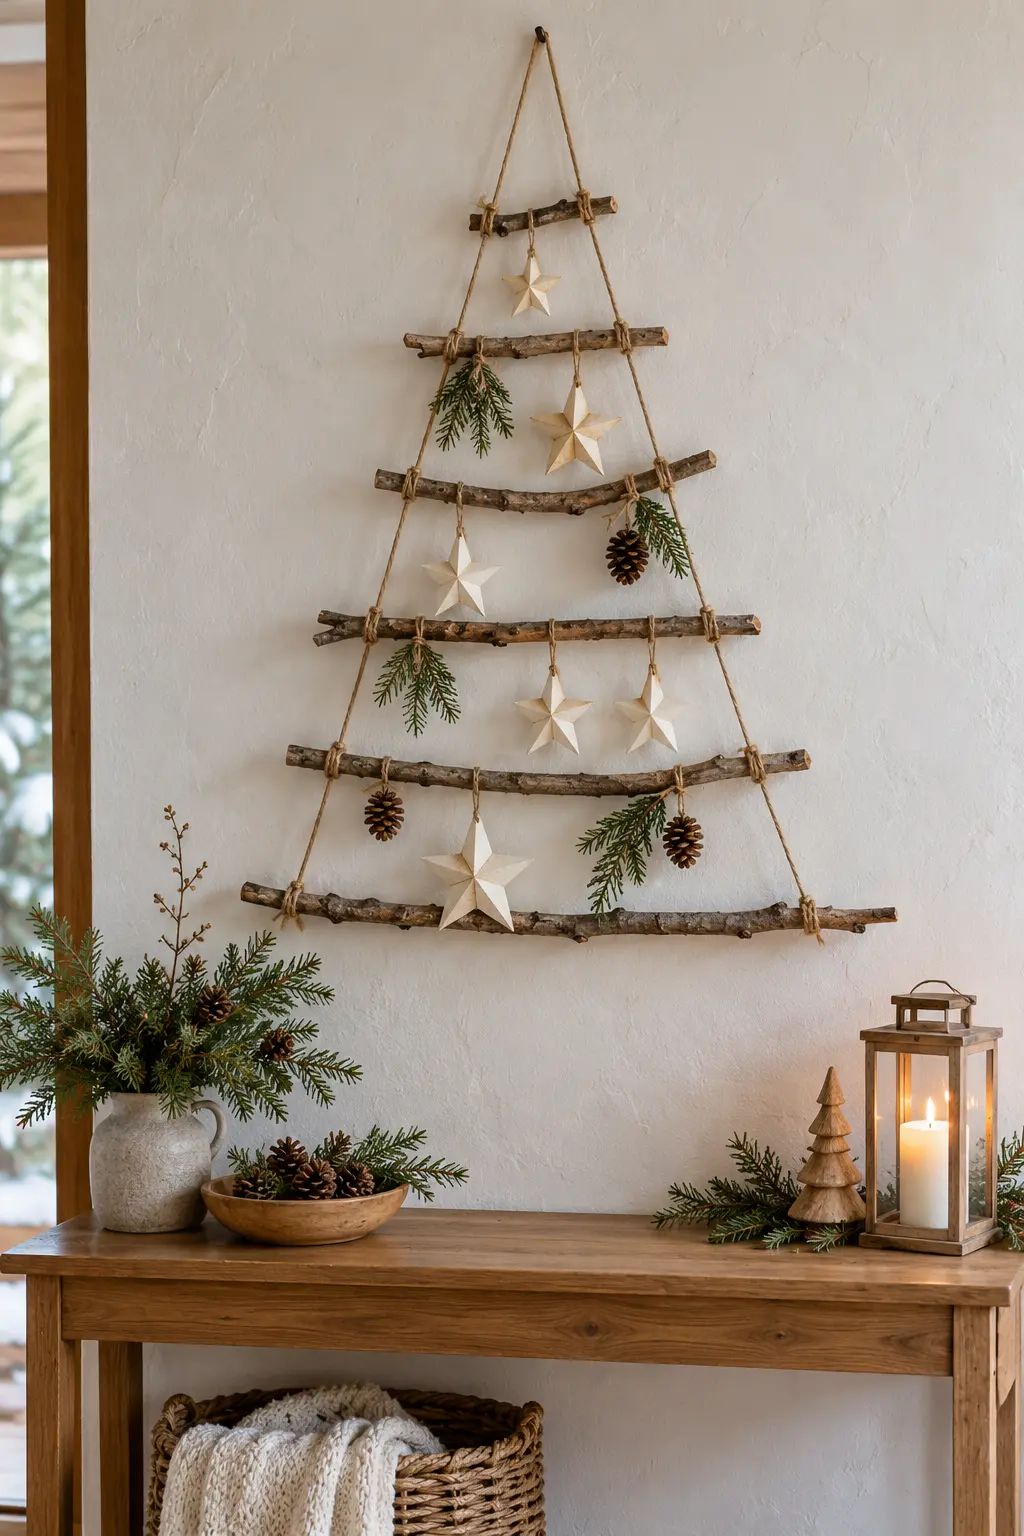
Total: roughly $220 to $650.
Budget alternative: Marketplace consoles regularly go for $50 to $80, thrifted baskets run $6 to $12, and a white fleece throw from Walmart reads nearly identically to the knit one for under $15.
The console underneath is doing half the styling work, so get the dimensions right. Aim for a table 14 to 16 inches deep and 30 to 32 inches tall — deeper crowds the room, taller collides with a standard window sill. Leave 8 to 10 inches of open wall between the tabletop and the lowest branch. That gap makes the tree look suspended rather than parked on the furniture, and it’s the single most skipped step in this whole look.
8. Red Berries and Pine Sprigs on a String-Light Skeleton
Those little berry clusters are almost always plastic with wire stems, and wire stems scratch paint. Wrap the ends in a small piece of green floral tape before you poke them into the display. Also figure out where your outlets actually are: most light strands run 6 to 10 feet, and an orange extension cord stretched across a cream wall is a mood killer. And don’t plug four strands into one cheap adapter — LEDs run cool, bargain adapters do not.
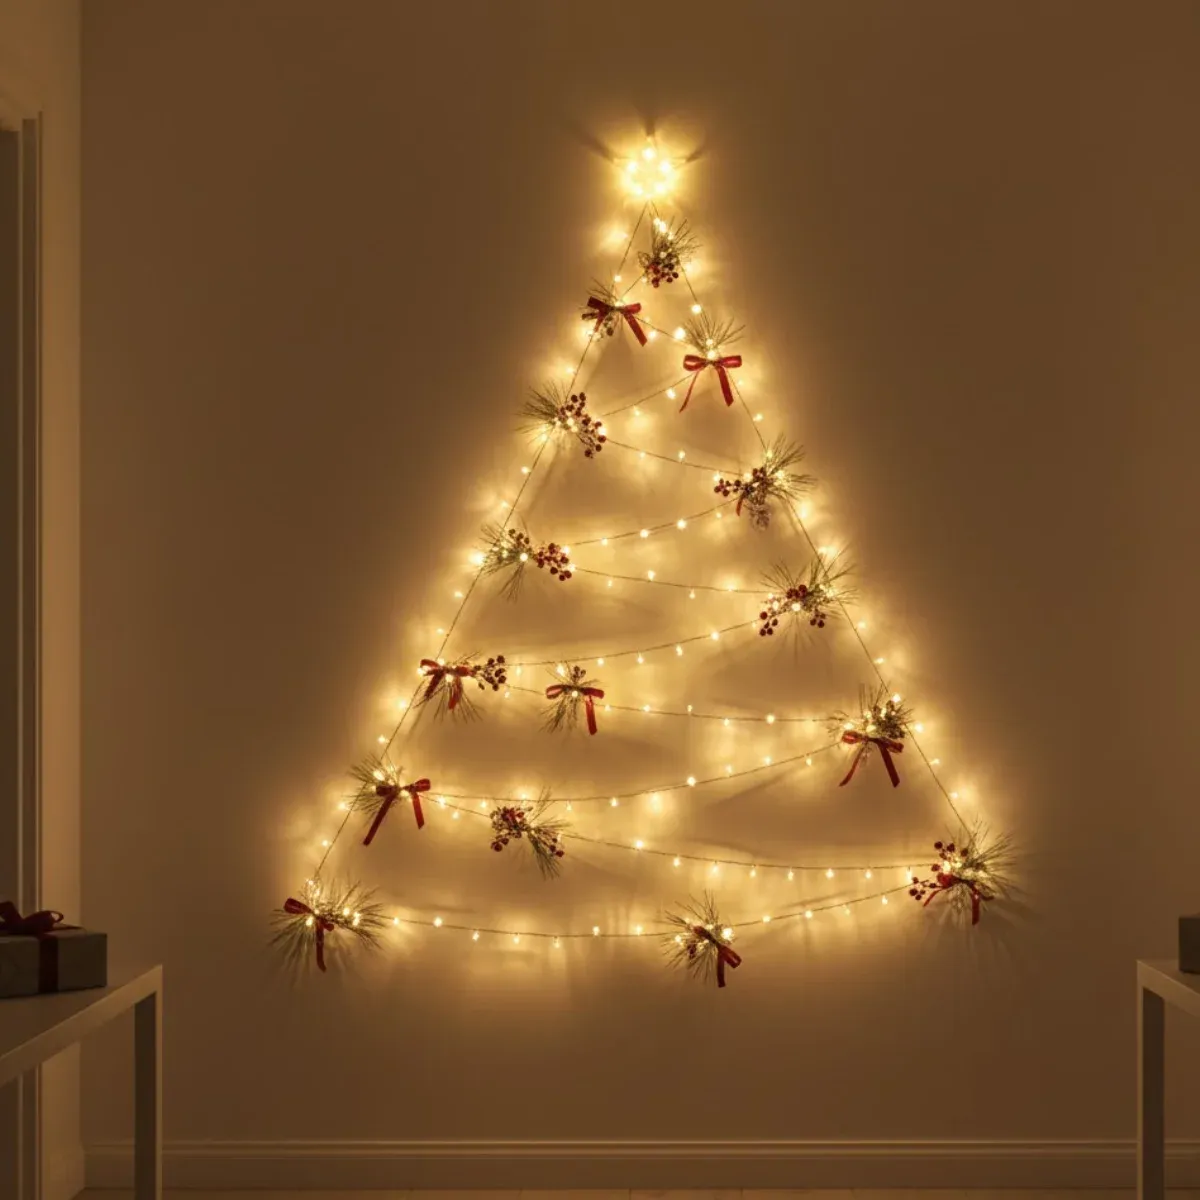
Four things to verify before you stick, drill, or buy anything.
- Measure the wall width and choose a tree height that leaves at least 12 inches of clearance under the lowest branch.
- Locate the nearest outlet and count cord length against it.
- Test every strand while it’s still on the floor — dead sections are much harder to find once they’re up.
- Check the weight rating on your hooks; berry clusters add up fast.
9. Wooden Lattice and a Striped Bow, Hung on the Door
Door trees have their own math. A standard interior door is 30 to 36 inches wide and 80 inches tall, so a door tree should land between 24 and 30 inches wide and 40 to 48 inches tall. Hang it so the bottom sits 4 to 6 inches off the floor — high enough that nobody kicks it, low enough that it doesn’t look like it’s floating. If you’re working with a hallway wall instead, scale up to 60 inches tall and it’ll read correctly from across the room.
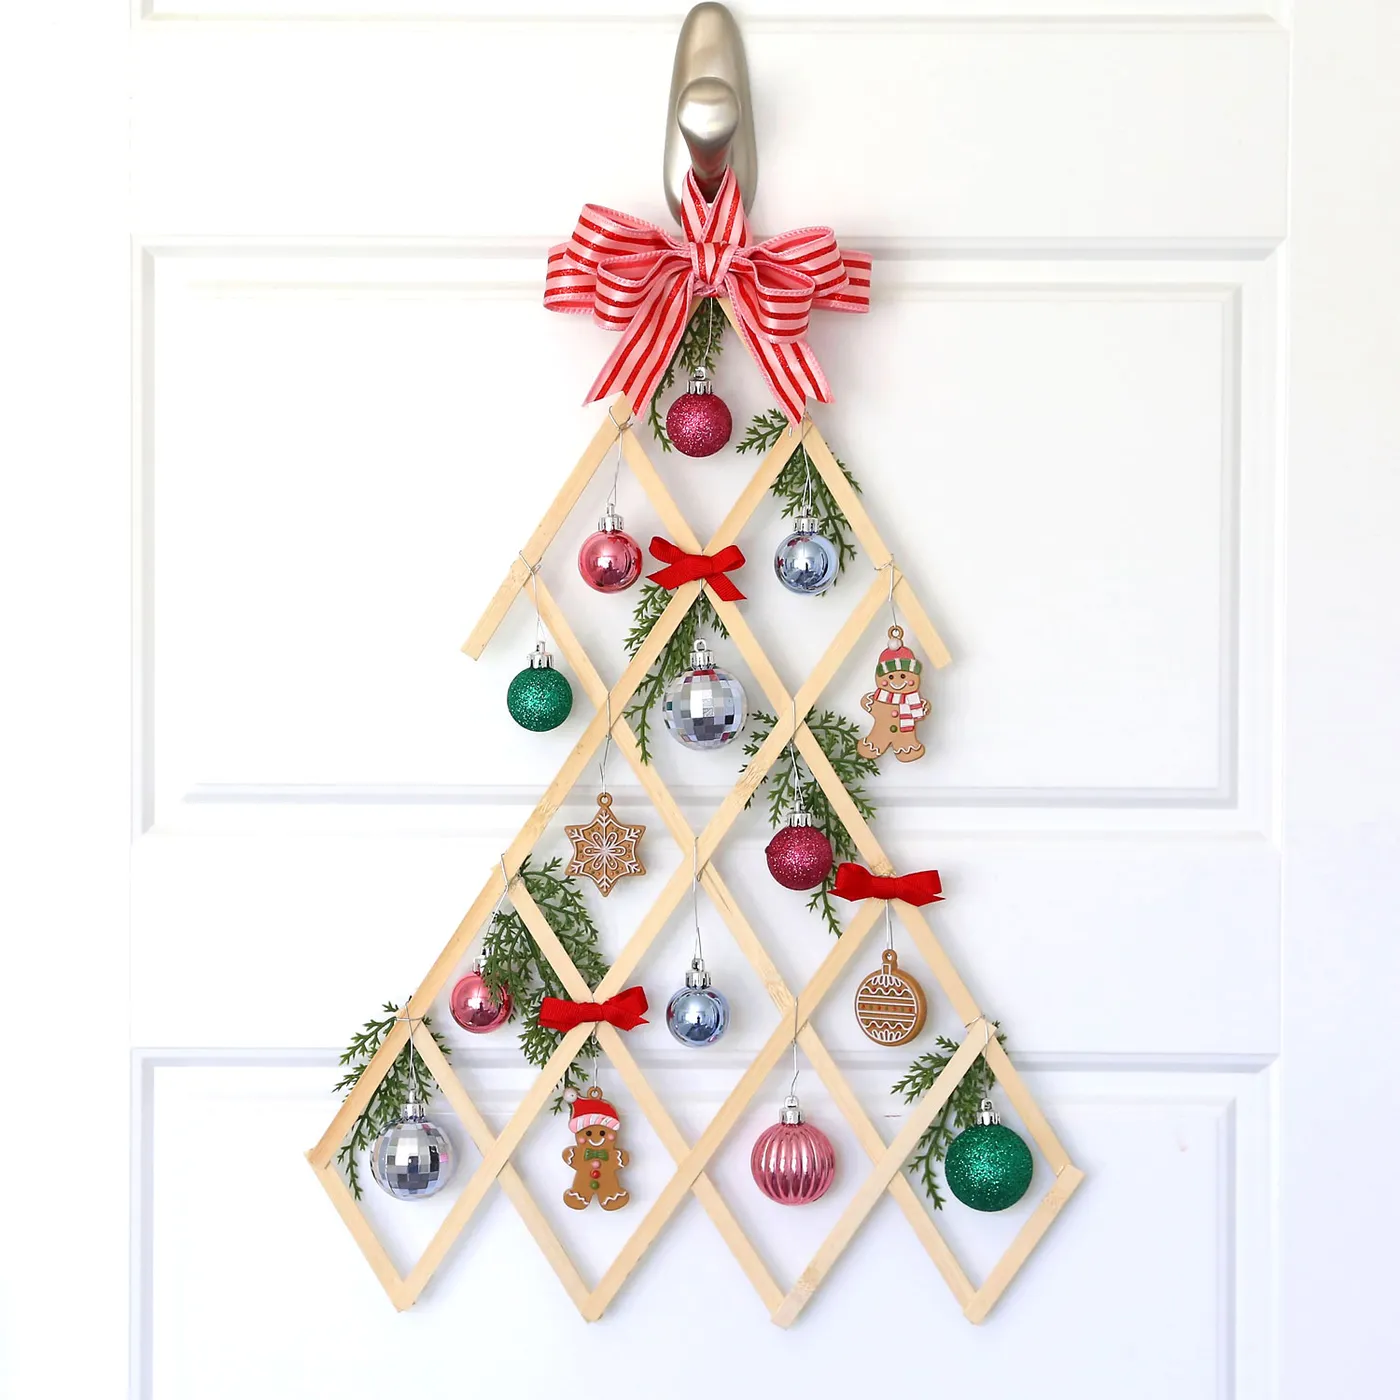
It’s the oversized red-and-white striped bow at the top. Nothing else in this setup pulls that much weight. The bow hides the door hook, caps the triangle so your eye knows where the tree ends, and adds the only shot of saturated color in an otherwise wood-and-white composition. Swap it for plain ribbon and the whole thing slides into craft-project territory. Go bigger than feels reasonable — anything under 10 inches wide disappears against a 40-inch tree.
10. Red-and-Cream Ornaments in a Room Lit Only by the Tree
This palette needs room to breathe. Two colors plus dark curtains plus a dim room only works when the wall behind the tree is at least 9 feet wide and the ceiling is 7.5 feet or higher — the glow needs somewhere to fall. In a smaller space the reds get loud fast. If your wall runs under 8 feet, cut red ornaments to about a third of the total and let cream and clear glass carry the rest of the shape.
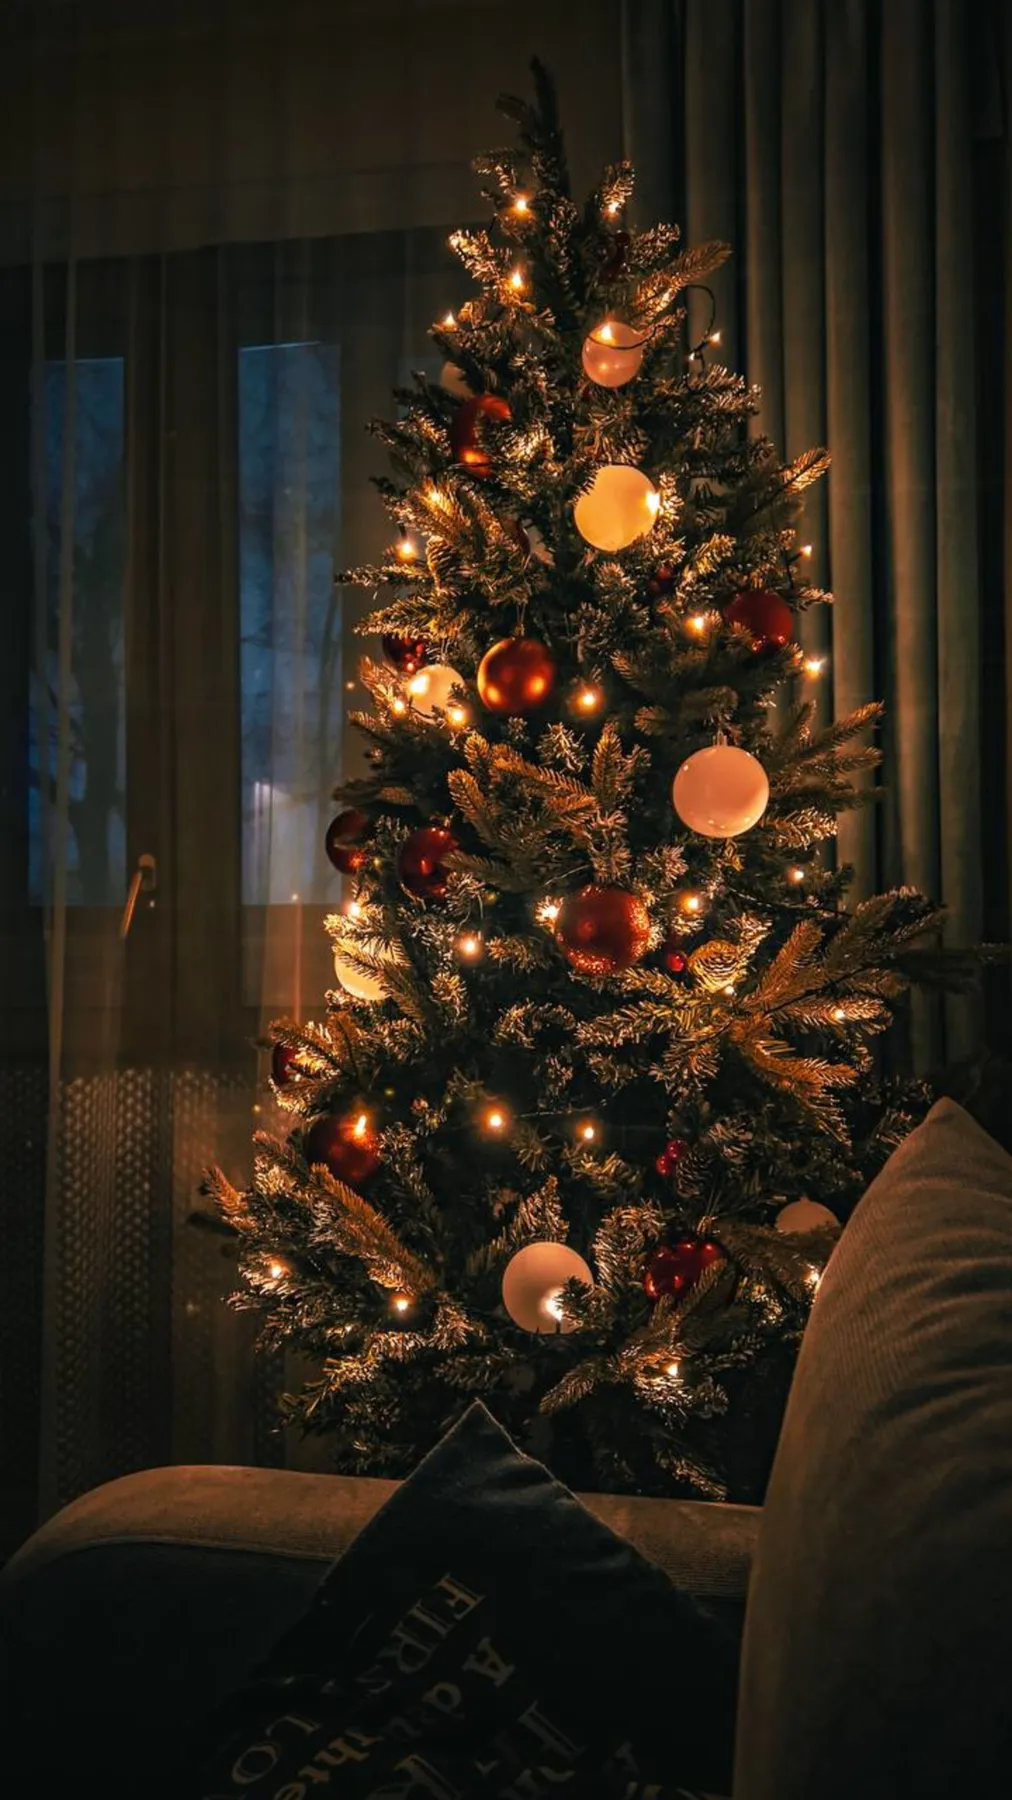
The tree is the only light source in the room. No overheads, no floor lamp fighting it for attention. That’s why the red and cream balls read as jewel tones instead of primary colors, and why the dark curtains fade into the background instead of competing. Flip on a ceiling light and the whole scene downgrades to a normal tree in a normal room. Keep it dim and it looks styled.
11. Light-Wood Branches and White Baubles, Nothing Else
Uniform spacing is what separates a clean branch tree from a pile of sticks. Space horizontal branches 6 to 7 inches apart vertically, and shorten each one by 2 to 3 inches per side as you climb. That gives you a clean triangle without a ruler. Use a laser level or chalk line for the first and last branch and eyeball everything between — perfect symmetry isn’t the goal, and slight irregularity is what keeps it from looking store-bought.
Sourcing matters more than technique.
- Look for birch, aspen, or bamboo — anything with a pale, smooth bark.
- Cut branches 1 to 2 inches thicker than you think you need; thin ones sag under lights.
- Sand the cut ends and wipe them down so they don’t shed on your wall.
- Drill a pilot hole 1 inch from each end, thread twine through, and knot behind.
- Hang each branch from two points so nothing rotates overnight.
About 90 minutes for a six-branch tree. Compare with Idea #17 — same bare-branch idea, much warmer palette.
12. Set-Up Day, Storage Bag and All, With Red and Gold
Here’s the quiet 2026 shift nobody’s writing about: decorating is being treated as an event again, not a chore. Reusable storage bags instead of collapsing cardboard boxes. Garland on the mantel the same afternoon as the tree, candles lit before the boxes are back in the closet. People are buying for the ritual, not just the result. That’s exactly why wall trees have outlasted the small-apartment trend that started them — they go up faster and come down faster in January.
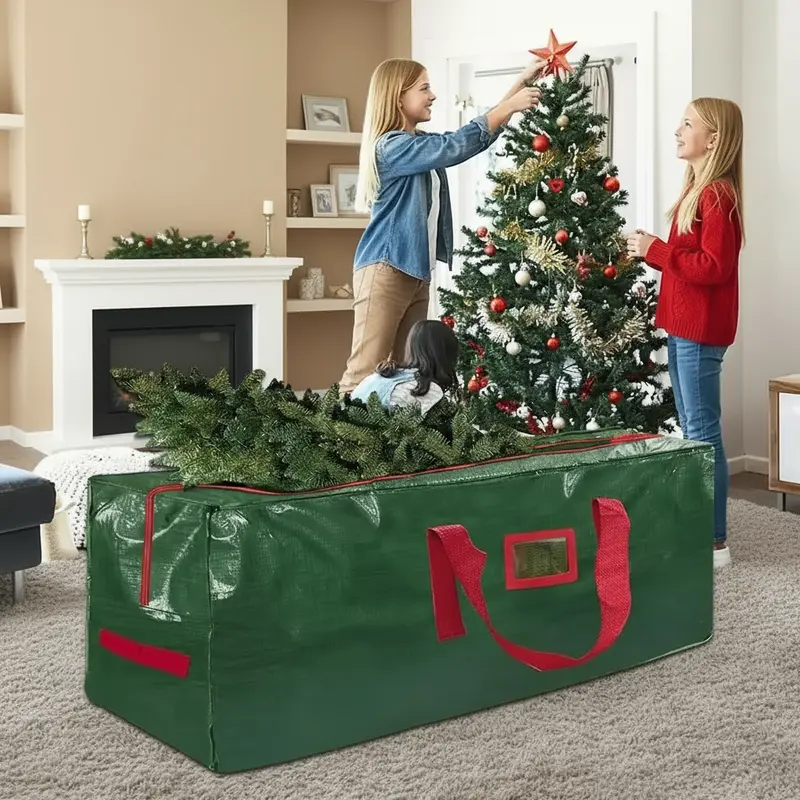
- Artificial tree, 7-foot: $90–$300
- Gold tinsel garland (tree and mantel): $20–$50
- Red and white ornament set: $35–$90
- Red star topper: $12–$30
- Green mantel garland: $25–$60
- Candles and holders: $15–$45
Total: roughly $200 to $575.
Budget alternative: post-holiday clearance gets you a full ornament set for around $12 in early January. Buy for next year and save close to 70 percent.
13. Velvet Baubles and Pampas Grass on a Greenery Wall Tree
The recipe is 55 percent dark forest green, 25 percent warm brown, 15 percent cream and beige, and 5 percent candlelight glow. Velvet is the secret weapon — matte texture absorbs the glare glass ornaments throw, so the arrangement feels soft instead of shiny. Swap the brown for charcoal and it turns moody. Swap cream for dusty rose and it softens into something almost romantic. Keep the greenery sparse enough that you can see wall through it, or the velvet disappears into a green blur.
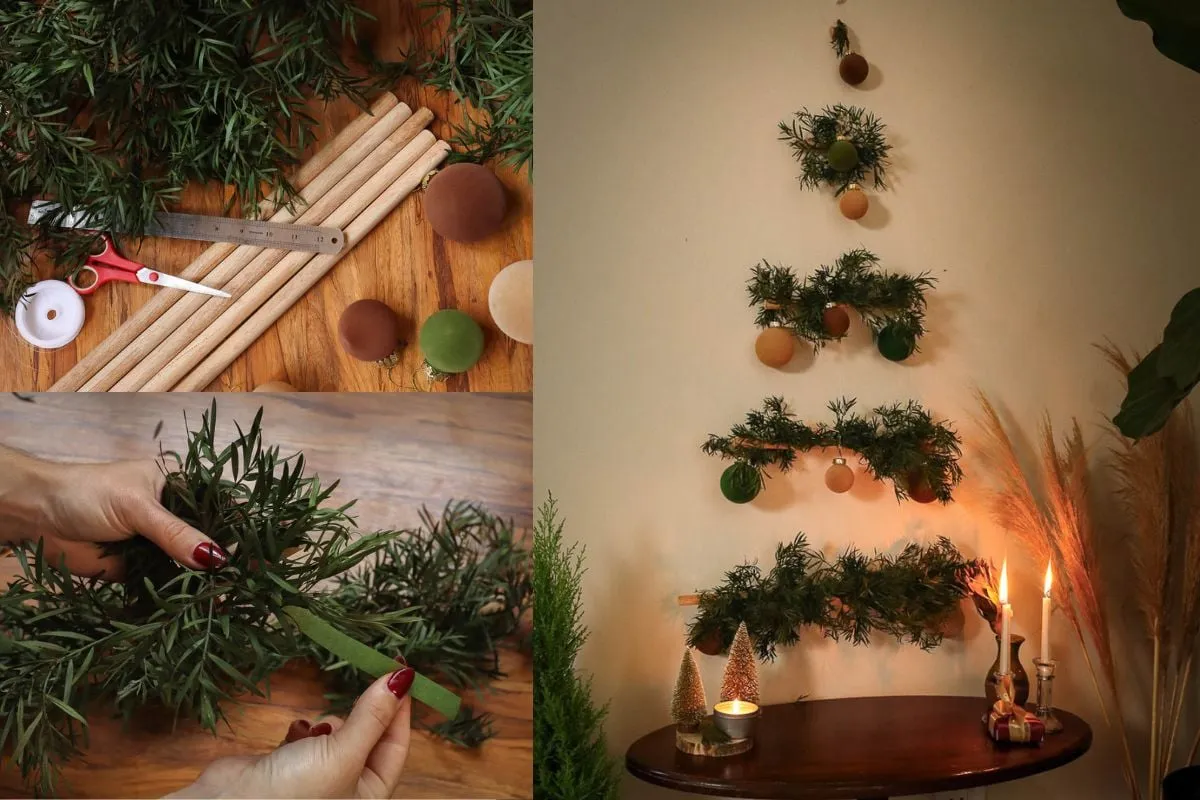
This one needs a real wall. Plan on 7 feet of width minimum and an 8-foot ceiling, with the tree filling the top 4 to 5 feet and the table anchoring the bottom. The round table should be about 30 inches tall and 16 to 20 inches in diameter — small enough to read as a pedestal rather than furniture. Under 6 feet of wall width, drop the table entirely and let the candles sit on a narrow floating shelf.
14. Birch Branches, Fairy Lights, and a Weathered Wood Star
Two things to know before you string this up. Cheap fairy lights on bare wood get warm, so don’t leave them running more than three or four hours unattended, and never use incandescent strands on dry branches. Second, if you’re hanging this above framed artwork, expect the art to fade slightly over a few seasons of daily use. Move the frame off to the side, or just accept that whatever sits under the brightest section will age faster than the rest.
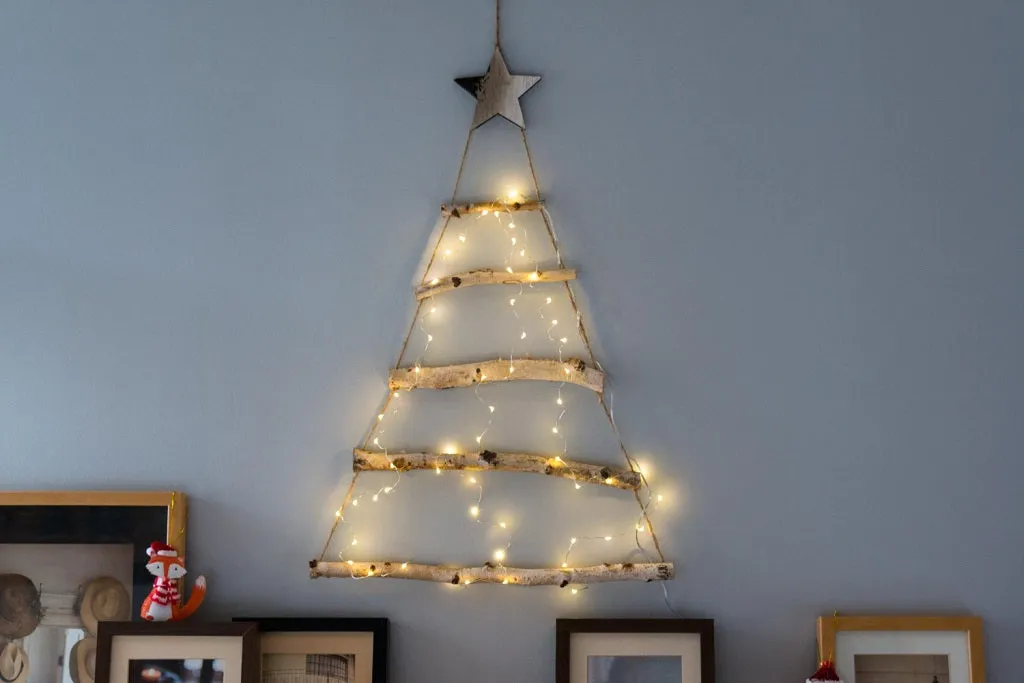
Total cost for this look can land under $35 if you’re willing to forage. Birch and aspen branches drop after storms — check your park’s brush pile, not the standing trees. Dollar stores sell 20-foot fairy light strands for about $5, and a weathered star is exactly the kind of thing that turns up at estate sales for $4. Twine runs $3. The whitewashed take in Idea #18 proves the same formula works on a dark wall.
15. Dark Branches Against Gray, Poinsettias at the Mantel
60 percent cool neutral — light gray wall, cream upholstery — 25 percent dark brown branch, 10 percent red, 5 percent silver. The gray wall is what makes those dark branches pop; against warm beige they’d sink in and the contrast would flatten. Swap the poinsettias for white amaryllis and it goes elegant and chilly. Swap the silver candlesticks for brass and the whole room warms up a full notch. Keep red under 10 percent or it stops being an accent and becomes a theme.
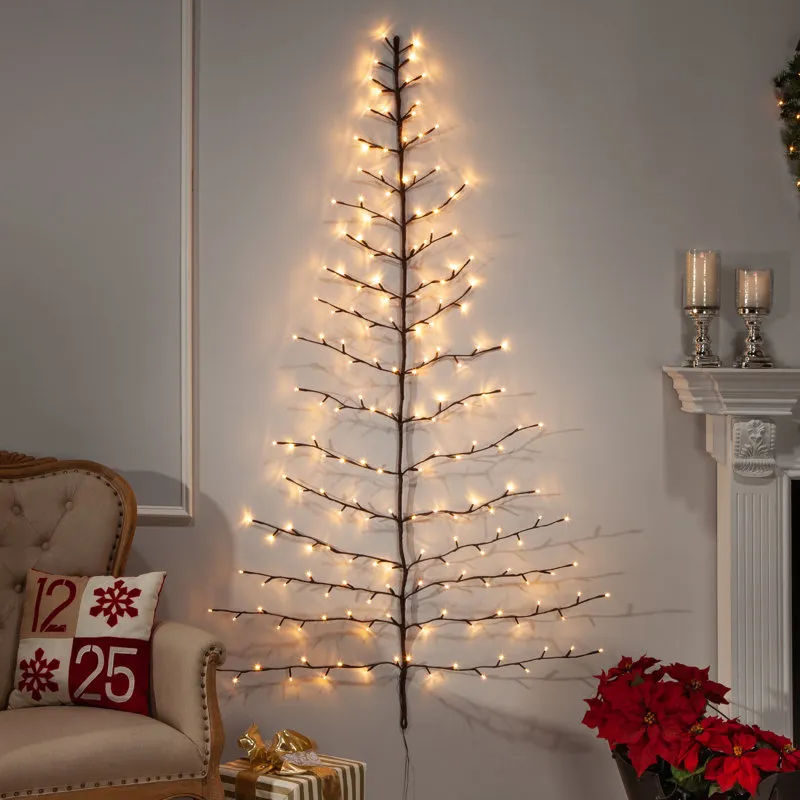
If you’re using real poinsettias on that mantel, they want about six hours of indirect light a day and a saucer under every pot — a white mantel shows every water ring. Keep them away from heat vents too, since they drop leaves within days when they dry out. Want the look with none of the fuss? Buy two faux stems and mist them with a matte finishing spray. That single step kills the plastic shine that gives cheap faux florals away.
16. The Painted Wall Tree You Can’t Take Down in January
A painted tree is a commitment, and the upkeep is real. Matte wall paint scuffs, so expect to touch up around the trunk once a year with the same can you used originally — decant 2 ounces into a labeled jar and store it. If you leave it up year-round, which plenty of people do with the ornaments swapped seasonally, it needs a fresh coat every two to three years as the wall fades around it. Faded paint around a crisp green silhouette is the one thing that makes this look tired instead of charming.
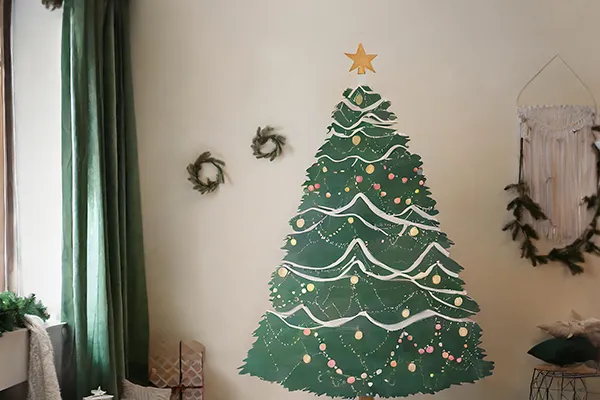
Three checks before the brush comes out.
- Confirm your lease allows painting — and if not, whether peel-and-stick wallpaper in the same green passes.
- Decide honestly whether you’ll repaint each spring or leave it up, because the answer changes which finish you buy.
- Test the green on a hidden patch and look at it in both morning and evening light.
Semi-gloss on a textured wall shows every bump; flat or eggshell hides them.
17. Red Baubles on Bare Branches, Gifts on a Round Rug
Negative space is the whole idea. Most trees get decorated until you can’t see green; this one is maybe 15 percent ornament by area, and the emptiness is what makes it feel modern. Your eye fills in the missing foliage on its own. Repetition helps — same size red ball, roughly even spacing, no clusters. And the round rug beneath does something clever: it softens the hard horizontal line of the bottom branch and gives the gifts a defined stage instead of letting them drift across the floor.
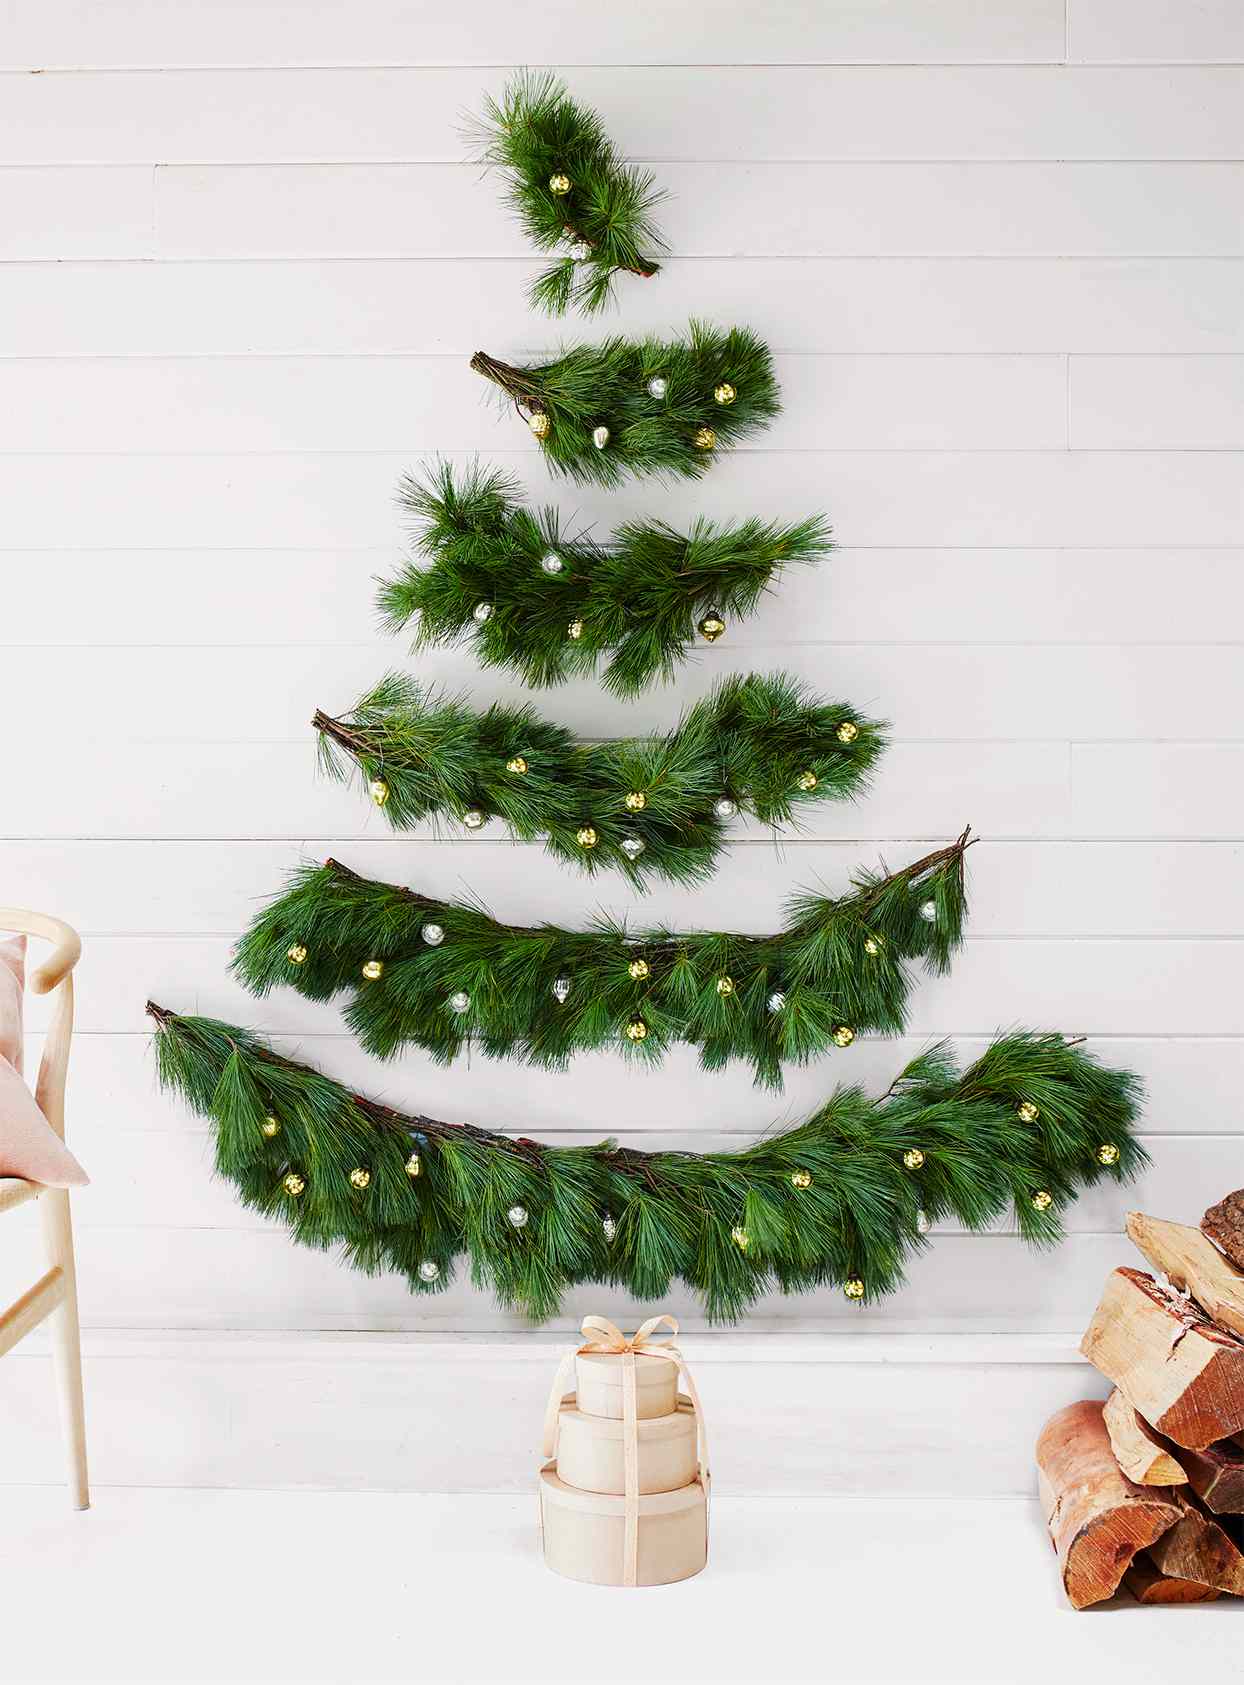
Getting the branch stack level is the only genuinely hard part.
- Cut six to eight branches in descending lengths, from about 30 inches down to 10.
- Let them dry indoors three days so they stop shrinking after they’re on the wall.
- Snap a chalk line down the center and mark heights every 7 inches.
- Fasten each branch with two small hooks, one at each end, knots hidden behind.
- Run the light strand vertically down the center, then drape red balls at 8-inch intervals.
Roughly two hours and $40 in materials.
18. Whitewashed Branches on a Dark Wall, Dried Citrus Included
This is the DIY-est look in the roundup, and the cheapest. Dry your own orange slices in a 200°F oven for three hours — three dollars of fruit makes about 30 ornaments. Pinecones from a neighbor’s yard are free. Twine is $3, a five-pack of mini gift boxes is $6, and Target’s warm LED strands run about $8. Total outlay lands under $40, plus whatever you already have loose in a junk drawer. The dark wall does the rest of the work for you.

Dark walls demand contrast, which means whitewashed branches, not natural ones — plain natural wood disappears against charcoal or deep gray. Budget 8 to 10 feet of wall width so the tree can sit centered with breathing room on both sides. With 8-foot ceilings, cap the tree at 5 feet tall; anything bigger starts pressing down on the room. In a tighter space, drop the bottom two branches and it’ll fit a 6-foot wall.
19. A Flat-Back Artificial Tree on a Paneled Wall
Skip the flimsy hanger and use a 3-inch metal French cleat rated for at least 40 pounds, screwed into studs. It keeps the trunk flush against the wall instead of tilting forward at the top, which is the dead giveaway that a wall tree isn’t really a tree. If studs aren’t where you need them, two 50-pound toggle bolts will do it. And keep the tree about 4 inches narrower than the furniture below — a flat-back that overhangs its console looks like it’s about to fall on someone.
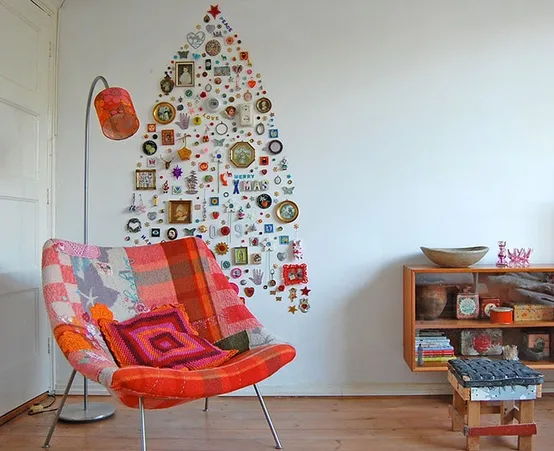
Flat-back artificial trees have one real flaw: needles crush against the wall and stay crushed. Fluff every branch before you mount it, not after, because once it’s up you can only reach the front. Small silver ornaments on a white paneled wall also nearly vanish without warm light on them. If your tree isn’t pre-lit, add a strand anyway — without it, silver reads as gray smudges from across the room. This is the store-bought cousin of the flat-back build in Idea #2.
20. Multicolor Baubles on Garland Above the Fireplace
When you’re building a tree shape out of horizontal garland segments, overlap each row by about 2 inches and let the ends taper — 36 inches at the bottom, then 30, 24, 18, and about 8 at the top. Secure every segment with two clear hooks, one at each end, so nothing sags by New Year’s. Hang the ornaments from the garland wire itself rather than the wall, so the entire display lifts off as one piece when January rolls around.
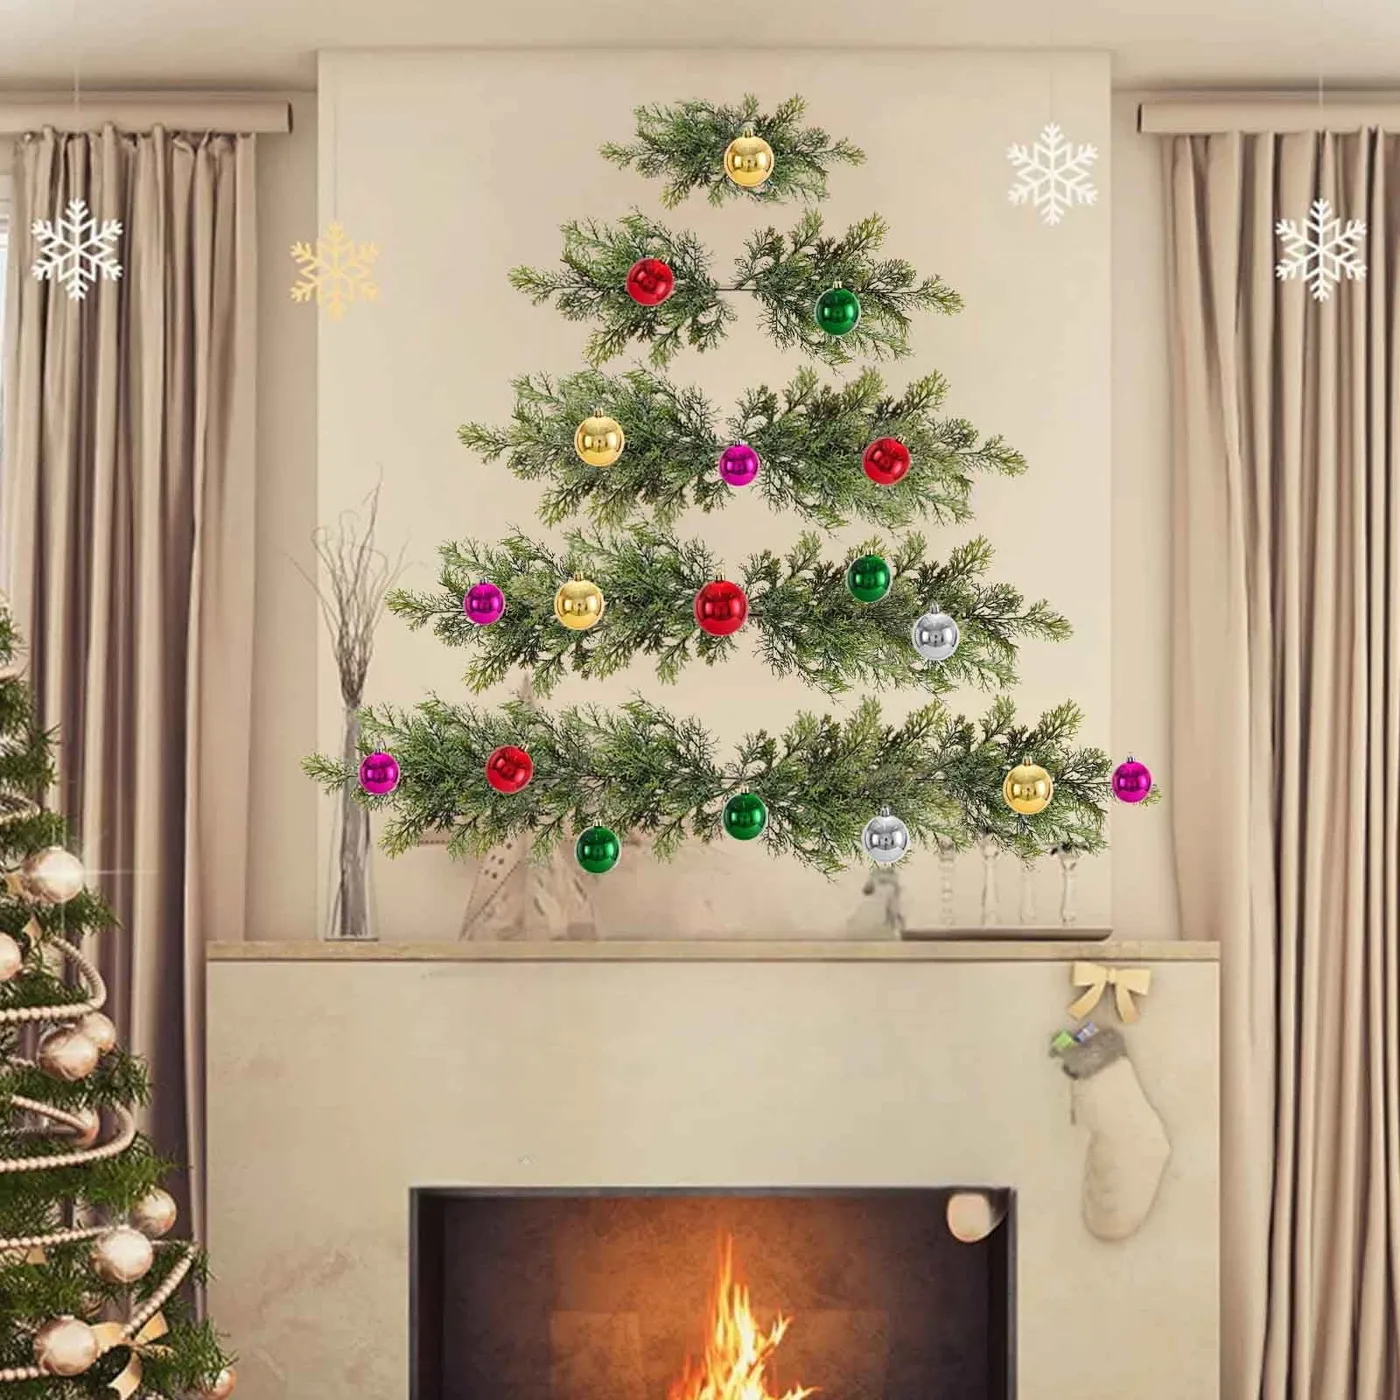
Multicolor baubles are the riskiest thing in this entire article. Red, green, gold, silver, and magenta on a beige wall can tip into chaos fast. Three rules keep it working:
- Keep ornament sizes within an inch of each other — mixed scales look accidental, not collected.
- Repeat each color at least three times so no single bauble reads as a mistake.
- Leave 10 inches of clearance above the mantel so candles don’t scorch the garland.
If it still feels loud, pull the magenta and you’re back to classic red and green.
21. A Wooden Lattice Advent Calendar You Fill With Gifts
- Wooden lattice frame (build or buy): $40–$180
- 24 small wrapped gifts: $60–$150
- Kraft paper, twine, and labels: $10–$25
- Light wood bench: $80–$260
- Cardboard gingerbread house: $12–$35
- Paper chain garland: $6–$15
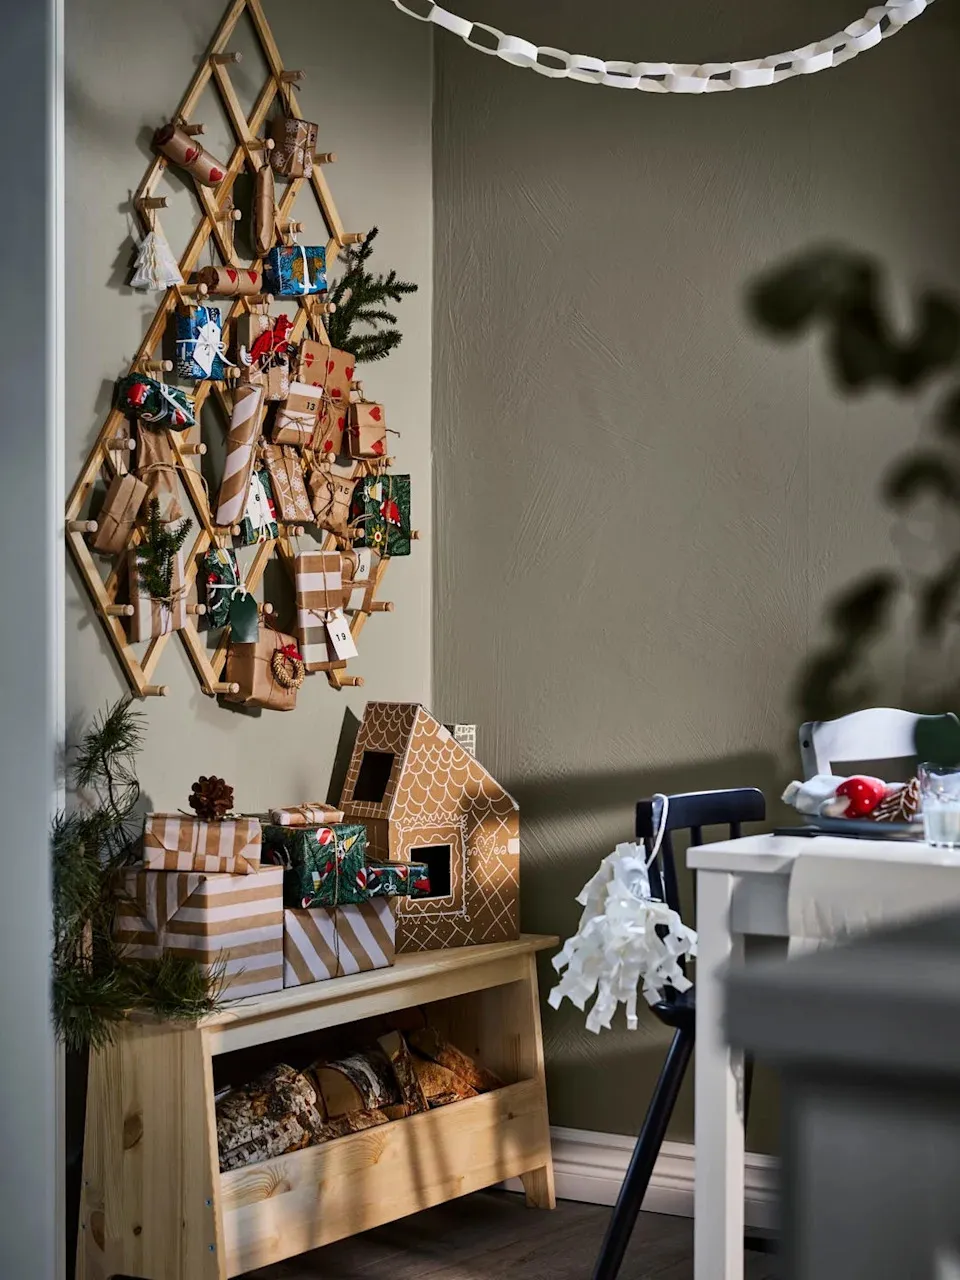
Total: roughly $210 to $665.
Budget alternative: reuse the same lattice year after year and refill it with dollar-store finds — 24 small gifts for under $35, wrapped in brown paper bags cut into squares and tied with twine you already own.
The gifts are the decoration. That’s the whole trick — no greenery, no lights, no baubles, and it still reads instantly as a Christmas tree because 24 wrapped packages are arranged in a triangle. Keep the wrapping in one palette, kraft and white and dark green, and the shape does everything else. Lose that consistency and you’ve got a random pile of presents. The door-sized version of this lattice lives in Idea #9.
Hang It Once, Enjoy It All December
Wall trees aren’t a downgrade — they’re a different kind of display, and honestly a smarter one for the way most of us actually live. Start with the idea that matches your wall width and your patience level, and don’t overthink the rest; a warm strand of lights covers an enormous number of design sins. 📌 Pin this guide now so it’s waiting for you when the boxes come out of storage, and tag us when you hang yours — we want to see which one you picked.