You know that feeling when you finally find the tree that looks like it wandered straight out of Halloween Town and somehow belongs in your living room? We went down the rabbit hole so you don’t have to. After filtering through hundreds of options across Etsy, Target, HomeGoods, Walmart, and Anthropologie, we narrowed it down to 22 ideas that actually deliver — from a $4 sheet of character stickers to a $315 lit miniature haunted house scene. Inside you’ll find whimsical spooky-glam trees, vintage cinema installations, maximalist character displays, and minimalist festive setups, with budget and luxury versions compared side by side and every idea shoppable with direct product links. In 2026, the spooky-meets-cozy mashup is exploding on Pinterest because collectors have started treating their ornaments like decor instead of clutter. Save this post now — you’ll want it when you’re ready to shop.
1. Life-Sized Sandy Claws Anchors a Warm, Whimsical Living Room
Strip away everything else in this living room and the Sandy Claws figure is still the whole story. A life-sized character standing at eye level does something no ornament can — it turns a corner into a scene. That’s why the rest of the room stays so calm: a white slipcovered armchair, a plain wooden mantel with garland and taper candles, a built-in white bookshelf. Nothing competes. If you own one statement figure, give it a clear sightline from the doorway, keep 18 inches of breathing room on either side, and let the lit tree behind it carry the glow.
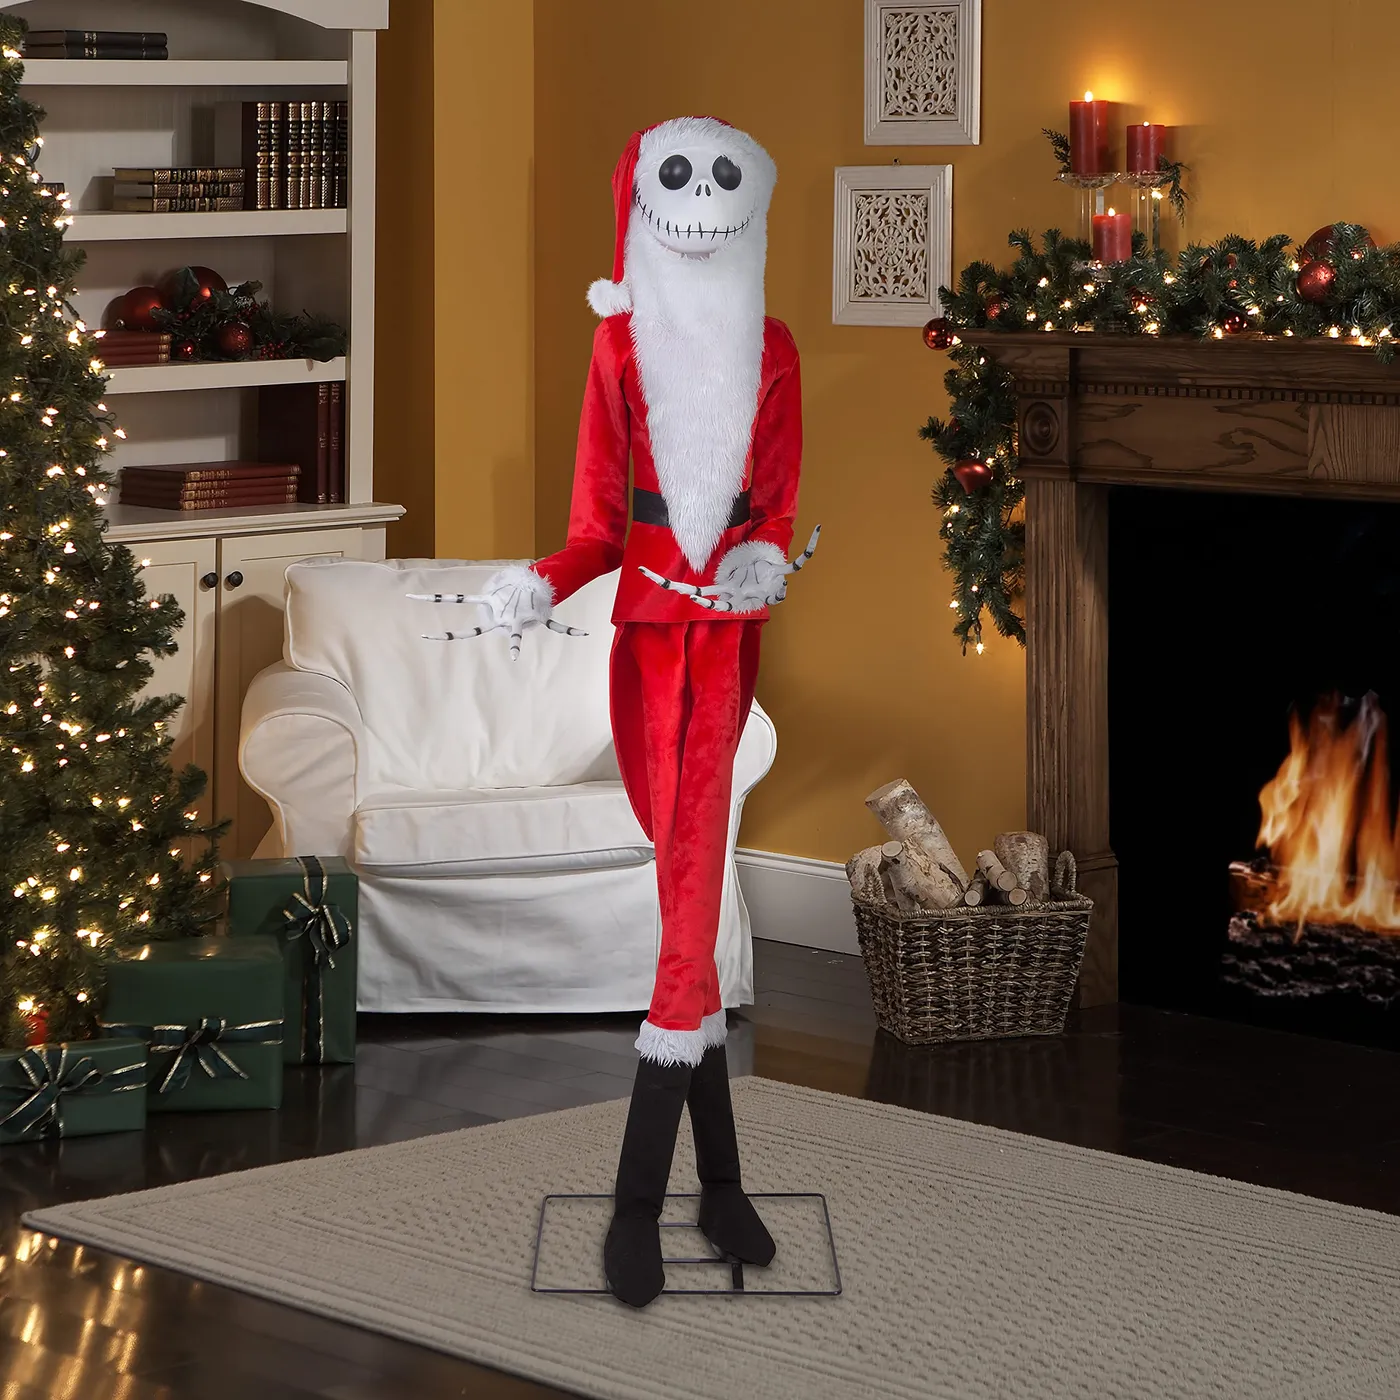
Here’s the trick designers use with life-sized figures: never light them from directly above. A downlight throws shadow into the eye sockets and the face reads as a black hole from across the room. Instead, place a warm 2700K floor uplight about two feet in front and slightly off to one side, angled at the chest. The figure picks up a soft glow, the red suit stays rich instead of going pink, and the metallic accents on the mantel get a second life. Total cost: one $30 uplight.
2. Flocked White Tree With Black-and-White Striped Ribbon Bows
Flocked white tree, black-and-white striped ribbon, character ornaments. That’s the whole formula, and it works because of the ratio: roughly 65% white flocking, 25% pattern from the striped bows, and 10% color from the ornaments and the red patterned cushions nearby. Swap the striped ribbon for solid black velvet and the tree goes moody. Swap it for candy-cane red-and-white and the whole thing turns playful. The muted blue-green wall behind it is doing quiet work too — a cool backdrop keeps white flocking looking creamy instead of gray.
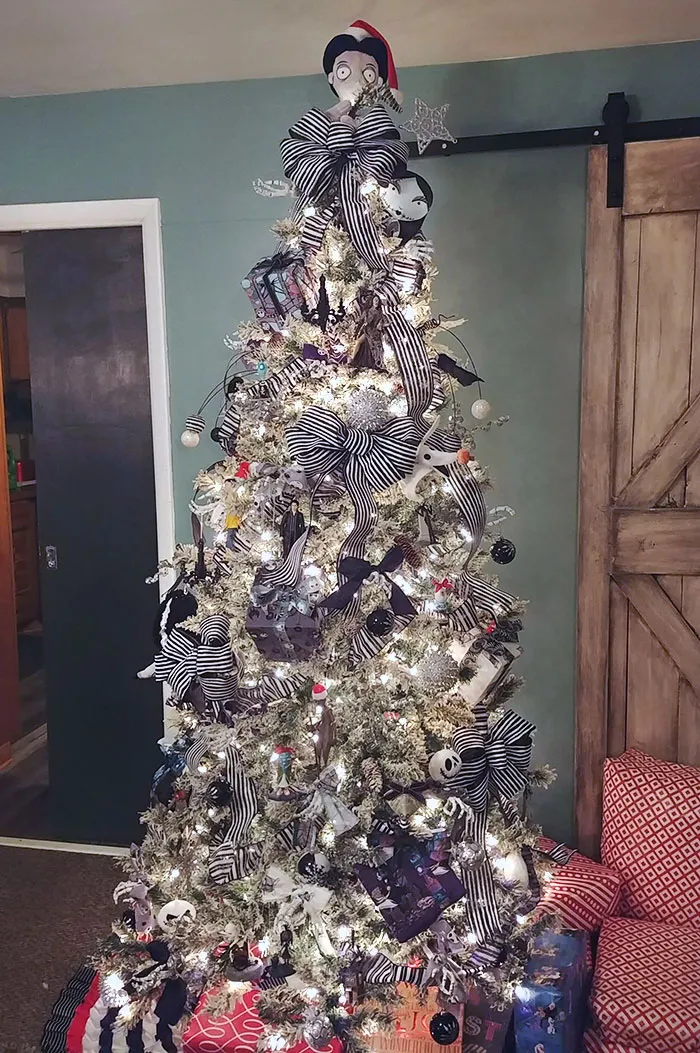
Three things make this tree read as designed rather than decorated. First, the backdrop: a wooden sliding barn door against that muted blue-green wall gives the white tree something warm to sit against, so the flocking doesn’t vanish into the paint. Second, repetition — the same striped ribbon appears at every scale, from small bows to big loops, which keeps a busy tree from feeling chaotic. Third, restraint on color: black, white, and red only, with natural wood carrying the warmth. Compare with Idea #13 — same palette, much smaller footprint.
3. Where To Put It: Planning the One Wall a Themed Display Needs
Before you buy a single figurine, inflatable, or oversized plush, measure the wall. A tabletop vignette needs about 4 feet of clear width, a floor-standing figure needs 6, and a tree-plus-figure combination wants 9 feet or more of uninterrupted wall. Ceiling height matters just as much — under 8 feet, a 7.5-foot tree plus a topper will crowd the room badly. Working with less? Look at the potted mini tree in Idea #17 or the ornament-scale pieces in Idea #7.
- Measure wall width and ceiling height, and note the nearest outlet.
- Track where afternoon sun hits — direct light fades flocked trees and printed ornaments.
- Confirm one grounded outlet for lights plus any lit house or figure.
- Choose the hero item first, then build everything around it.
- Set a budget ceiling before you browse; character collectibles add up fast.
4. Hand-Painted Skeletal Bauble With a Crocheted Santa Hat
- Start with a plain white round bauble — matte finishes take acrylic paint better than gloss.
- Sketch the eye sockets and stitched smile in pencil first; symmetry is what sells the character.
- Fill the features with black acrylic, then add white highlights in each socket while the paint is still slightly tacky.
- Crochet a small red hat around a 2-inch ring, leaving a fluffy white yarn brim.
- Attach the hat with a dot of strong craft adhesive and let it cure overnight.
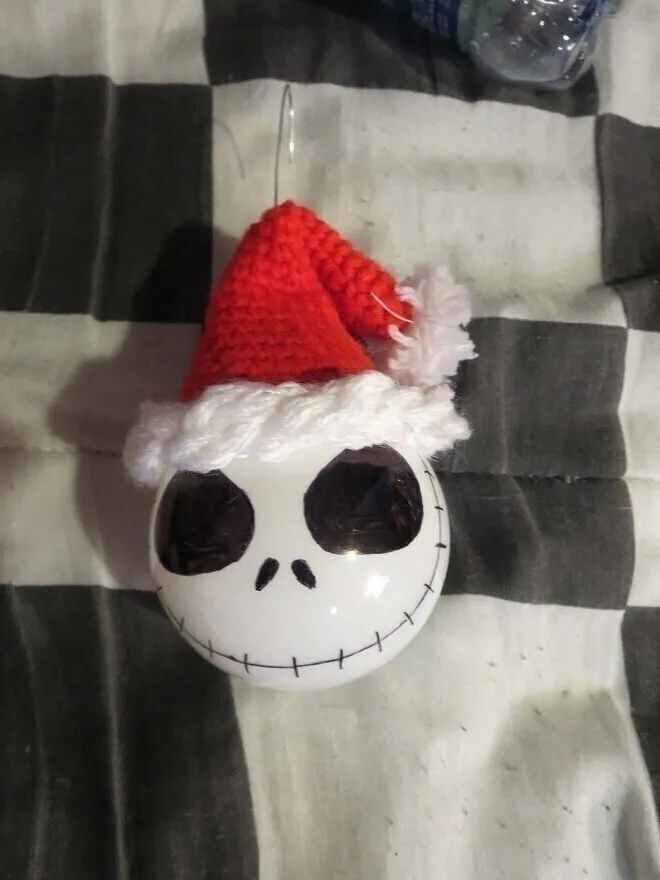
Time: about 90 minutes for the first one, 45 for each after that. Materials run roughly $12 for a six-pack of baubles plus paint and yarn.
Store-bought character baubles with a knit hat run $12 to $20 each, and a whole tree’s worth adds up fast. Make eight of these by hand for the price of two, then splurge on the two or three ornaments you genuinely can’t replicate. Thrift stores and Facebook Marketplace are goldmines in January, when people dump entire themed collections for $2 to $5 a box. A yard of black-and-white checkered fabric makes an instant display backdrop for under $8.
5. Neon Monster Tree Topper With Googly Eyes and Glitter Bats
A topper this loud needs a calm anchor. Keep the tree’s base width around 40 inches and leave the top 12 inches of branches nearly bare — you want the topper silhouetted against the wall, not swallowed by pine. Wire sprays should arc outward and slightly downward, never straight up, which is what gives mass-produced toppers that sad, wet-noodle look. If yours leans, run a zip tie from its base down to the top branch before you add anything else.
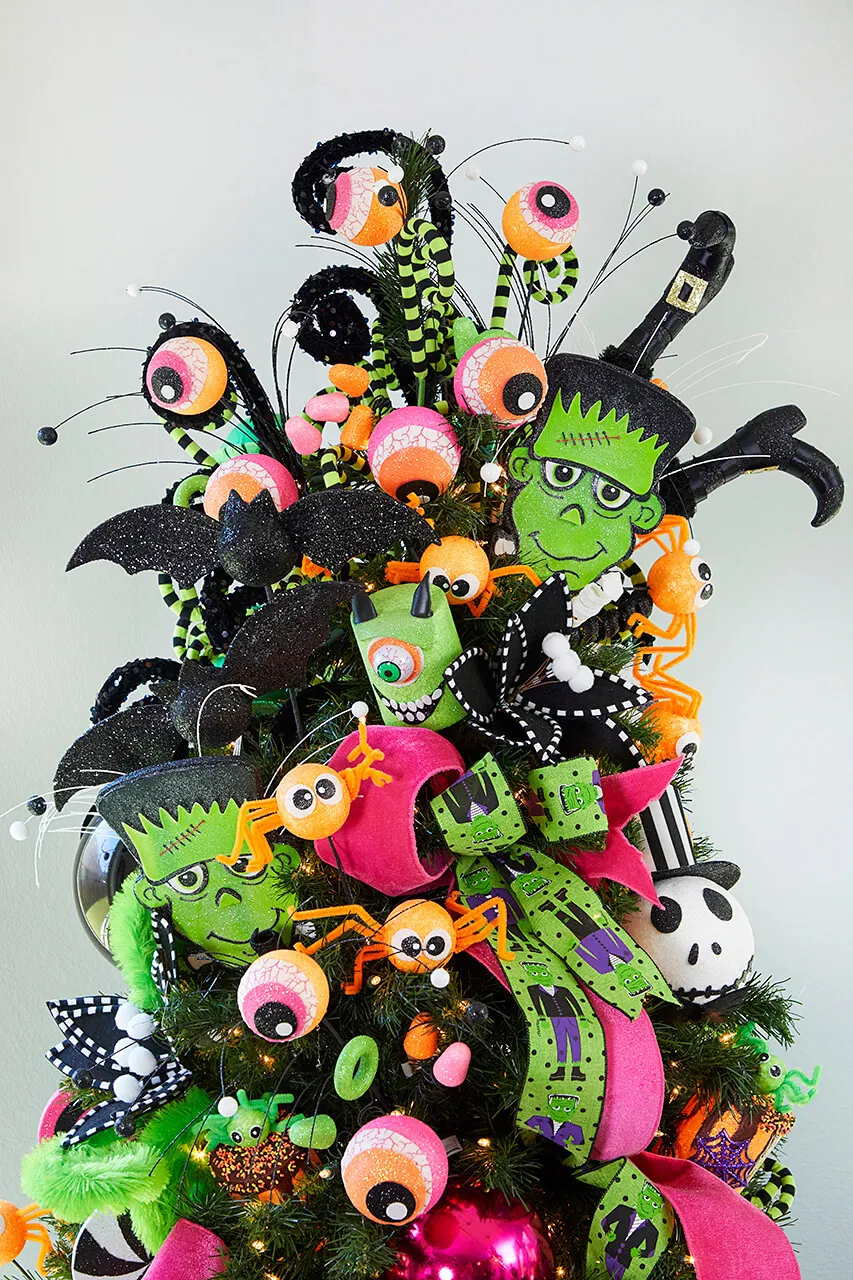
Neon monster toppers are riding the same wave as Halloween tree culture, which has moved from a niche collector habit to a mainstream holiday tradition. Pinterest searches for Halloween trees climb every September and stay high through December now. What changed in 2026 is the palette — the old purple-and-orange combo is being replaced by neon green, hot pink, and orange against black, which photographs dramatically better on a phone. Staying power? Strong. This isn’t a one-season gimmick.
6. Orange Artificial Tree Crowned With a Vintage Black Cat
Orange tree, warm white lights, dark charcoal wall, off-white curtains. The formula is roughly 70% saturated orange, 20% warm light, and 10% black accents, with the arched doorway acting as a ready-made frame. If orange feels like too much, switch to a deep purple tree and keep everything else — it reads more elegant and less candy-corn. Want it brighter? Dial the lights to multicolor and let the black cat topper become the single dark note in the whole room.
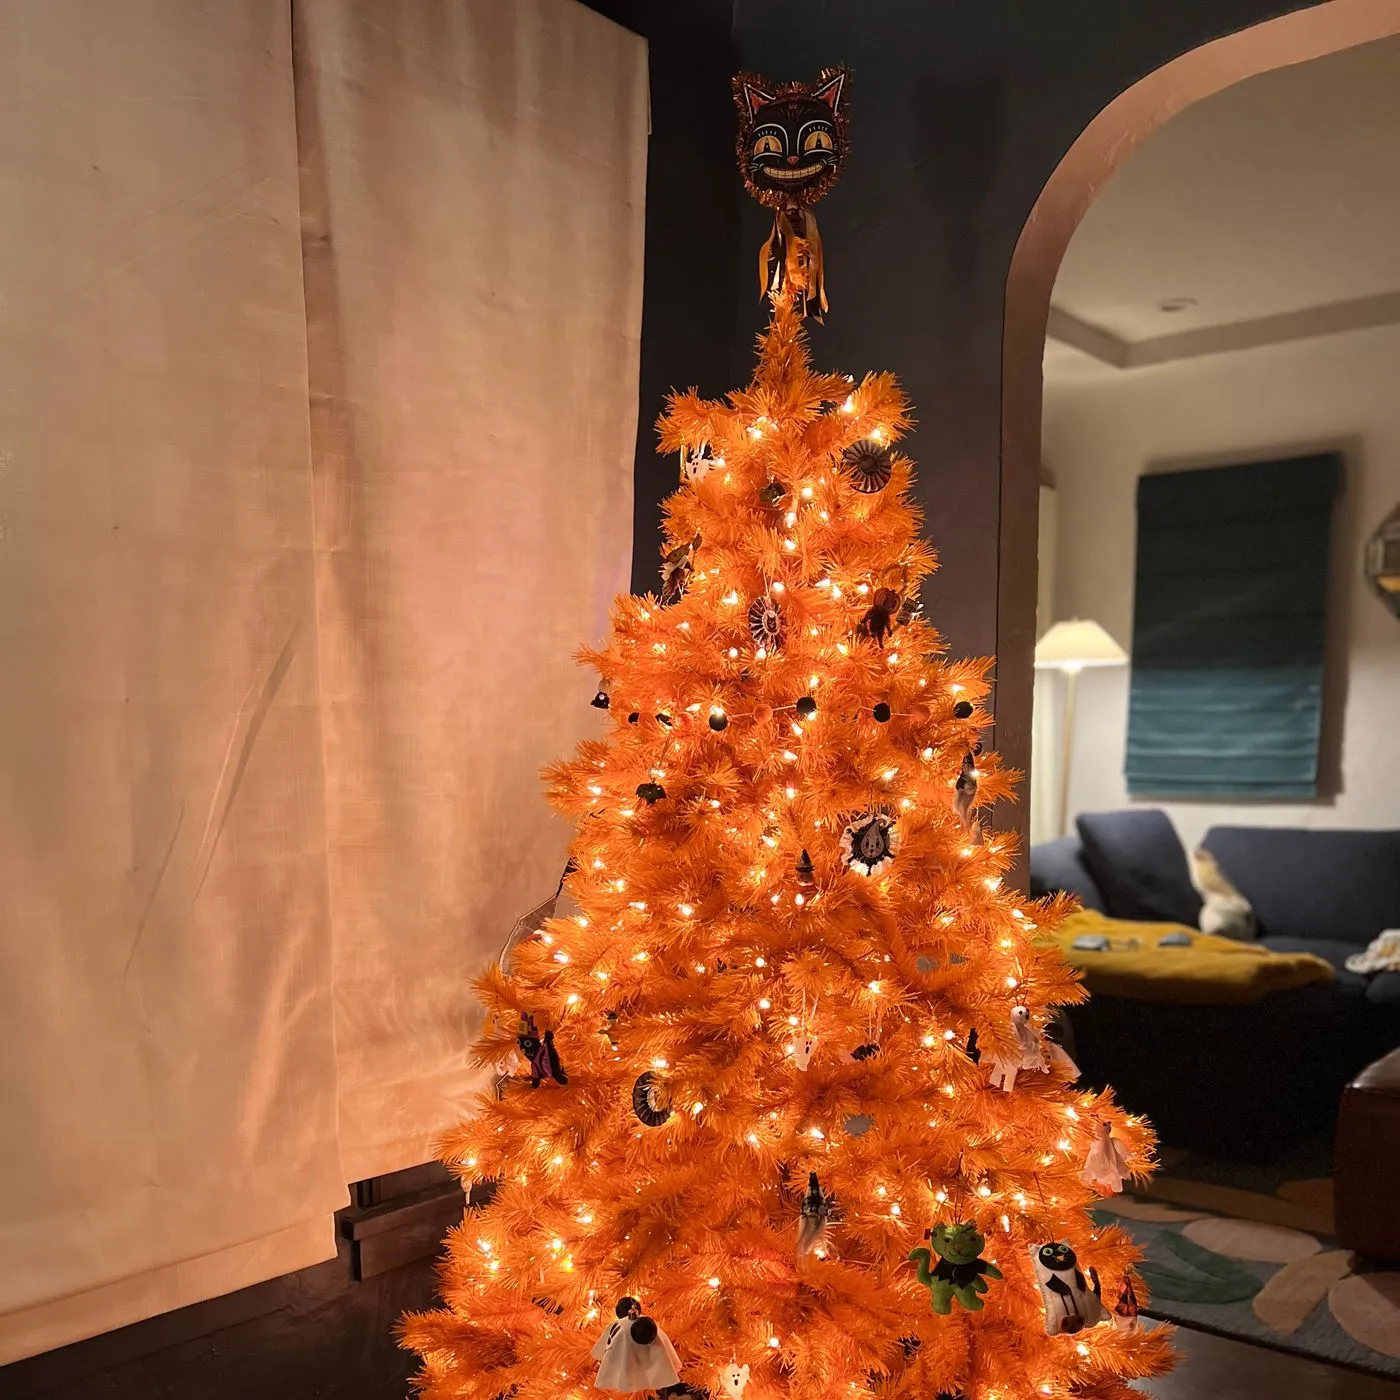
- Artificial orange tree, 6–7 ft: $70–$220
- Warm white string lights: $15–$40
- Vintage-style black cat topper: $20–$60
- Small character ornaments, set of 12–20: $25–$70
- Tree collar or skirt: $20–$45
Total: roughly $150–$435. Budget alternative: a secondhand green tree plus two cans of orange floral spray gets you about 90% of the look for $60, though the coverage is less even up close.
7. A Spiral Hill Ornament With Hand-Lettered Jack and Sally
- Cut a rectangle of basswood or heavy chipboard to roughly 3 by 4 inches.
- Paint a full yellow moon circle, let it dry, then layer a curved dark gray hill across the lower third.
- Build texture on the hill with a stiff brush and short dabs of gray before it sets.
- Add two small silhouettes at the top of the curve plus three tiny orange pumpkins along the slope.
- Hand-letter the names and year in white gel pen, then seal with matte varnish.
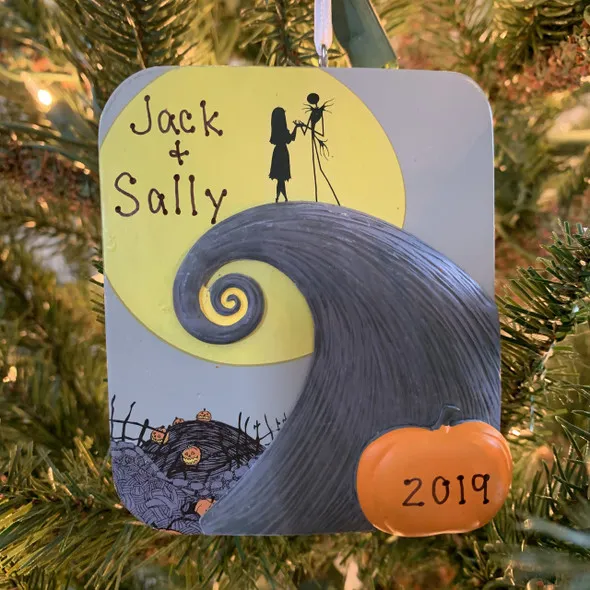
About 2 hours per ornament and roughly $9 in materials. The pine branch behind it does the rest of the work.
The year. That little hand-lettered date is what turns a cute ornament into a keepsake, and it’s the detail most people skip. Dated ornaments age into a timeline — five years later you have a row of them and the display tells a story no store-bought set can match. If you’re starting a collection this season, commit to one dated piece per year. The spiral hill shape is forgiving enough that even shaky handwriting looks intentional.
8. Ceramic Pinstripe Jack Beside a Pumpkin-Carved Mini Tree
Two reasons this ornament feels expensive. First, contrast of scale: the standing figure is tall and vertical, the tree beside it is round and squat, and those proportions echo the real thing at a fraction of the size. Second, material honesty — glossy ceramic with gold beaded garland and a golden cord reads as heirloom, while resin versions of the same design read as toys. The tiny wrapped presents stacked at the base complete the sense of a scene rather than a single figure.
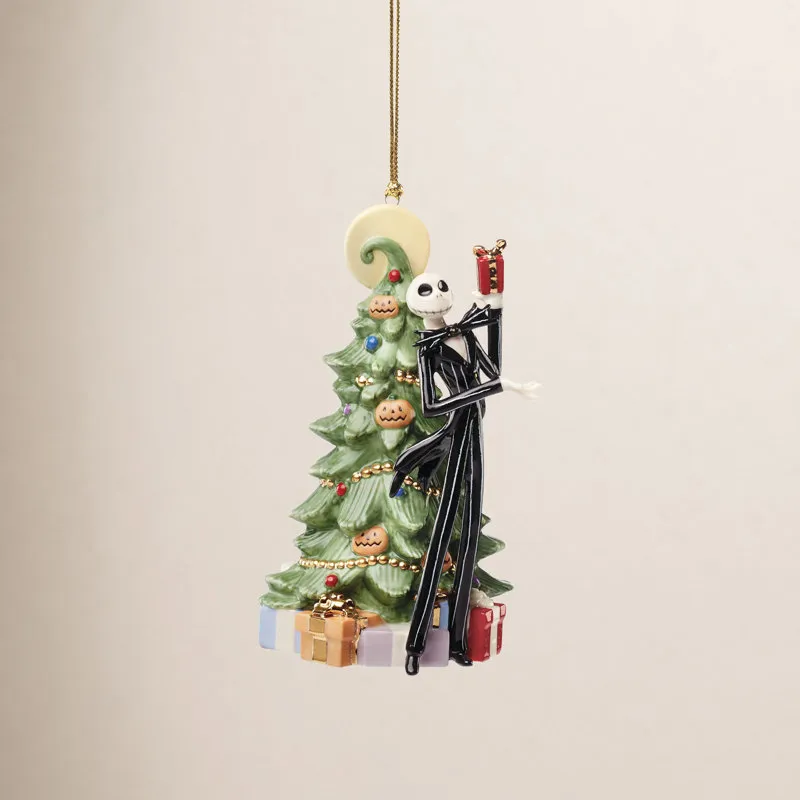
Glossy ceramic is the easiest holiday material to live with: wipe it with a damp cloth, no special products, no fading. The real risk is the gold cord and beaded garland — thin elements bend and eventually snap if the ornament rattles loose in a storage bin. Keep the original box or wrap each piece in tissue inside a divided ornament case, about $20. Hand-painted details on wood or paper are the ones that need a fresh matte sealer every few years.
9. A Striped-Suit Skeleton Tangled in Multicolor String Lights
Blue and purple lighting looks incredible in photos and slightly haunted in person. If you’re building a vignette around this scene, remember that cool blue light makes skin look gray and food look unappetizing, so keep it to a corner, a shelf, or a hallway display rather than the main living area. Multicolor string lights also read as chaos when they’re the only light source in the room. Pair them with one warm lamp and the space still feels like a home.
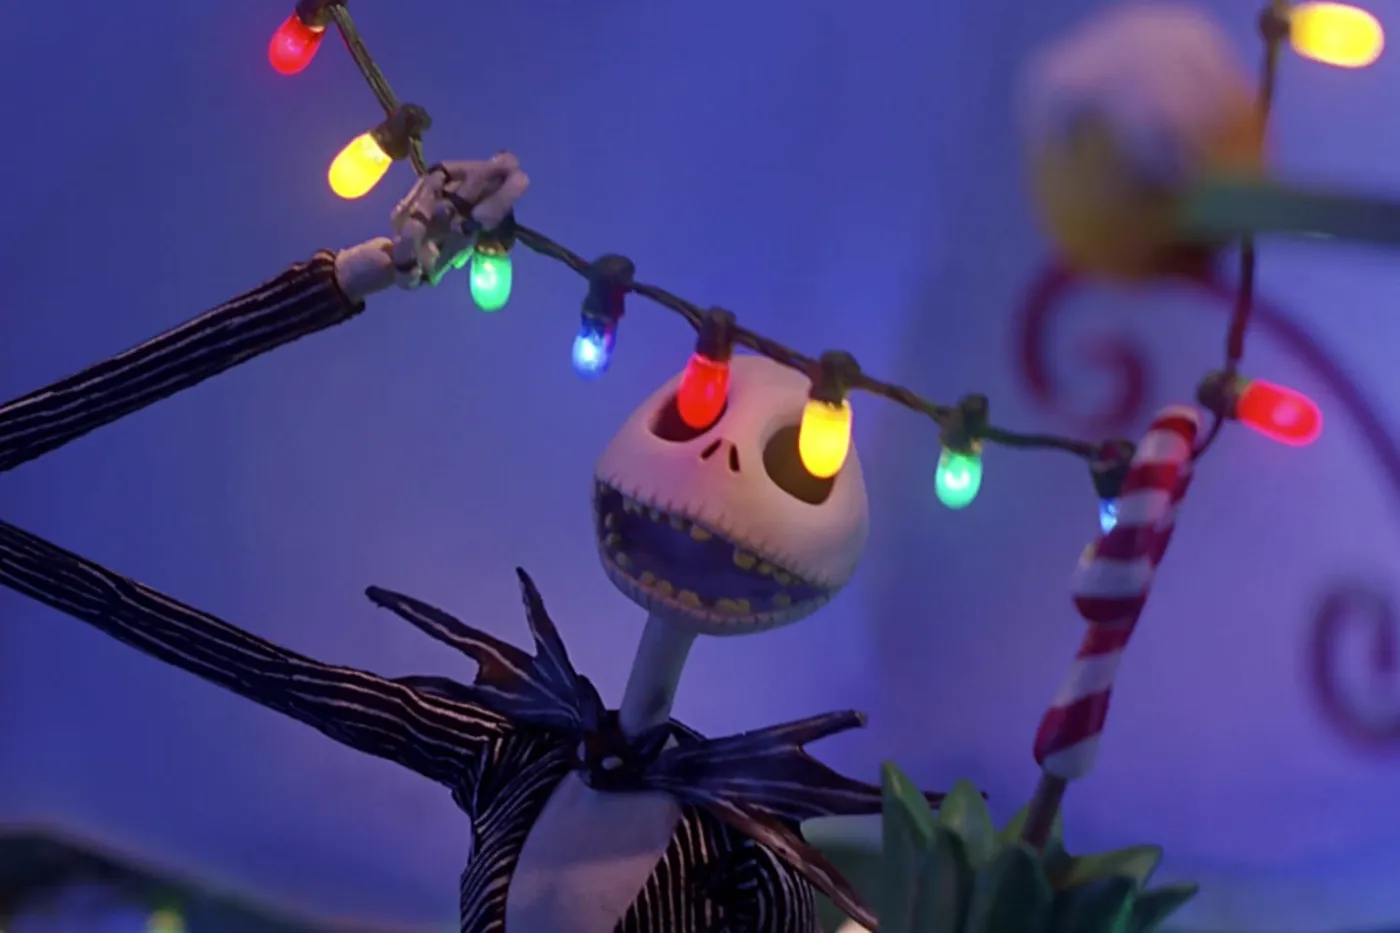
The formula is 50% deep blue and purple wash, 30% black-and-white character elements, and 20% multicolor light. It works because a cool background makes warm bulbs pop far harder than they would against a neutral wall. Want it warmer? Swap the blue wash for deep teal and the multicolor strand for warm white — same theatrical mood, much friendlier at 9 p.m. on a weeknight. Keep the bow tie as the single graphic note.
10. Paper Craft Character Ornaments With Accordion-Fold Limbs
- Print or sketch a simple character body onto 110 lb cardstock, keeping the limbs as separate strips.
- Fold each limb strip accordion-style into ¼-inch pleats.
- Glue the pleated limbs to the torso and let them dry flat under a book for 20 minutes.
- Ink the outlines and facial features with a fine-tip black pen for that hand-drawn look.
- Punch a hole at the top, thread baker’s twine, and hang.
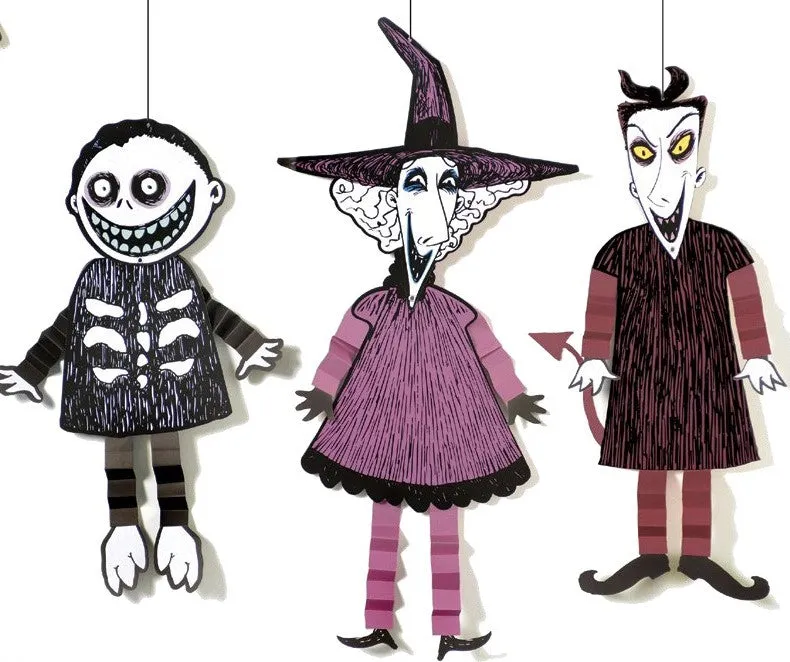
About 25 minutes per figure and roughly $6 in supplies for a set of six. The pleats let the arms and legs swing, which is the entire charm.
This is the cheapest idea in the whole article — cardstock, black ink, and twine, under $10 for a full set. Compare with the sculpted and ceramic ornaments in Idea #8 that run $18 to $35 apiece. If you want volume without spending, paper is the answer: make twelve of these in an evening, mix in three or four nicer pieces, and nobody notices the ratio.
11. Lock, Shock, and Barrel Riding a Yellow Wheeled Tub
The tub. Not the three characters — the yellow wheeled tub with the hinged crank handle on the side. That single prop turns three figures into a moving scene, and it’s the detail that makes people stop and look twice. Without it you just have three character busts competing for the same branch. If you’re designing your own display, always give your figures something to be doing, and the whole composition tightens up instantly.
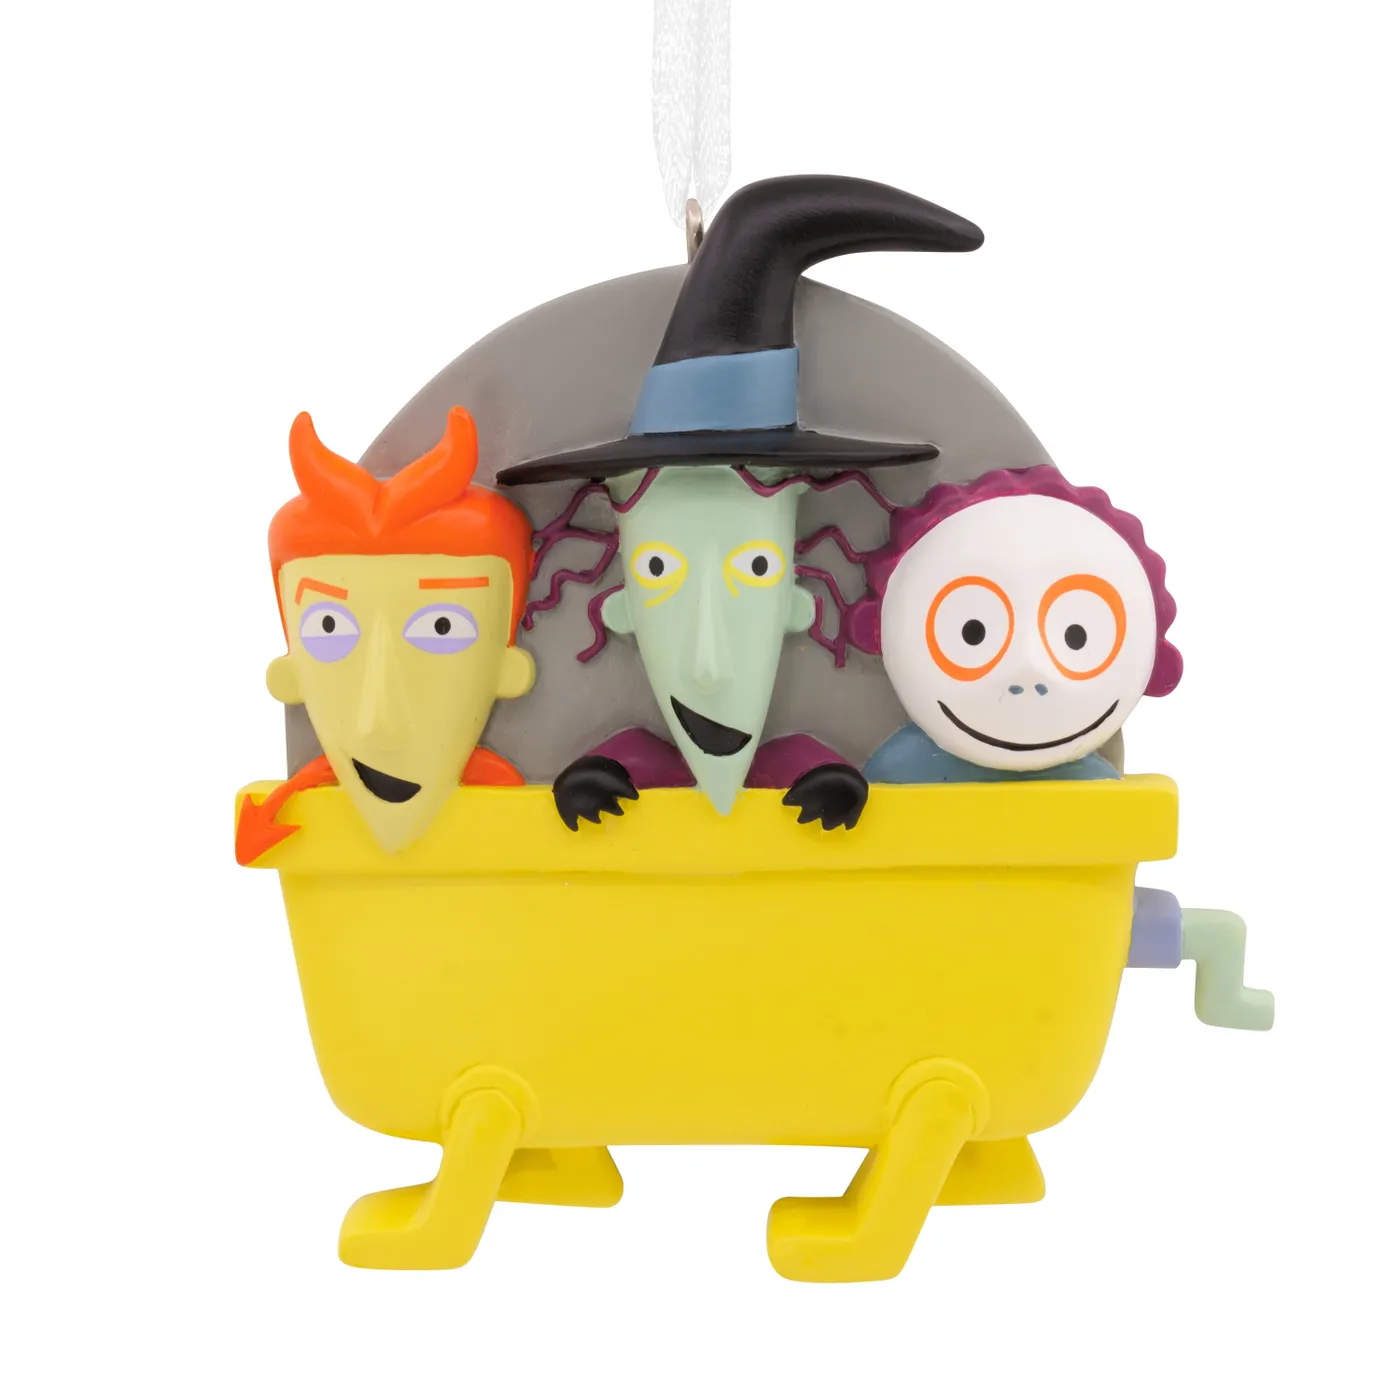
Judge figurative ornaments by footprint, not height. A piece like this needs about 4 inches of clear branch depth so it hangs without spinning into the pine, which means a tree at least 6 feet tall with sturdy, well-spaced branches. On a small 4-foot tabletop tree, character groupings read as a clump — hang them solo and let each one be the star. Working with a tight corner instead? See the mini tree in Idea #17.
12. A Cinema Tree With Popcorn Garland and an Usher Mannequin
Full-room themed installations stopped being a theme-park thing and became a home decor flex, partly because so many people now treat holiday decorating as a creative hobby rather than a chore. The cinema angle works because it’s specific: it references the film without resorting to character overload. Wood paneling, red damask, a marquee sign — that’s set design, not shopping. Expect more of this in 2026 as people build one dedicated scene room instead of spreading decor evenly through the house.
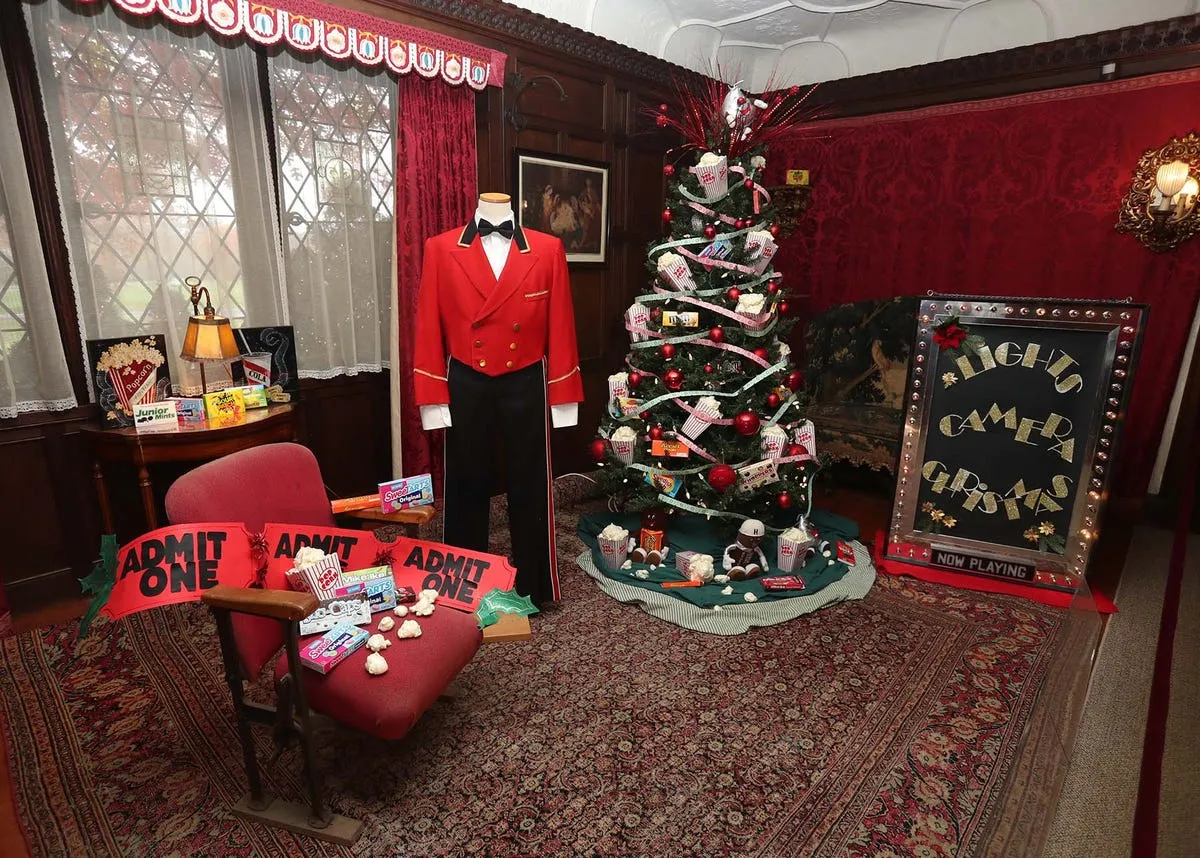
Popcorn garland is charming and also a pantry-moth magnet — if you have pets or a warm kitchen, use shellac-coated or artificial popcorn instead of the real thing. The bigger design tip for a theater vignette is height: run your marquee sign at eye level, around 60 to 66 inches on center, and keep everything else below it. Signs hung too high lose their punch, and if the sign is backlit, put it on a dimmer — a soft glow reads nostalgic, a bright one reads airport gate.
13. Jack Skellington Baubles With Tiny Crocheted Santa Hats
Yarn hats look adorable and collect dust like nothing else. A quick pass with a lint roller every couple of weeks keeps them from going fuzzy, and storing them flat in a zip bag prevents the hats from getting crushed into little red pancakes. If you’re buying rather than making, check that the hat is stitched on rather than glued — hot glue lets go in a warm attic by year two. Store-bought versions with knitted hats run $10 to $18.
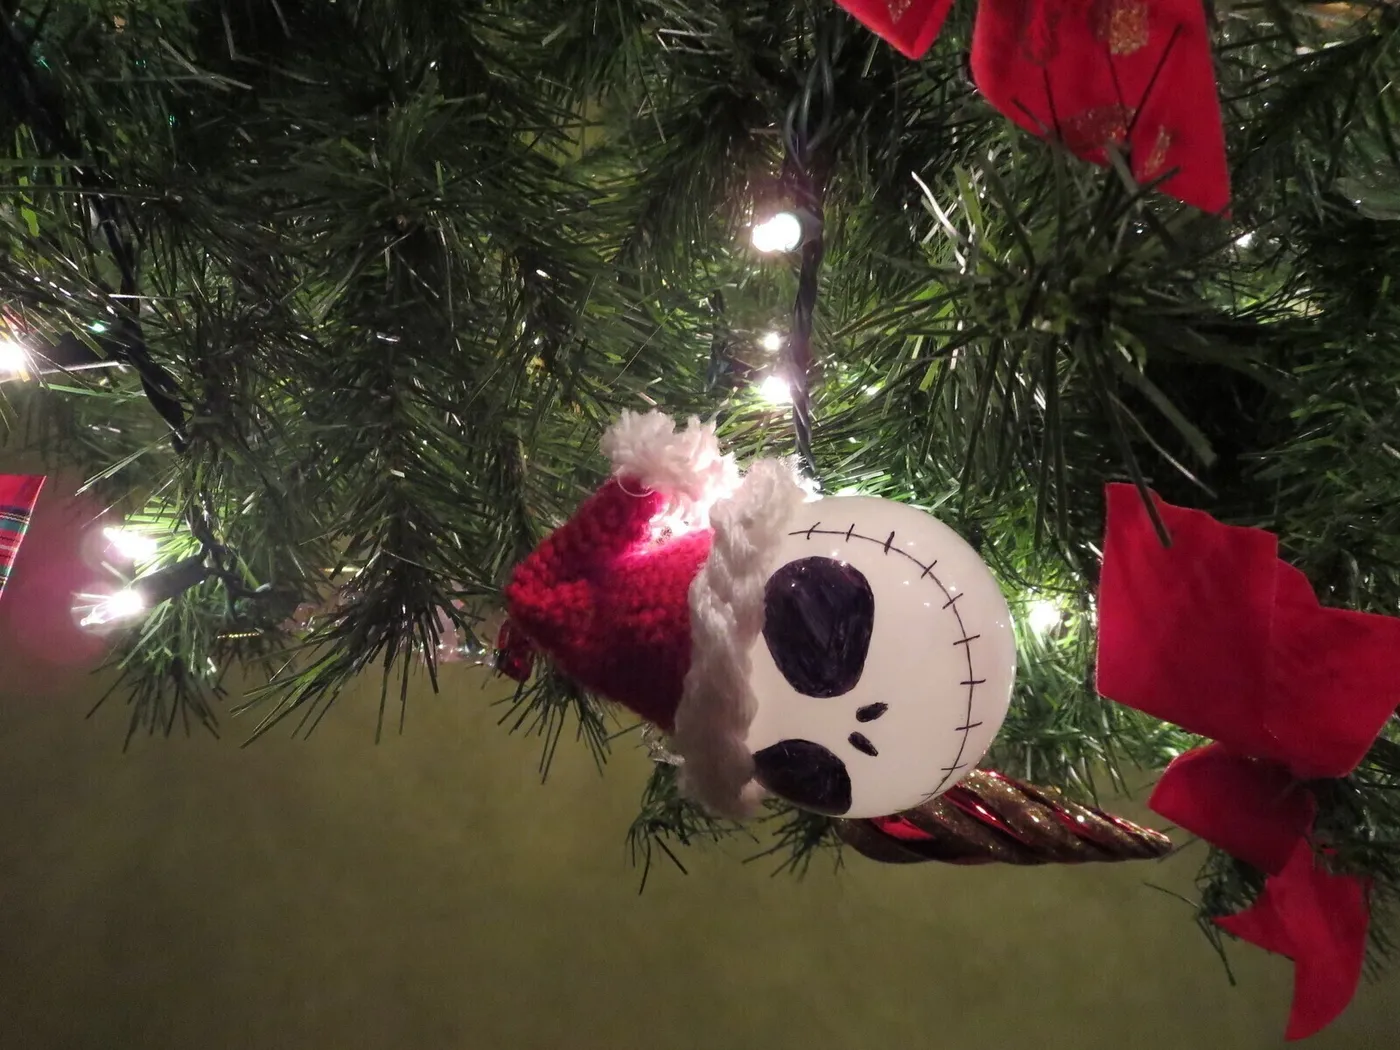
The ratio here is simple and easy to repeat.
- 60% forest green pine
- 25% warm white light
- 10% red ribbon accents
- 5% black-and-white character faces
That red ribbon is the connector — it makes the white baubles and the red hats feel like one idea instead of two. Swap the ribbon for gold and the tree goes elegant. Swap it for buffalo check and it turns farmhouse rustic. Same ornaments, completely different personality.
14. Inflatable Jack-as-Santa Riding a Locomotive Train
Inflatables are the fastest way to get a big, joyful statement and also the fastest way to get a sagging, muddy mess. A multi-piece setup needs a flat surface, a tethered base, and a covered outdoor outlet or a heavy-gauge cord with a drip loop. The blower runs around 60 decibels, so don’t park it directly under a bedroom window. And during a hard freeze, deflate and store it — vinyl cracks below about 14°F, and no amount of wishing will fix a split seam.
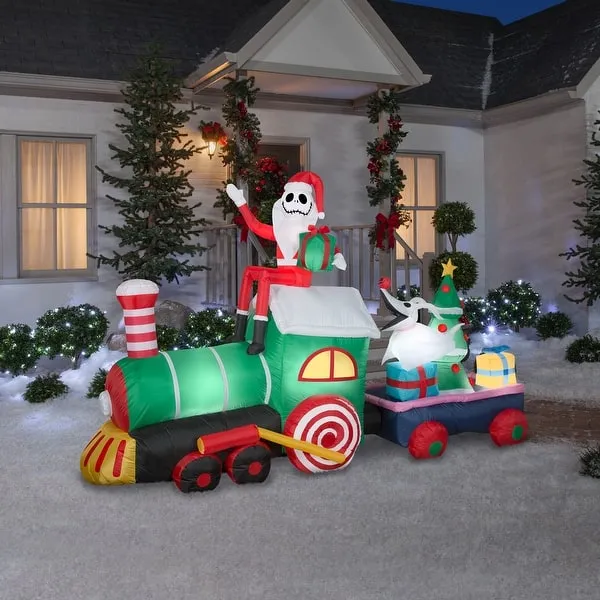
Rule of thumb: keep an inflatable display no taller than one-third the height of your facade, or it starts to dwarf the house. A locomotive setup with an attached car needs roughly 10 feet of clear width, 6 feet of depth, and 3 feet of walkway clearance on the side nearest the driveway. On a narrow lot, skip the train car and run the single figure. For the indoor version of the same character, see Idea #1.
15. A Sculpted Ghost Dog With Purple Flourish Detailing
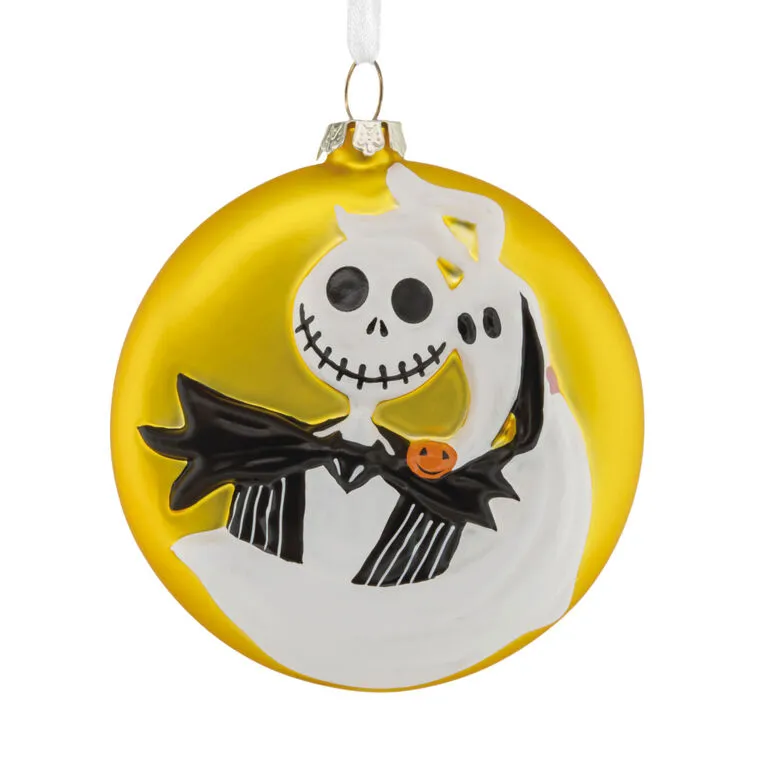
Most character ornaments are all face and no body. This one earns its keep through the sculpt: long, flowing lines that taper toward the hem, plus carved flourishes along the lower edge that act as a border and add a second color without fighting the face. The red collar is the smallest possible punctuation mark, and the pumpkin-shaped nose keeps it tied to the theme. Three details, all doing a job, none decorative for the sake of it.
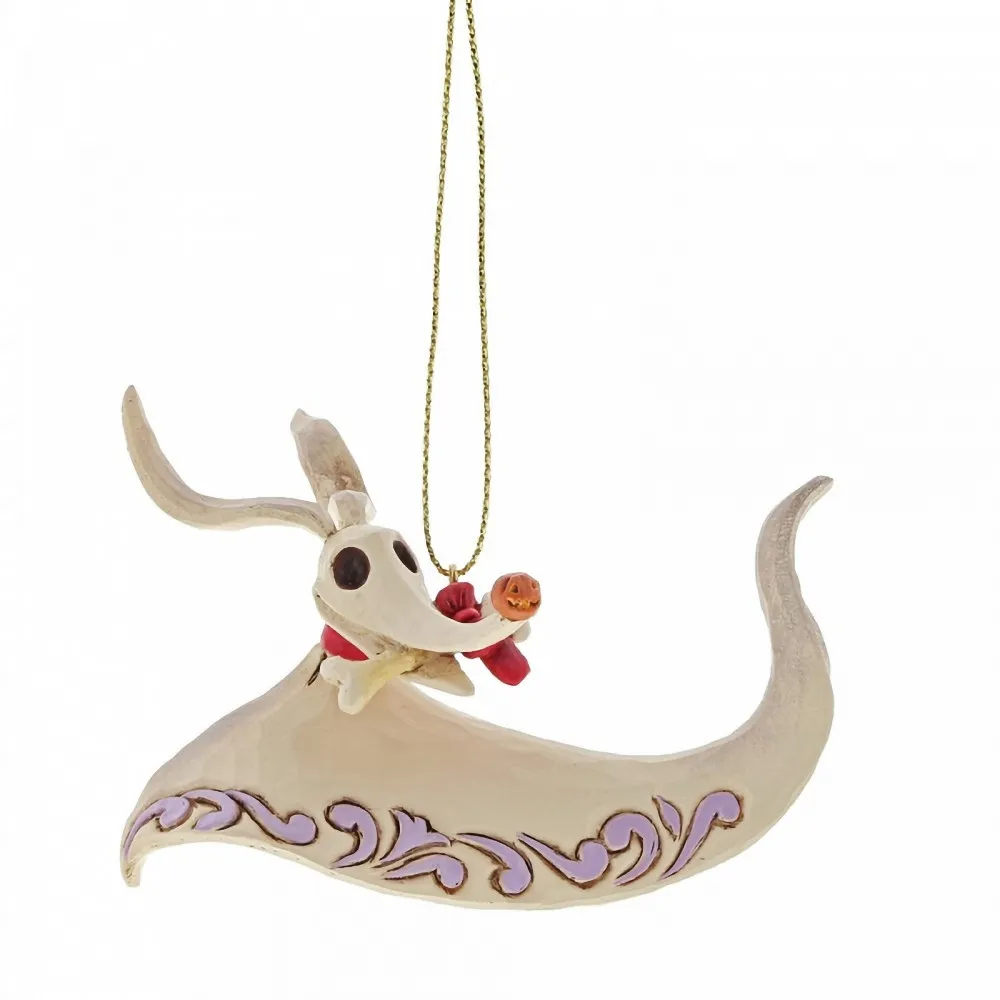
Two ornament categories, two hanging rules. Sculptural pieces like this need a branch with real weight and some depth — hang them toward the interior of the tree where branches double up, at least 6 inches back from the tips. Flat or lightweight ornaments belong on the outer edge where light catches them. Always hang the heaviest piece in the bottom third; a sculpted resin ornament on a top branch is how branches get permanently bent.
16. A Lit Miniature Haunted House With Jack, Sally, and Zero
- Wooden miniature house with interior lighting: $40–$150
- Character figurines: $25–$80
- Glittery skeletal tree accents: $10–$30
- River rocks, moss, and base tray: $15–$35
- Warm LED fairy lights: $8–$20
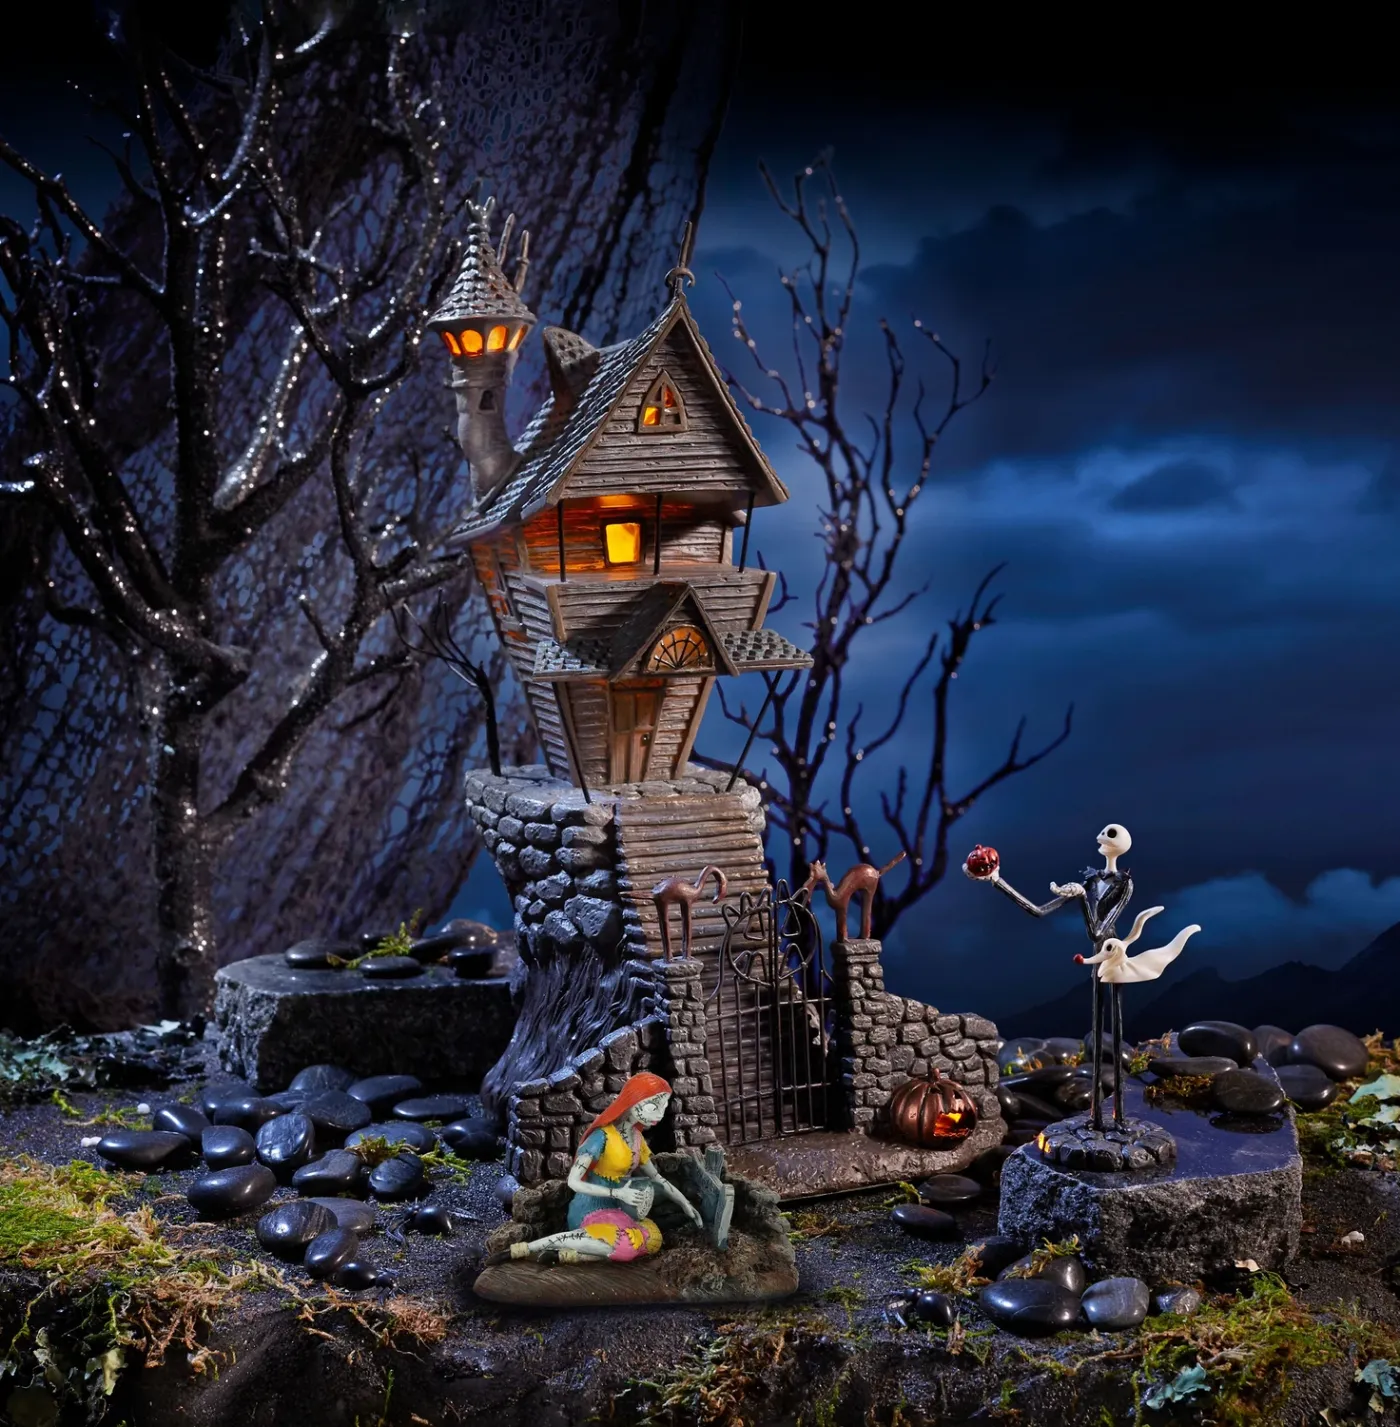
Total: roughly $100–$315. Budget alternative: a dollar-store birdhouse repainted and lined with a battery tea light, plus thrifted figures, gets you a similar scene for around $35.
The warm light inside the house. Everything else — the stone foundation, the gated entrance, the glittery skeletal trees, the smooth black river rocks — is staging. The moment that interior glow turns on, the scene stops being a collection of objects and becomes a place. If you build one of these, put the light on its own switch or remote so you can leave it dim by day and glowing at night, and keep those interior bulbs warm, around 2700K.
17. A Plush Jack Topper on a Potted Mini Tree
This is the entry point if you love the theme but live in 600 square feet. A small potted evergreen, a woven basket, a big plush topper, and a handful of simple white and metallic ornaments — that’s the entire list. Total at Walmart or Target: about $45, and the plush does so much heavy lifting you barely need ornaments. Kraft paper and twine for the presents keeps the whole thing under $60. It’s the same idea as the full room installs, just compressed.
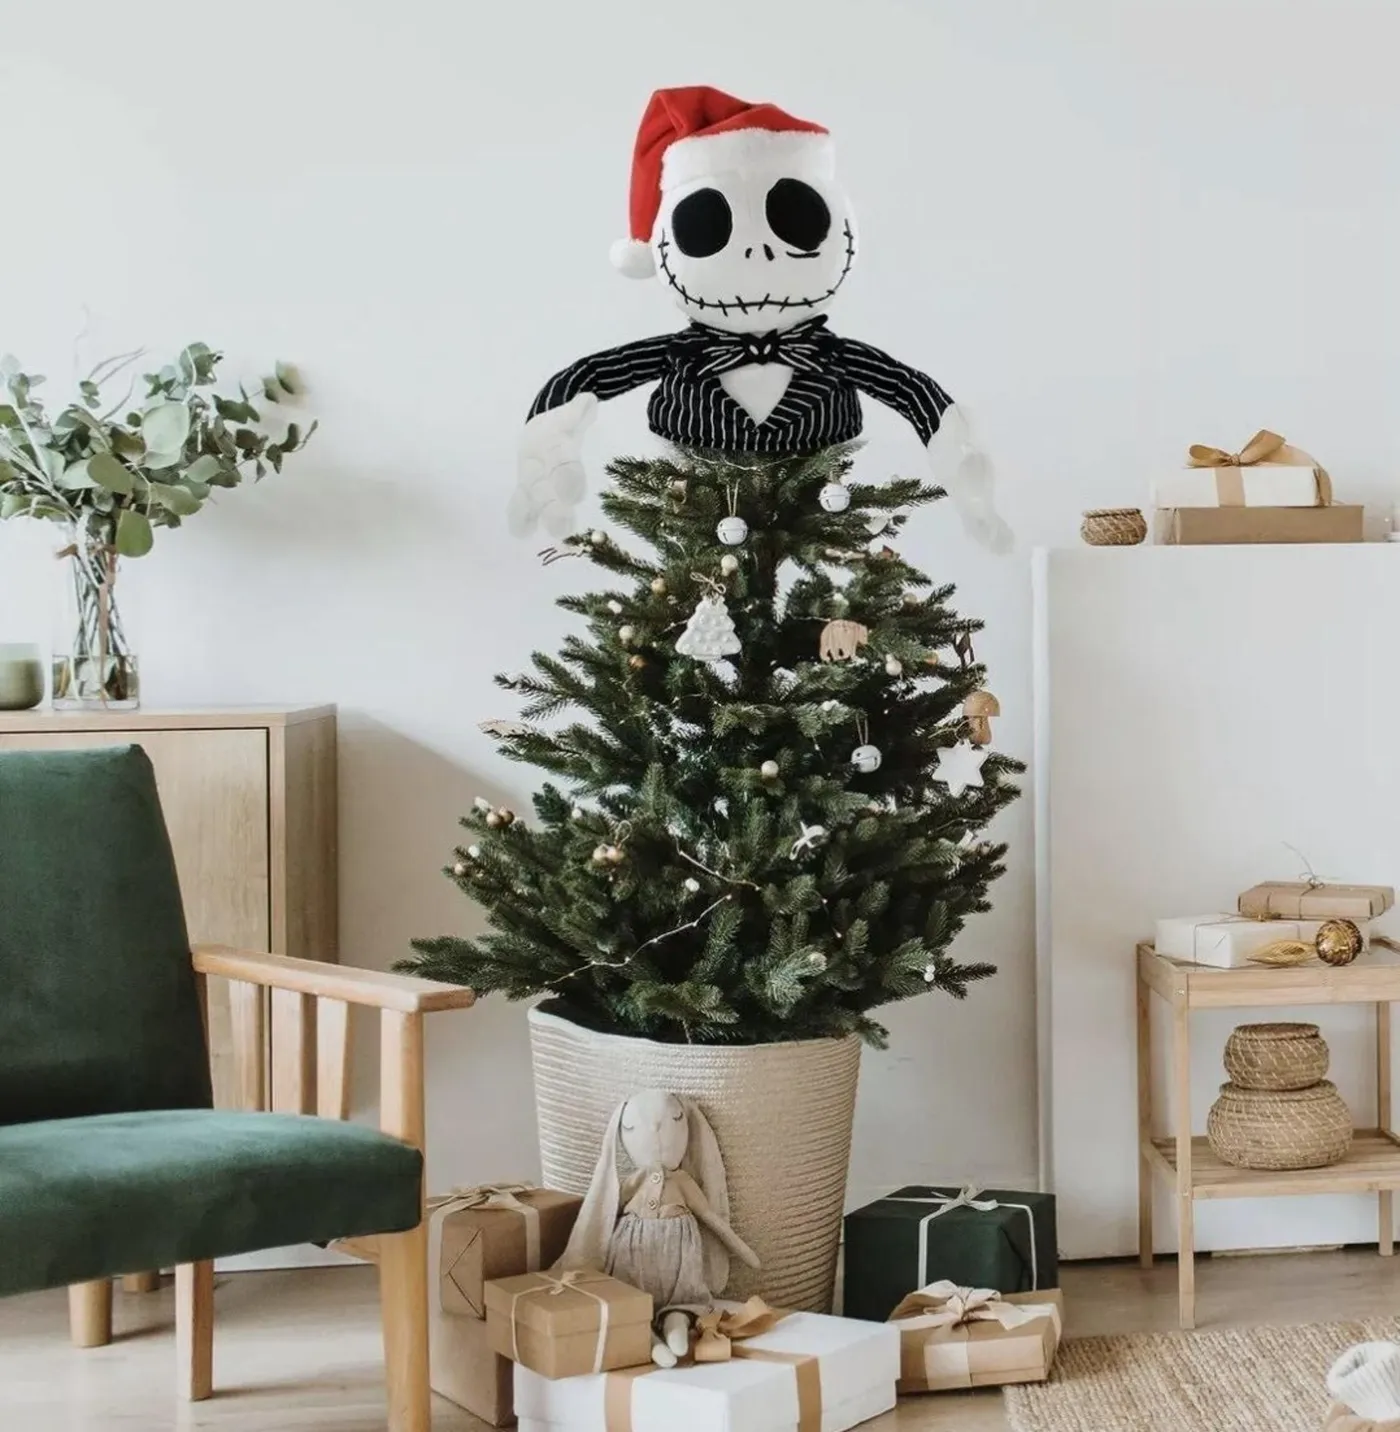
- Measure the corner or tabletop spot; a potted tree needs about 24 inches of diameter.
- Make sure the pot is heavy enough that a plush topper won’t tip it — add a brick inside if not.
- Check that the plush is washable or at least spot-cleanable, especially with pets around.
- Decide on lights up front; unlit works fine here and saves the outlet scramble.
18. Lock, Shock, and Barrel Caged in Bronze Wire
Tiny figures inside a wire cage are gorgeous and fussy in equal measure. The cage protects them from casual bumps, which is genuinely useful on a busy tree, but the wire catches tinsel, ribbon, and stray pine needles constantly. Keep this one away from the lower third if you have kids or curious cats, and hang it on a branch with some give so it doesn’t clang against the trunk. Also check the ribbon loop — thin satin degrades and snaps around year three.
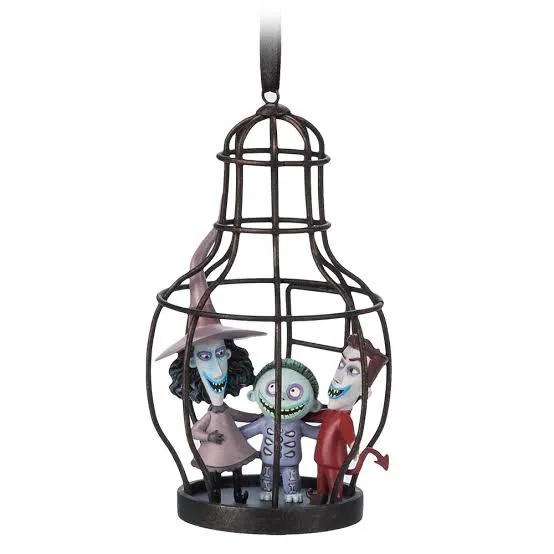
Caged and diorama-style ornaments are the priciest category here, often $25 to $45 each. A cheaper route: buy a plain sculpted figure set for $12 to $18, add a small decorative birdcage from a craft store for about $6, and wire them together. It won’t be identical, but from tree distance it reads the same. Thrift stores turn up vintage wire cages and mini lanterns for a couple of dollars, especially in spring.
19. A Glitter-Filled Bauble Printed With Character Graphics
- Start with a clear fillable ornament, about 3 inches across.
- Add two tablespoons of fine silver and black glitter — coarse glitter sinks and clumps.
- Print a small character graphic on clear decal paper and apply it to the outside in one smooth press.
- Tie a black satin bow at the cap and thread a silver string through the loop.
- Shake gently to redistribute the glitter, then seal the cap with a dot of glue.
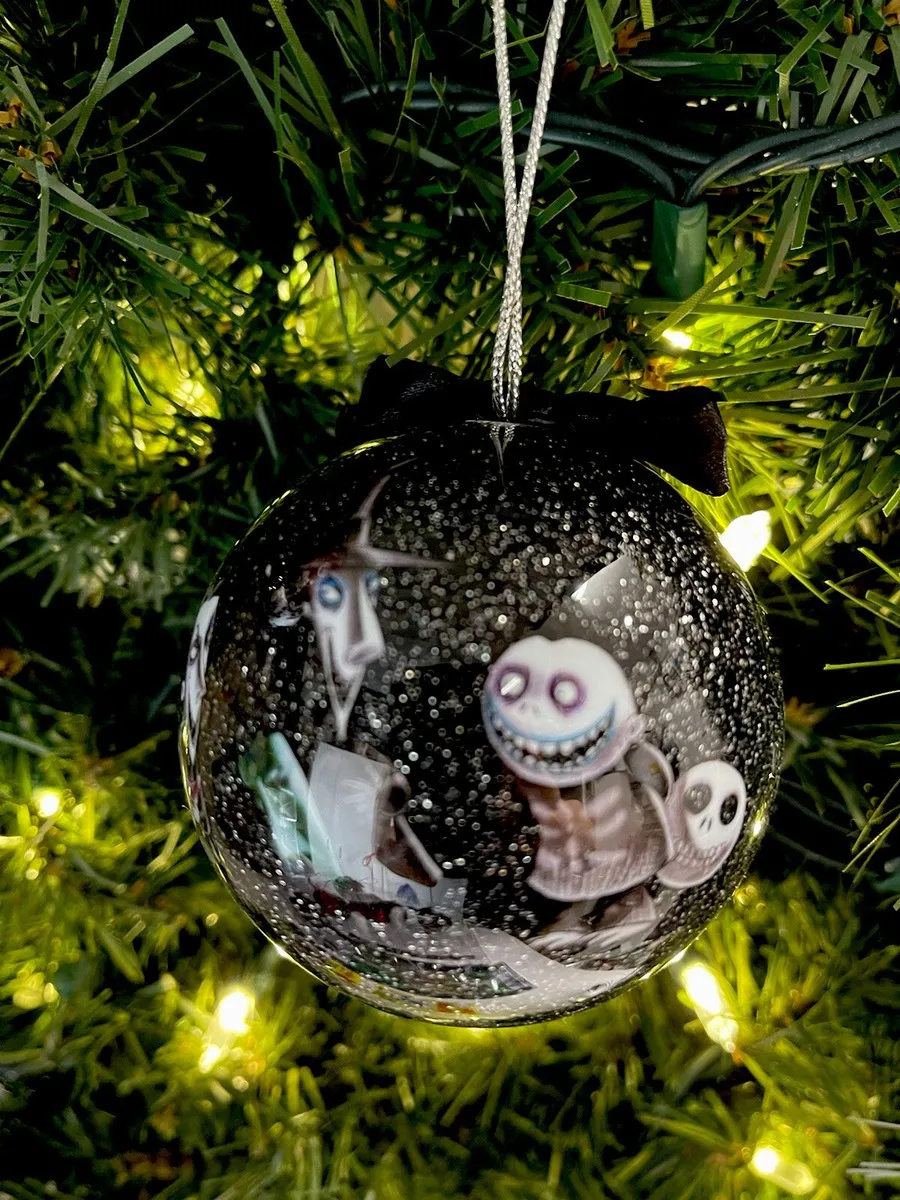
About 15 minutes and $8 per ornament, and the glitter catches string lights beautifully.
- Clear fillable ornaments, set of 6: $10–$18
- Fine glitter in silver and black: $6–$12
- Printable decal paper, 10 sheets: $9–$16
- Black satin ribbon spool: $4–$8
- Silver string and hooks: $3–$7
Total: roughly $32–$61, or about $5–$10 per ornament. Budget alternative: skip the custom decals and pick up character stickers from a party supply store — about $4 for a sheet of 30.
20. A Dark Wood Library Dressed in Life-Sized Character Figures
Whole-room character displays are having a moment because collecting culture has changed. People who grew up with these films now have their own homes and their own shelves, and they’d rather see the collection than store it in a bin. The wood-paneled library setting does a lot of the work: dark walls and built-ins make green, orange, and black read as intentional rather than chaotic. This is maximalism with a plan, and it’s the opposite of the minimalist holiday decor that dominated the early 2020s.
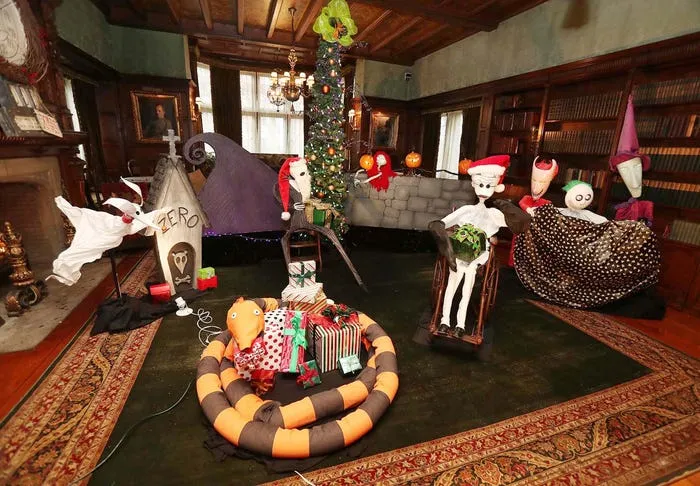
A library display needs real volume to work. Here’s what to plan for.
- Wall space: at least 8 feet of shelving or paneling behind the tree.
- Tree height: 6 to 8 feet, so life-sized figures don’t tower over it.
- Clear floor area: about 5 by 5 feet for the tree, presents, and figures.
- Lighting: two or three warm accent sources so dark wood doesn’t swallow the display.
Short on square footage? Borrow the palette instead of the volume — see Idea #16.
21. One Close-Up Bauble, One Knitted Hat, One Red Bow
If you want an ornament to read the way it does in photos, light it like product photography. Small string lights work best tucked slightly behind and to the side of the ornament, never directly in front — front light flattens the face and blows out the white. Space character baubles no closer than about 6 inches apart and drop a red ribbon bow between them as a visual comma. Density without spacing turns into an unreadable clump.
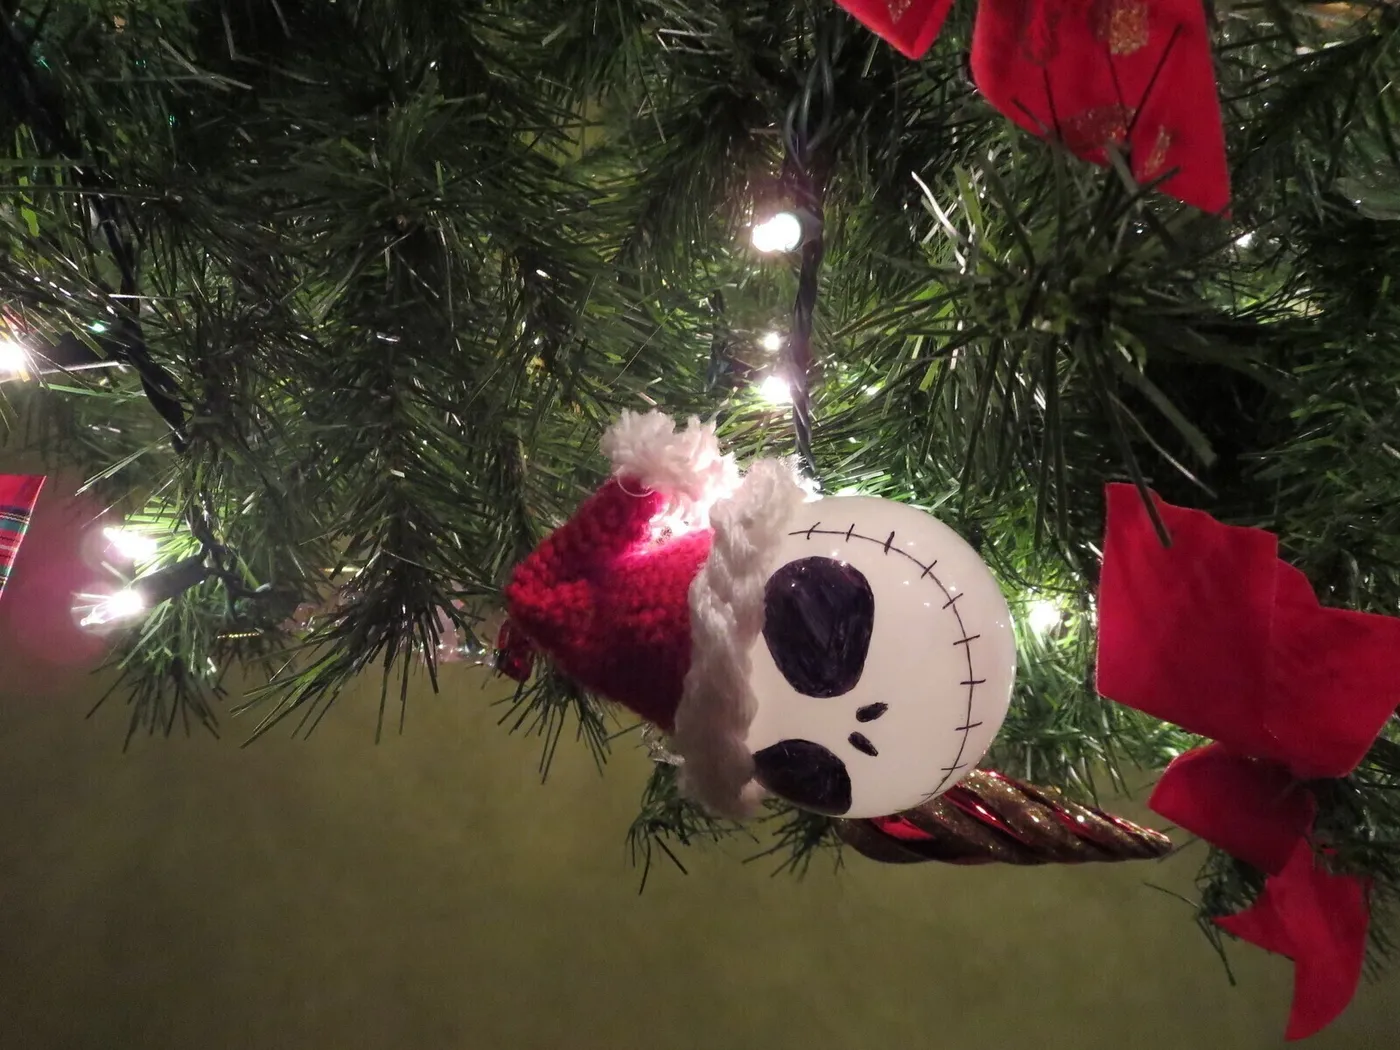
The close-up is the design lesson. A white ornament on a dark green tree is the highest-contrast pairing in holiday decorating, and contrast is what makes small things visible from across the room. The miniature knitted hat adds a warmer second note and keeps the black-and-white face from feeling cold. Then the red fabric ribbon ties the ornament back into the tree so it doesn’t float. Three colors, tight relationship, zero visual noise.
22. Lock, Shock, and Barrel Standing on a Dark Platform
- Choose a flat platform base — a painted wood disc about 2½ inches wide works well.
- Attach three small figures with epoxy, standing close but not overlapping.
- Install a small silver eyelet and thread a fine chain through the top.
- Wrap a twisted red-and-white ribbon garland around the base for the tie-in.
- Hang with a metal hook that can carry the weight, and place it where it won’t swing.
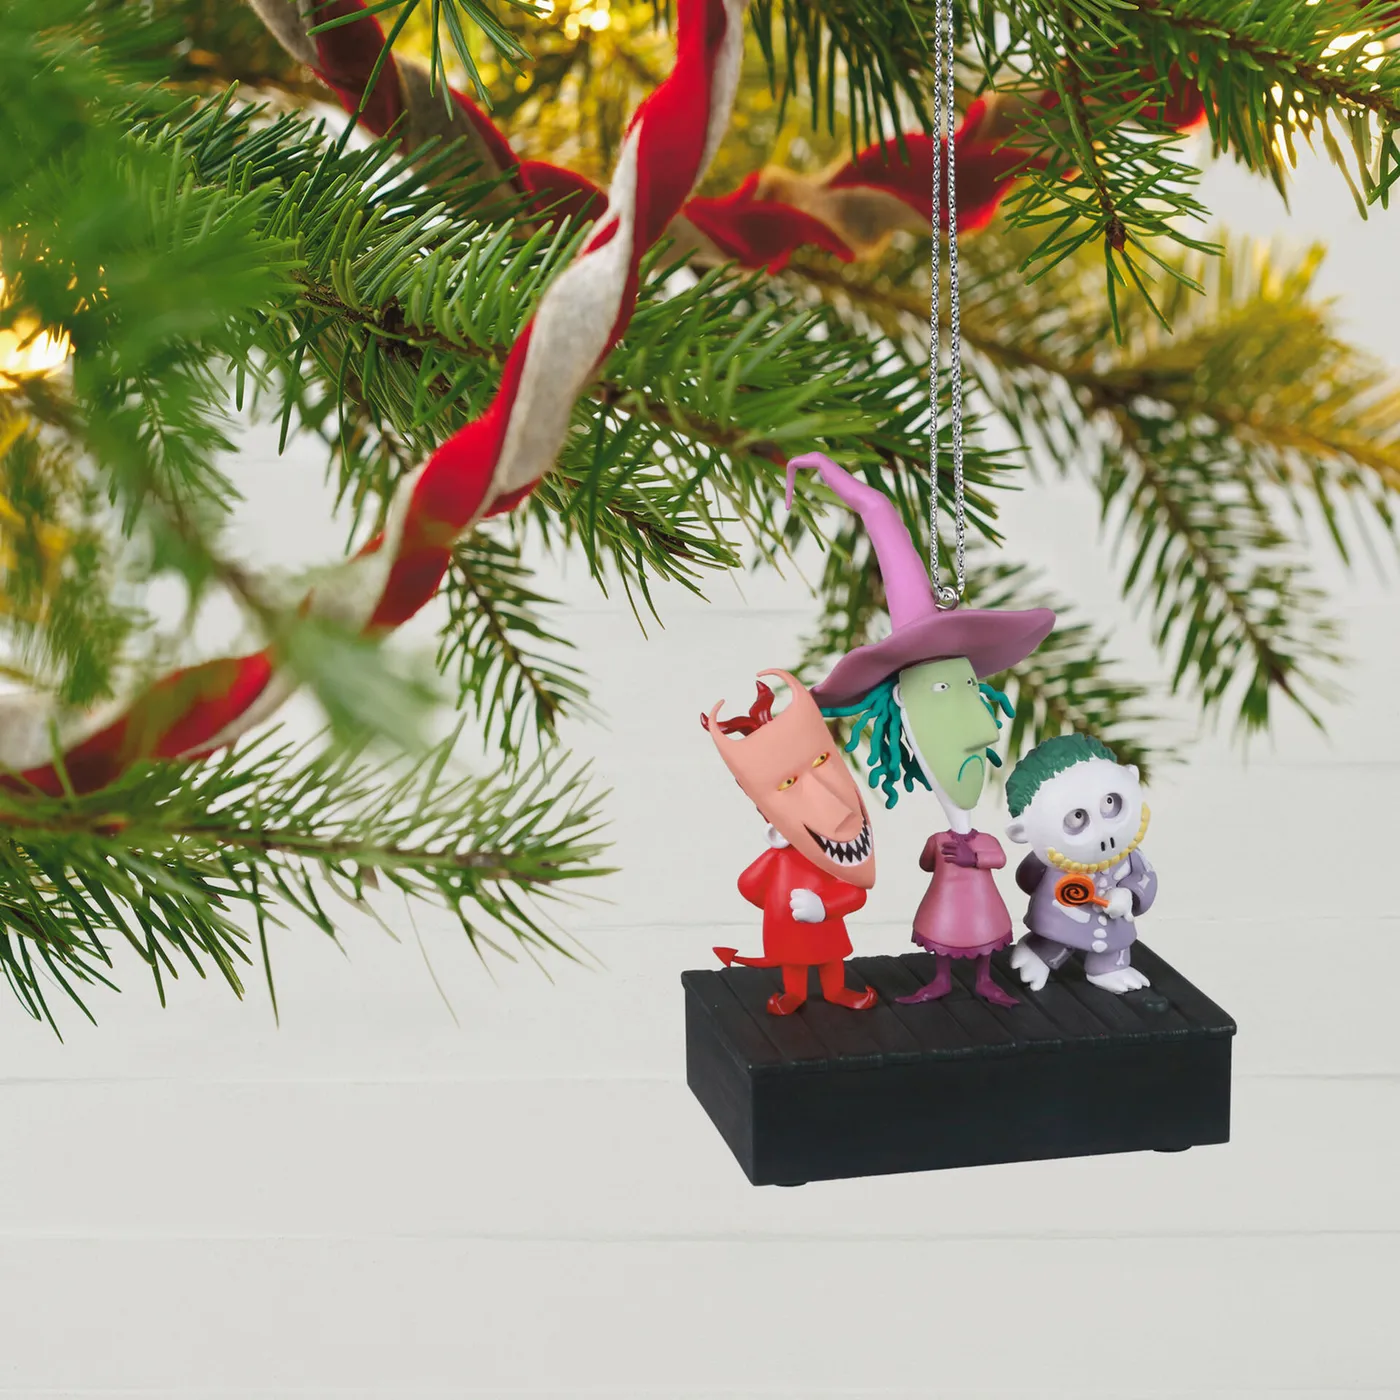
Roughly 30 minutes and about $15 if you’re repurposing figures you already own.
Multi-figure ornaments are heavier than they look and they swing on a light branch, which means they’ll knock into their neighbors every time someone walks past. Hang them on a stiff interior branch no more than 8 inches from the trunk, and use a metal hook rather than ribbon. If you have tile floors, hang the heavy ones high enough that a drop won’t matter. And keep them out of direct sun — the twisted ribbon garland fades to pink within a season.
Your Own Little Halloween Town Starts in One Corner
You don’t need a mansion, a movie set budget, or a basement full of storage bins to pull this off — one statement figure, one well-lit tree, or even a single hand-painted bauble with a tiny crocheted hat does the job. Start with the idea that fits the space you actually have, then let it grow year by year like a collection should.
📌 Pin your favorite idea now so you can find it again when the decorations come out.