You know that feeling when you’ve saved forty candyland Christmas photos and still can’t tell which ones would actually survive contact with your living room? Same. So we did the scrolling for you, working through Target, Etsy, Anthropologie, World Market, and HomeGoods to pull the ideas that hold up in a real house — and skip the ones that only work in a photo studio.
After filtering through hundreds of options, we narrowed it down to 23 ideas that actually deliver, spanning everything from a $12 dollar-store garland to $480 worth of tabletop gingerbread architecture. Inside you’ll find pastel maximalist trees, flocked gingerbread villages, glossy red-and-white candy cane classics, and a few rustic fabric-candy touches — with budget and luxury versions compared side by side.
Candyland decor in 2026 has gone softer and more bakery-window than movie-set, and pastel flocked trees are racking up Pinterest saves faster than any other holiday theme this year. And stay until the end — we break down the most common mistakes that can ruin these looks.
📌 Save this to Pinterest for later — you’ll want to revisit these ideas.
1. Marshmallow Skewers, Gumdrop Cones, and a Snow-Dusted Tree
Marshmallow skewers look store-bought in the worst way when people use real ones — they sweat, sag, and get picked at by every guest under ten. Instead, set a block of dry floral foam inside a small crock and push 12-inch red-and-white striped paper straws in at staggered heights, roughly two inches apart, so the candy reads as a cluster rather than a bouquet. Three mini marshmallows per straw. Total cost lands around $14, and it survives until New Year’s.

The single element holding this vignette together is the snow-flocked tree behind it. Flocking is what makes candy look intentional instead of sticky — those pale, sugar-dusted branches give the marshmallows, the multicolored gumdrop cones, and the sprinkle bowl a soft white backdrop to pop against. Strip the flocking, swap in a plain green tree, and the same ornaments suddenly feel like a party aisle exploded in your foyer. Frost first, decorate second.
Candyland has been creeping up holiday boards for years, but the 2026 version is different: less Willy Wonka, more bakery window. Pastels are replacing primary reds, flocked branches are replacing tinsel, and the sweets are oversized and few instead of tiny and everywhere. The upside is that it photographs beautifully and doesn’t date itself the way movie-themed decor does.
2. Pastel Pink and Mint Lollipop Tree on a Velvet Skirt
Three things make this tree read as designed rather than decorated. Scale contrast is first: the oversized striped ribbon bows and flower-shaped floral picks are almost comically large next to standard spheres, which keeps the eye moving. Surface contrast is second — glossy glass against a matte velvet skirt, matte ribbon against foil. Third, a two-color spine, so even a very busy tree stays calm. Maximalism only works when the palette is disciplined.
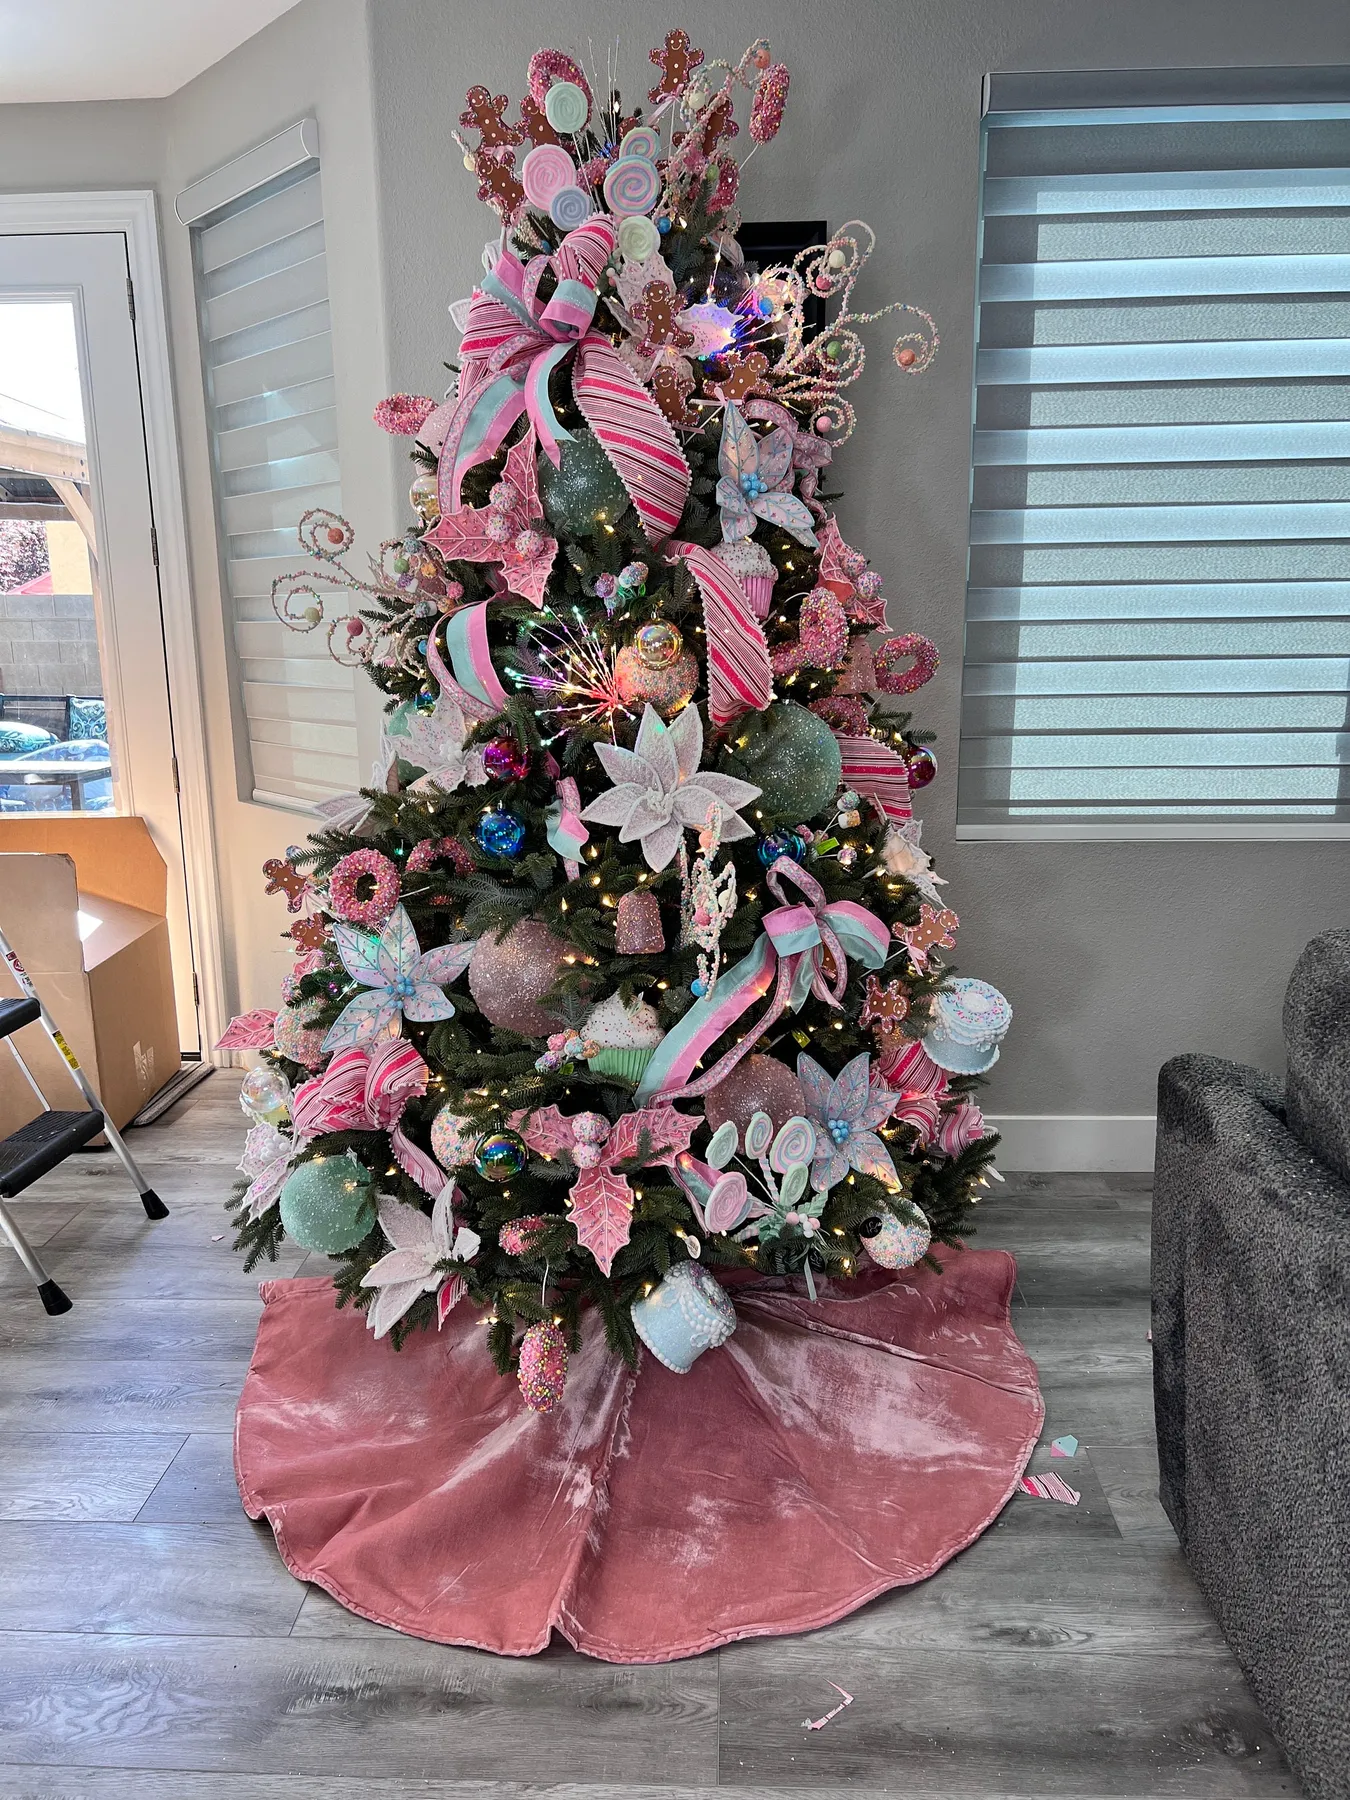
The working formula is roughly 55% pink, 30% mint green and white, 15% silver and glass shine. Write that down, because it’s the part people get wrong — they buy every pastel ornament on the shelf and end up with a rainbow instead of a candy shop. To shift the mood without buying anything new, trade the silver for brushed gold (warmer, more vintage) or the mint for baby blue (cooler, more 1950s diner). Keep the ratios and the tree still works.
3. A Cozy Dining Room With Checkered Runners and Tabletop Trees
For years candyland decor lived exclusively on the tree. In 2026 it has migrated to the table, which is honestly the smarter move — a dining room hands you a flat surface, overhead light, and a built-in reason for guests to look down. Red-and-white checkered runners, glass and ribbed metallic tabletop trees, and miniature white reindeer are showing up in rooms where hostesses used to set one centerpiece and call it done.
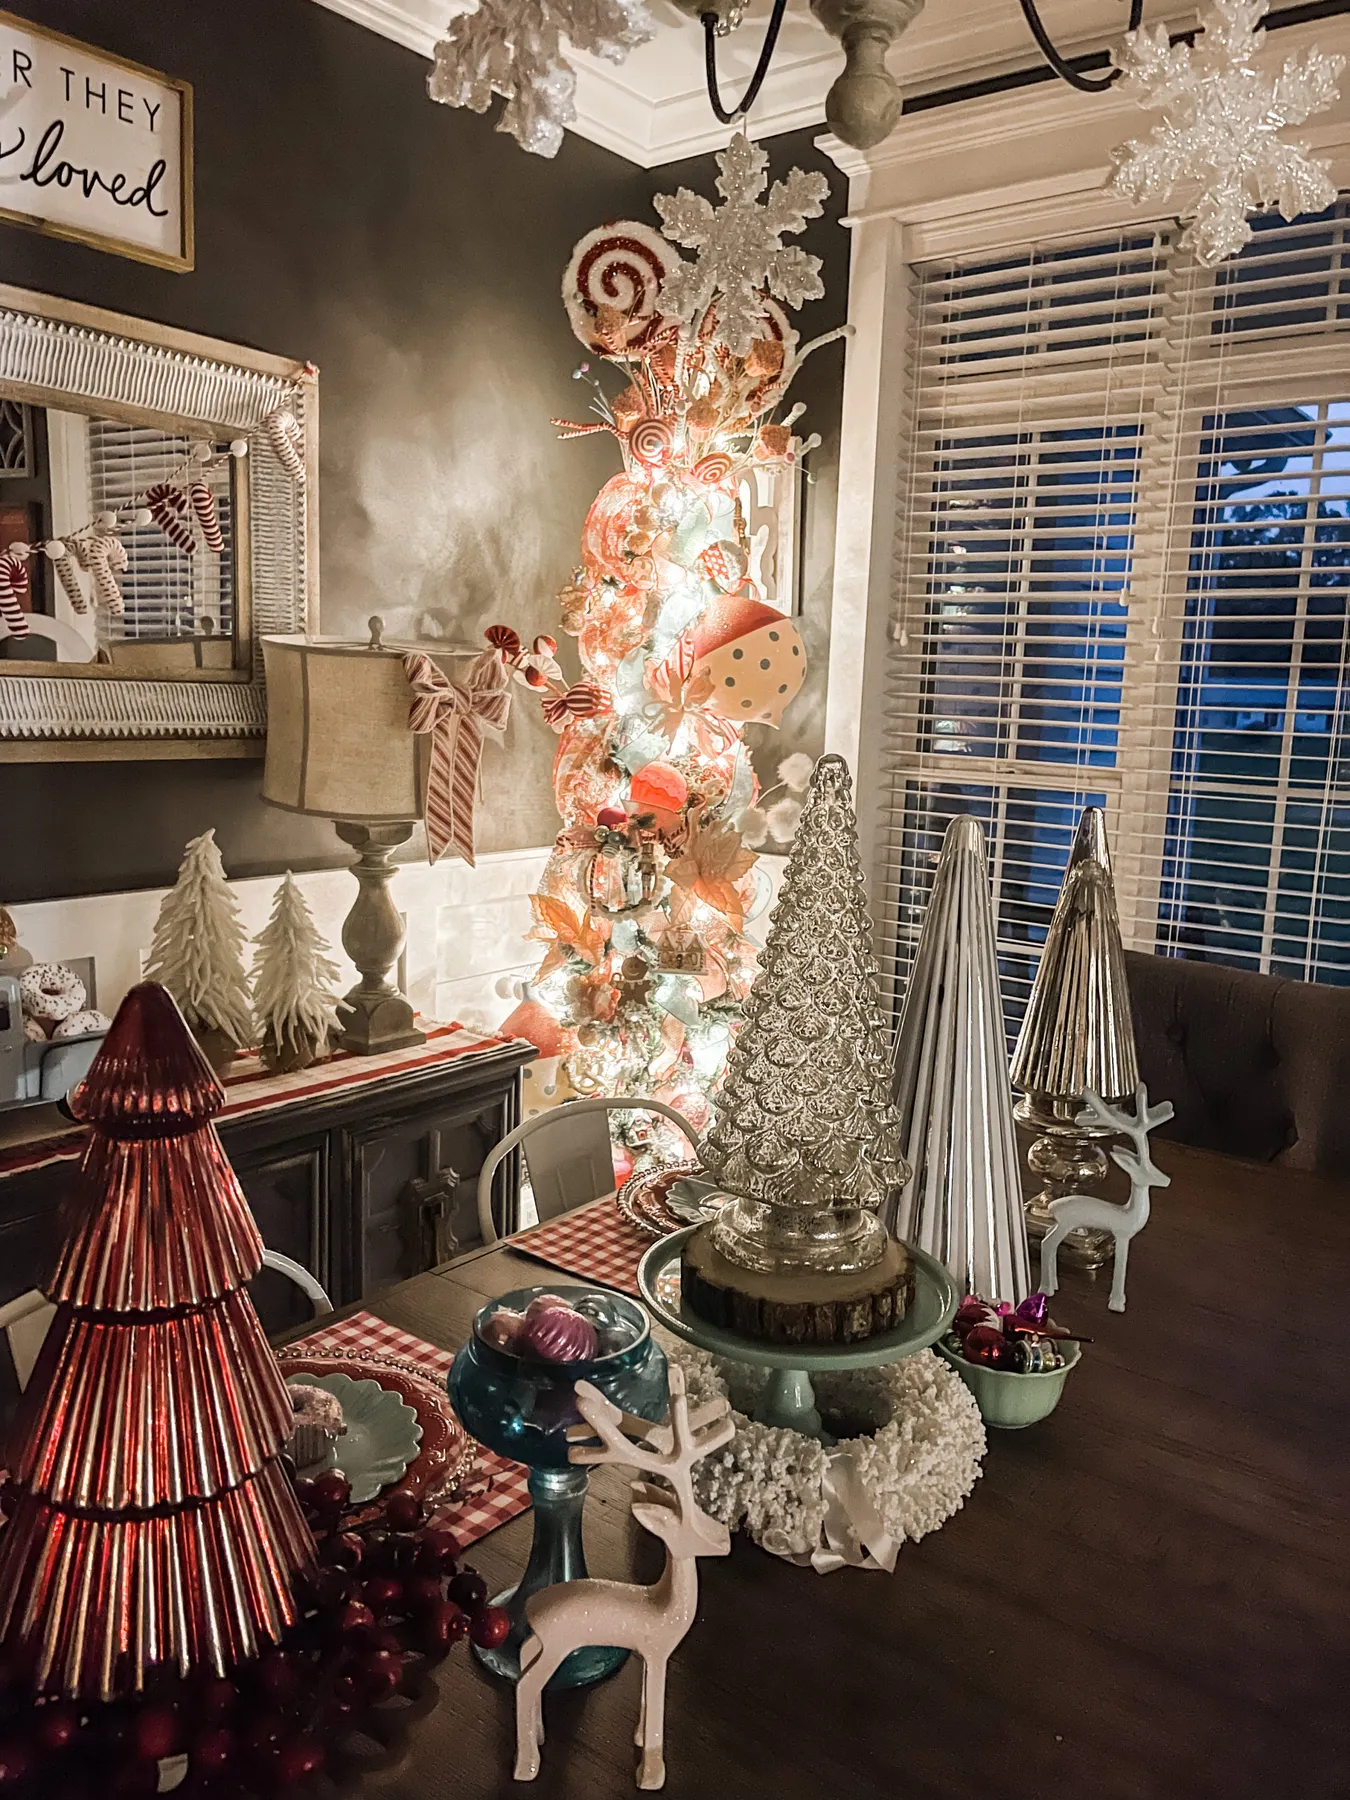
A tabletop trio takes about 25 minutes and lands under $40.
- Clear the table completely — no saltshakers, no mail pile.
- Run a checkered runner down the center, letting it hang two to three inches over each end.
- Cluster three trees — one glass, one ribbed metallic, one ceramic — in the middle third, not dead center.
- Set the miniature reindeer at the outer edges, facing inward.
- Add two low candle holders, then step back and confirm nothing blocks eye contact across the table.
4. Hot Pink and Emerald Living Room With Honeycomb Ornaments
Pull the fireplace out of this room and the candyland story collapses into a pile of ornaments. The white brick mantel does three jobs at once: it gives hot pink and emerald somewhere neutral to land, it holds the garland and pink bows right at eye level, and the green-framed mirror above it bounces light back onto the tree. That’s the difference between a decorated living room and a room that merely has decorations in it.
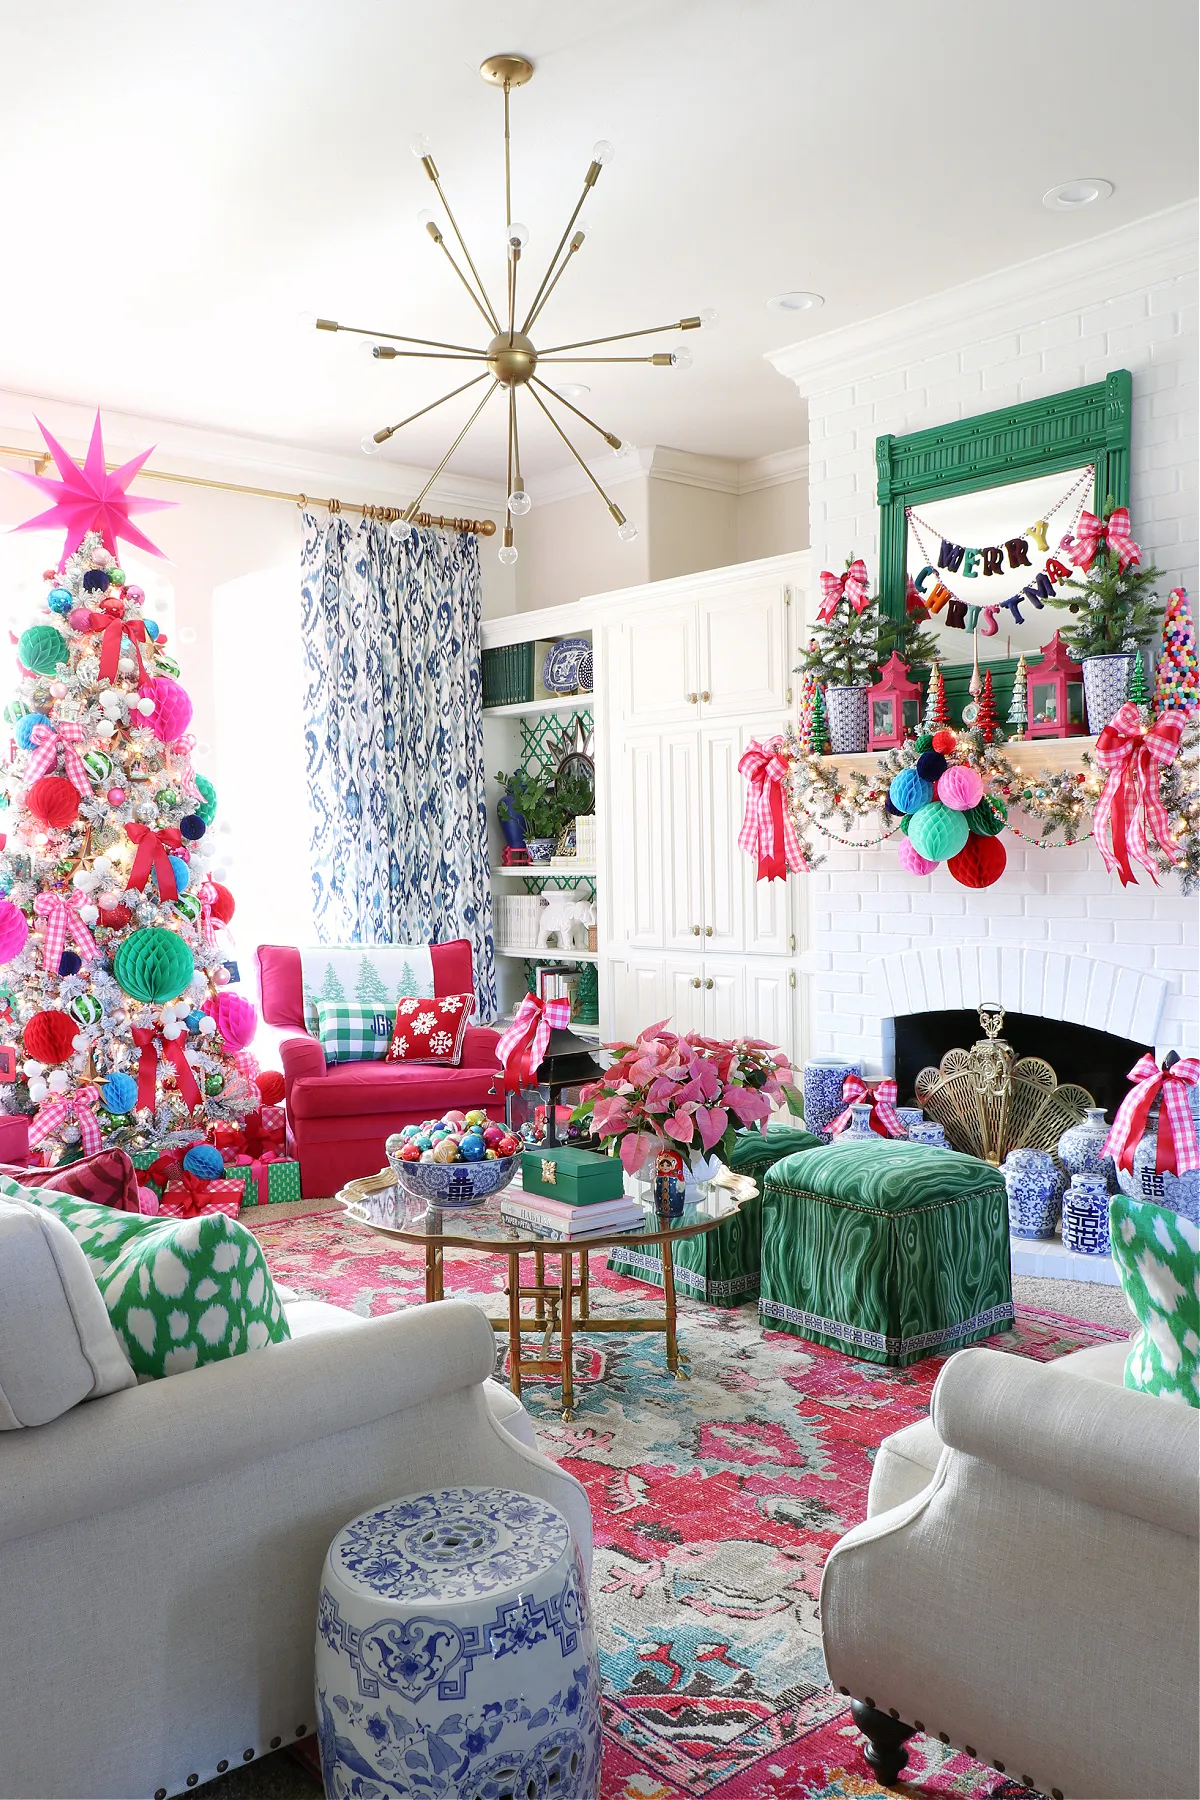
Honest warning: this palette will be visible from the front door, and there’s no quiet way to walk it back. It also leans on paper honeycomb ornaments, which crush permanently if you bin them — hang them in a closet instead of stacking. In rooms under about 150 square feet, keep the saturated pink on the tree and let the fireplace stay mostly white and green, or the whole space starts to feel like a gift shop.
5. Apothecary Jars Turned Into Tiny Gingerbread Villages
- Three glass apothecary jars with lids: $45–$120
- Miniature gingerbread houses, set of 3–5: $25–$60
- Bottle brush trees, dozen: $12–$25
- Battery fairy lights, two strands: $10–$18
- Faux snow granules, 2 lbs: $8–$15
- Wooden tray or tabletop: $0 if you use what you own
- Budget alternative: dollar-store latch jars, paper gingerbread cutouts, one strand of lights — about $35 for the same silhouette.
Total: $100–$238
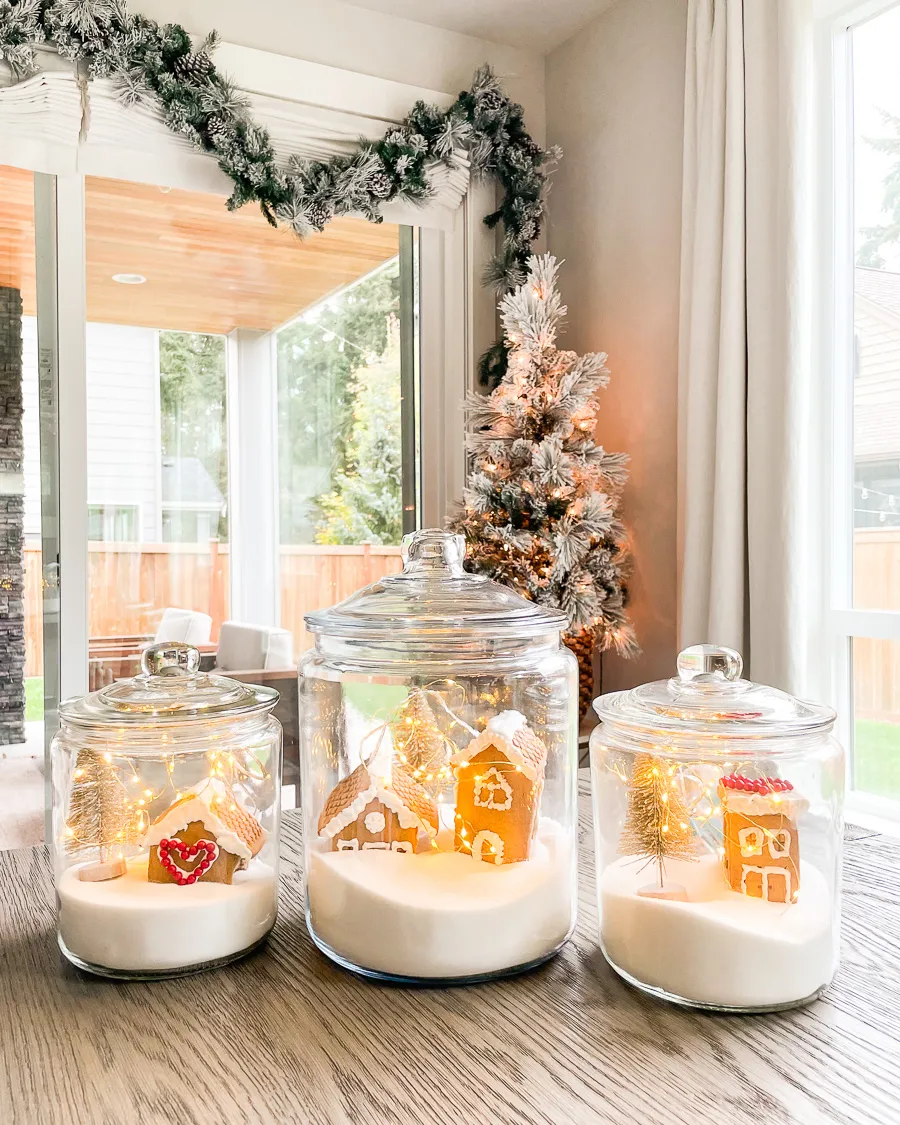
Layer the jars in this order and they’ll look expensive forever: two inches of faux snow first, then the light strand coiled loosely against the glass rather than buried, then your houses and bottle brush trees sitting on top of the snow. Coil the strand upward, not sideways, so the glow actually reaches the lid. Tuck the battery pack behind the jar and set the timer for six hours on, eighteen off — that’s roughly six weeks of nightly glow on one set of batteries.
6. Donut Ornaments on a Candyland Tree in a Family Living Room
Donut ornaments are the easiest candyland piece to fake at home. Slice a pool noodle into one-inch rounds, paint them in pink, mint, and chocolate brown, then glue on seed beads for sprinkles — twenty ornaments for about $12. Target and Walmart both carry pre-made donut ornaments for $3 to $6 each, and Facebook Marketplace is full of them every January when people clear out. Nobody at the party inspects the back of a donut.
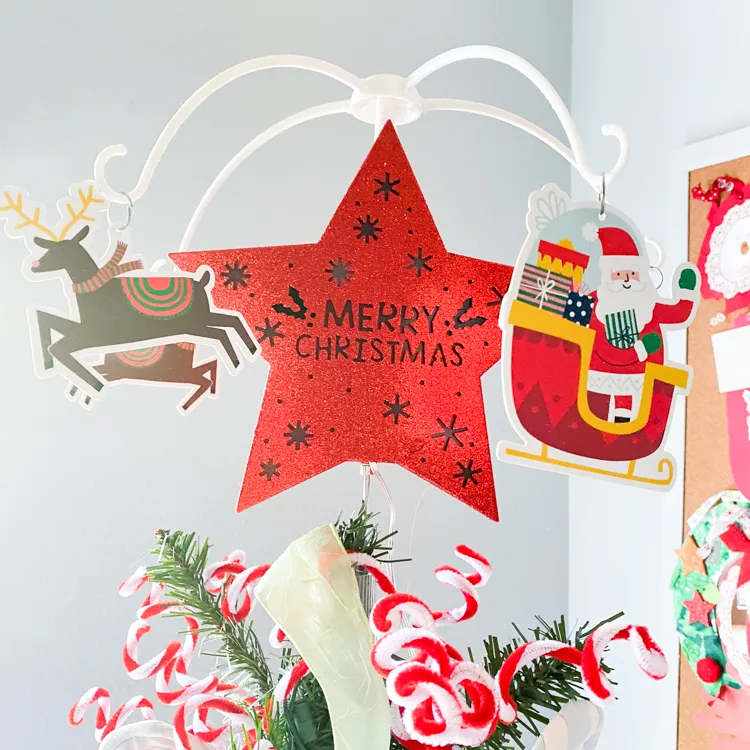
Because this look lives on the tree rather than the architecture, it works in almost any living room — but the donut-to-tree ratio matters. On a six-foot tree, eight to twelve donuts is plenty; at fifteen or more it starts to look like a bakery case. In rooms under 120 square feet, go with a pencil tree in the corner. For a bigger space, compare with Idea #4 — same playful spirit, spread across the mantel and rug too.
7. Pink Tree With Blue Bows Against Wall-to-Wall Glassware
Here’s the ratio: about 50% pink, 20% blue, 20% sage green, 10% white and wood tone. The blue ribbons carry the surprise, which is why they’re clustered as bows instead of scattered as baubles — one color used in one repeated shape reads as a decision rather than a mistake. Swap the blue for lilac and the tree goes soft and vintage; swap it for red and you’re suddenly decorating for Valentine’s. Keep the accent at 20% and it stays chic either way.
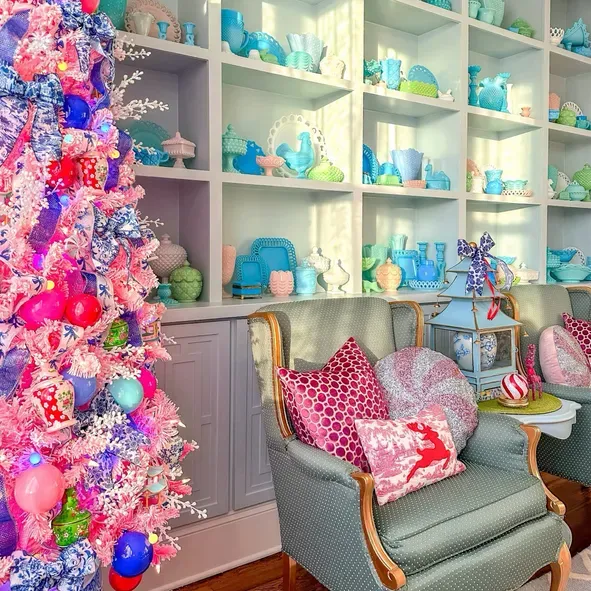
What makes this room work isn’t the pink tree — it’s that the pink keeps showing up after the tree ends. It’s in the patterned throw pillows with the reindeer graphic, in the pastel blue and green glassware lined up on the built-ins, in small details you notice on the second pass. Your eye reads continuity rather than decoration. The sage armchairs and light wood shelving supply the calm counterweight, which is the only reason a palette this loud doesn’t tip into nursery territory.
8. A Tabletop Gingerbread Estate With Frosted Shingle Roofs
Styling a large gingerbread display takes an afternoon and about $80 in materials beyond the house itself.
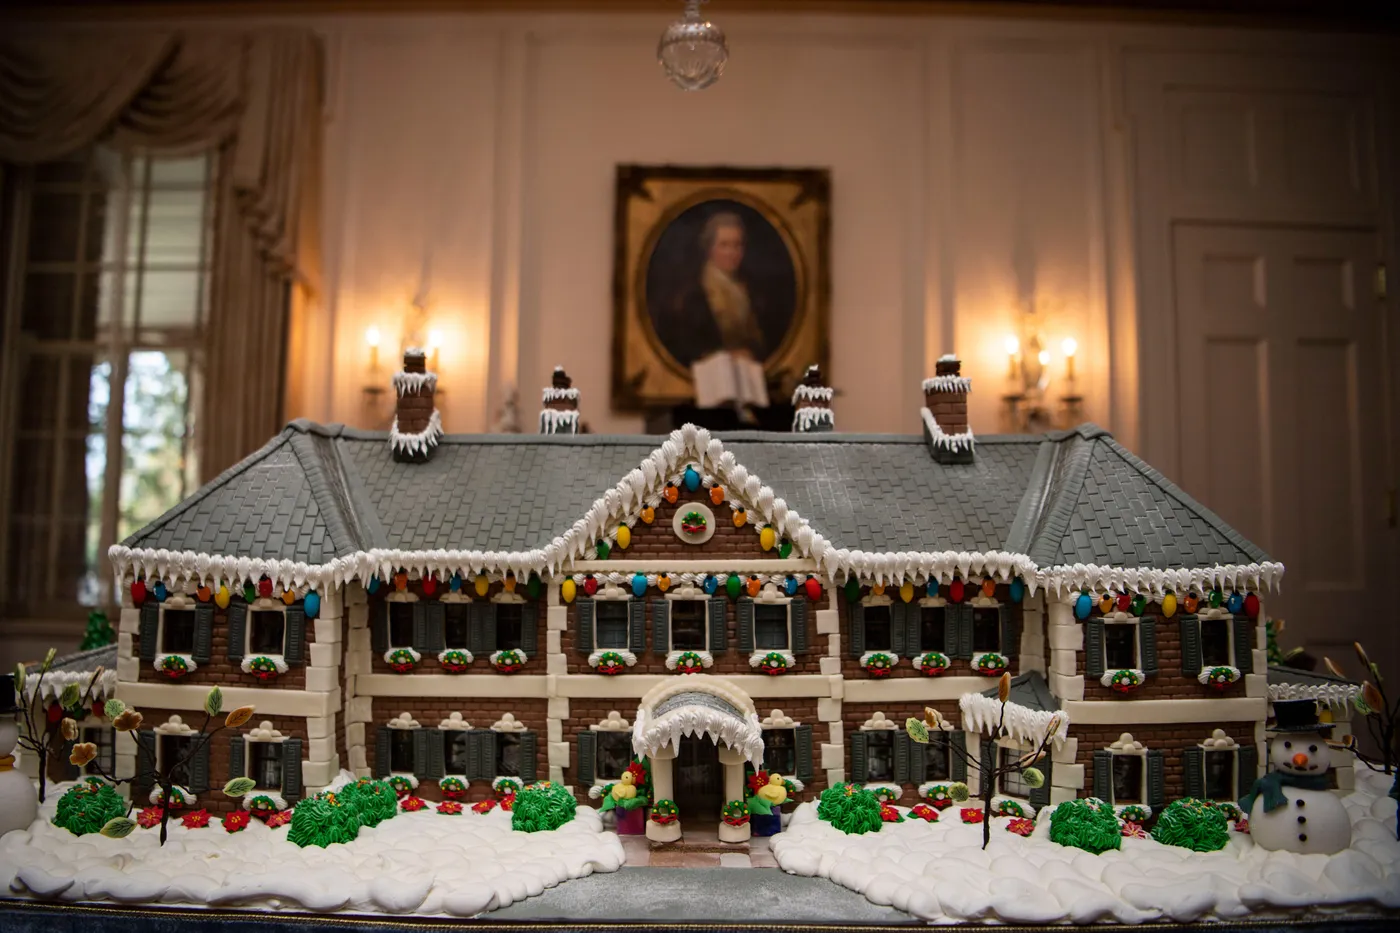
- Set the house on a round cake board one to two inches wider than its base.
- Spoon a frosting snow line along the base and press green shrubbery into it while it’s still soft.
- Add a small snowman off-center — never dead center.
- Slide a battery puck light behind the windows and one up under the eaves.
- Step back three feet and check that the roofline sits below your eye level.
Height is the detail most people miss. On a standard 30-inch table, a gingerbread house taller than about 14 inches starts to block the wainscoting and the framed art behind it, and the whole display reads as one brown lump. Keep the roof under eye level and let the wall do half the work. A warm lamp placed off to one side will throw a soft shadow behind the house too, which is what gives a tabletop scene depth instead of flattening it out.
A graham cracker version gets you 80% of the effect for about $25: five full crackers per wall, royal icing from a piping bag, and a sack of gumdrops and peppermints for the roof lights. Build it on a foil-covered board and skip the frosting shingles entirely — a dusting of powdered sugar does the same job in three seconds. It also means you won’t flinch when someone inevitably eats a wall.
9. Gingerbread Family Figurine Between Frosted Bottle Brush Trees
Small figurines are the least kid-proof thing in holiday decor. Sugar-based faces chip, frosted bases shed white dust every time they move, and a two-year-old will absolutely test whether the gingerbread dad is edible. Put this display at 40 inches or higher, on a shelf or mantel a toddler can’t reach, and set it on a felt pad so it doesn’t scratch the tabletop. If you have cats, weight the base — swatting is inevitable.
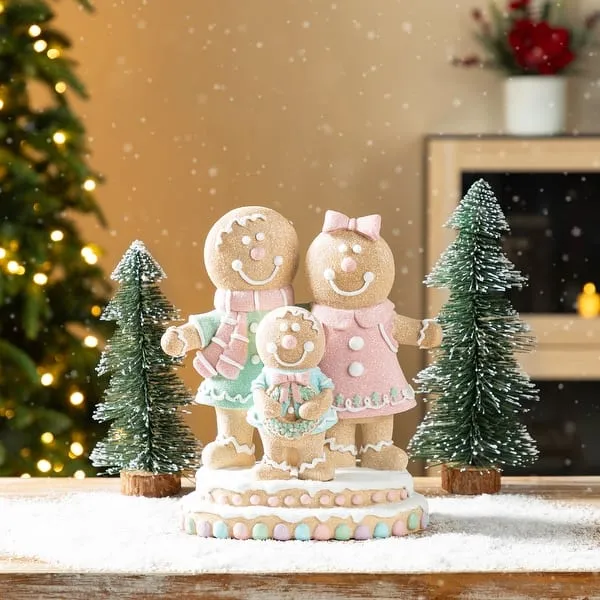
The three-piece gingerbread family is the whole story here. Two frosted bottle brush trees alone are just generic holiday filler, but add a family of three standing on a tiered, snow-dusted base and you suddenly have a scene with a beginning and an end. That little narrative is what makes people stop and smile instead of walking past, and it’s the one piece worth spending real money on.
10. All-Pink Peppermint Arch Garland Framing a Window
You can build this entire peppermint arch for under $60. Dollar Tree sells peppermint swirl cutouts and large ornament packs in the same pink-and-white pairing; layer three or four of them over a wreath form or a tension rod, then wrap a $6 feather boa around the whole thing to hide the mechanics. Toss in a handful of shatterproof pink ornaments from Walmart at $6 a set. Read our mistakes section before you hang anything over a window — that’s where these arches tend to go wrong.
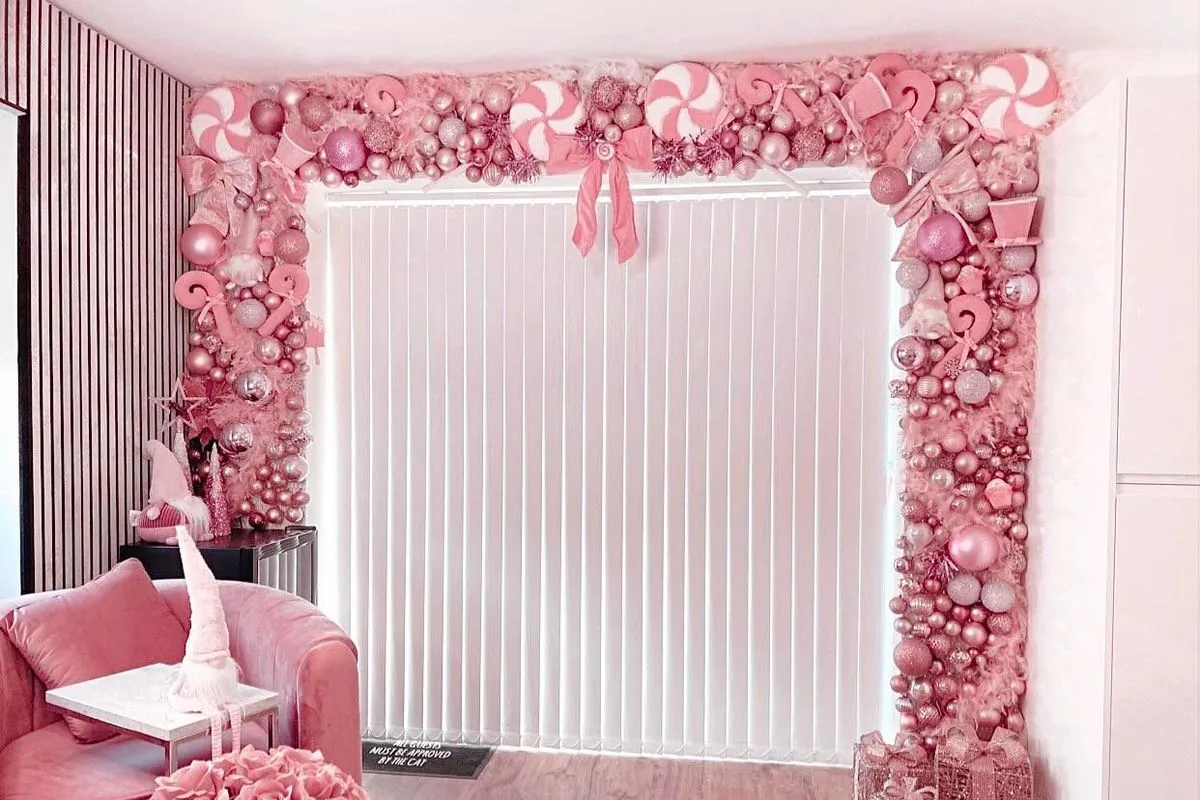
Feather boas shed, so expect pink fluff on the floor for the first week — vacuum gently rather than lint-rolling, which pulls the trim apart. Glittered ornaments drop dust every time you move them, so store them in individual tissue wraps rather than one big bin. Budget about 30 minutes of fluffing and re-hanging each season, plus $10 every couple of years to replace crushed pieces. Skip the boa entirely if anyone in the house has a feather allergy.
11. Candyland Color Discipline: Two Hues, Repeated Everywhere
However you build your candyland room, the ratio that keeps it livable is 60% white or neutral, 30% one pastel, and 10% a second accent — pink and mint, pink and baby blue, pink and butterscotch. Write it on an index card before you shop. The accent color is swappable at any point and the room still holds together, because the neutral base is doing the structural work and the pastels are just frosting on top.
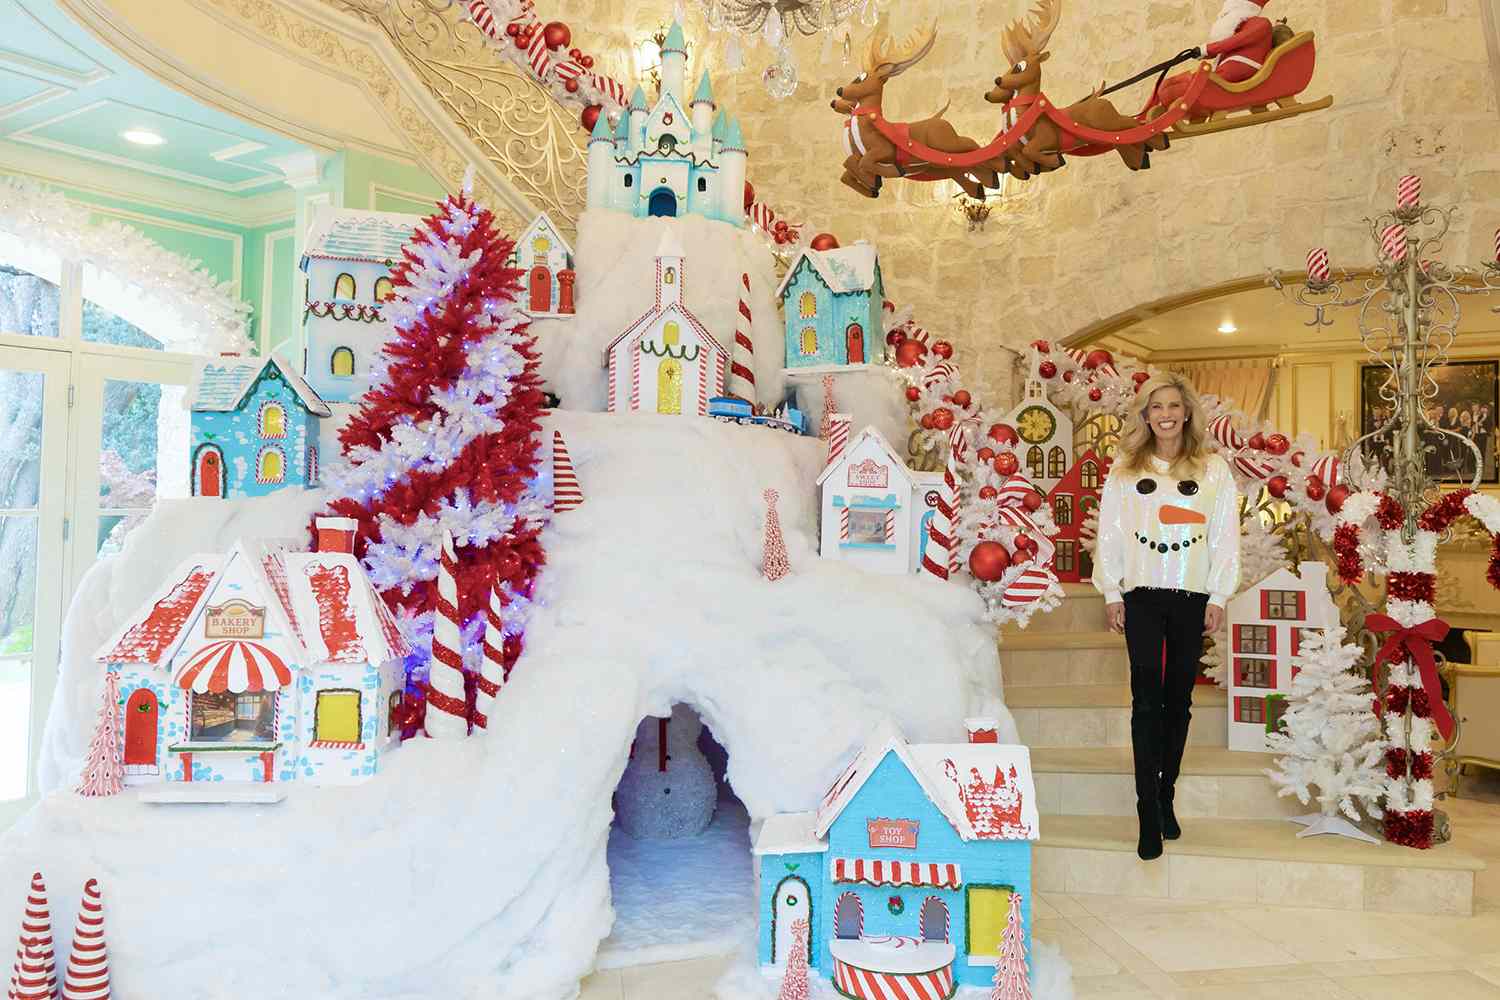
This formula scales in both directions. In a 10×10 bedroom, keep the pastel to one tree, one garland, and three pillows. In a 400-square-foot open living area, you can push it across the mantel, the tree, and the sofa without going sideways, as long as the neutral 60% holds. If you’re working with tall ceilings, add height rather than more objects — Idea #7 uses floor-to-ceiling shelving to carry a pastel palette upward instead of outward.
12. Gingerbread Trees and a Bright Blue Deer Figurine
The blue deer is doing something subtle and very clever. Everything else in this grouping is brown, white, and gold — a warm, edible palette with almost no saturation. Dropping in one bright cobalt figurine creates a complementary jolt that makes the gingerbread patterns pop instead of blending into beige mush. It also gives the eye a single place to land in what would otherwise be a static tabletop scene. One loud object beats five medium ones.
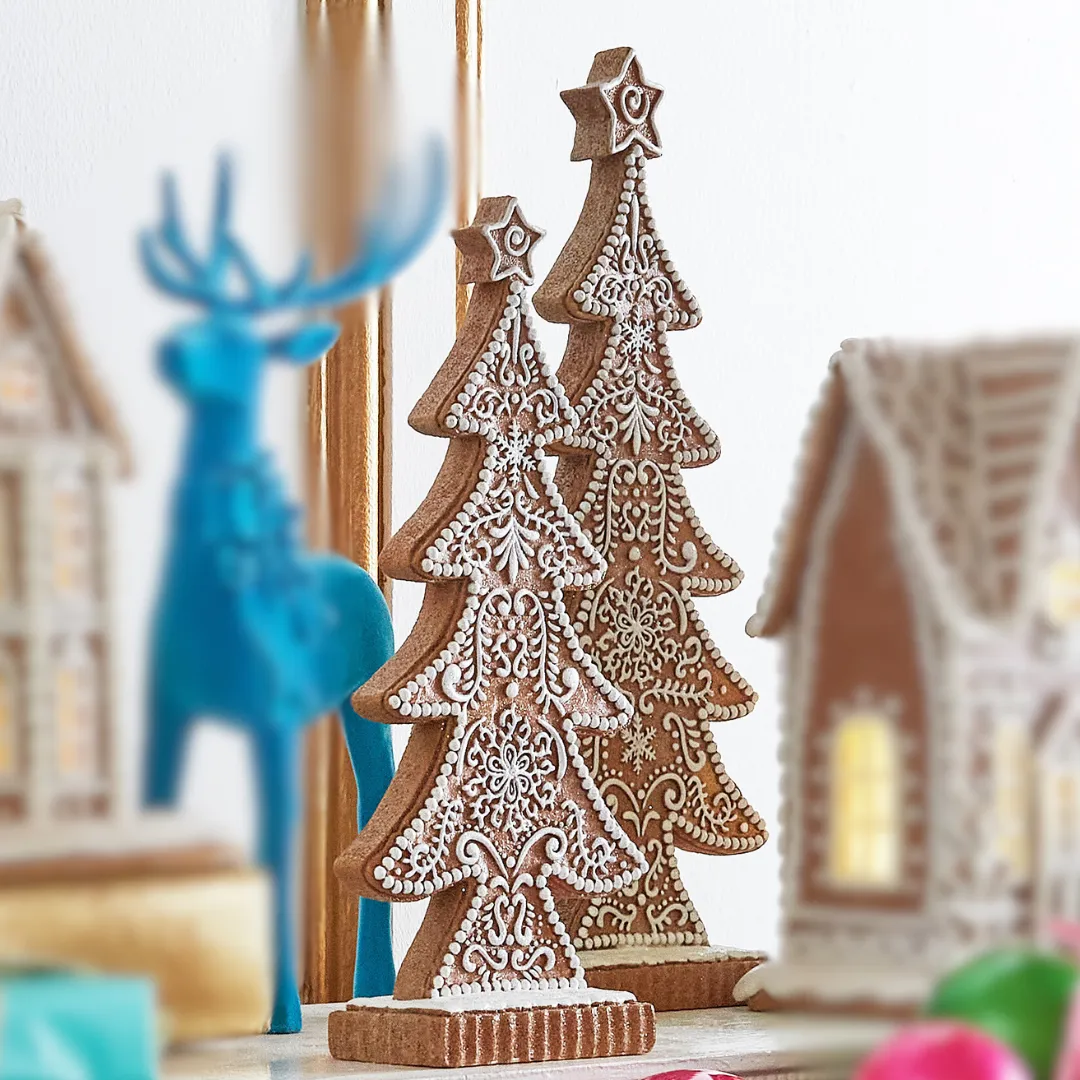
Group odd numbers, and keep the tallest piece off-center. Three objects in a row — tree, deer, tree — reads as furniture; three arranged in a loose triangle with the deer pushed slightly forward reads as styling. Keep the supporting pieces under six inches so the gingerbread trees stay the stars, and set the whole group on a white or very pale surface, because patterned icing filigree needs a plain background to stay legible from across the room.
13. White Tinsel Tabletop Tree With Vintage Glass Ornaments
Vintage glass ornaments are the sleeper trend of the past few seasons — the ones with faded painted stripes and slightly wobbly shapes, the ones your grandmother hung. Designers have been leaning on tabletop trees specifically because they give those collected ornaments a proper stage without needing a full-size tree, and the pink star topper keeps it from reading purely nostalgic. It looks like heritage rather than trend, which is exactly why it keeps gaining saves on Pinterest year after year.
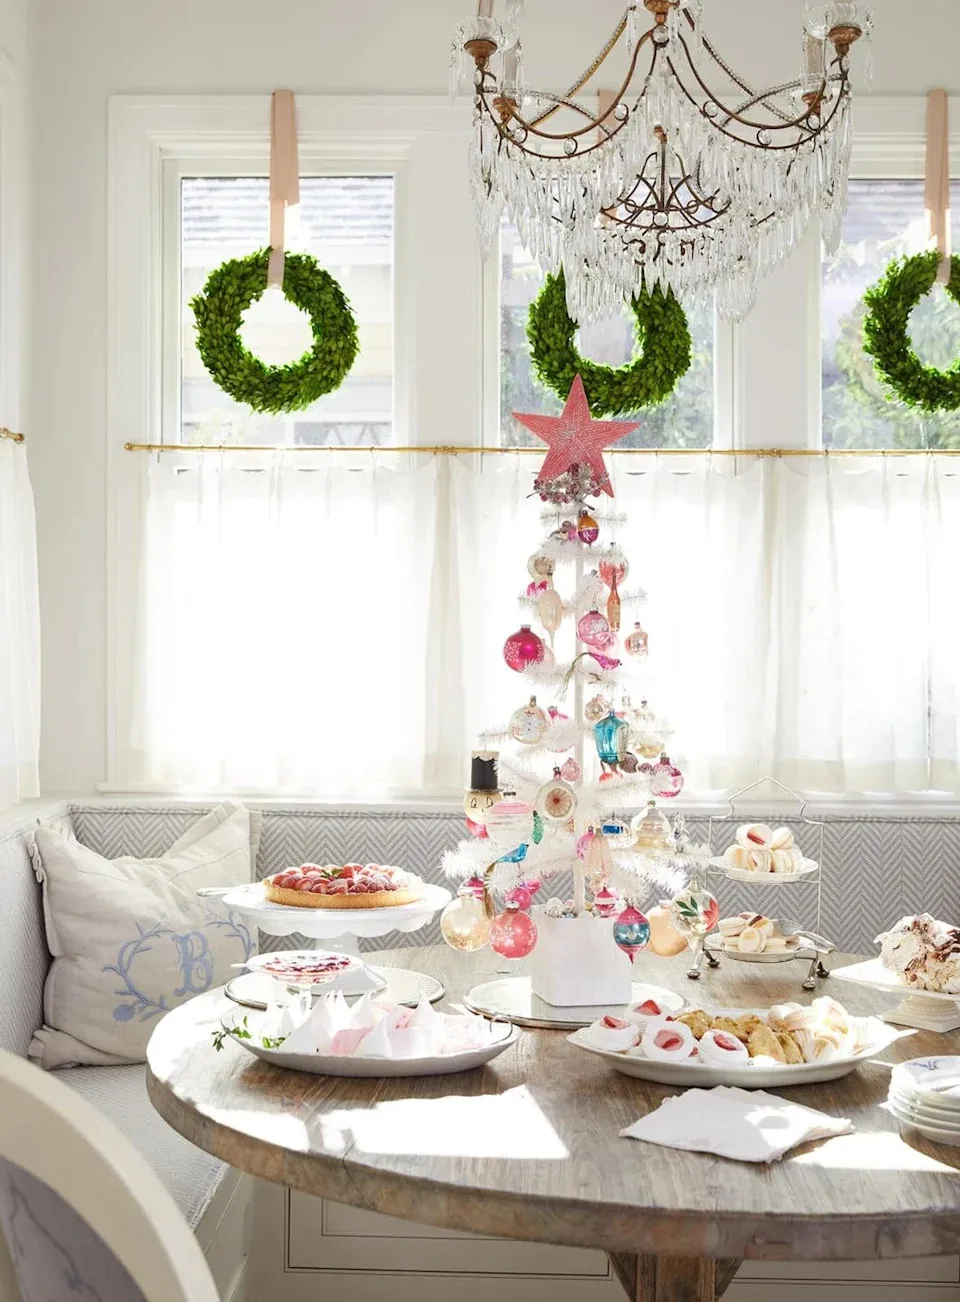
This is one of the few looks where thrifting genuinely beats retail. Estate sales, church rummage sales, and eBay ornament lots regularly turn up 20 to 40 vintage glass pieces for $15 to $40 — often less if you buy in January. Fill the gaps with new shatterproof balls in the same pastel range and no one can tell which is which once the lights are on. A white tinsel tabletop tree runs $12 to $25 at Target.
14. A Console Table Gingerbread Village With Street Lamps
- Console table: $0 if you own one, $90–$260 new
- Gingerbread houses, 4–6 assorted sizes: $40–$120
- Frosting snow base and royal icing mix: $10–$20
- Bottle brush trees, 15–20: $18–$35
- Miniature benches, lamps, and figures: $15–$40
- Peppermint candy accents, one bag: $5–$12
- Budget alternative: dollar-store village houses and a jar of white icing — about $45, same silhouette from across the room.
Total: $88–$242
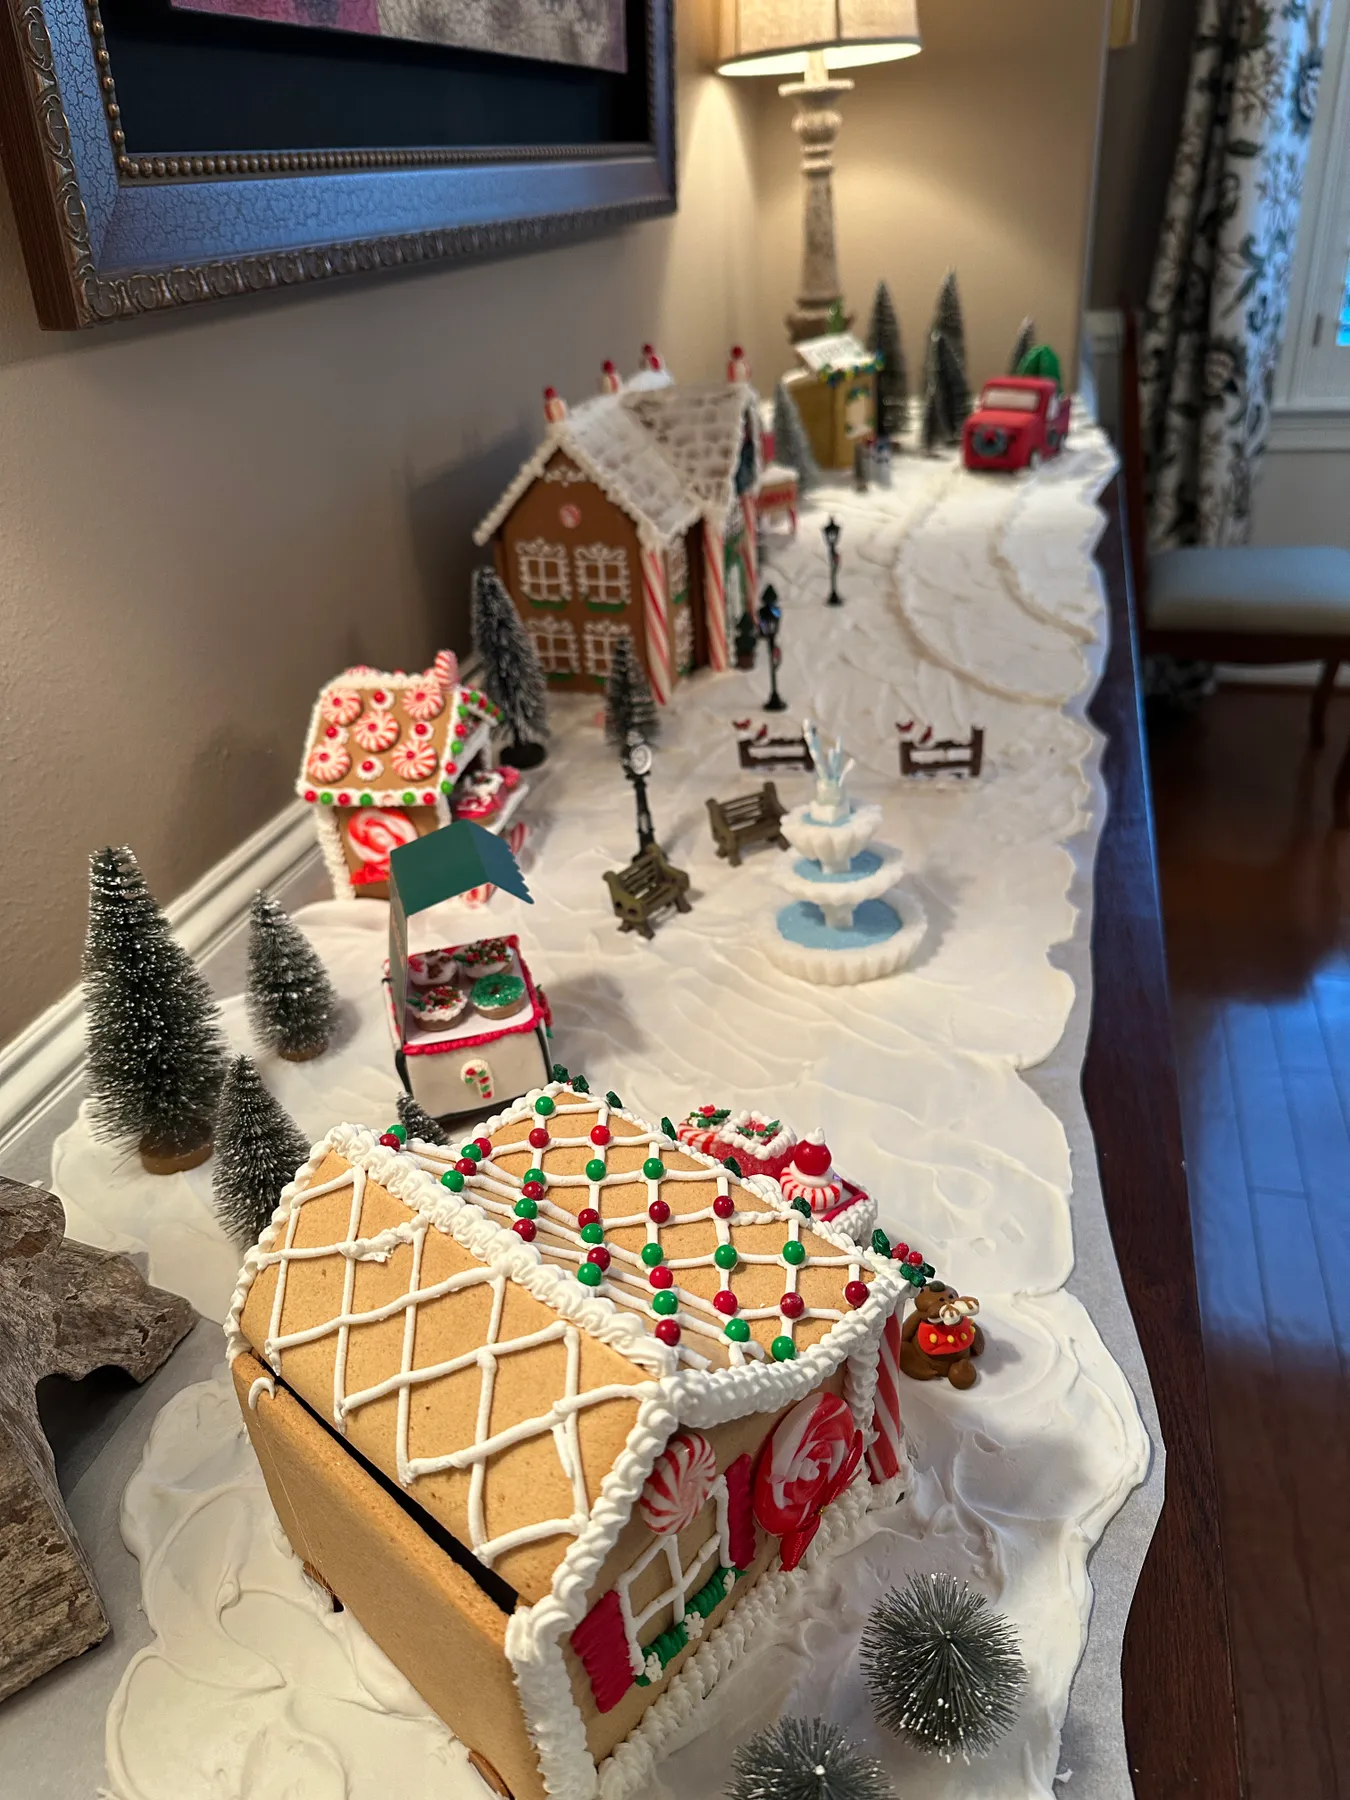
Village layouts live or die on layering. Put the tallest house in the back third, mid-height houses in the middle, and keep the front edge low so nothing blocks what’s behind it. Bend the frosting snow so it spills over the front lip of the table by half an inch — that’s the trick that makes it read as snow rather than a base. Stagger the trees at three different heights and tuck the street lamps at the outer edges so they frame the scene instead of crowding it. Ten minutes of rearranging after your first pass is completely normal.
Think of the console as a stage: roughly 60% white snow base, 25% buildings, 15% small props. Villages go wrong when the props outnumber the houses — a dozen tiny figurines competing for attention turns a charming street into a yard sale. One bench, one lamp, and three peppermints is plenty for six buildings. If you want a bigger scene, add buildings, not accessories.
15. Pastel Tree With Oversized Gingerbread House Ornaments
Oversized ornaments are the entire point. A normal candyland tree uses dozens of small candy picks, and the result is texture — pleasant, but forgettable. Trade those for a handful of frosted gingerbread houses, peppermint lollipops, and swirled faux-candy clusters measuring four to six inches each, and the tree becomes a display. You lose the busy sparkle and you gain a clear silhouette you can read from across the room. Fewer, bigger, better.
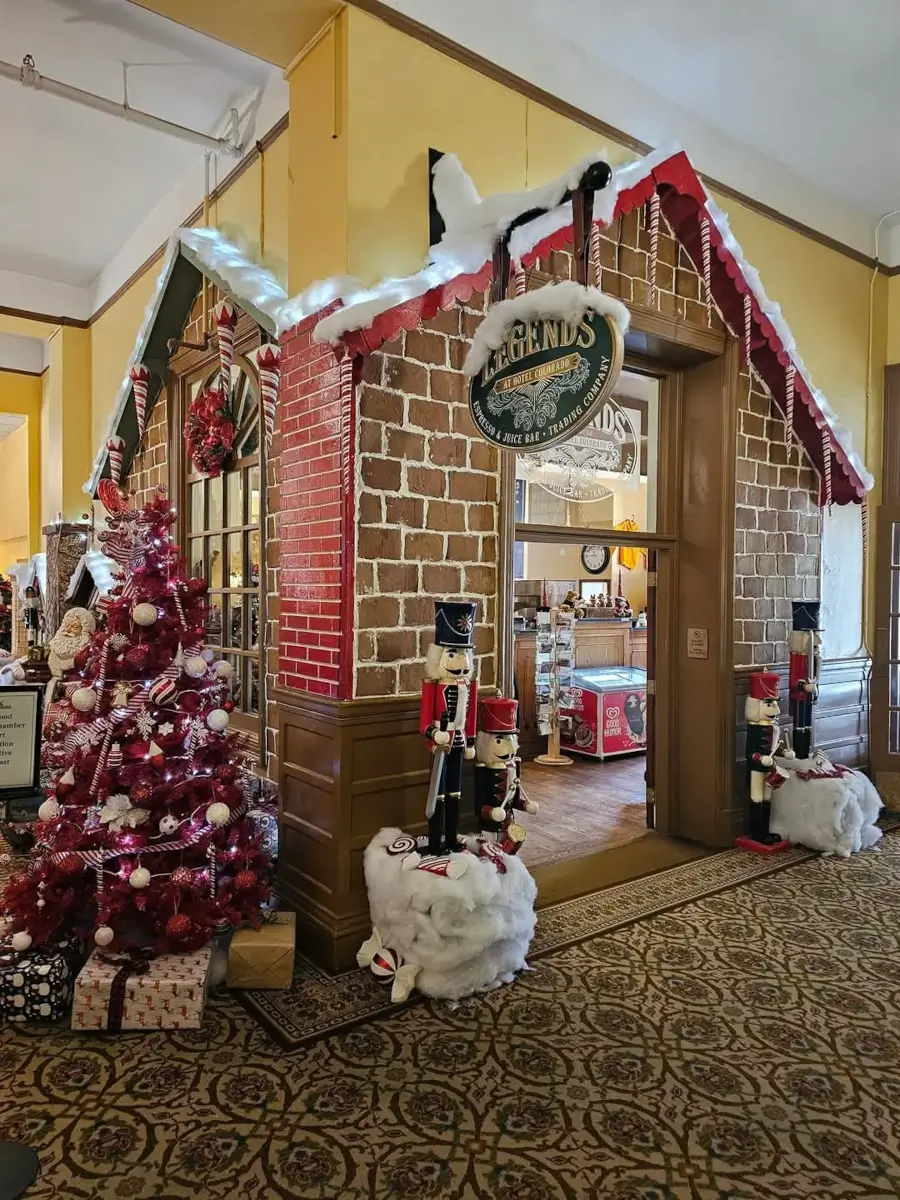
Oversized ornaments are also heavy. If your tree has flimsy wire branches, the big frosting pieces rotate, sag, and eventually pull themselves down — reinforce those spots with a second branch hook, or hang the heaviest pieces within an inch or two of the trunk. Blush and mint also show dust faster than dark greens, so a quick pass with a hairdryer on the cool setting does more before a party than a full re-fluff. And no, they will not fit in a standard ornament bin.
16. Miniature Gingerbread Bakery and Ice Cream Shop Village
Miniature shops are the rare candyland piece that looks better small. Two buildings at 6 to 8 inches tall need only about a 24-inch run of surface — a sideboard, a bookshelf, even a deep windowsill. They also read beautifully at eye level if you raise the surface to about 40 inches. If you’re planning a full village with benches and street lamps, see Idea #8 for the bigger tabletop setup.
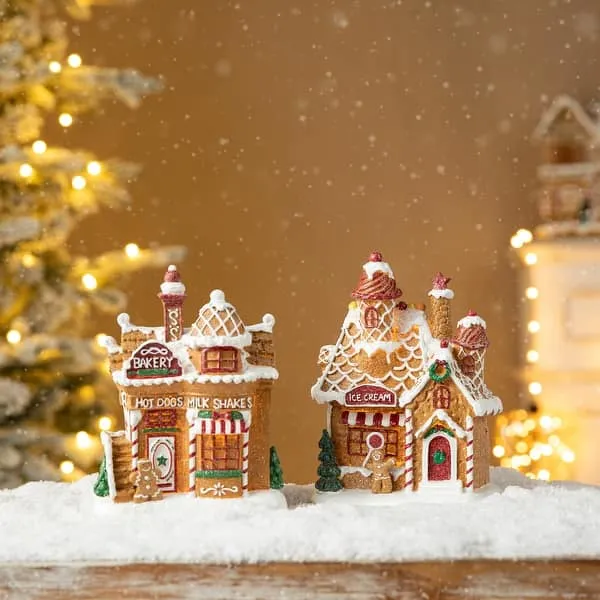
Treat a two-building display as a tiny composition: 70% snow surface, 20% architecture, 10% figures and accents. Candy-cane striped columns and frosting trim supply the verticals, so keep the surrounding surface bare enough that those stripes stay visible against the white. Add a third building and you should drop the figures to two and push the snow base forward, or the grouping starts to look like merchandise instead of a scene.
17. Pastel Donut Wreath With Glittery Snowflake Cutouts
A wreath this busy needs breathing room. Keep the base form no wider than 18 inches for a standard front door, and cluster the donut ornaments in threes rather than spacing them evenly — even spacing is the fastest way to make a novelty wreath look cheap. Set the glittery snowflake cutouts at roughly the 10, 2, and 7 o’clock positions, and push the pink ribbon bows toward the inner ring so the outer edge stays ruffled and soft.
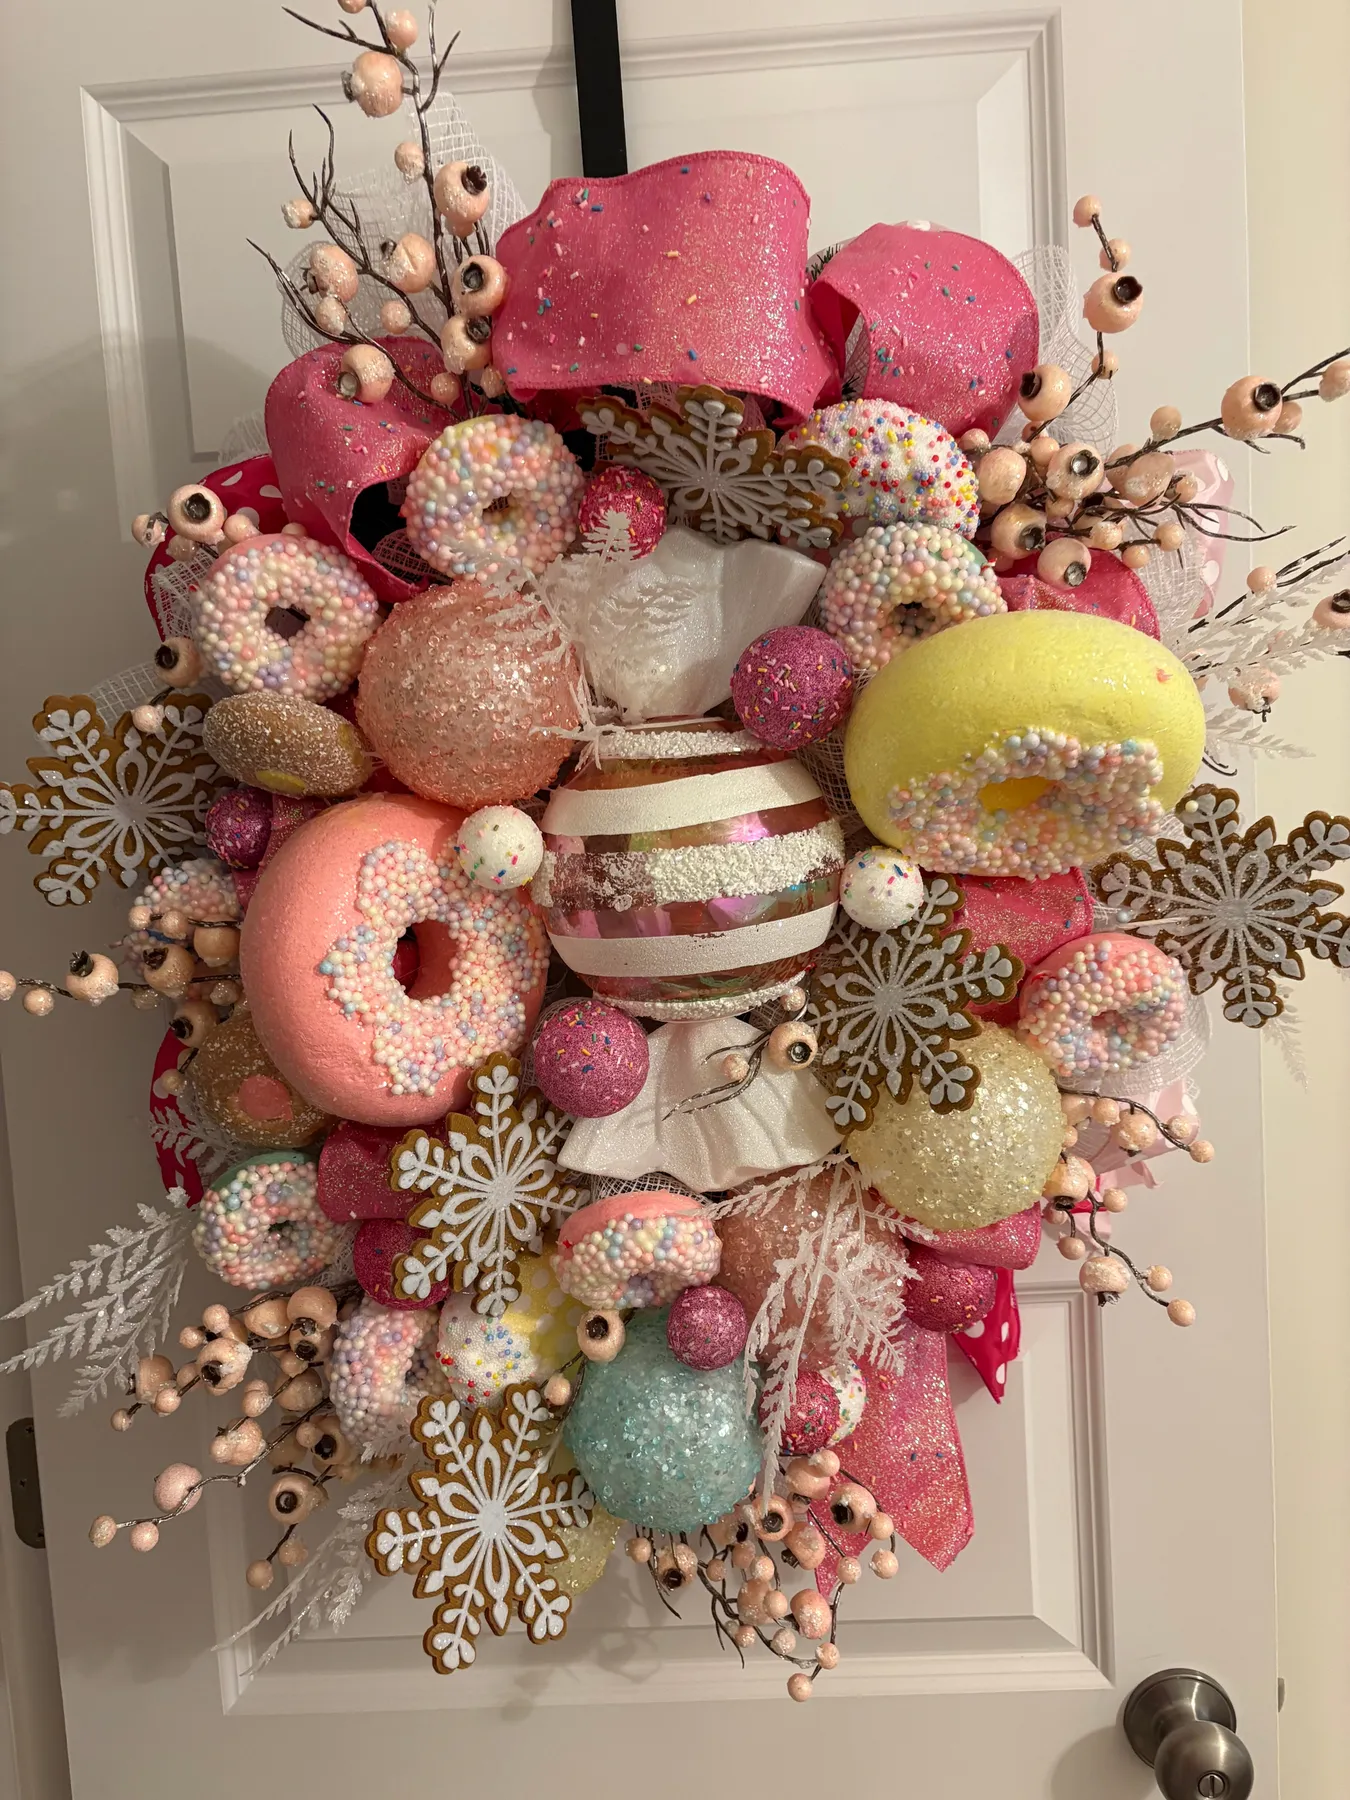
It works because the theme is implied rather than announced. There are no literal candy wrappers or cartoon gingerbread men — just donuts, striped candies, frosted berry twigs, and glossy spheres. Your brain fills in the candy shop. It also leans on texture contrast: glossy ceramic donuts against matte glitter, frosted twigs against smooth baubles, so an almost-monochromatic wreath still reads as rich. That restraint is what lets it hang on a front door without looking like a party store display.
18. Plush Gingerbread Chef on a Garland-Draped Staircase
Styling a staircase takes about an hour for the garland and fifteen minutes for the plush figure.
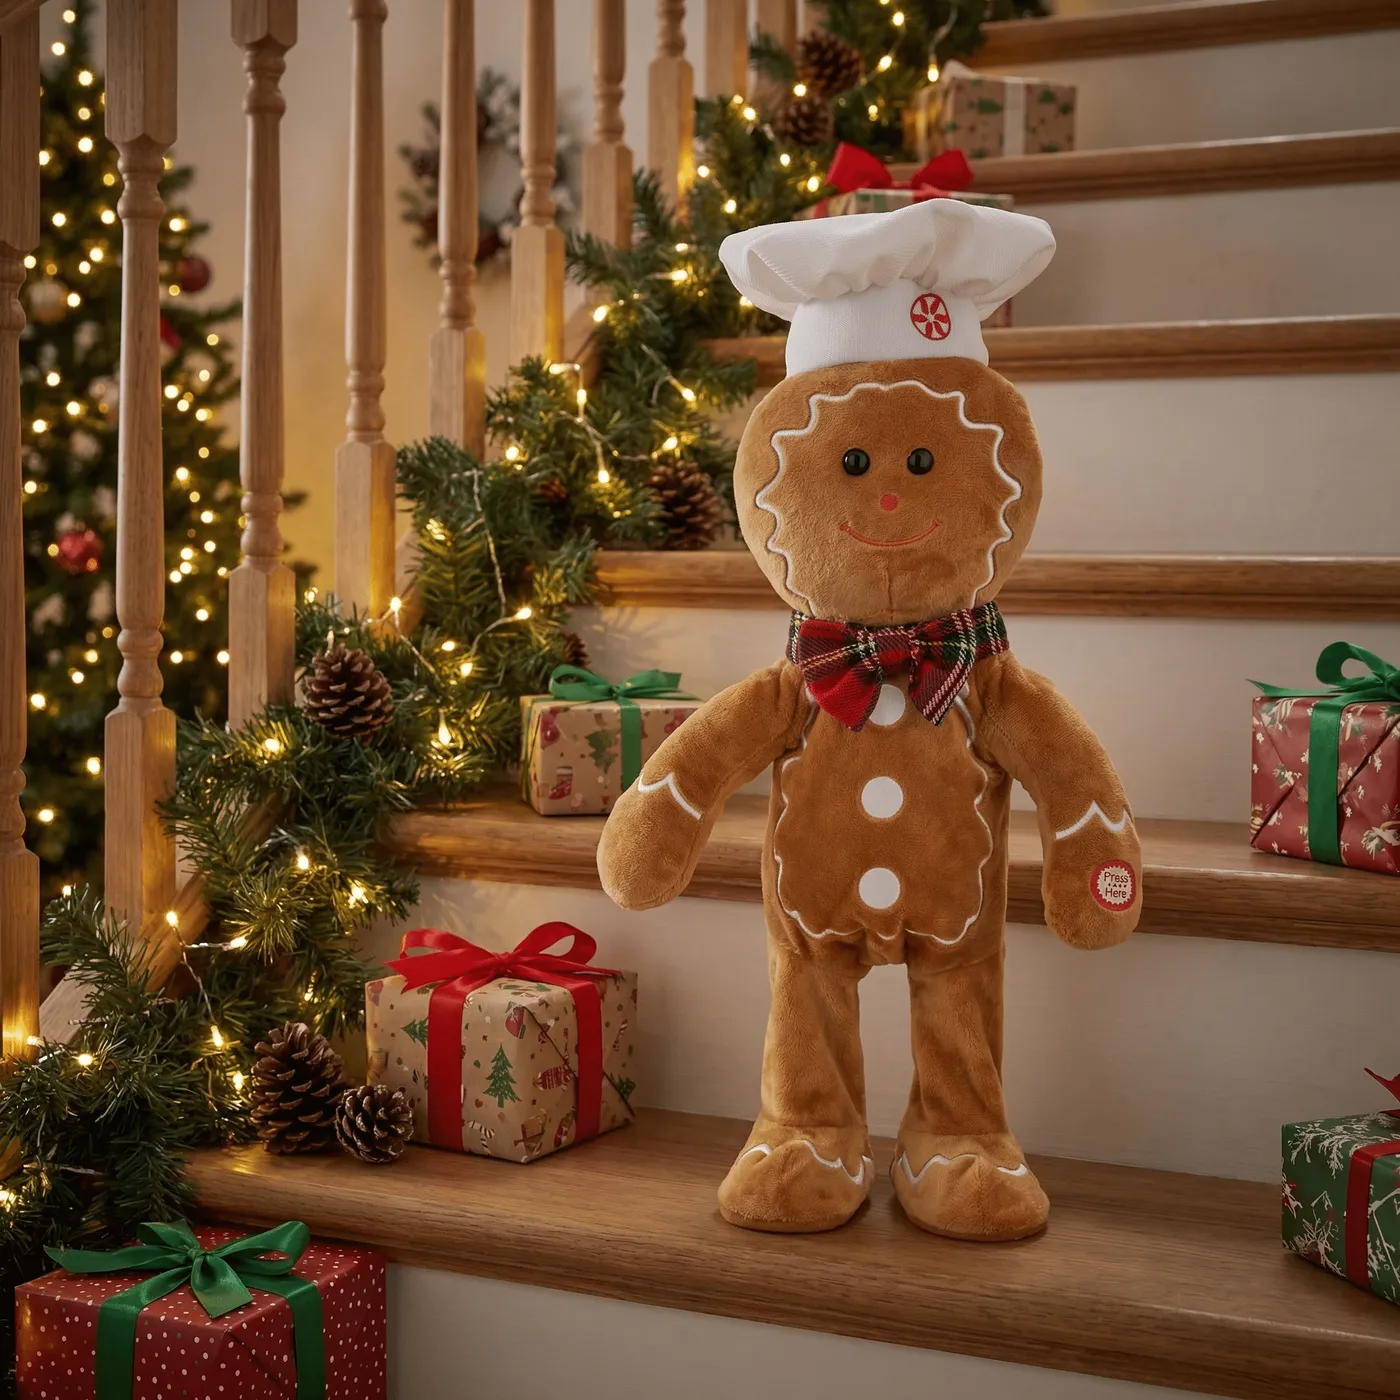
- Wind the lit garland from the banister base upward, tucking the wire behind the spindles so it disappears.
- Wire two or three pinecones in at uneven intervals.
- Seat the plush gingerbread figure on a step, back from the tread edge, so nobody kicks it on the way down.
- Stack two or three wrapped gifts beside him, using odd sizes.
- Check that the handrail is still fully grippable before you call it done.
The plush gingerbread chef in his hat and plaid bow tie is the one piece that turns a decorated staircase into a scene. Remove him and you have a perfectly nice garland-and-pinecones stair. Keep him, and suddenly the stairs tell a joke. He also does something practical: he gives the eye a focal point at the bottom of a long diagonal, which keeps the garland from reading as an endless green stripe.
19. Pink Glass Santa With a Peppermint Candy Belly
Check these before you commit to a glass ornament collection.
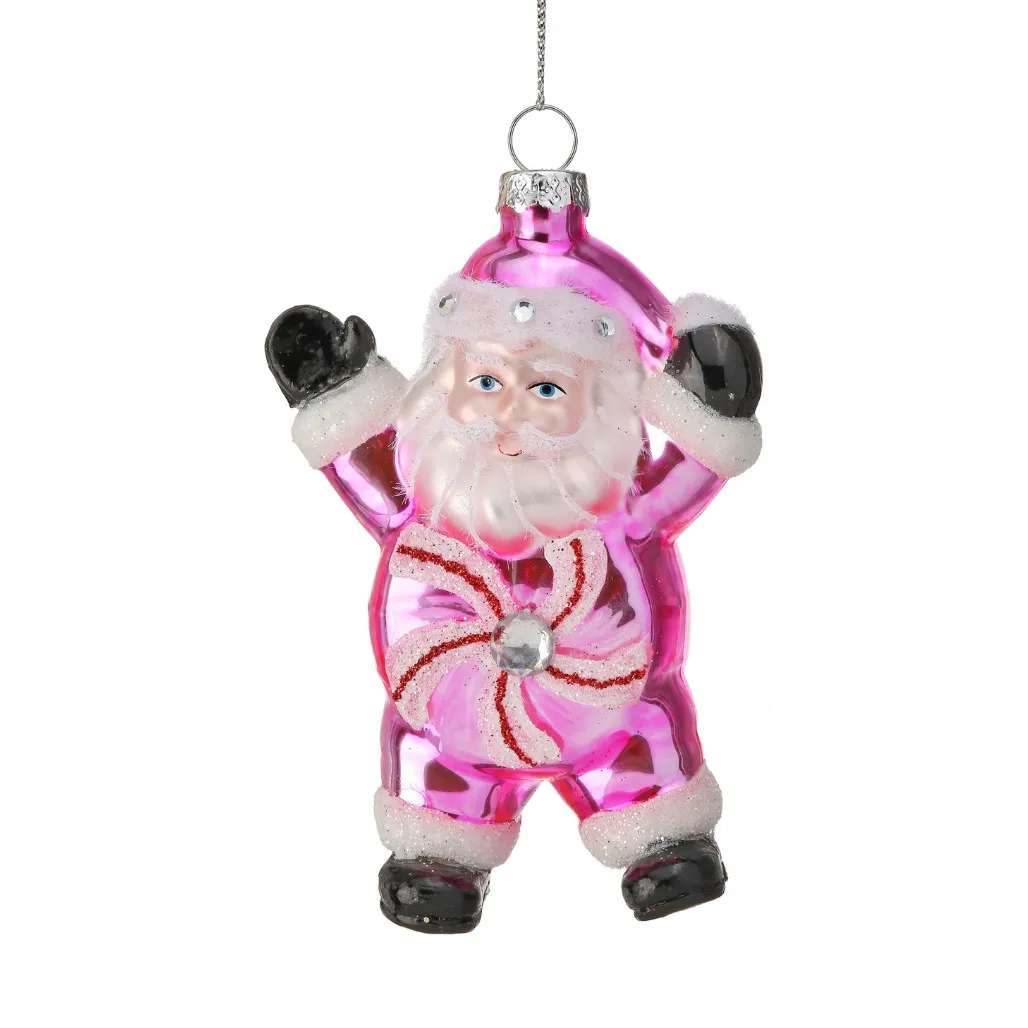
- Measure your branch spacing — hand-blown glass needs at least an inch of clearance so pieces don’t clink.
- Confirm your floor situation; a dropped glass ornament on carpet usually survives, on tile it doesn’t.
- Check for pets — glass Santas and wagging tails are a bad pairing.
- Budget for storage: individual tissue-lined compartments, not one big bin.
- Decide on a size; 4 to 5 inches reads best on a full-size tree, 3 inches on a tabletop one.
Glass ornaments are a genuine commitment. The metal caps tarnish, the white glittery trim sheds a little every year, and pieces chip if two of them knock together in a crowded box. Expect to lose one or two a season if your tree is densely packed. A $20 divided ornament case will save you $60 in replacements within two years. Shatterproof ornaments in the same pink finish cost about a third as much and survive the drop test.
20. Candy Wrapper Ornaments in Glossy Red and White
Glossy red-and-white candy ornaments are gorgeous and merciless: gloss shows every fingerprint, and the white frosted ends yellow slightly if you store them somewhere warm, so keep them out of attics and garage rafters. They also read very traditional against a green tree, which means if you’re chasing the pink 2026 look, this isn’t it — this is the classic version, and it commits. Go all in or choose something else entirely.
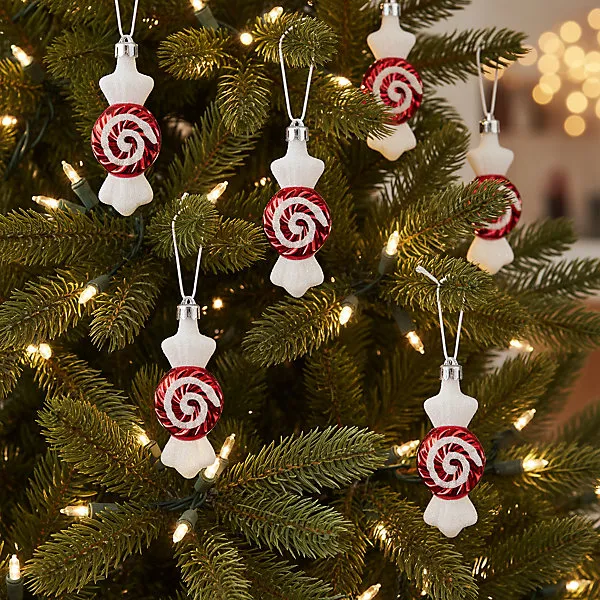
Candy wrapper ornaments are one of the easiest DIYs in holiday decor. Wrap a small foam or wood bead in a square of cellophane, twist the ends into points, and tie them off with white twine — about 40 cents each, and a set of twenty takes an evening. World Market and Target carry ready-made candy ornaments at $4 to $8 apiece. This is the budget version of Idea #1 — same candy concept, no flocking required.
Alternate scale so a candy-themed tree doesn’t look like a vending machine. For every large candy ornament, hang two smaller red balls at roughly half the size, spaced at least six inches apart. Light temperature matters too: 2700K bulbs make red and white glow like real candy, while 4000K cool white turns the same ornaments slightly blue. Fill the tree from the inside out and the gloss will do the rest.
21. Candy Cane Tree With Gold and Magenta Baubles
Here’s the formula: 45% glossy red and white stripes, 35% metallic gold and silver baubles, 20% deeper jewel tones like magenta. The candy canes are the pattern, the metallics are the shine, and the magenta is the surprise. Swap the magenta for deep teal and the tree reads slightly vintage; swap it for black and it goes moody and modern. Keep the stripes at nearly half and the candy theme stays unmistakable no matter what you do with the rest.
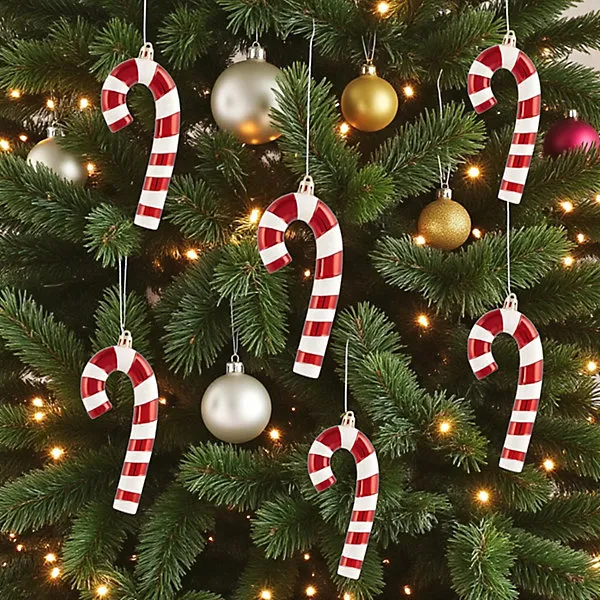
Candy cane ornaments read best on a dense, full tree — six feet and up, where the stripes have room to repeat. On a smaller tree, thin them to about a dozen and let the metallics carry more of the load, otherwise a four-foot tree starts to look like a candy aisle endcap. Standard baubles should be 2.5 to 3 inches so the canes, typically 5 to 7 inches long, stay the focal point.
22. Flocked Candyland Tree With Giant Candy Picks
The trick here is that the tree never has to compete with the room. Soft neutral furnishings and a warm, low light level mean the frosted branches and pastel candy picks are the only saturated thing in the frame, which makes an otherwise busy tree feel calm. Flocked branches also diffuse string lights, so the glow reads as ambient haze rather than a row of individual bulbs. Take the same ornaments onto a plain green tree in a colorful room and the whole effect evaporates.

Match your gift wrap to the tree and the corner reads as one designed moment — two or three papers in the same pink, mint, and white range, with a single ribbon color across all of them. Keep the gifts low and stack them in odd numbers, and let one oversized candy pick hang below the lowest branch line so the tree and the floor visually connect instead of floating apart. Coordinate with Idea #5 if you want the candy to spill onto a tabletop nearby.
23. Fabric Candy Garland Draped Over a Rustic Wooden Mirror
Fabric candy garlands take about two hours and under $25 to make.
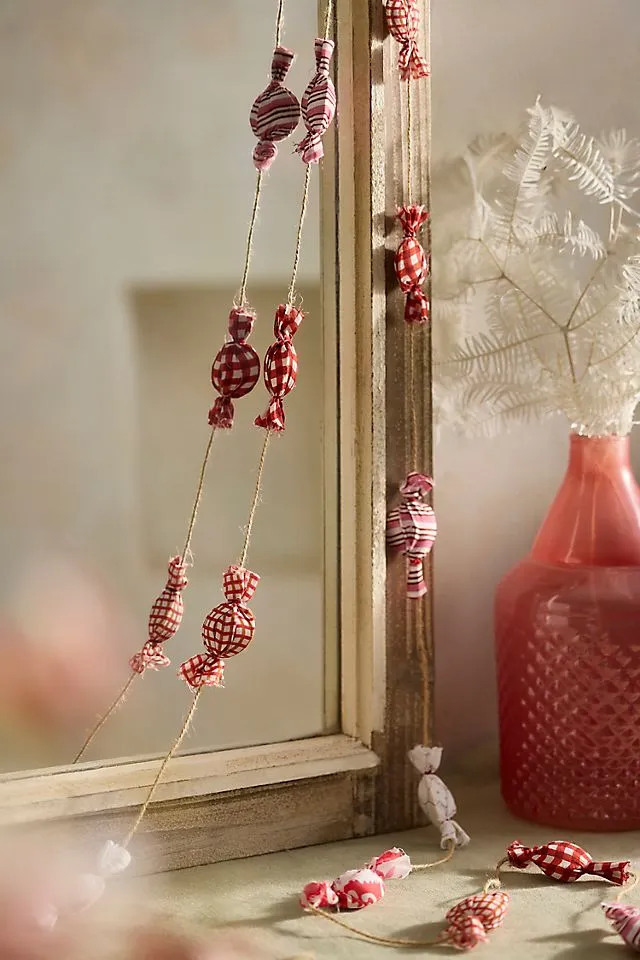
- Cut fabric scraps into five-inch squares — felt, flannel, and cotton all work.
- Wrap each square around a small foam ball and tie the ends with twine to form a wrapper shape.
- Tie each candy onto a length of jute twine with a six-inch gap between pieces.
- Drape the garland over the mirror frame, letting one side hang lower than the other.
- Rest a textured pink vase with dried white stems beside it and stop there.
Fabric garlands are forgiving, with two exceptions. Jute twine sheds and can scratch wood finishes, so line the back of a mirror frame with felt pads or switch to fishing line. And if the mirror hangs near a heat source or takes direct afternoon sun, rotate the garland every few weeks — cotton and flannel fade unevenly, and the back sides will be noticeably darker by February. Otherwise, this is the most forgiving candyland project on the list.
Sugar, Sparkle, and a Little Restraint
Candyland decor works best when you pick a palette, commit to it, and let one plain surface give all that frosting somewhere to sit. Start with the tree or the tabletop village, live with it for a week, and add the next layer only if the room still feels calm.
📌 Pin your favorite idea from this list so it’s waiting for you when the decorations come down from the attic.