23 Stunning Cardboard Christmas Tree Ideas You Need to Try for a Sustainable 2026 Holiday Season

You know the spiral: you open Pinterest for one quick idea, and forty minutes later you’re deep in a folder of cardboard Christmas trees and still haven’t picked one. Fair. There’s a reason the handmade-tree corner of the internet exploded this year — it’s cheap, it’s genuinely sustainable, and honestly it looks better than half the plastic trees on the shelf.
We spent serious time browsing Etsy, Michaels, IKEA, Target, and Amazon to bring you only what’s worth your attention this year, from six-dollar paper ornaments to a hundred-and-eighty-dollar sculptural statement piece. After filtering through hundreds of options, we narrowed it down to 23 ideas that actually deliver, across modern minimalist, Scandinavian natural, playful craft, and cozy traditional styles, with budget and luxury versions compared side by side.
2026 is the year of the anti-plastic tree — craft supplies are trending hard on Pinterest and cardboard checks every box, from the budget to the compost bin. 📌 Save this to Pinterest for later — you’ll want to revisit these ideas. And stay until the end — we break down the most common mistakes that can ruin these looks.
1. A Faceted Pale Blue Tree That Reads Like Sculpture
Take away the wrapping paper and the honeycomb bauble and this tree still holds up. Remove the single fuzzy hot-pink ball resting near the base, though, and the whole vignette goes quiet in the wrong way. That one saturated object is doing all the emotional work. A faceted, matte, pale blue-green tree is a cool and slightly severe shape — it needs exactly one warm, tactile, slightly silly thing to push against it. One. The instinct is to keep adding, and that is precisely the moment this look collapses into clutter.
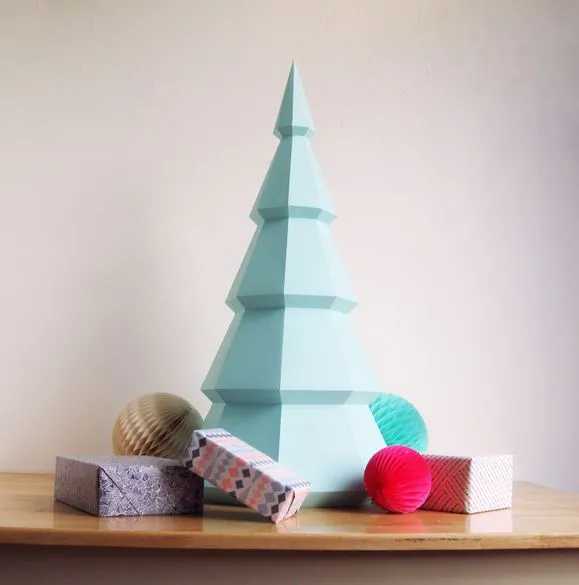
Here’s the formula: 70% cool neutral (the pale blue-green tree, the plain off-white wall), 20% light wood (the table it sits on), 10% loud accent (that pink sphere, plus a little pattern in the wrapped boxes). Swap the accent and the mood shifts entirely — burnt orange goes warm and autumnal, chrome goes Scandinavian-modern, black goes graphic. Keep the ratio, change the color, and you get a different room out of the same tree.
2. Fluted Conical Candles in Red, Green, and Cream
Before you commit, lay the three candles out and check your spacing: the widest gap between any two should be no more than half the width of the shortest candle. Anything more generous and the trio stops reading as one arrangement and starts reading as three separate objects waiting to be put away. And put the darkest candle — here, the red — at an outer edge rather than the middle. Dark anchors the eye, and an off-center anchor keeps a symmetrical group from feeling stiff.
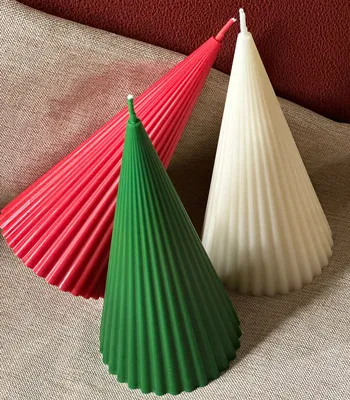
Fluted candles are genuinely lovely and mildly high-maintenance. Wax pools into those vertical grooves and sets there, and digging it out with a pin is a job nobody enjoys on December 27th. Trim wicks to a quarter inch, burn them on a plate with a lip, and never leave them going in a room you’ve walked out of. Want the look without the archaeology? Buy a battery version in the same fluted shape and keep one real candle for the night itself.
3. A Felt Tree Cat Scratcher That Earns Its Floor Space
This works because it solves a problem instead of just decorating one. The corrugated cardboard base gives a cat something to actually dig into, and the layered felt tree — cut into soft, stacked silhouettes with white cloud shapes tucked between the layers — makes the whole thing look like decor rather than pet furniture. The gold tinsel wand on top is the closer: it turns an object into a place where a person and a cat meet, which is exactly why it lands in the living room and not the laundry room.
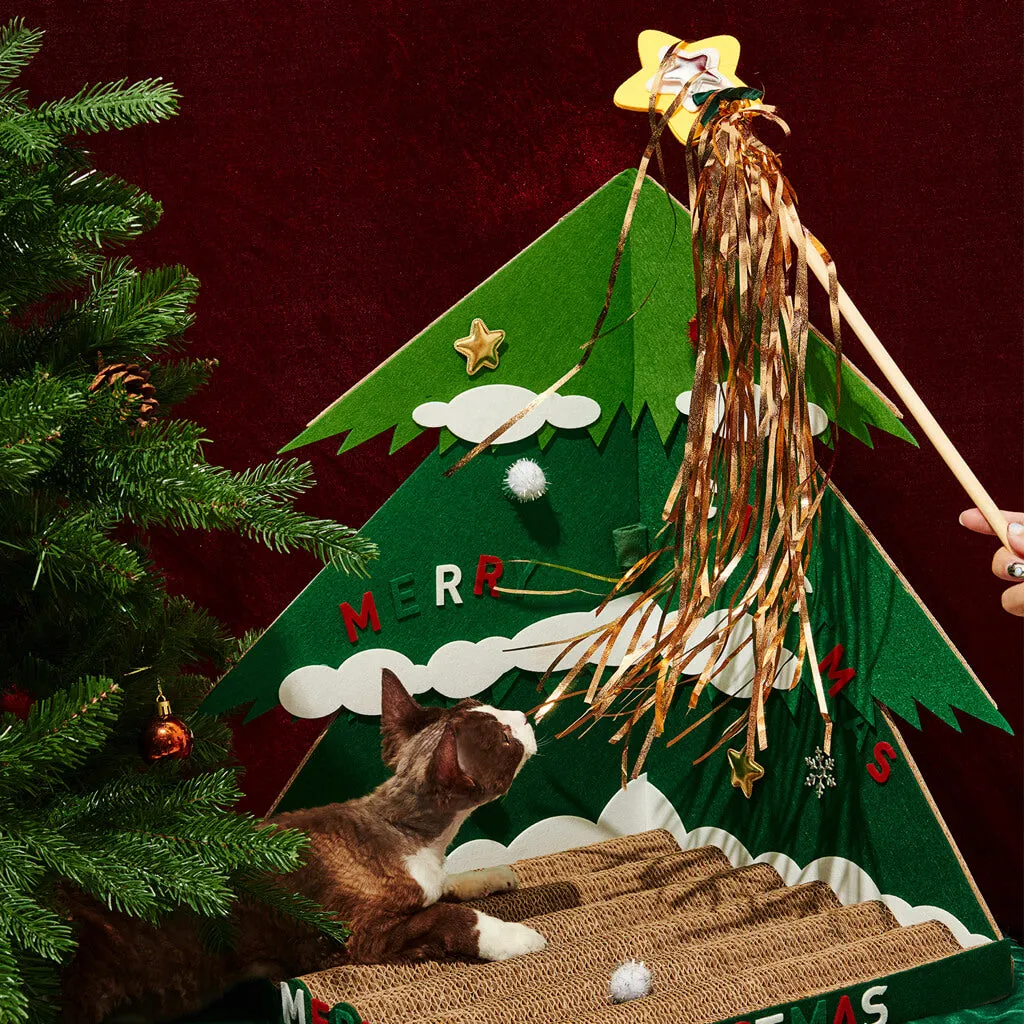
- Green felt panels (5–6 craft sheets): $8–$15
- Corrugated cardboard base, or a free shipping box: $0–$6
- Gold tinsel wand toy: $5–$12
- Wooden or felt MERRY lettering: $10–$22
- Glue gun and sticks: $12–$18
Total: $35–$73. Skip the lettering and marker the word onto the felt instead and you’re back near $25.
4. Tiered Wood Trees on a Fringed Cream Textile
Raw, unfinished wood is beautiful for about six weeks and then it starts telling on you. Dry winter air makes the tiered edges lift slightly, water rings bloom instantly, and dust settles into the grain like it’s being paid to. Wipe with a dry microfiber cloth weekly — never a wet rag — and rub food-safe oil or beeswax into the pieces once a year. Five minutes of work and they’ll stay that honey color instead of drifting gray by February.
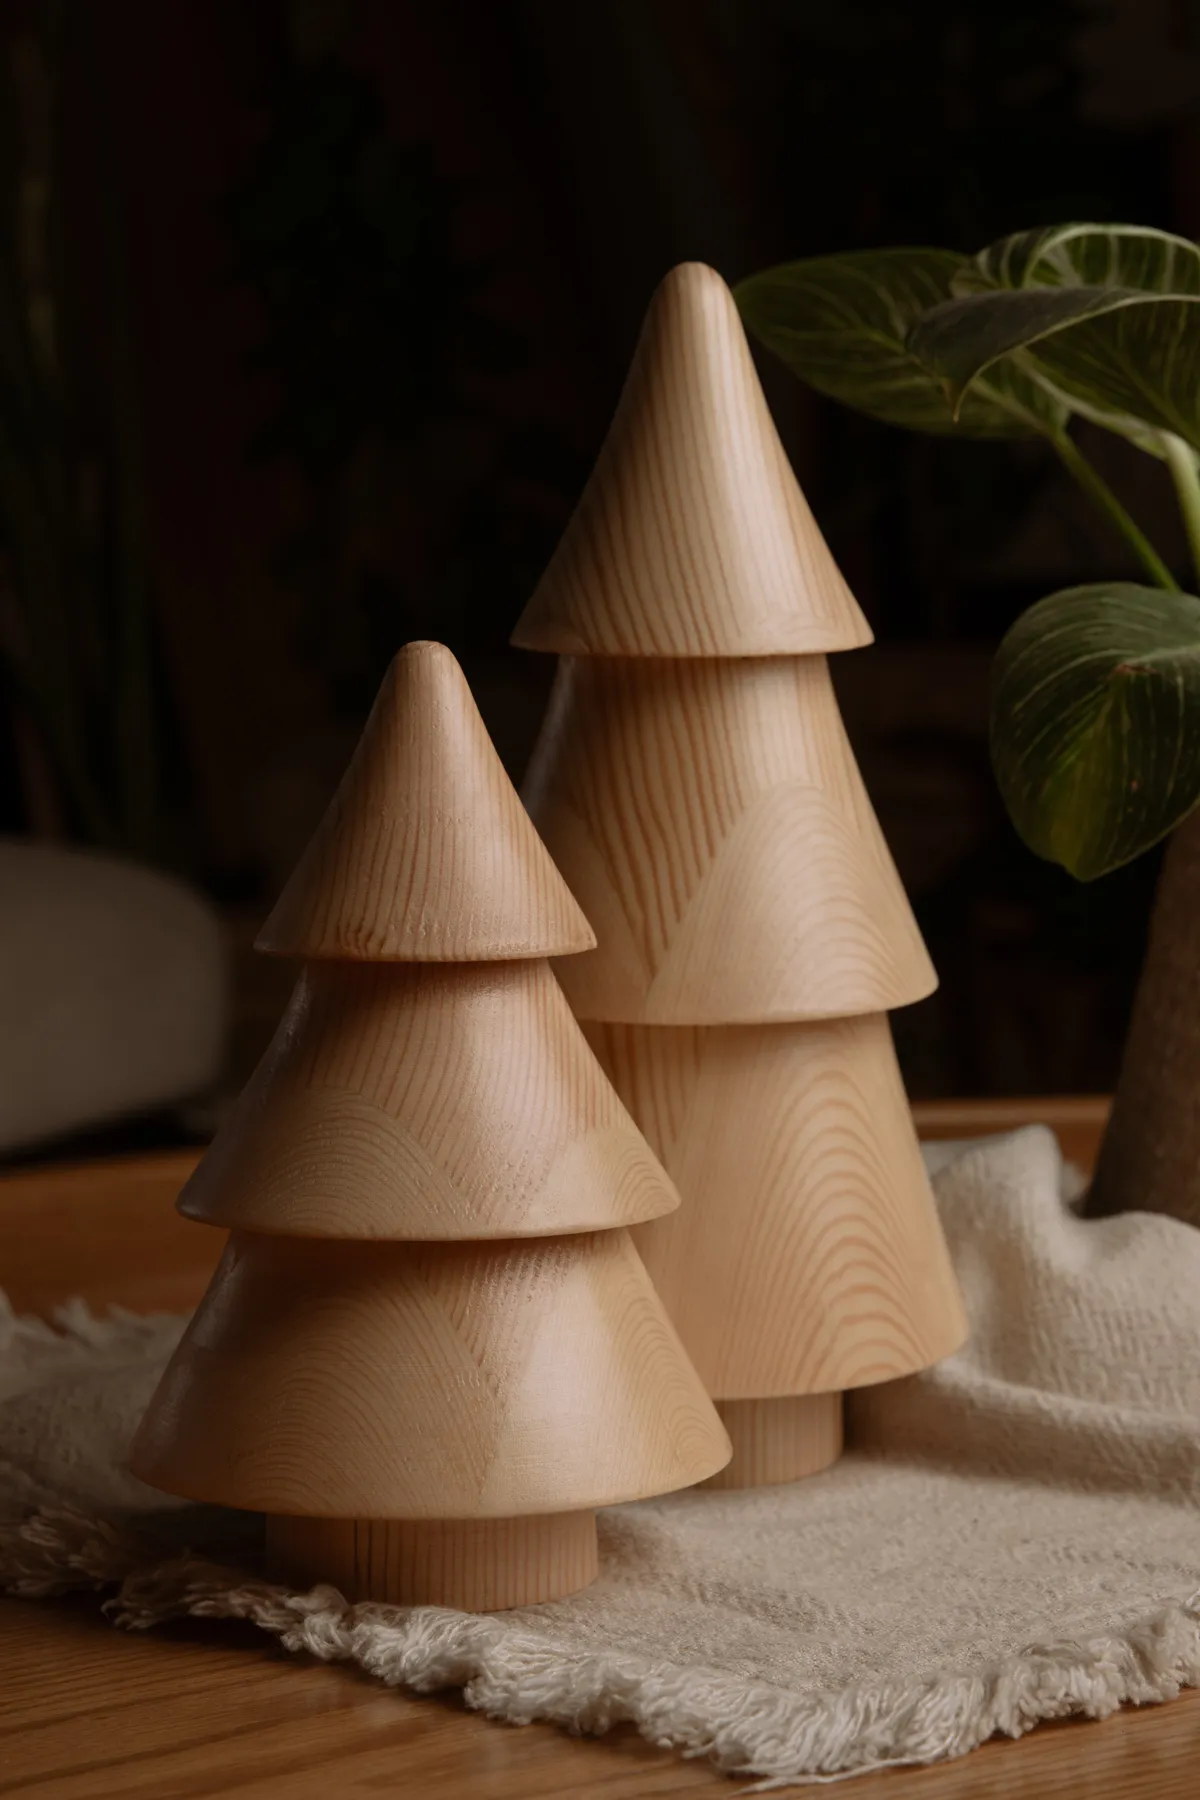
That fringed cream textile isn’t decoration, it’s a boundary. The rule: the cloth should extend three to four inches past the widest object sitting on it. Less and the trees look like they’re sliding off the edge; much more and the textile starts competing with the furniture underneath. A 14×20 inch runner handles a pair this size perfectly, and the fringe does the softening work a coaster never will.
5. Folded Paper Tree Garlands That Float on Clear Thread
- Cut two identical tree silhouettes from cardstock, about 4 inches tall.
- Score both down the center with a bone folder or the back of a butter knife.
- Fold along the score, then glue the halves back to back, leaving the fold lines exposed.
- Thread a needle with clear monofilament and pass it through the top point.
- Space trees 6–8 inches apart so each one can spin freely.
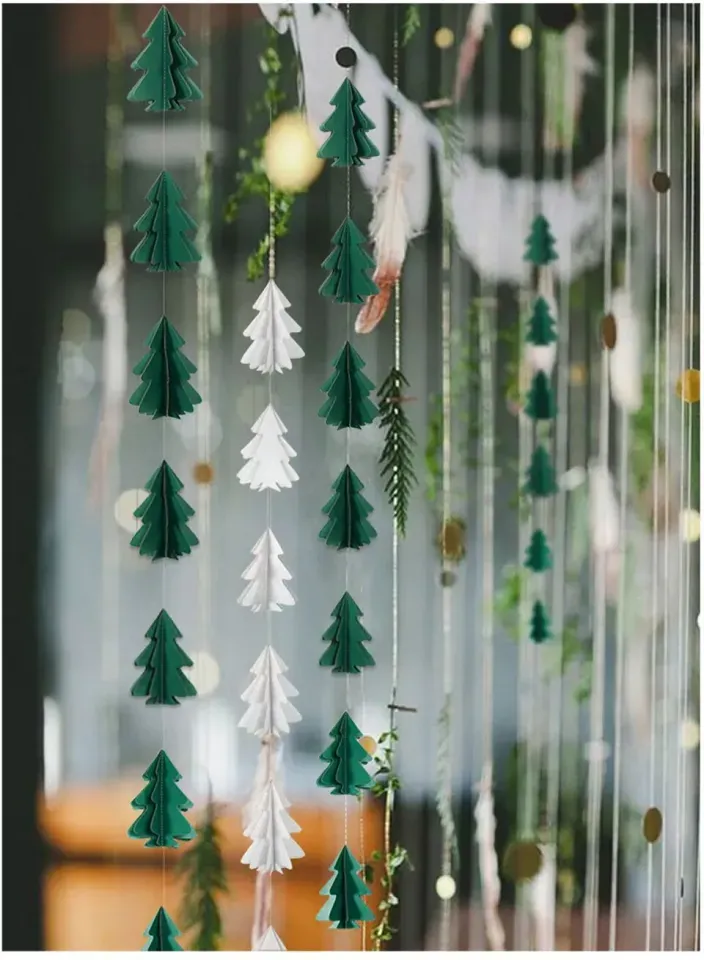
Roughly 10 minutes per tree, and about $8 in paper covers a full window’s worth.
The magic is the fold, not the paper. Each tree is creased down the middle so it throws a hard little shadow on one side and catches light on the other, which makes a flat cutout read as a solid object from six feet away. Alternating dark green and white keeps the eye traveling down the strand instead of parking on one tree. If the accordion fold is what you love, Idea #22 takes it full size.
6. A Cardboard Tree That Holds the Cupcakes
The red circular platforms are the whole trick. Without them you’d have a green cardboard cone with a yellow star — cute, forgettable, the kind of thing that goes in the recycling the first week of January. The red discs slice horizontally through the tree and give it three clear jobs, each holding a cupcake at a different height, and the eye reads the entire object as a cake stand rather than a tree. Function is what makes it stick in someone’s memory.
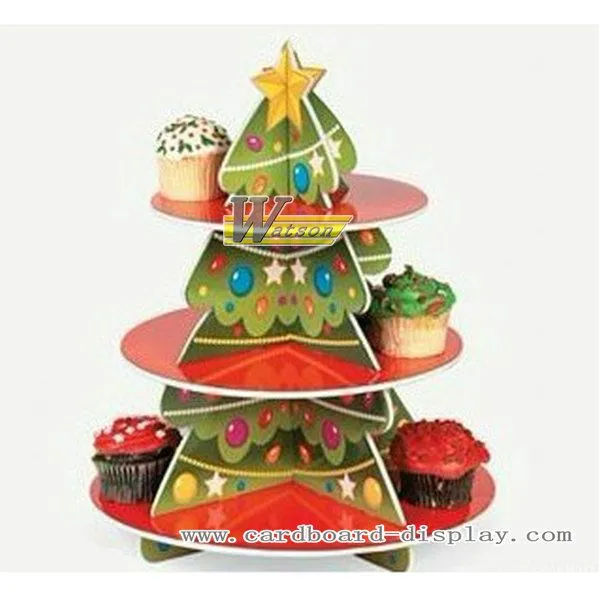
Dessert-as-centerpiece has been building for a couple of years, and 2026 is the year it fully took over the holiday table. The shift is toward one big handmade object instead of twelve small store-bought ones — partly budget, partly the fact that guests photograph a cake stand, not a garland. Cardboard is the quiet hero of that shift: cheap enough to risk cutting into, sturdy enough to hold a dozen cupcakes, and compostable when the season ends.
7. Wine Cork Trees Topped With Mismatched Stars
You don’t need to buy anything but the glue. Call three bars in your neighborhood and ask them to save corks for a week — most will hand you a bag. The star toppers here are mismatched on purpose, one light wood, one dark metal, both pulled off a thrifted ornament set. The distressed metal pedestal is the kind of thing that sits unloved at Goodwill for four dollars. Realistically this whole vignette runs $0 to $15 if you already own a glue gun.
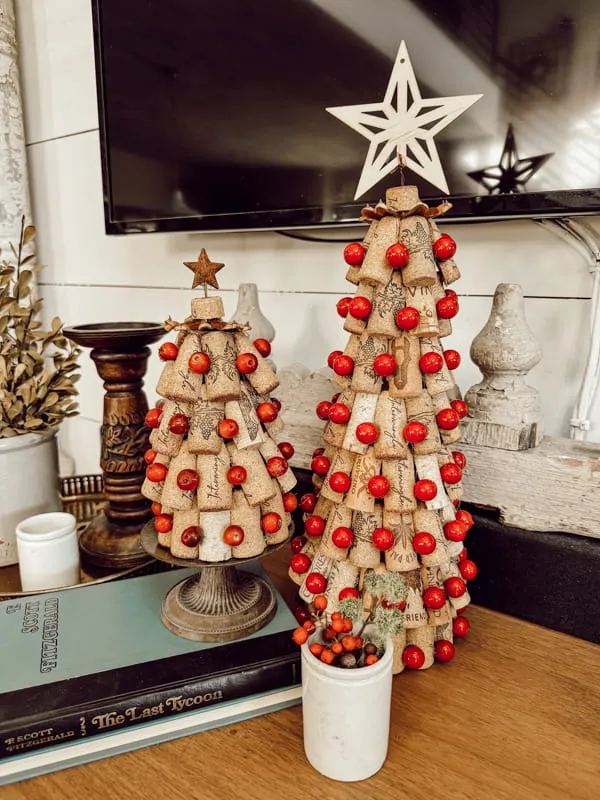
Topper size is what people get wrong. A star should be no wider than about a quarter of the tree’s base diameter — anything bigger and the tree looks like it’s wearing a hat two sizes too large. On a cork tree this size, that’s 2 to 2.5 inches, not the 4 inch one that feels right in your hand at the store. Deliberately mismatching the two toppers is what keeps a pair from looking like it came in a kit.
8. A Felt Tree Crafting Session on the Kitchen Table
- Cover the table with a woven pad or canvas drop cloth — felt glue does not come out of wood grain.
- Buy 2mm craft felt, not the flimsy 1mm sheets, so the trees hold their shape.
- Have sharp fabric scissors and a fresh glue stick loaded before small hands arrive.
- Pre-cut the tree shapes yourself and let kids do the red circles — it keeps the afternoon under an hour.
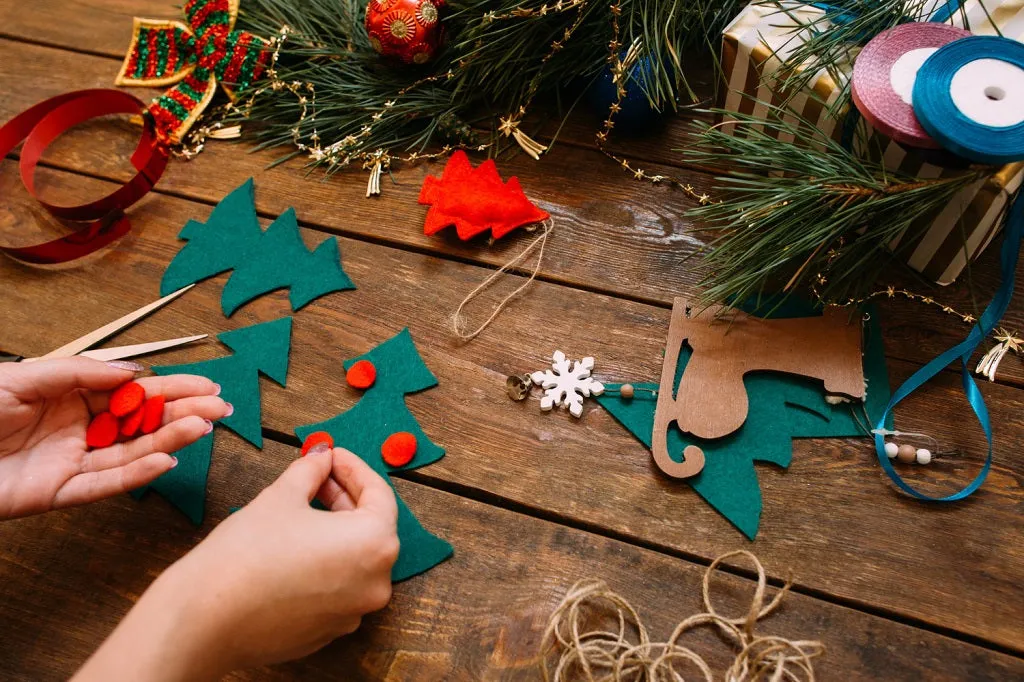
- Cut green felt into three graduated tree silhouettes.
- Stack and glue along the center line only, so the outer edges stay loose and lift.
- Cut red circles in three sizes with pinking shears for a clean edge.
- Glue circles in clusters of three, working from the bottom tier up.
- Press under a heavy book for 15 minutes before hanging.
9. Accordion Paper Trees Against White Subway Tile
This counter is a textbook 60/30/10: 60% cool white subway tile and dark green cabinetry, 30% warm paper trees in red, gold, and charcoal, 10% brass. The dark green cabinet is what makes the red trees sing — put the same trees against a white kitchen and they’d look like a craft fair table. That brass rail on the shelving matters more than it seems to; one thin warm line pulls all four tree colors together without introducing another hue.
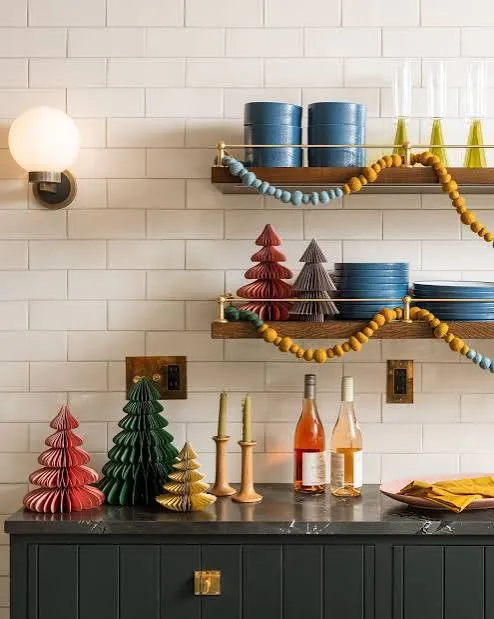
The trees are stacked at three heights across two surfaces, and that’s the entire composition — counter, shelf, counter again. The eye keeps stepping up and down. It’s the same accordion fold as Idea #5 scaled up, and the felt ball garland quietly repeats three of the tree colors, which is why the whole wall feels finished without anything actually matching.
10. Pleated Beige Paper With a Whisper of Silver Glitter
Glitter is a commitment. Pleated paper with glittered edges sheds for the first week at minimum, and if you store it loose in a box it will shed all over again every December. Seal it with a light coat of matte spray fixative or a quick pass of hairspray from 12 inches away, let it dry fully, then store the tree standing in a shoebox with tissue around the pleats. Keep it out of a steamy bathroom too — paper pleats warp and never quite fold back.
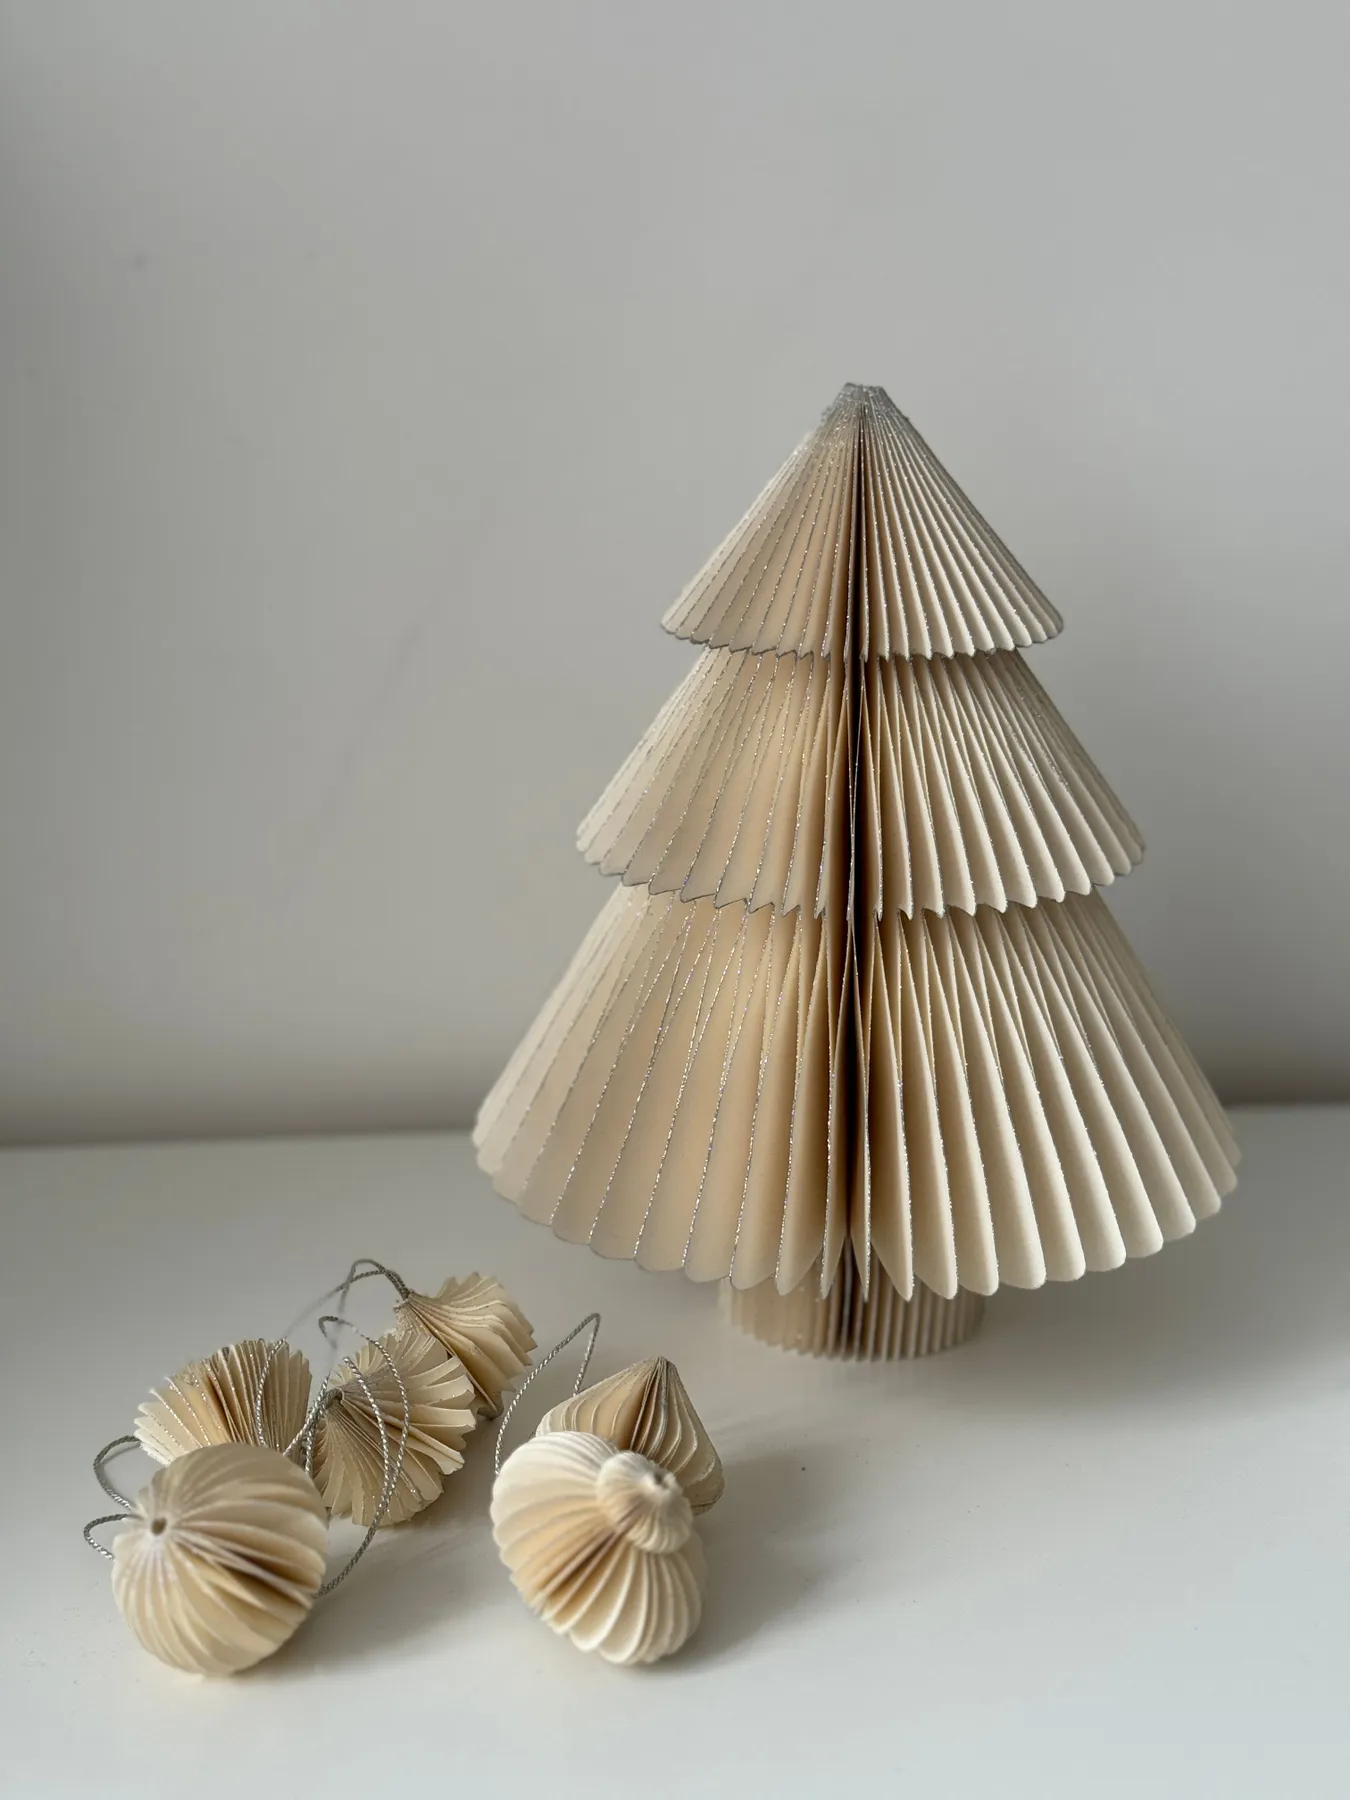
The glitter lives only on the pleat edges, and that restraint is the point. Cover the whole surface and you’d have a craft-store ornament; edge it, and the sparkle becomes a thin outline that draws the silhouette instead of the material. It’s the difference between a tree that shimmers and a tree that’s shiny. Going DIY? Run a glue pen along the edges and dip in fine silver glitter, keeping coverage to a couple of millimeters.
11. Slotted Flat-Pack Trees With Star and Candy Cane Cut-Outs
These want a surface between 36 and 48 inches wide with at least 18 inches of depth — a console, a sideboard, a wide windowsill. They read as small sculpture, so squeezing them onto a narrow entry table makes them look like leftover craft supplies instead of a deliberate vignette. If you have open floor to fill instead, go up to Idea #15; the open-frame idea scales down far better than it scales up.
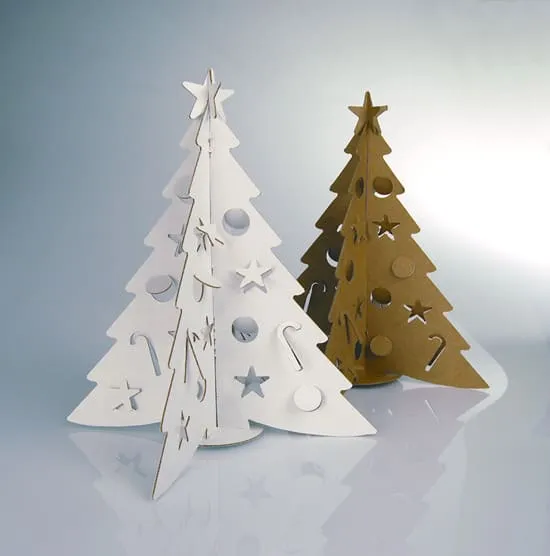
The cut-outs are the design, not the decoration. Stars, candy canes, and circles punch holes through solid panels, letting the wall color show through and turning each tree into a piece of negative-space drawing. Pairing one white with one raw golden-brown does the same trick on a bigger scale — a bright shape and a kraft shape, identical in form, totally different in mood. Two trees, one silhouette, no competition.
12. Red Accordion Trees on Cork Bases With Wooden Dowels
- Red cardstock (two 12×12 sheets per tree): $3–$6
- 1/4 inch wooden dowel, cut into 3 inch lengths: $2–$4
- Cork rounds for the bases: $4–$8
- Star toppers or small straw ornaments: $3–$6
- Glue and a bone folder: $5–$9
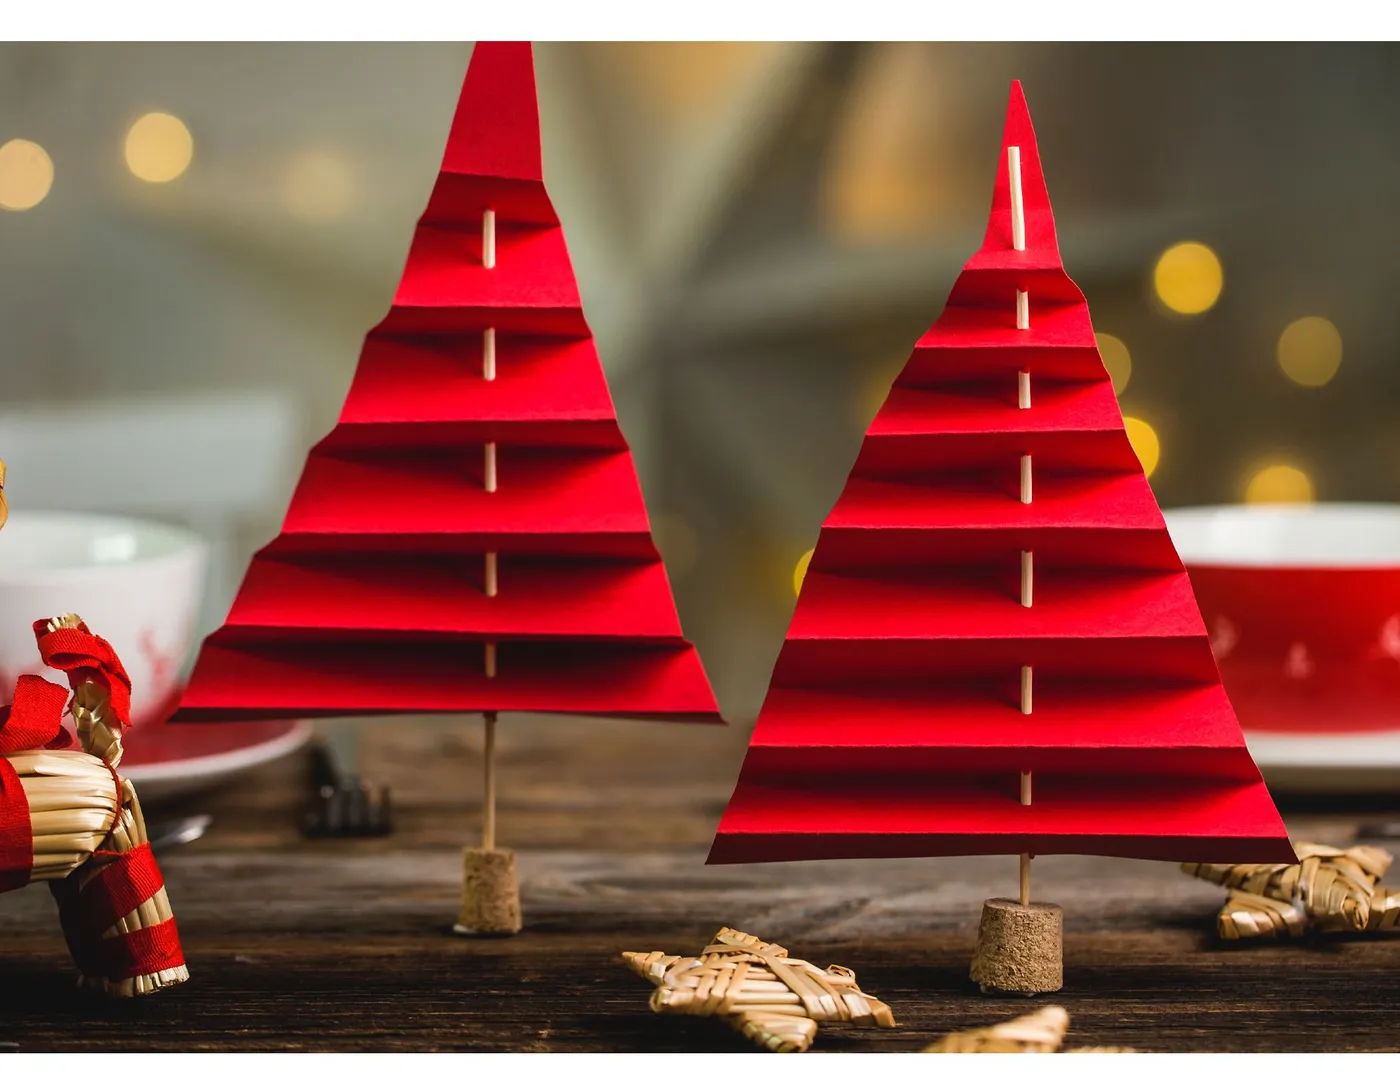
Total: $17–$33 for the pair. Harvest the dowels from an old hanging rod and you’re under $20.
Paper and heat do not get along. Keep these away from radiators, heat vents, and any window that catches direct afternoon sun — the red fades to a dusty salmon by New Year’s and the accordion folds relax and droop. They dent, too. Store them upright in a box, never stacked, and expect to reshape a pleat or two each season. That’s the trade for something this light and this cheap.
13. A Three-Tiered Cardboard Ornament With a Wooden Stem
This one costs almost nothing if you have a shipping box and a glue gun. Three graduated pleated tiers, a sliver of pale wood dowel for the stem, and a fine line of glitter outline on the edges — that’s the whole recipe. On Etsy, sets of six similar ornaments run $16 to $24, which is fair for the time involved but unnecessary if you enjoy the folding. Thrifted kraft paper and a chopstick work just as well.
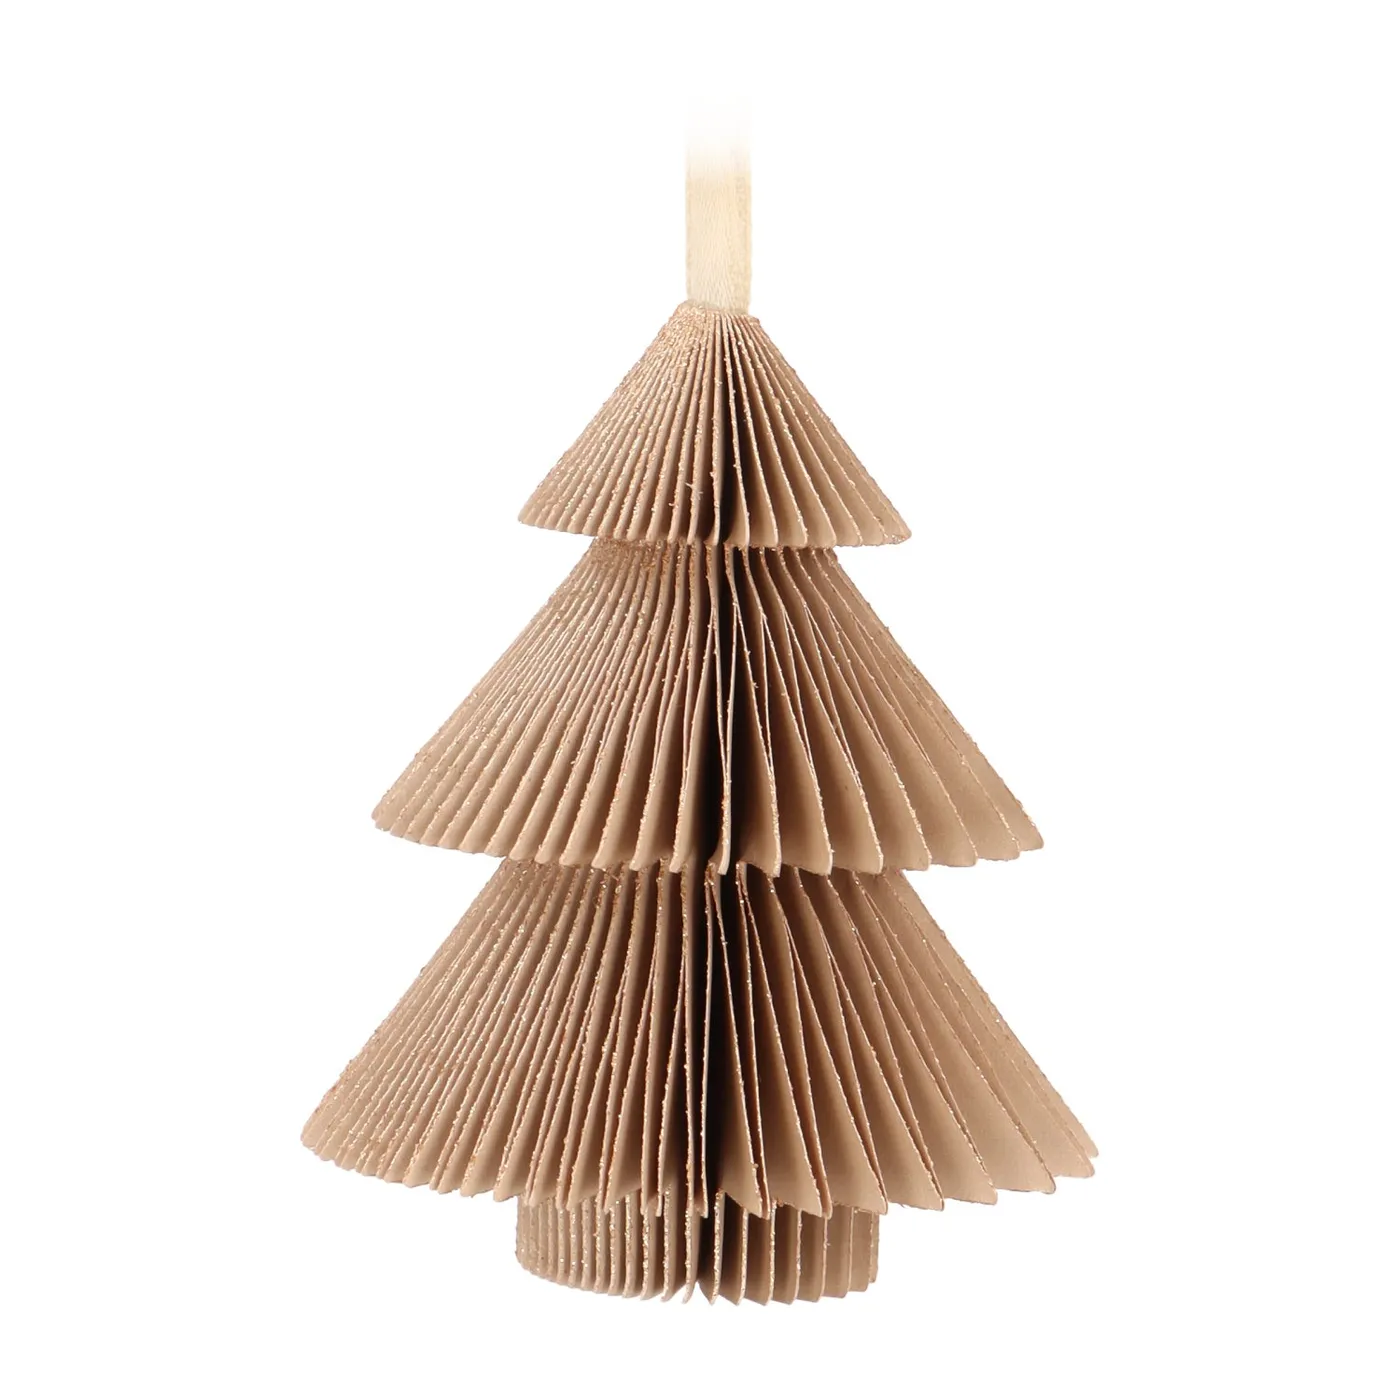
Think 80% kraft and pale wood, 15% warm white light, 5% glitter. It’s the least festive formula in this entire list, and that’s exactly why it works on a minimal tree or a neutral shelf where red and green would feel like an interruption. Swap the glitter for matte copper and it warms right up; swap kraft for black card and the identical shape turns sharp and modern.
14. Stacked Cardboard Layers Painted Green With Polka Dots
- Cut three triangles from thick double-wall cardboard, each about 30% narrower than the one below it.
- Leave the corrugated edges raw — that fuzzy brown line is half the charm.
- Paint only the front faces in two shades of green and let them dry flat.
- Dab yellow-orange dots with the eraser end of a pencil for perfect circles.
- Glue the stack and top it with a painted star.
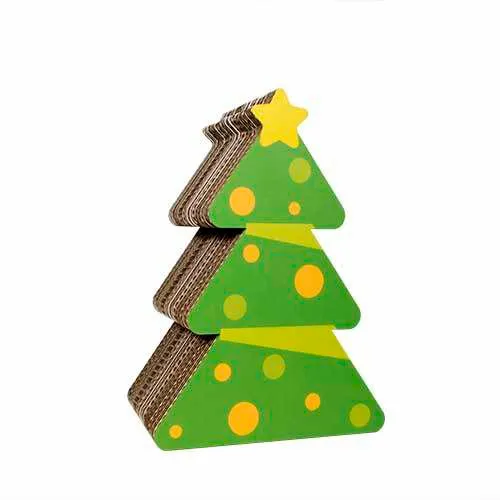
About two hours including drying time, and under $10 if the paint’s already in the garage.
This is a tabletop piece — 14 to 18 inches tall is the sweet spot for an entry console or kitchen counter, and it holds its own at that size because the stacked layers create real depth. Push it past 24 inches and cardboard starts looking flimsy rather than sculptural. If you want floor presence from the same material, look at Idea #21 instead.
15. A Spiral Wood Slat Tree Lit in Cool Blue
Blue LEDs are gorgeous in photos and unforgiving in person. Cool light makes warm oak floors and beige sectionals read yellow-green, and it drops the whole room about ten degrees in perceived temperature. If you love the blue, commit hard and keep everything else cool — grey, white, chrome, black. If your living room is warm-toned, switch to warm white LEDs and let the spiral form do the talking instead. One light temperature, one room.
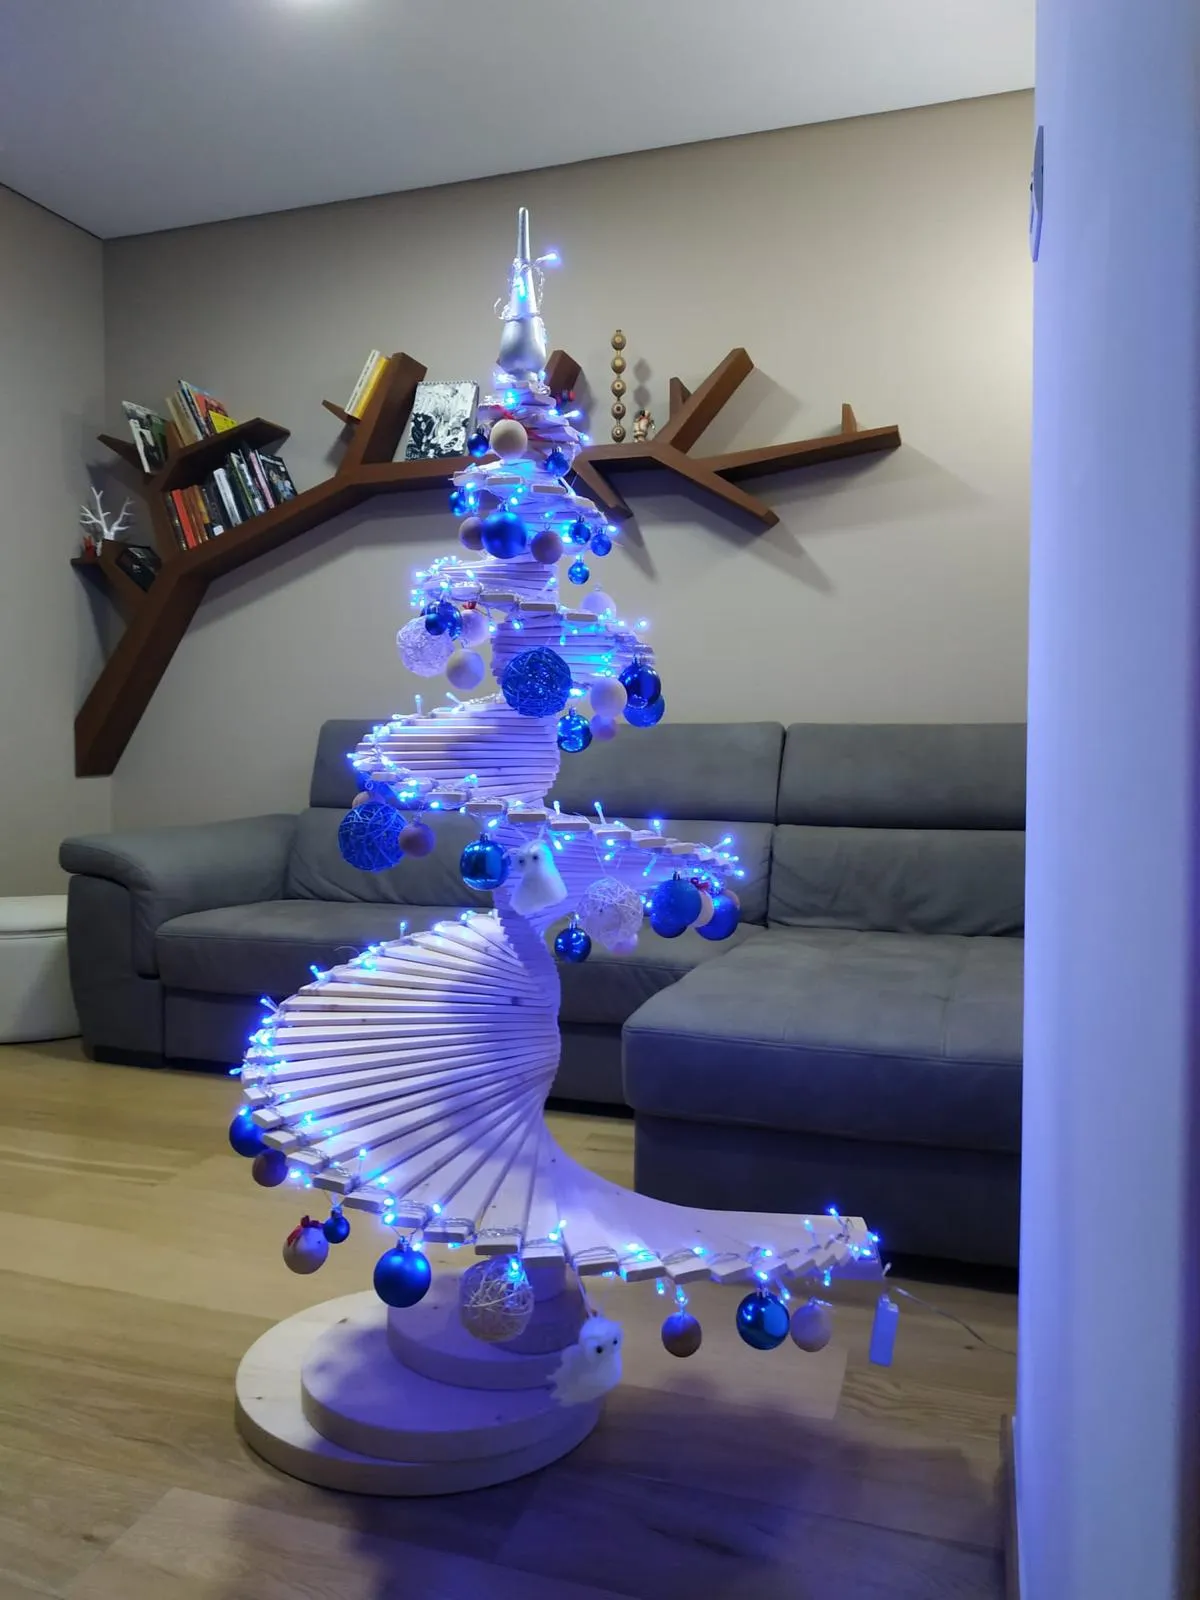
The non-green Christmas tree has been quietly gaining ground since 2023, and 2026 is the year it stopped being a novelty. Blush trees, silver trees, and open wooden frames are all part of the same shift: people are treating the tree as furniture rather than a tradition to reproduce. A spiral slat form earns its place in a modern room because it’s a shape first and a Christmas tree second.
16. Green and White Folded Paper Tree on a Side Table
Style tabletop scenes in threes with three different heights: a tall vertical element (the paper tree), a soft organic one (the evergreen sprig), and a flat horizontal one (the stack of envelopes). The tallest should be roughly one and a half times the middle and twice the shortest. That ratio is why a small grouping like this looks composed instead of scattered — and why adding a fourth object usually ruins it.
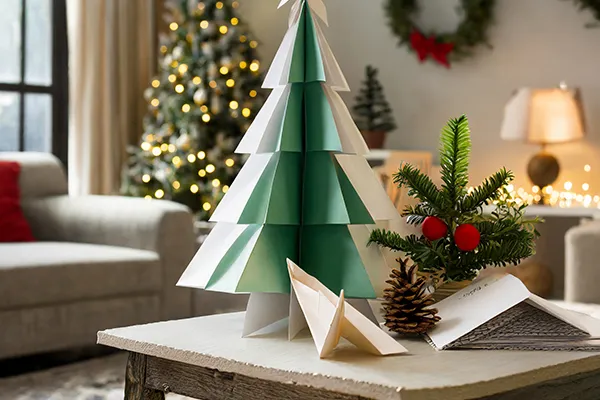
- Folded paper tree kit or printable pattern: $8–$18
- Evergreen sprig with red berries, from a grocery bunch: $6–$12
- Pinecone: free, if you take a walk
- Envelopes or a small card stack: $0–$6
Total: $14–$36. The paper tree is the only real expense, and it’s reusable for years if you store it flat.
17. Layered Fabric Trees Against an Exposed Brick Wall
Call it 50% terracotta brick, 25% dark navy and cream fabric, 15% distressed wood, 10% brass. That brick wall is the reason the dark fabric trees don’t disappear — warm terracotta behind cool navy is a contrast you can’t fake with white paint. Swap navy for forest green and the vignette goes traditional. Swap the brick for plaster and you lose half the warmth, so add rattan or cane somewhere to compensate.
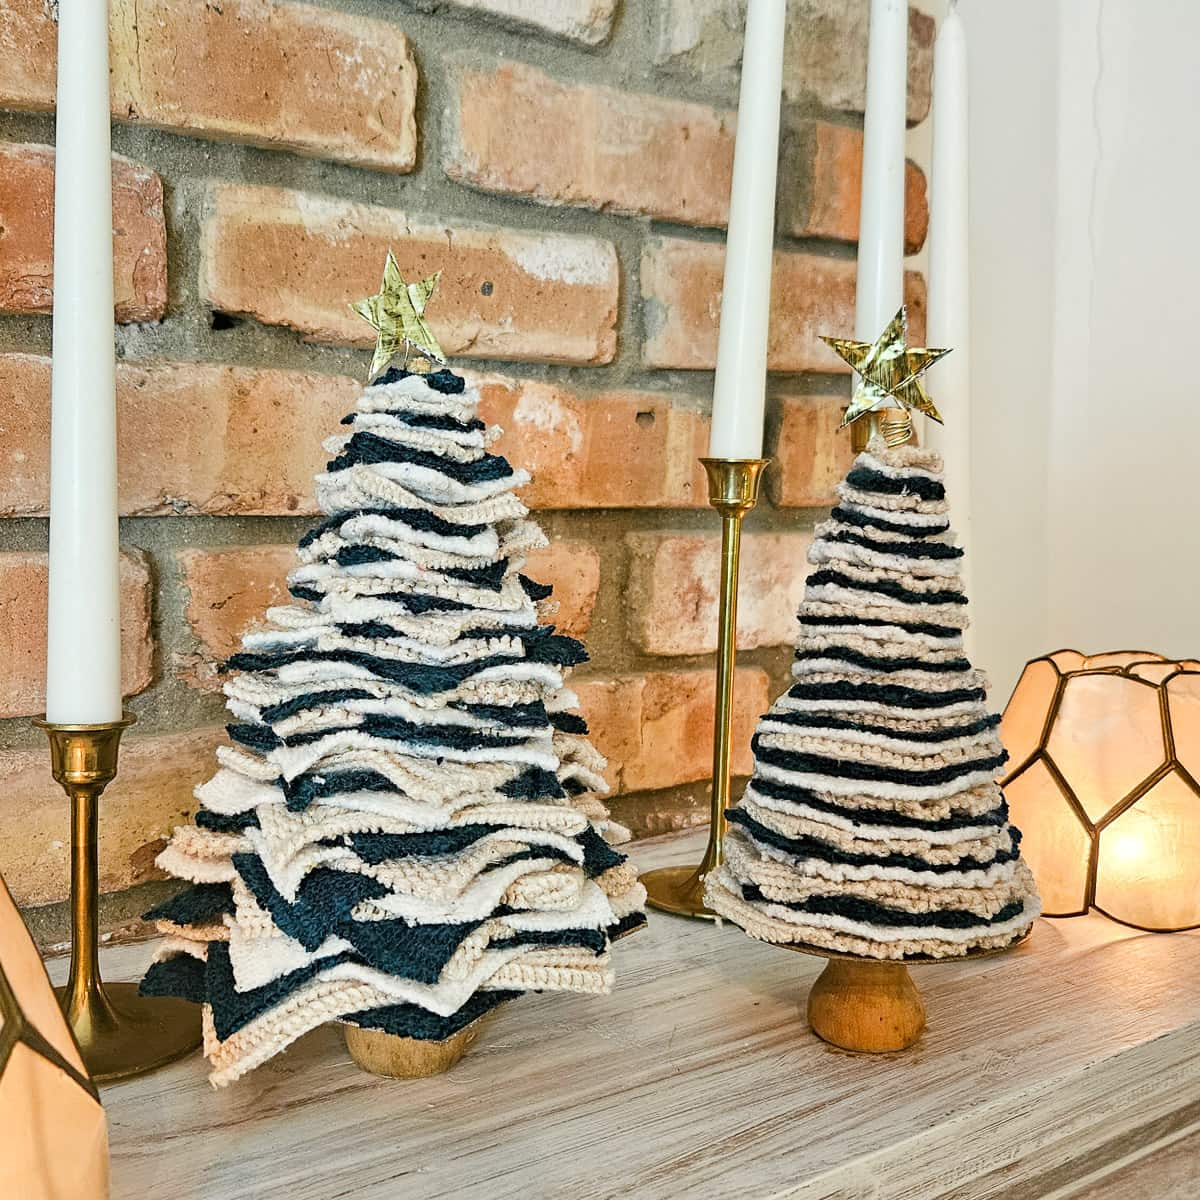
Fabric strips are the cheapest material in this entire article. A remnant bin at any fabric store will hand you navy and cream offcuts for under $10, and the trees are built from horizontal layers glued to a cardboard cone you cut yourself. The brass candlesticks are the splurge at $30 to $60 a pair new, but thrift stores and Marketplace are full of them for $6. Compare with Idea #13: identical tiered silhouette, completely different material.
18. The Kids’ Painting Project That Becomes the Tree
- Lay down a woven rug or canvas cloth — tempera is washable, acrylic is not.
- Use double-wall cardboard so wet paint doesn’t warp the layers.
- Set out one brush per child and one shared water cup, not the reverse.
- Plan 24 hours of drying time before the tree stands upright.

- Cut three graduated cardboard triangles and slot them together into a standing tree.
- Let each child claim one tier and one color.
- Paint the flat faces, leaving the cut corrugated edges bare for texture.
- Dry flat for a full day, flipping once at the halfway mark.
- Stand it up and hang lightweight ornaments from the top tier only.
19. An Interlocking Cardboard Tree the Size of a Book
- Cardboard, one shipping box: $0
- Craft knife with fresh blades: $8–$12
- Self-healing cutting mat: $12–$22
- Warm white fairy lights or a small puck light: $8–$16
Total: $28–$50 from scratch, under $15 if you already own a knife. The knife and mat are the only real purchases and they’ll outlive a decade of projects.
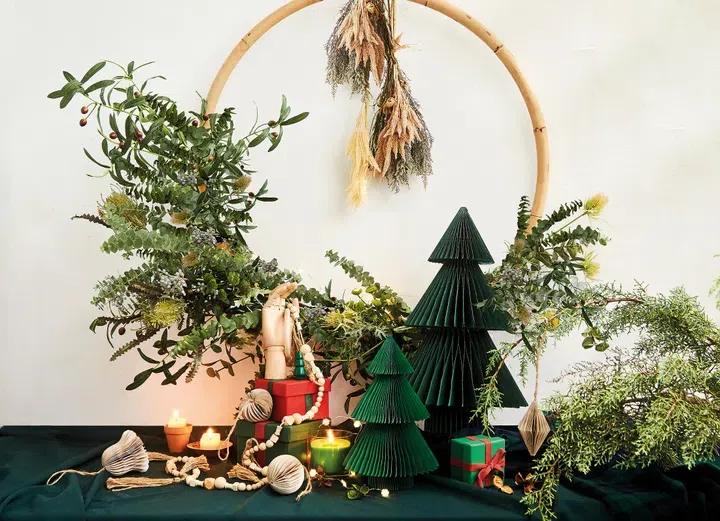
Cut the slots to the exact thickness of your cardboard and no wider. A snug friction fit is the difference between a tree that stands on its own and one that leans against the wall like it’s tired. Measure the board’s caliper — most shipping boxes run 3/16 inch — and cut your slots a hair under so the joint squeezes together instead of wobbling. Then backlight it with a single warm puck light and you get that soft halo for free.
20. A Dollar Bill Tree in a Terracotta Pot
If you want the green-and-red look without the currency question, cut 40 to 50 half-inch strips of green cardstock and fold them the same way. Total cost: about $6 for a paper pad, plus a terracotta pot from a garden center for $4. The red glitter star and the berry sprigs are the only things anyone actually notices from across the room, and those come from a dollar store for under $5.
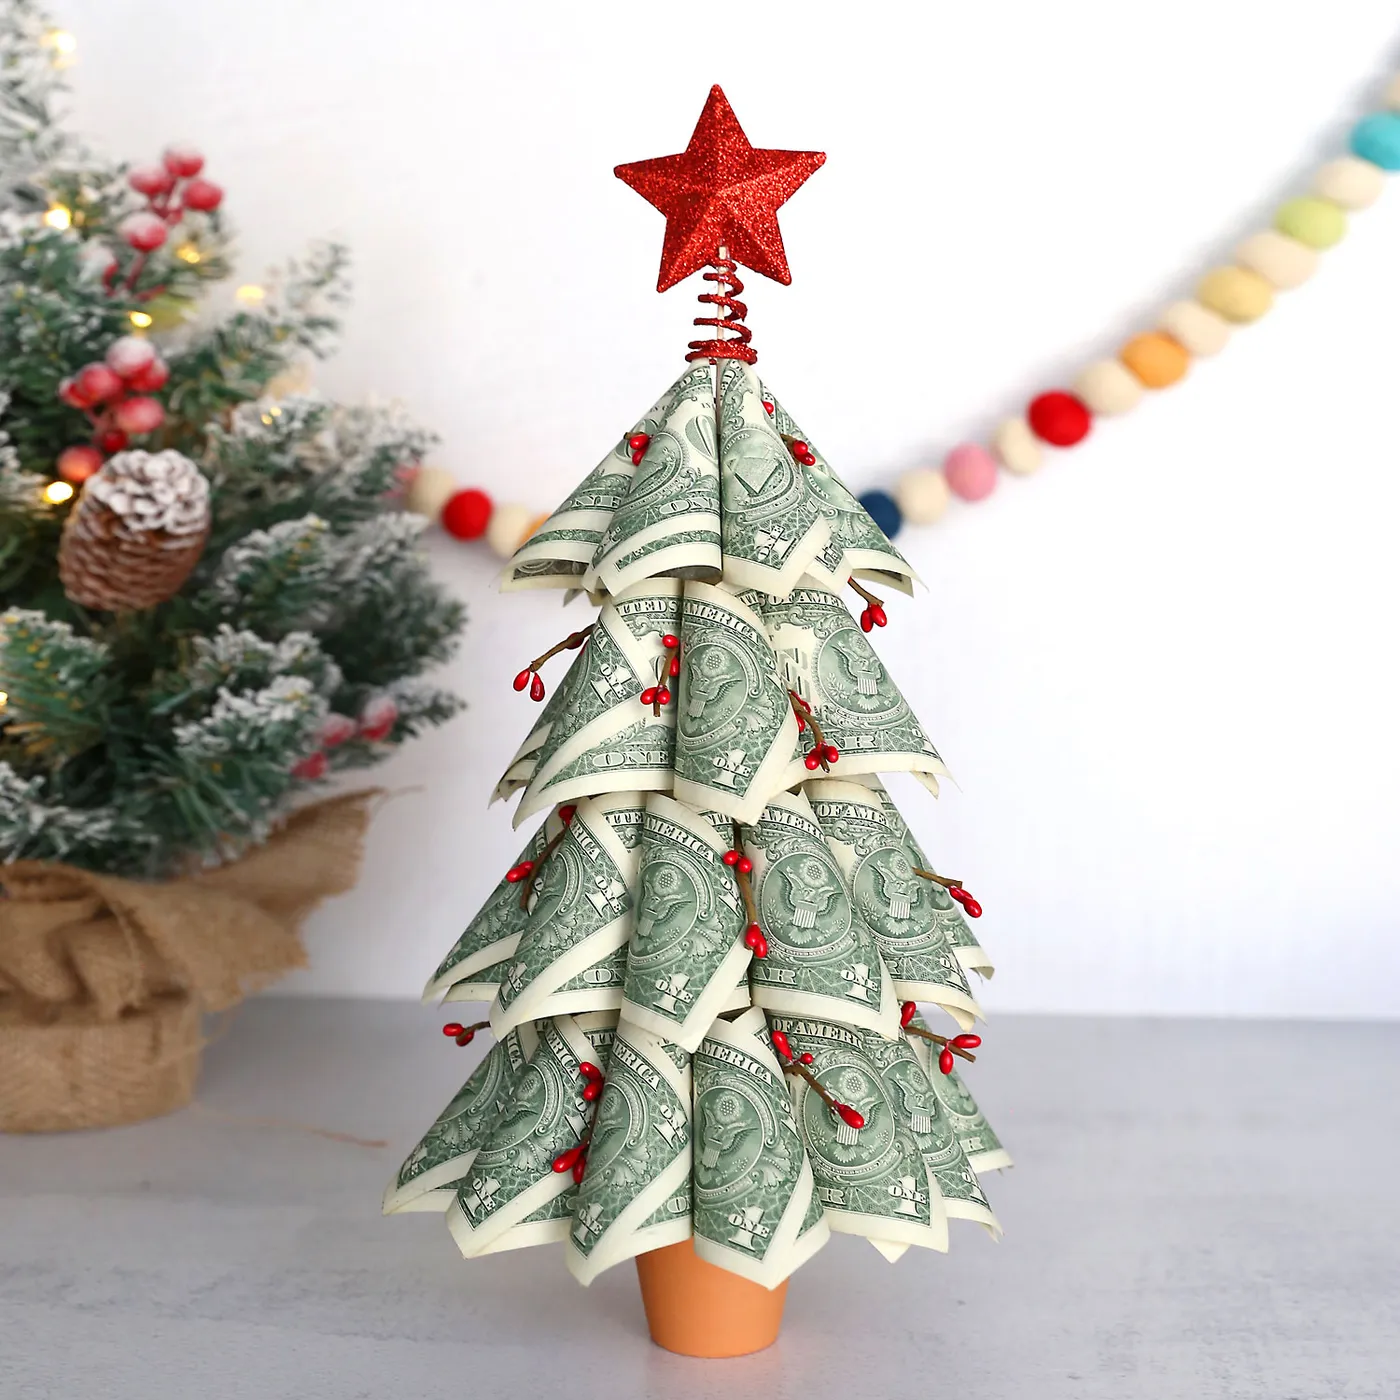
Honest note before you start folding: in the US, permanently altering currency — gluing, cutting, mounting — is legally murky, while folding and tucking is generally fine. So don’t glue through the bills; fold and tuck them so they can be unfolded later. Also, this thing is light. Keep it out of a drafty doorway, because a cone of folded paper will absolutely go over.
21. Slotted Silhouette Trees in Dark Brown and White
These are silhouettes, not volumes — the slotted panels are thin enough that from across the room you read a branching shape and almost no mass. That’s why a dark brown one and a white one can sit next to each other without fighting: they’re the same drawing in two values. Exposing the raw cardboard edge on the white tree is the detail that keeps it from looking plastic. That thin brown outline is a material signature.
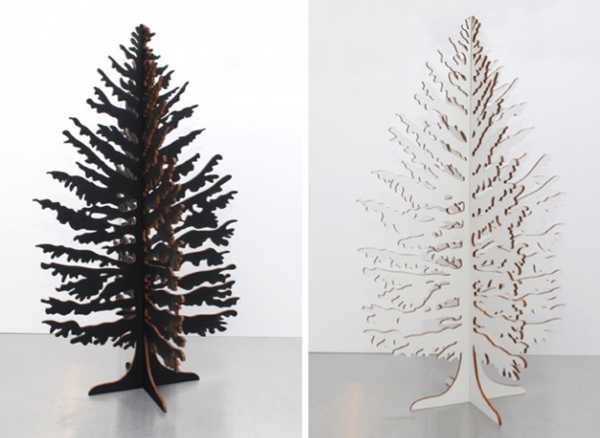
A freestanding pair needs roughly 24 to 30 inches of clear width and about 14 inches of depth to look intentional, which makes them a natural fit for a hallway, a guest room corner, or the dead zone beside a fireplace. They’re the answer for anyone in a small apartment who wants a tree but can’t surrender three feet of floor. For a tabletop version of the same idea, see Idea #11.
22. Accordion Trees Loaded With Gold and Red Ornaments
Paper trees plus string lights is a combination worth thinking through. Use LEDs only — incandescent bulbs get hot enough to scorch pleated paper, and ornament weight will start pulling the folds open over a season. Expect the white rug underneath to shed for a month and to need a good shake-out weekly. If you have a dog who thinks fuzzy white things are toys, gate this vignette off and thank me later.
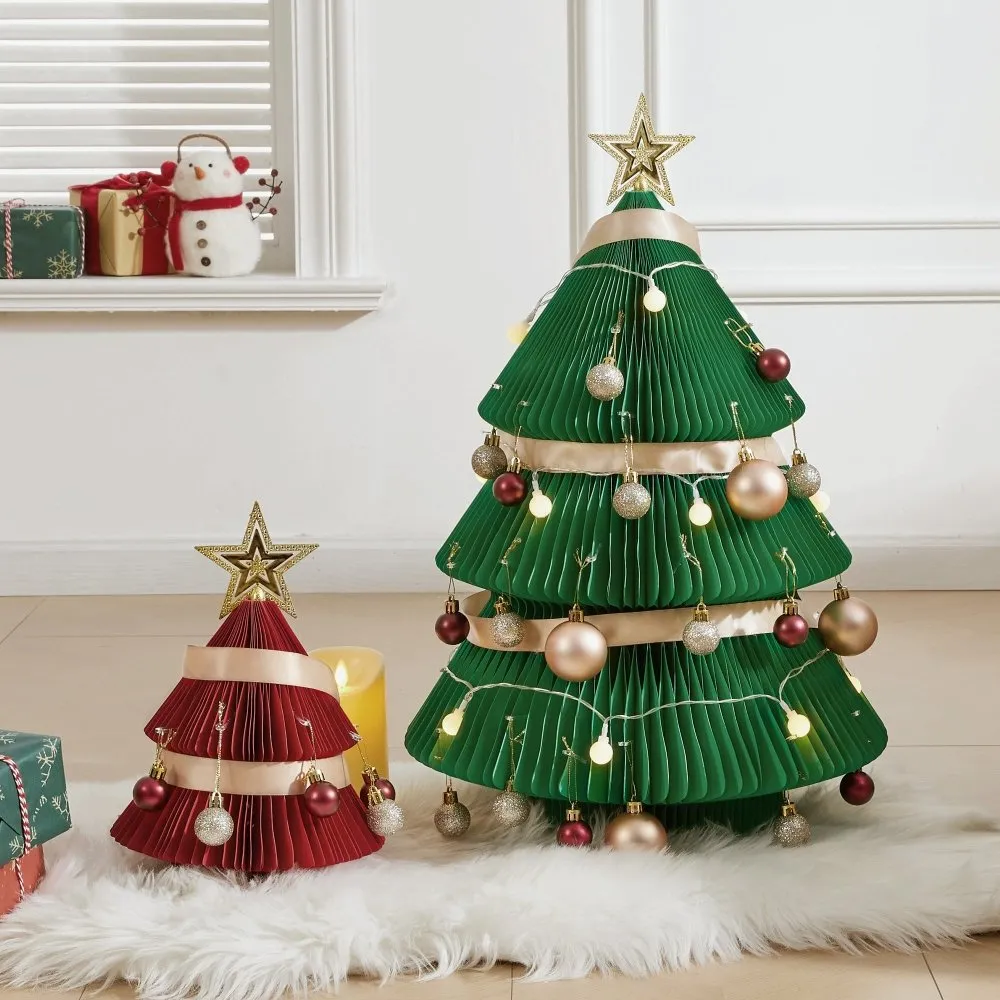
It’s the white furry rug, and I’ll defend that. Two paper trees with ornaments and lights is a nice craft project; the same two trees sitting on white shag suddenly read as a snow scene, complete with gift boxes and a snowman on the sill. The rug does the storytelling. Take it away and you have two objects on a floor. Everything else in the frame is supporting cast.
23. A Cluster of Painted Cardboard Trees on Pale Blue
- Cut kraft card into a mix of flat triangles and three-tiered layered shapes.
- Paint green foliage marks on the layered ones with a stiff brush and a light touch.
- Add white and black dots and lines to the flat ones — pins, string, tiny stars, whatever.
- Roll a small cardboard tube for each base and glue it to the back.
- Cluster them at three heights so no two tops line up.
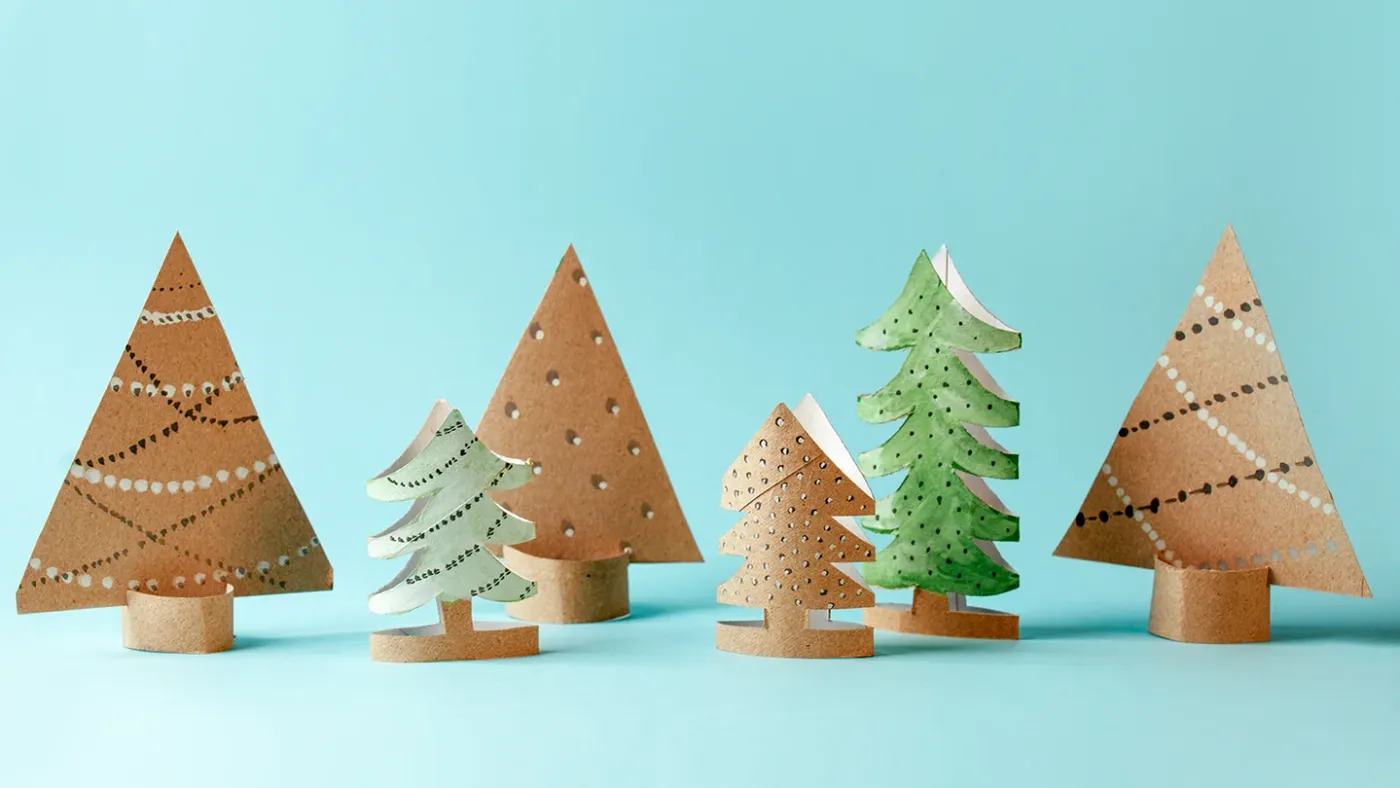
An afternoon’s work, mostly free, and the whole set fits in a shoebox.
Small-cluster styling is the 2026 alternative to one big tree, especially for renters who want something on the mantel without committing the entire living room. The pale blue backdrop isn’t incidental either — light blue has been climbing in holiday palettes for two years, and it flatters kraft brown in a way white never does. See Idea #21 for the same kraft-and-white logic at floor scale.
Twenty-Three Trees and One Empty Corner
You don’t need a twelve-foot spruce, a storage unit, or a budget that makes you wince in January. You need a box, a knife, about two hours, and the willingness to accept that the tree you folded yourself is the one guests will actually ask about. Start with the idea that fits the corner you already have and let the rest wait until next year.
📌 Save this to Pinterest now so it’s waiting for you when the decorations come out.