Still scrolling through tabletop Christmas tree 2026 photos without knowing where to start? You are not alone — the tiny tree has quietly become the hardest-working decoration in the house, especially for renters, small apartments, and anyone who wants a little festive spark without rearranging the living room. We spent serious time browsing Target, Walmart, Etsy, Anthropologie, and World Market to narrow down 29 real-room ideas, from $18 trinkets to $220 statement pieces. You will find rustic burlap, traditional red-and-gold, whimsical pink, and elegant mercury glass — plus budget and luxe versions side by side. And stay until the end — we break down the most common mistakes that can ruin these looks. This post contains affiliate links, which means we may earn a small commission at no extra cost to you. 📌 Save this to Pinterest for later — you will want to revisit these ideas.
1. Flocked Mini Tree with Burlap and Birch Candles
What makes this arrangement feel expensive is not the tree itself — it is the way the flocked white branches echo the birch candle holders and the natural wreath. The palette stays tight: warm white lights, burlap brown, pine green, and a few red berries. That repetition of texture, not color, is why it reads calm instead of cluttered. The burlap wrap also visually widens the base, so a skinny tabletop tree looks grounded rather than tippy.
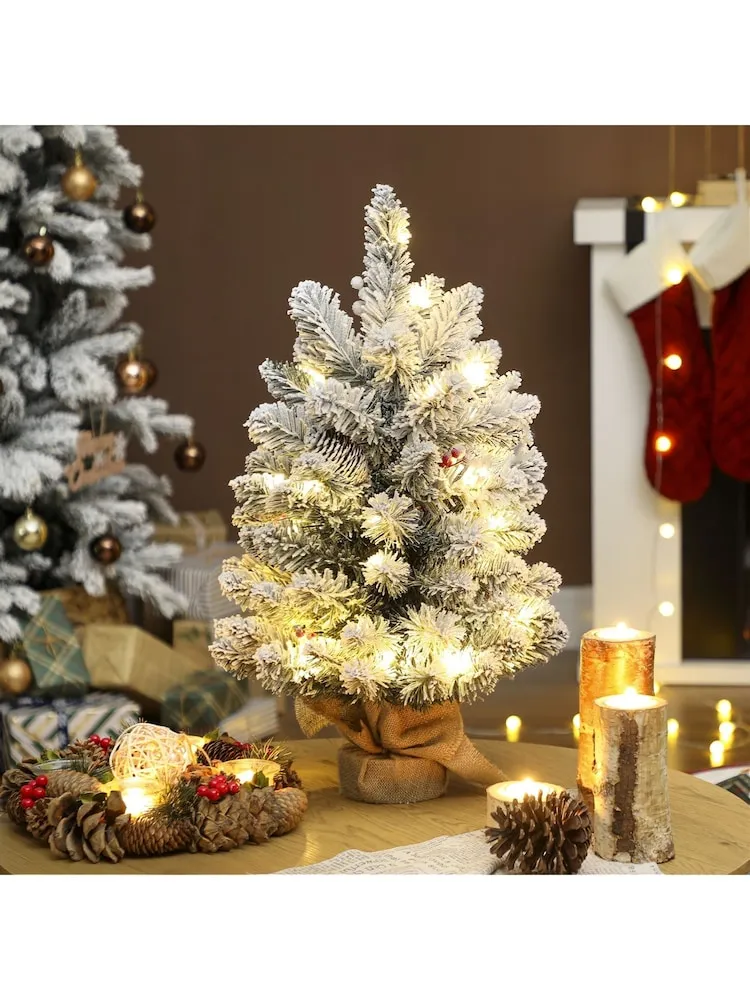
Keep the flocking from looking like a dusting of powdered sugar by placing the tree so its lit side faces the room’s main seating angle, not the front door. An 18- to 24-inch tree usually needs about 12 inches of clearance behind it, especially if the wall is dark. And swap the usual red-and-green ribbon for a 3-inch burlap strip wrapped twice — it costs about $6 and instantly makes a $20 tree look intentional.
2. Pre-Lit Evergreen on a Grey Paneled Wall
A pre-lit tree is the easy button, but the built-in lights are often cooler and sparser than the photo suggests. Before you commit, plug it in at the store or check the color temperature in reviews — 2700K to 3000K reads warm; anything above 3500K can look blue against a grey wall. Also check the stand: dark green metal disappears against the tree, but it can scratch a light wood table if you drag it. For a smaller side-table version, compare Idea #5.
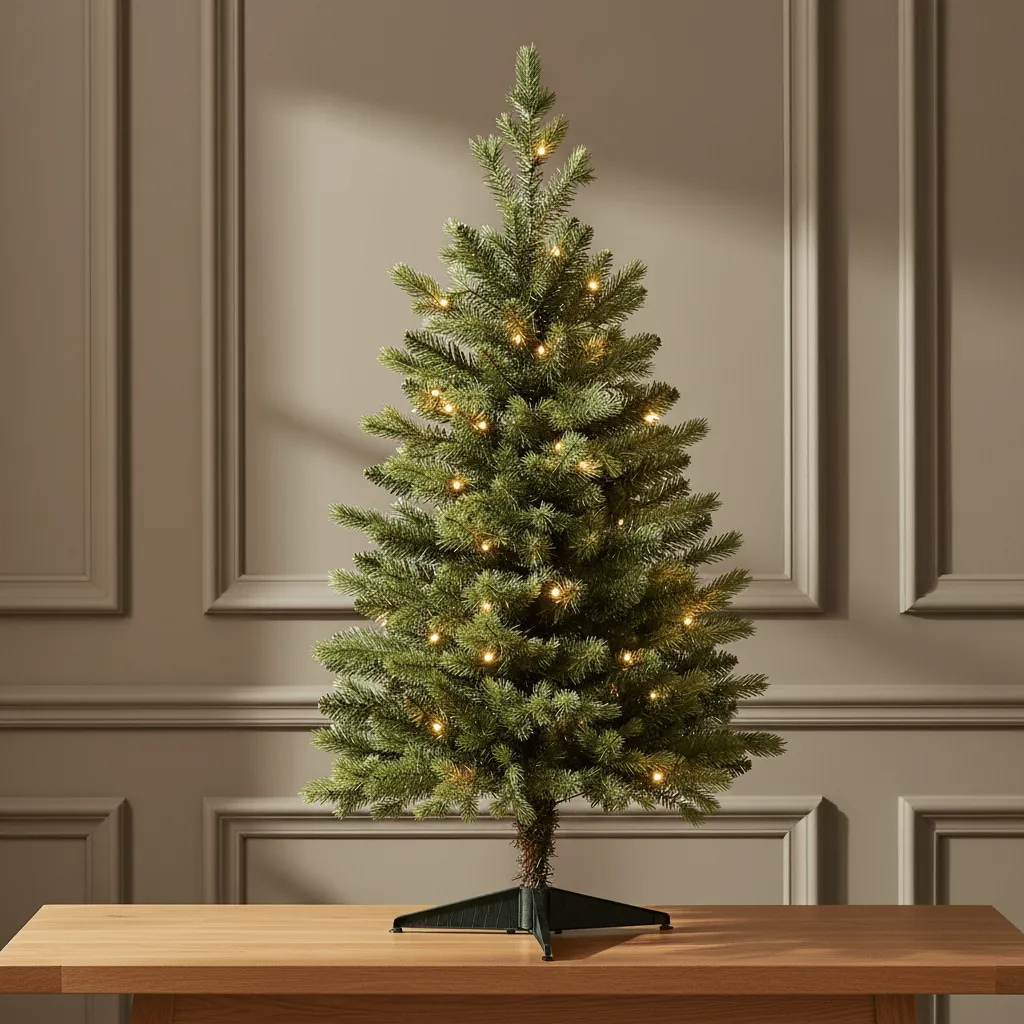
This look is roughly 70% quiet neutral, 20% evergreen, and 10% warm light. The grey paneled wall does the heavy lifting, so the tree does not need much decoration. If your wall is warmer — cream, oatmeal, taupe — switch the tree to a frosted or flocked version to keep the same soft contrast. The formula still works with a black metal stand instead of green; just repeat that black in one small frame or candle holder nearby.
3. Berry-Lit Flocked Tree in a White Cylinder Pot
This scene looks like a boutique hotel lobby, but most of the cost is in the styling, not the tree.

- Flocked mini tree: $18–$35
- White cylinder pot: $8–$20
- Warm fairy lights: $6–$15
- Red berry stems: $5–$12
- Star cookies, pinecones, ribbon: $10–$18
- Total: $47–$100
Budget alternative: use a plain white paint can or ceramic crock from a thrift store and skip the cookies for store-bought shortbread.
Use odd numbers of berry stems — three or five, not four — and push them into the tree at different depths. Berries that sit only on the surface look like a craft project; berries tucked 2 to 3 inches inside the branches look grown-in. For the cookies, place them on a small white plate just off-center so the tree remains the star.
4. Sleigh-Ride Tabletop Tree with Red and Gold
The red metal sleigh base is the entire personality of this tree. Remove it and you have a nice flocked tabletop tree with red and gold ornaments — pretty, but forgettable. The sleigh adds narrative, scale, and a hit of glossy red that makes the brick wall and dim mantel feel intentional. If you splurge on one element here, make it the base, not the ornaments.
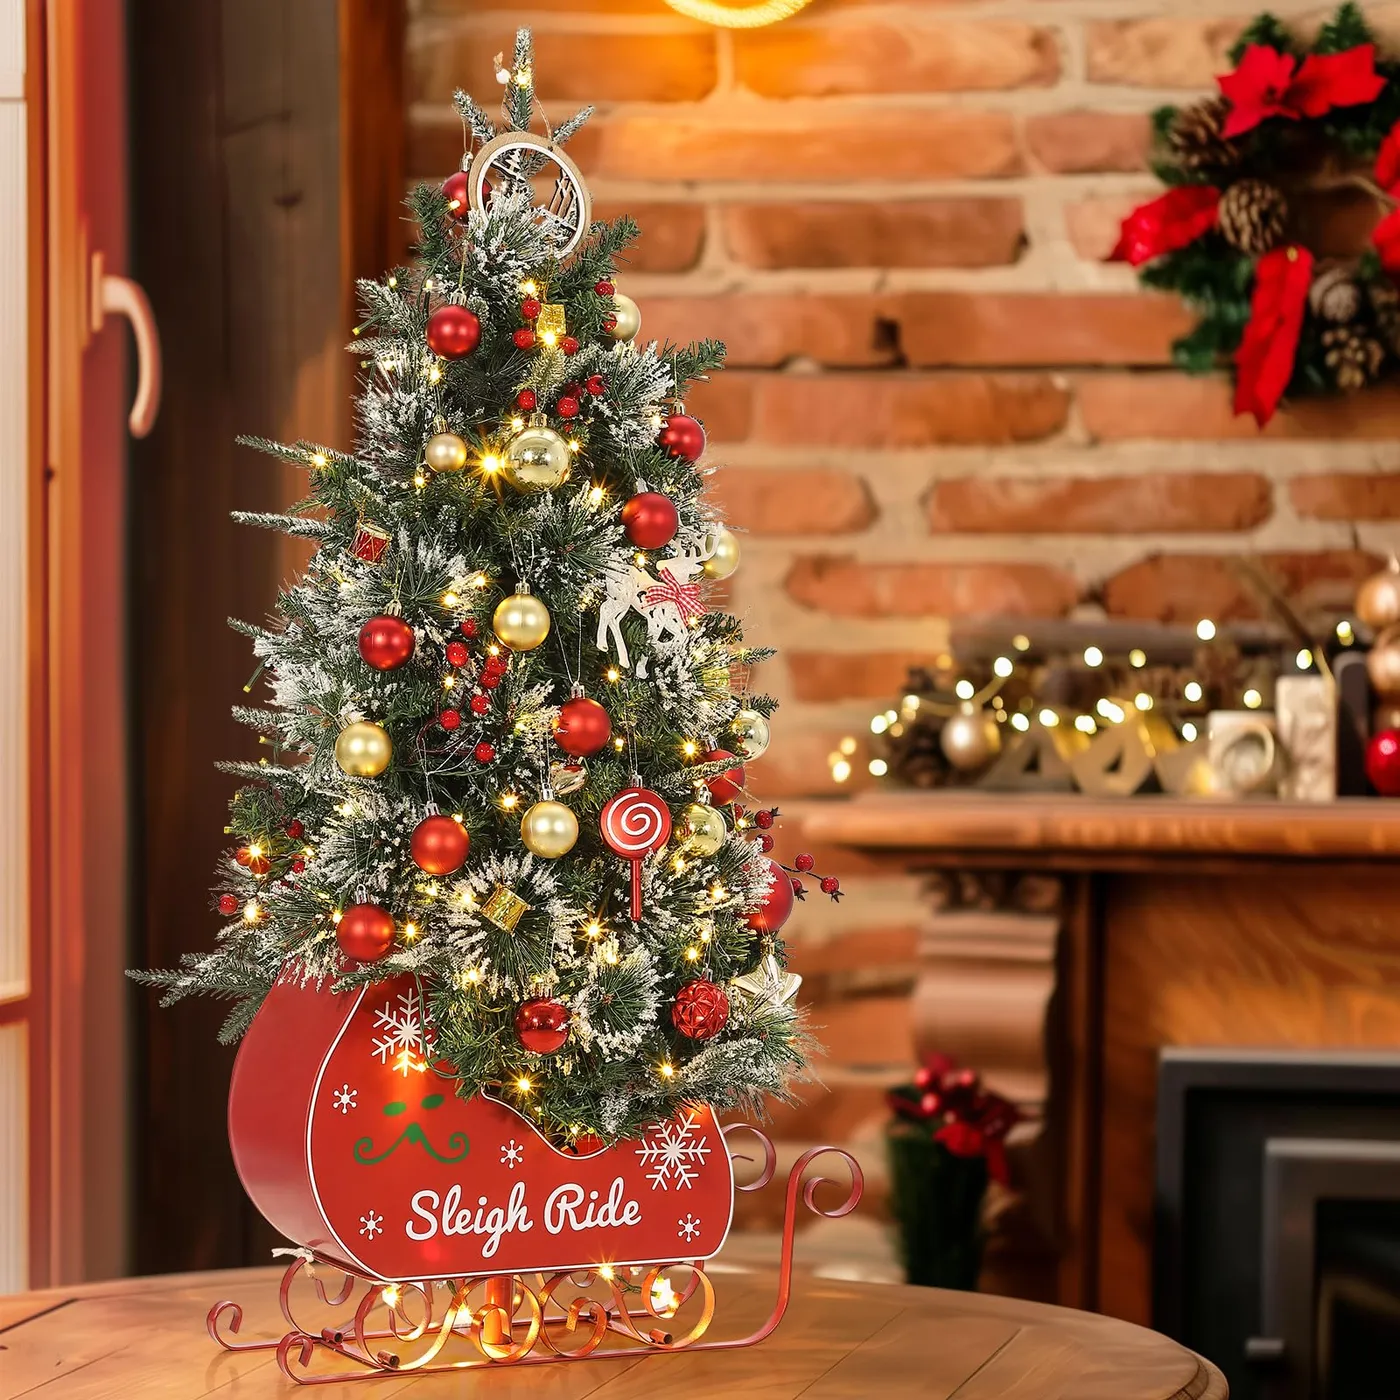
The sleigh base is part of a bigger 2026 shift toward tabletop trees that look like miniature scenes rather than scaled-down Christmas trees. Pinterest searches for vintage Christmas containers and tree-in-a-bucket styling keep climbing because people want decor that reads as collected, not catalog-bought. This one has staying power: a red sleigh works with traditional, cottage, and even maximalist rooms.
5. Frosted LED Tree Beside a Teacup
Flocked trees shed. Even good ones drop tiny white fibers for the first week, so avoid placing one where you eat or where dark upholstery lives. A quick pass with a hair dryer on cool — from at least 12 inches away — helps set the flocking before you decorate. The marble-look side table needs a coaster under the teacup and a soft felt pad under the tree base to prevent scratches.
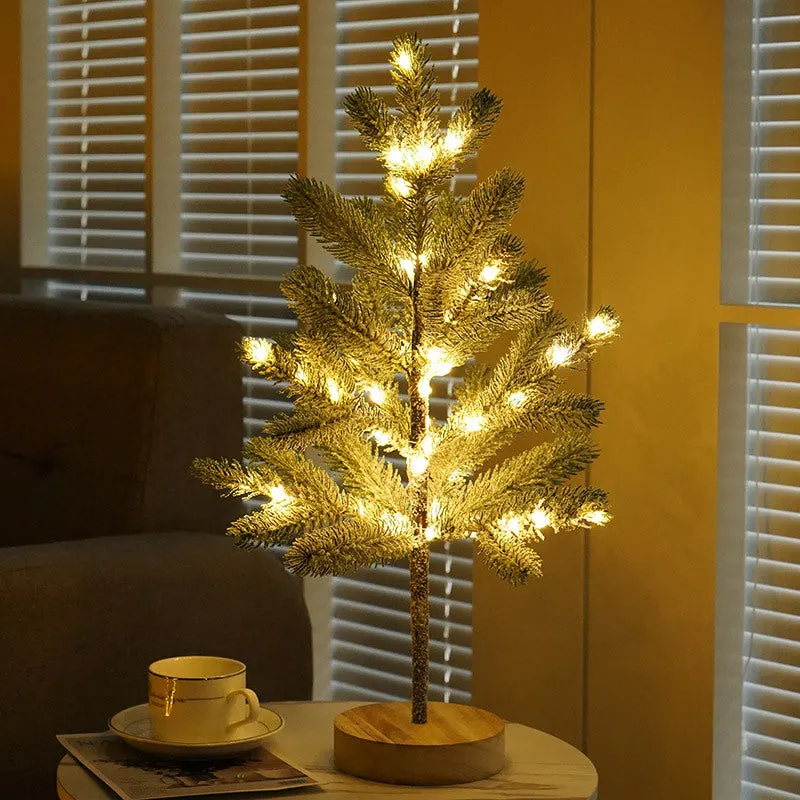
This setup works best on a round side table that is 18 to 22 inches in diameter with a 24- to 30-inch tree. You need at least 6 inches between the tree and the edge of the table so it does not feel like it might topple. In a small apartment, pair it with a slim floor lamp instead of a second side table; compare with Idea #12 for a fuller cluster that needs more surface area.
6. Heavily Flocked Tree with Lit Burlap Base
To get that lit-from-within base without a fire hazard:
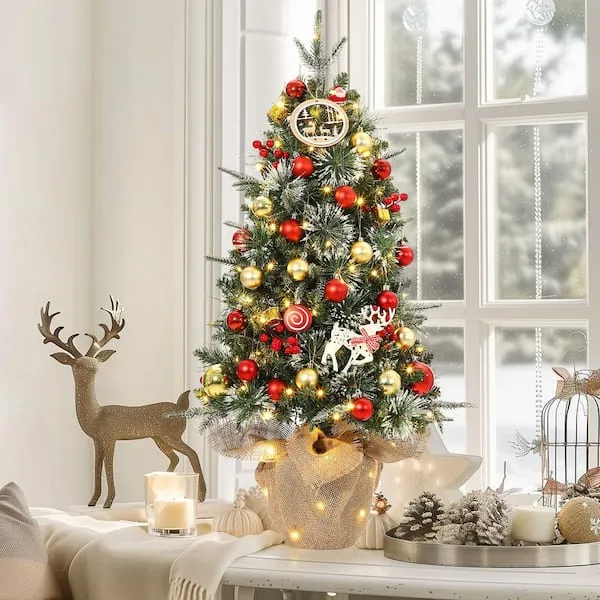
- Wrap the base in a 10-inch-wide burlap strip, starting at the bottom and overlapping by half.
- Use battery-operated micro lights on a timer, not plug-in lights.
- Tuck the battery pack behind the tree, not under the burlap.
- Secure the top edge with a single safety pin hidden at the back.
Time: 15 minutes. Cost: $12–$25.
The lit burlap base solves a common tabletop-tree problem: the bottom third usually looks empty. By adding a second light source down low, the whole arrangement gains depth and the gold reindeer and frosted pinecones catch a soft glow. The red-and-gold ornaments also repeat the warmth of the lights, so the tree feels cohesive instead of decorated in layers.
7. Chinoiserie Planter Tree with Navy Velvet Ribbons
Clip-on candles should sit at the outer tips, not deep inside, so they read as candlelight rather than dots. Space them about 6 inches apart and angle each clip slightly upward. For the navy velvet ribbons, cut 8-inch lengths, notch the ends, and tie them in a simple overhand knot — no bows. The flat knot keeps the chinoiserie planter from looking too sweet.
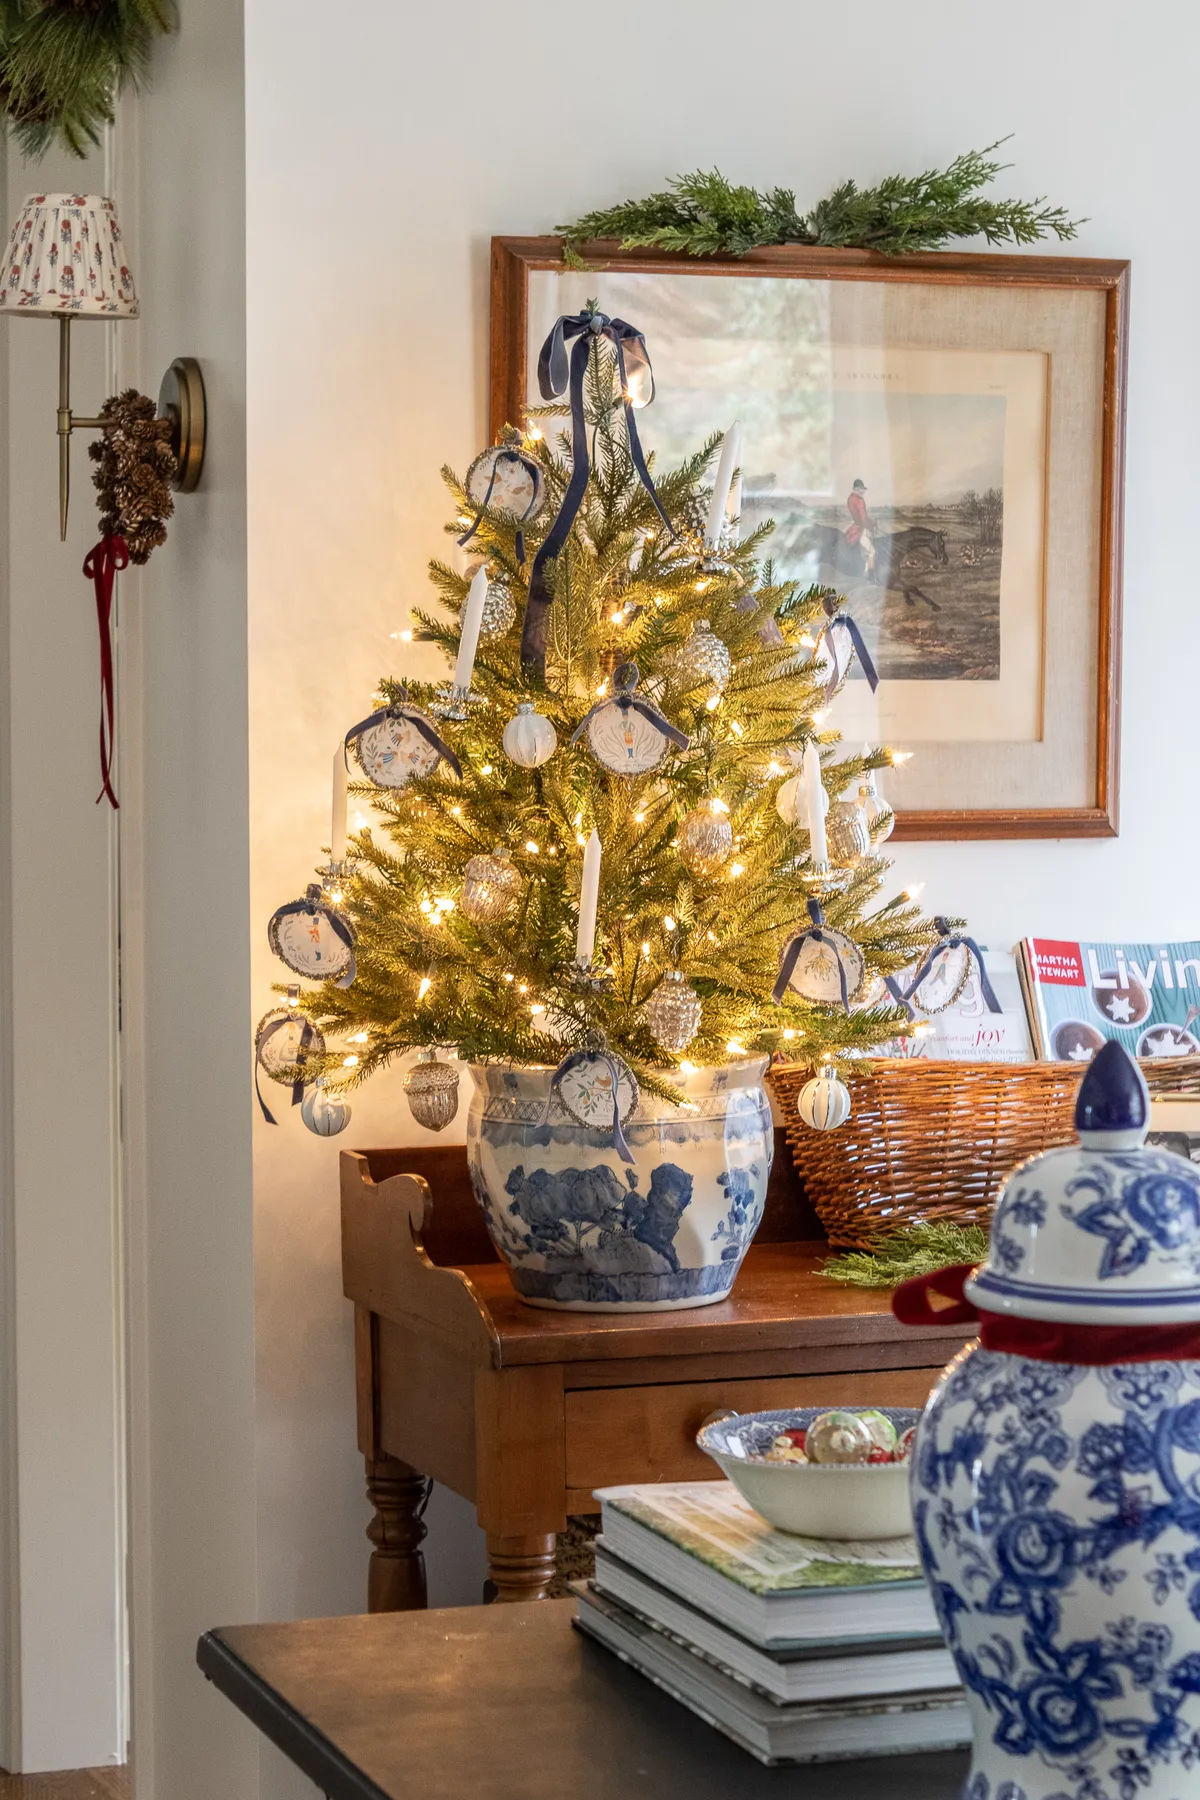
The formula here is 55% green and white, 25% navy, 15% warm gold, and 5% wood tone. The blue-and-white planter is the anchor, so the ornaments stay mostly clear or metallic. Swap the navy ribbons for chocolate brown velvet and the look becomes warmer and more cottage; swap them for black and it turns graphic and modern. Keep the painting behind it low-contrast so the tree stays the focal point.
8. Tiered Tray of Laser-Cut Wooden Trees
The nativity cutouts inside the wooden trees are the detail that makes this tray worth a second look. Without them, you have a cute farmhouse tray with trees; with them, each tree becomes a tiny story. That is the difference between decor that fills space and decor that rewards a closer look — and it is why the distressed white tray needs to stay visible, not buried under garland.
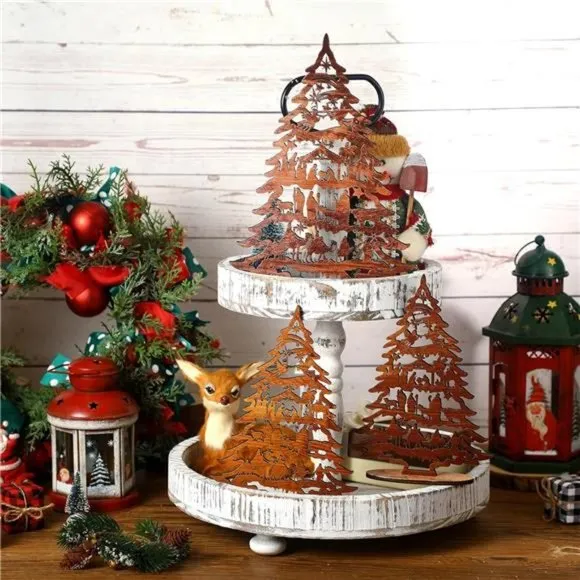
You can build this for under $40. Use a two-tiered tray from Target or Walmart ($20–$30), then look for laser-cut wood ornaments at Etsy or a craft store and glue them onto simple wooden tree cutouts from Dollar Tree. The red and green lanterns can be thrifted; the garland is a basic pine swag with a few red ornaments added.
9. Pink Bottle-Brush Tree with Candy-Colored Baubles
Pink bottle-brush trees are having a moment because they let people do Christmas without committing to red and green. In 2026, the trend is less kids’ room and more collected whimsy — think candy colors mixed with natural wood and white snow tips. It is also a natural fit for people who keep a neutral year-round palette but want a small hit of joy on a shelf.
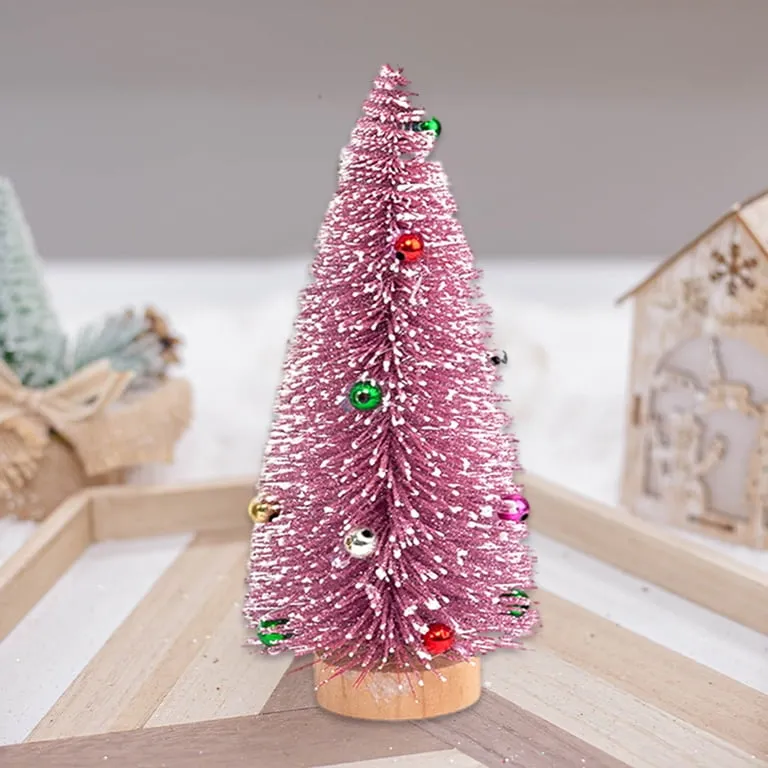
Skip the boutique bottle-brush price. A plain pink bottle-brush tree from Target or Walmart runs $8–$18, and a bag of tiny colorful ball ornaments is about $5. Use a wood slice or a small round cutting board as the base instead of a specialty tray. The whole look can come in under $30, which makes it easy to try a playful color without a big commitment; see Idea #3 for the same mini-tree scale in a traditional palette.
10. Hot-Pink Tree on a Spindle Chair
This is a look that needs a little restraint. Hot pink plus multicolored lights plus a unicorn stocking plus pom-poms can tip into chaos fast. Keep the tree small — 18 to 24 inches — and let the aqua wall be the only other strong color. Also check the chair: a spindle-back can scratch a painted floor, and a lightweight tree on a seat cushion can slide. A piece of museum putty under the base solves both.
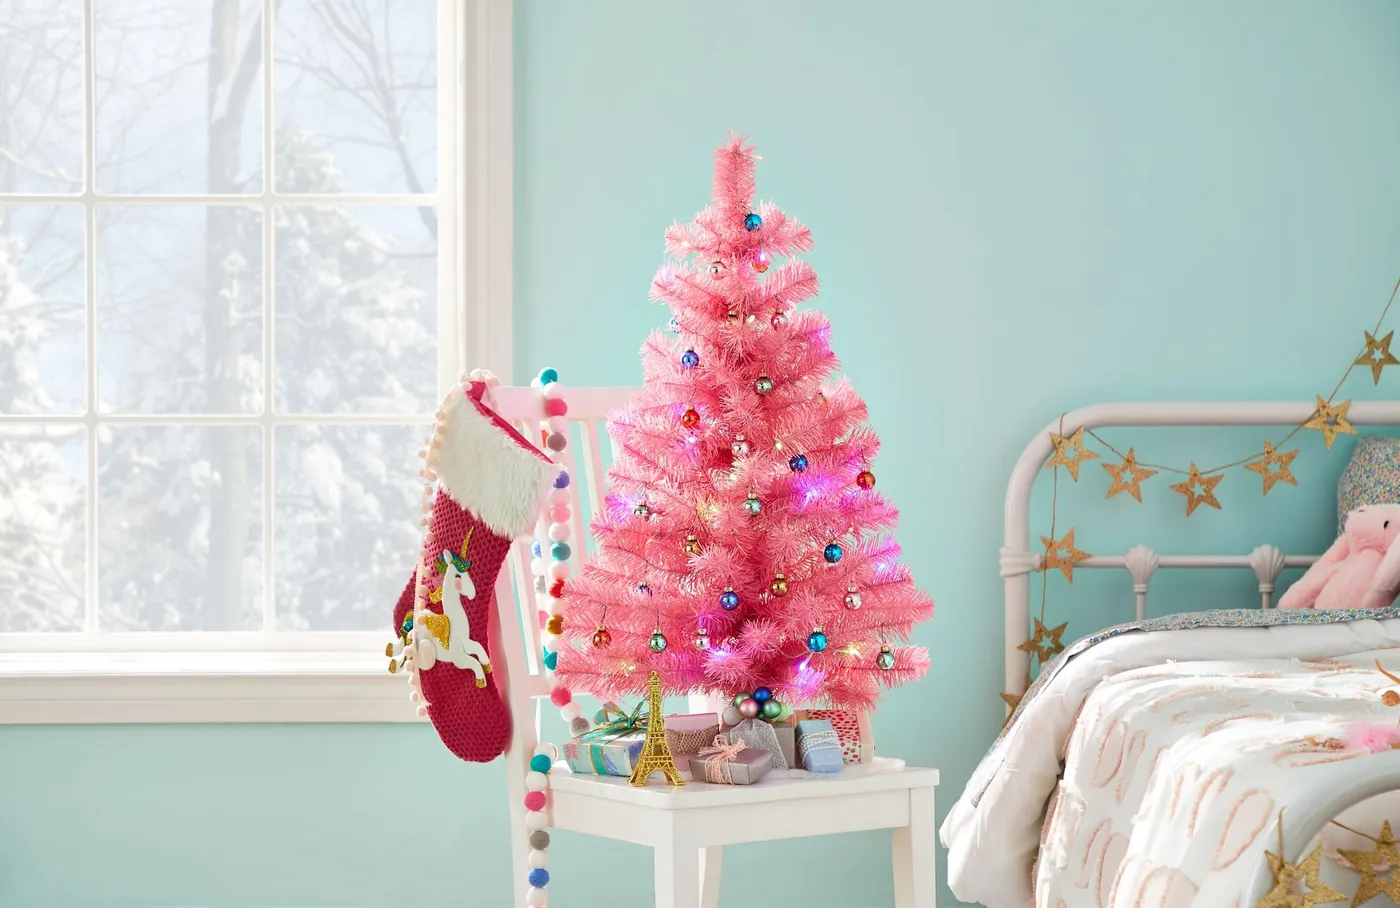
The magic here is color blocking, not decoration. Hot pink and light aqua sit opposite each other on the color wheel, so the tree pops without needing more ornaments. The white chair acts as a visual breather, and the red stocking adds a third accent in a small dose. It is a good lesson for any tabletop tree: one strong color pairing beats five random ones.
11. Green Mercury Glass Trees on a Dark Console
The arched gold mirror is what turns two shiny trees into a scene. It reflects the candlelight, doubles the glow, and gives the green mercury glass a deeper, more expensive-looking color. Without the mirror, the trees are just nice objects on a dark surface. With it, the whole console reads as a layered vignette — and that is the part guests remember.
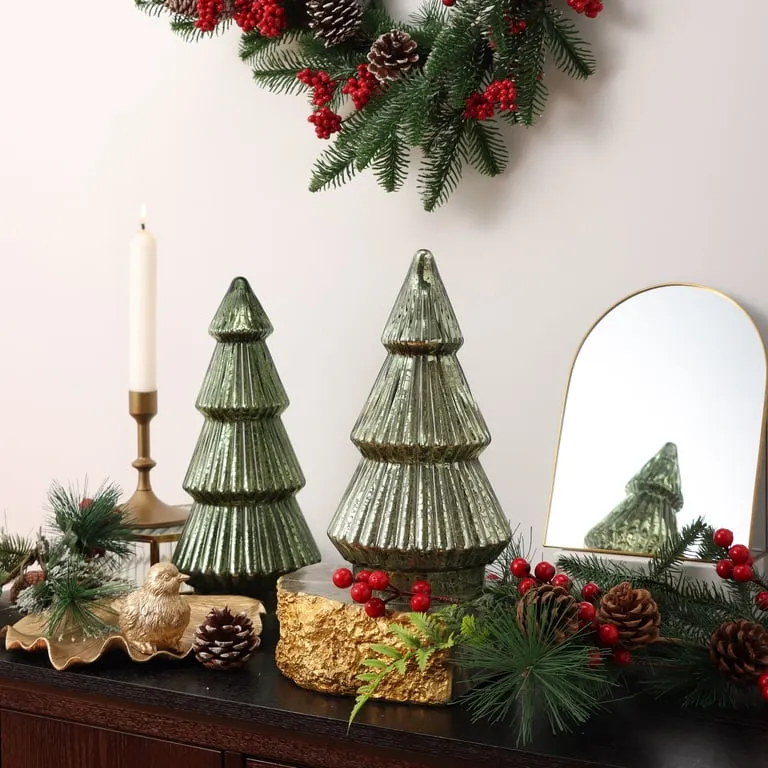
This works on a console that is at least 42 inches wide and 14 inches deep. The mirror should be no more than 36 inches tall so it does not compete with the trees. In a narrow entry, use one tree instead of two and hang the mirror vertically. For a similar layered look on a smaller surface, see Idea #19.
12. Three Burlap-Base Trees on a Wood Panel
This is a 60/30/10 formula: 60% natural burlap and wood, 30% deep green, 10% red accents. The three trees vary in height, which keeps the group from looking like a matching set. If your wood panel is lighter, lean into cream and kraft paper instead of red; if it is darker, add a single white candle to lift the arrangement. The burlap bases are the common thread.
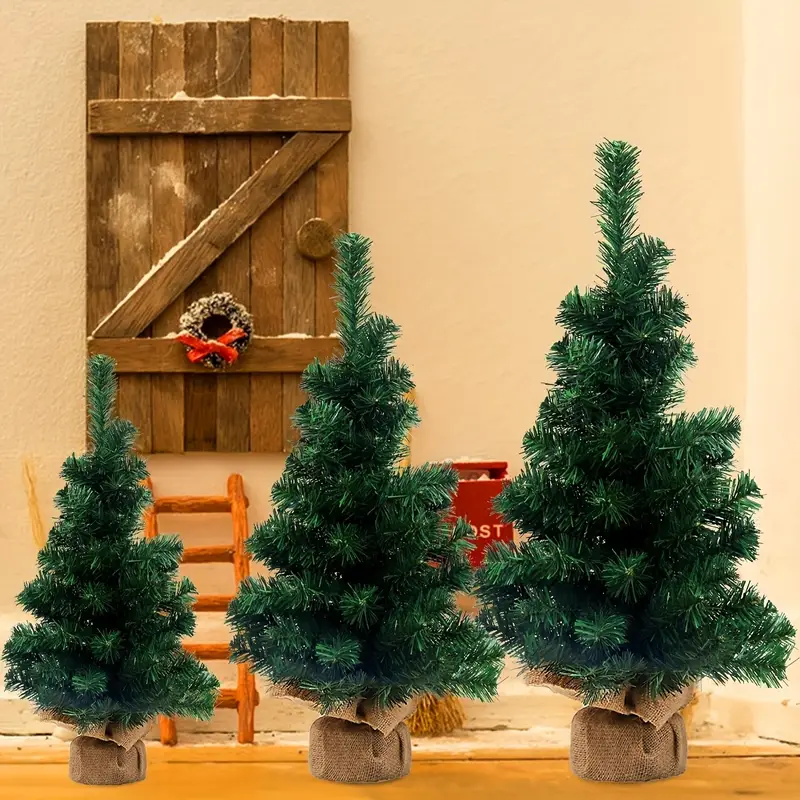
Check these before you style the trio:
- Measure the panel width — you need at least 30 inches for three trees to breathe.
- Confirm the surface is level; burlap can hide a wobbly base but not a tipping tree.
- Check the nearest outlet or use battery lights.
- Decide whether the mini wreath hangs above or beside the group.
13. Acorn-and-Gold Tree on a Pink Tablecloth
The light pink tablecloth keeps the deep green tree from feeling heavy. Gold baubles and acorns add warmth, while the white taper candles give the table a vertical line. It is a classic holiday table formula — green, gold, white — but the pink cloth makes it feel fresh and a little romantic. The green patterned stemware repeats the tree color without matching it exactly.
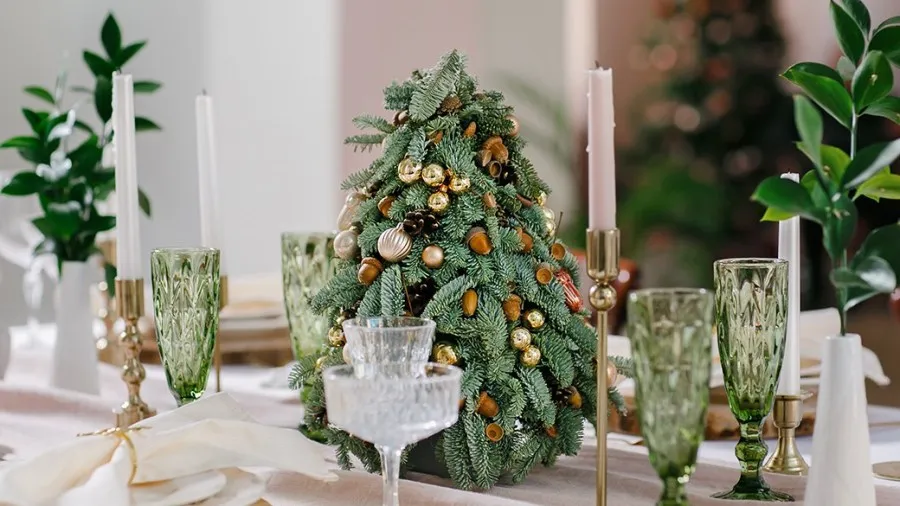
Use acorns as filler, not focal points. Hot-glue a small wire loop to the cap and hang them 3 to 4 inches inside the branches so they peek out. For the taper candles, choose 10- to 12-inch tapers in brass holders and keep them at least 8 inches from the tree. That distance keeps the flame away from the needles and makes the table feel less crowded.
14. White-and-Silver Tree on a Log Slice
A neutral tabletop tree is mostly a styling exercise, so you can keep it affordable.

- Small artificial tree: $15–$30
- Warm white battery lights: $6–$12
- Cream fabric bow: $4–$10
- Clear snow baubles and silver spheres: $12–$25
- Pinecones and wood slice: $8–$18
- Total: $45–$95
Budget alternative: use a cake stand instead of a log slice and plain glass ornaments filled with a pinch of faux snow.
Silver ornaments show fingerprints and dull over time, especially in a dry room. Wipe them with a microfiber cloth, not a paper towel, and store them in a zippered bag with a silica packet. The log slice should be sealed if it is real wood; otherwise it can crack near a heater. Clear baubles with faux snow are forgiving, but give them a gentle shake before guests arrive.
15. Distressed Green Metal Scrollwork Tree
The rust is the point. A clean green wire tree would look like a garden trellis; the distressed finish and visible rust make it feel like a flea-market find with a story. That patina also ties the tree to the white planked surface and paneled wall without adding another color. If you removed the rust, you would lose the entire vintage mood.
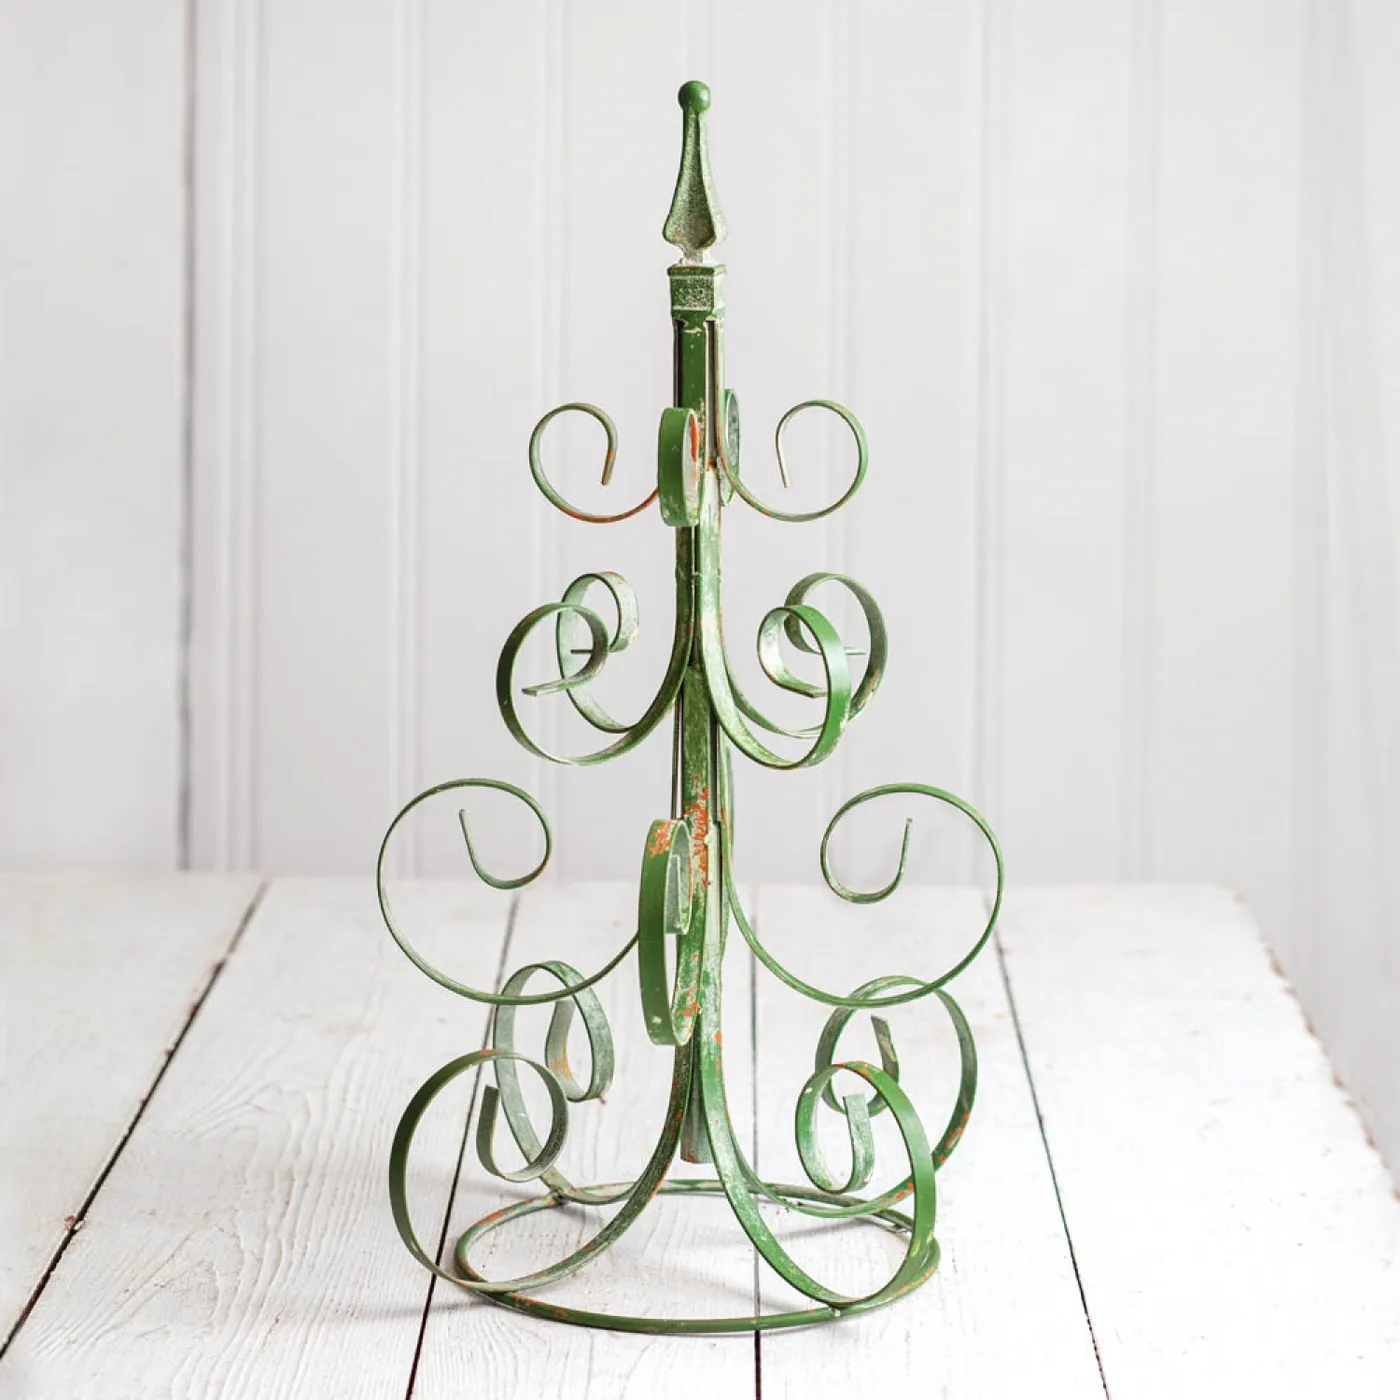
Look for a wire topiary frame or a vintage garden obelisk at a thrift store and spray it with a muted green paint, then scuff the edges with sandpaper. A $10–$20 frame plus $8 paint gets you the same silhouette for less than most boutique versions. Add a small clip-on light or a battery candle nearby — the scrollwork looks best with a little shadow play.
16. Illuminated White Ceramic Tree with Gold Tip
The white ceramic tree needs contrast at its base, not more white. A dark wood table and a few green pine branches keep it from disappearing into a pale wall. If your table is light, use a dark tray or a charcoal linen runner. Also check the bulb color: a warm white bulb makes the ceramic glow; a cool white one makes it look like a nightlight. For a metallic alternative, compare Idea #11.
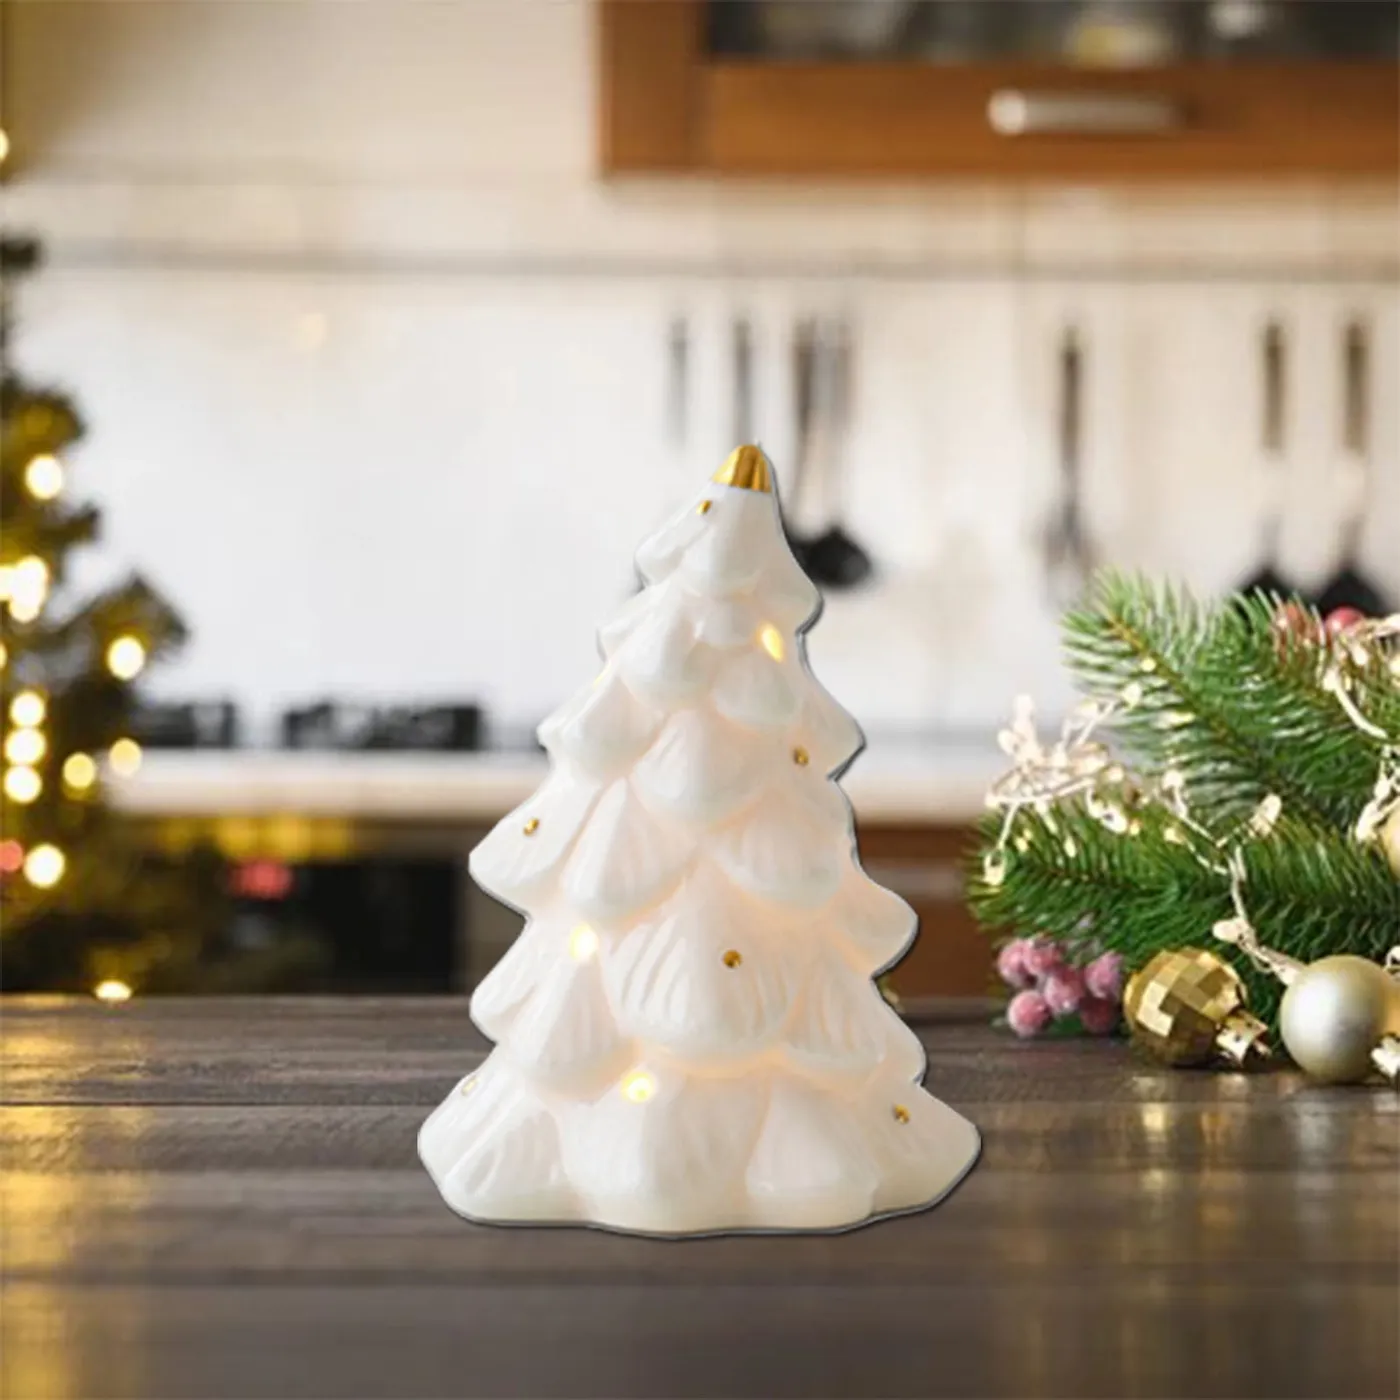
Vintage ceramic trees are collectible, but the cords can be fragile and some older models get hot. Inspect the cord before you plug it in, and do not leave it on overnight. Reproductions are safer and often brighter, but the finish can look flatter. If you are buying vintage, test every bulb and make sure replacements are still available for that model.
17. Blue Glass Glitter Tree with Frosted Votives
This is a cool-palette formula: 50% aqua glass, 25% silver glitter, 15% gold, 10% light wood. The gold-rimmed tray and gold star votives keep the blue from feeling icy. If you want a warmer version, swap the blue tree for clear glass and keep the silver ornaments; the same tray and votives still work. The light wood surface is the neutral that holds it all together.
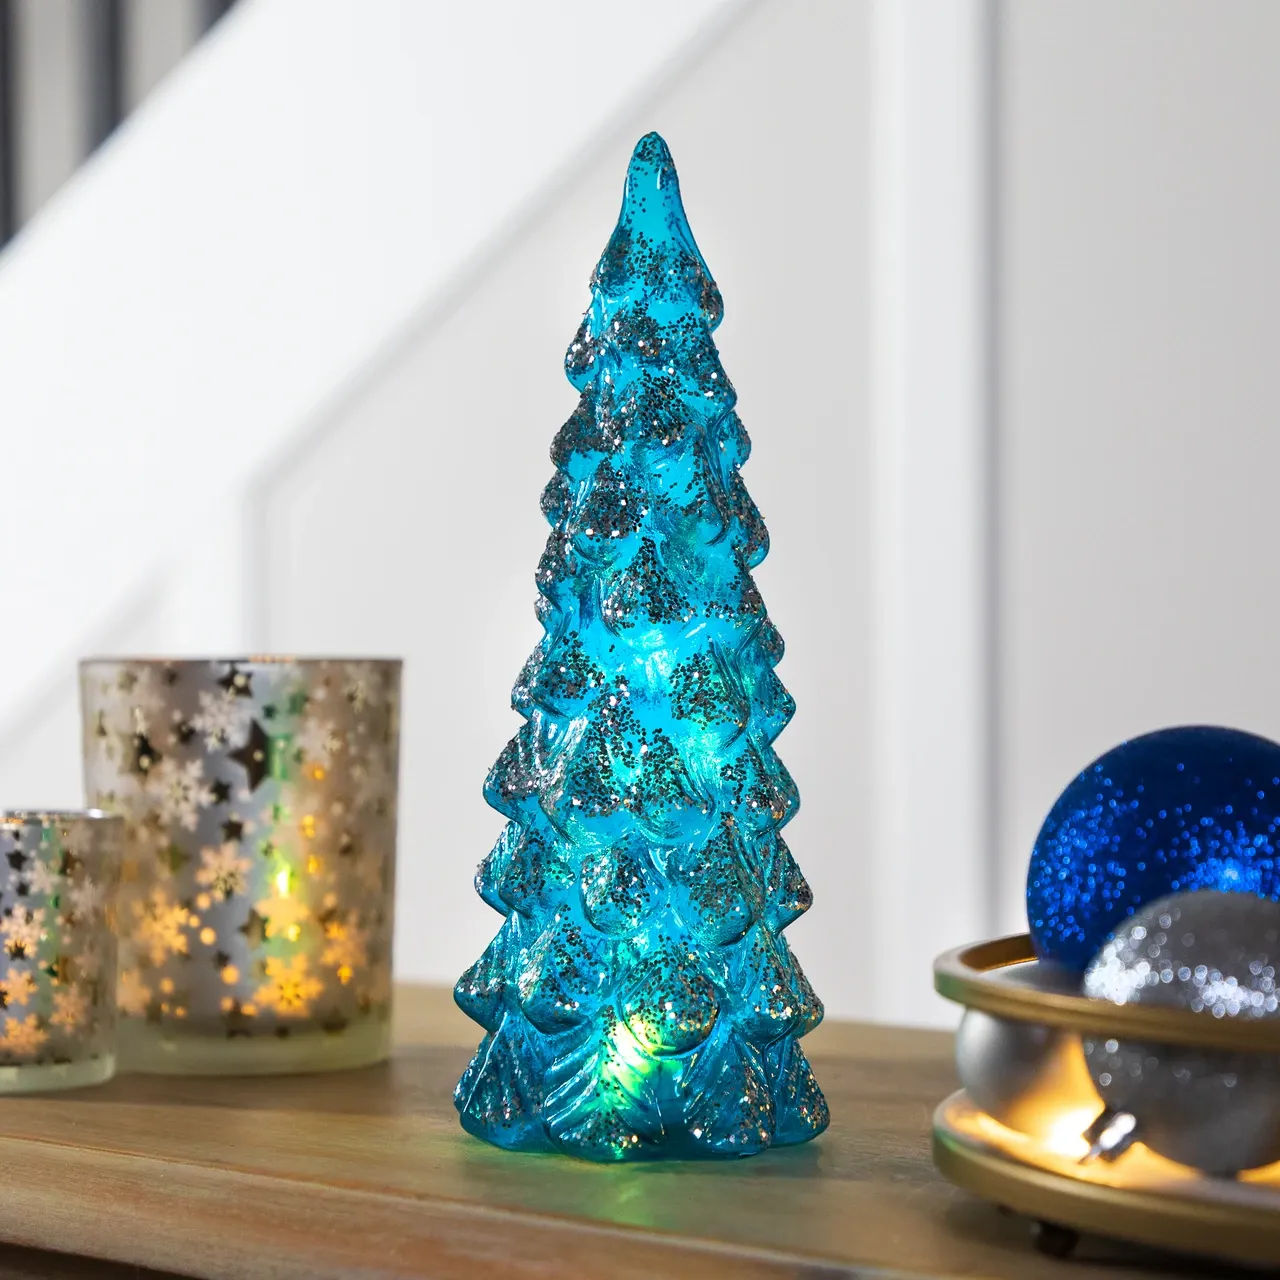
The frosted votives with gold stars are the quiet heroes here. They add a second texture — soft, matte, slightly vintage — that keeps the glossy blue tree from looking like a single shiny object. Without them, the vignette would be pretty but flat. The tray matters too, but the votives are what make it feel collected rather than purchased in one trip.
18. Laced Felt Tree with a Yellow Star
This is a nap-time-friendly project:
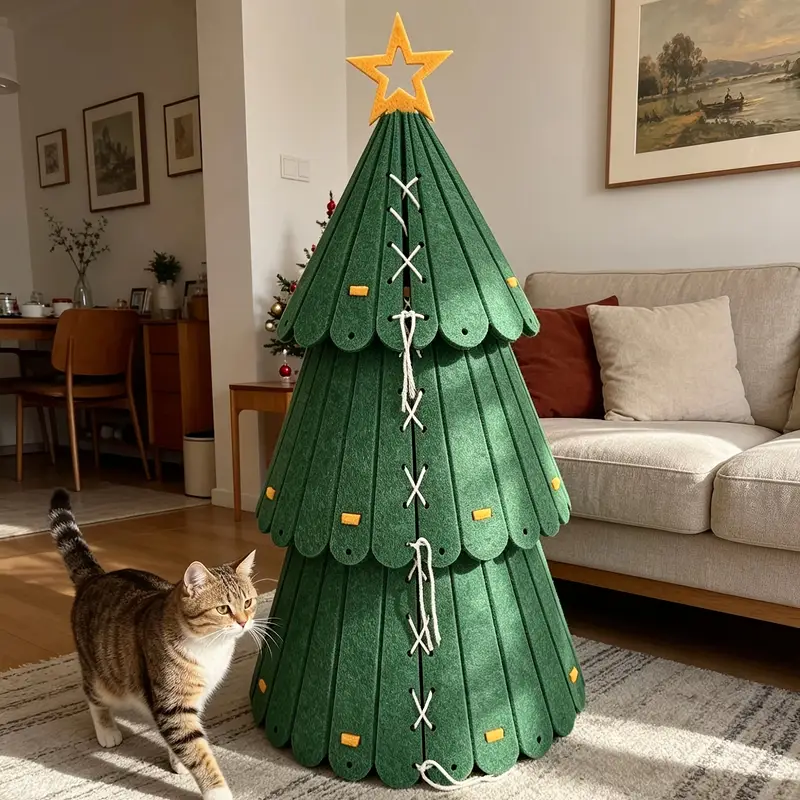
- Cut five green felt tiers, each 2 inches wider than the one above.
- Punch holes 1 inch apart along both short edges of each tier.
- Lace the tiers together with white string, leaving a little slack for the scallop.
- Cut a yellow star outline and stitch or glue it to a skewer.
- Add small yellow felt rectangles as ornaments.
Time: 2 hours. Cost: $10–$18.
Felt is one of the cheapest ways to get a handmade look. A half-yard of dark green felt is about $5, and white string and yellow scraps are likely already in your craft bin. If you do not want to cut tiers, use a felt tree banner instead and drape it across a shelf. The laced detail is the charm — do not skip it for glue.
19. Flocked Tree on a Snowy Log Slice
The log slice should be 1 to 2 inches wider than the tree base on each side. For a 24-inch flocked tree, a 10- to 12-inch slice looks balanced; anything smaller looks like a coaster. This setup fits on a 12-inch-deep shelf or a small entry table. If your surface is deeper, add the white gift and pinecone to one side rather than centering everything.
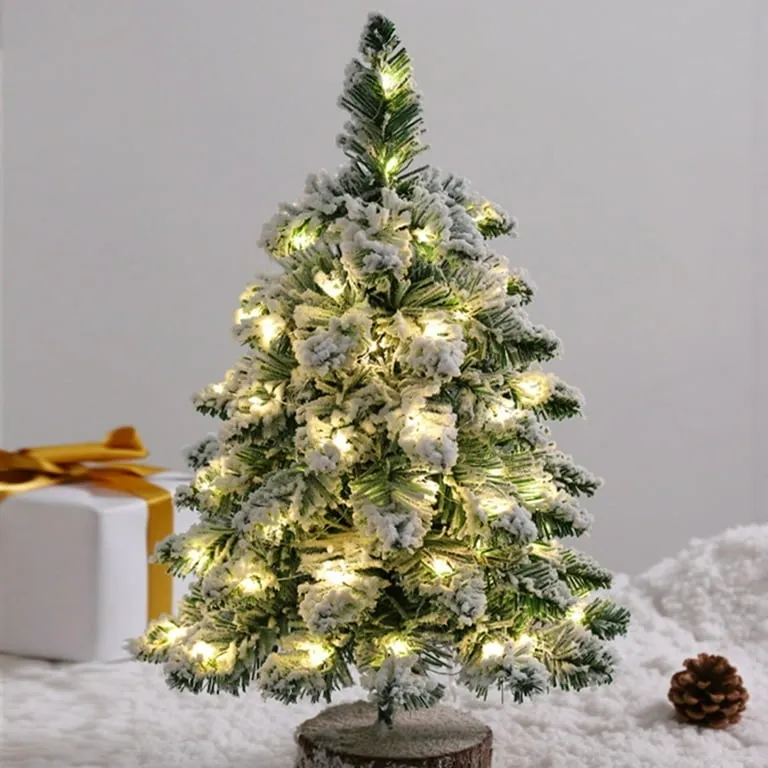
The faux snow does two jobs: it hides the tree base and it bounces the warm lights back up into the branches. That is why this little tree looks brighter than its size. The white gift with gold ribbon also repeats the snow and the lights, so the eye travels in a triangle from tree to gift to pinecone. It is a simple composition, but it is not accidental.
20. Mini Tree Village in a Red Tissue-Wrapped Pot
Keep the village low and wide so the tree still reads as the star. The miniature houses should sit below the lowest branches, not beside the middle of the tree. Use a red pot that is just 1 inch wider than the tree base, then wrap the pot in tissue paper and tuck the edges under. A gold star topper is enough — resist the urge to add a second focal point up top.
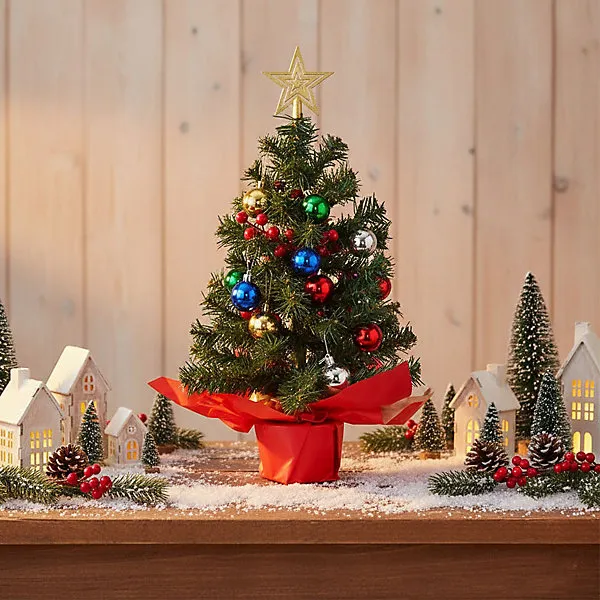
Tiny village scenes are trending because they satisfy the urge to decorate without taking over a room. In 2026, the look is less department-store village display and more one small story on a tabletop — a few houses, a tree, some faux snow. It is especially popular with renters who want a holiday moment they can pack away in one box.
21. Burlap-Base Tree with Tiny Wrapped Gifts
Wrap the gifts in papers that repeat the tree palette but vary in scale — one small grid, one solid, one metallic. Tiny gifts look intentional when they are stacked at different heights rather than lined up. Use double-sided tape instead of big bows; at this scale, a ribbon tail longer than 3 inches overwhelms the tree. For a rustic base treatment that feels fuller, compare Idea #1.
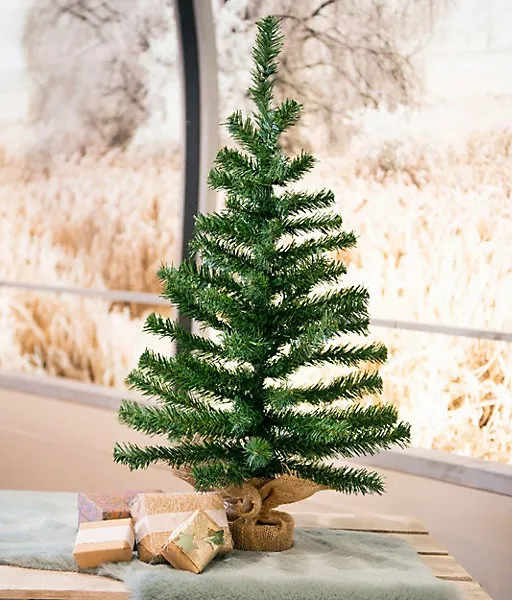
This vignette works on a light wood surface that is at least 20 inches wide, because the gifts need to spill to one side. The tree itself can be 18 to 24 inches tall. If your table is narrow, put the gifts in front of the tree instead of beside it. The light green furry textile adds softness, but it also adds bulk — keep it to a 12-inch square.
22. Red Glitter and Gold Ball Close-Up
This close-up is a reminder that ornament scale matters more than quantity. The formula is 70% green branches, 20% gold, 10% red glitter. One large red glitter ball anchors the composition, while smaller gold balls fill in around it. If you swap the red for burgundy, the look becomes more grown-up; if you swap gold for silver, it turns cooler and more modern.

Glitter ornaments shed — that is their nature. Hang them away from high-traffic areas and avoid placing them directly over a tablecloth you love. A quick pass with a lint roller picks up stray glitter, and a small paintbrush can dust the crevices of textured balls. Gold ornaments with a mirror finish show smudges, so handle them by the hanger, not the sphere.
23. Red Ribbon-Cinched Burlap Tree
The red ribbon cinching the burlap is doing more than hiding the base. It creates a waistline, which makes the tree look fuller above and more finished below. The red glitter star topper repeats the ribbon, and the tiny gift boxes echo the tree scale. It is a tight, classic composition that works because every red element is in a different texture — fabric, glitter, paper.
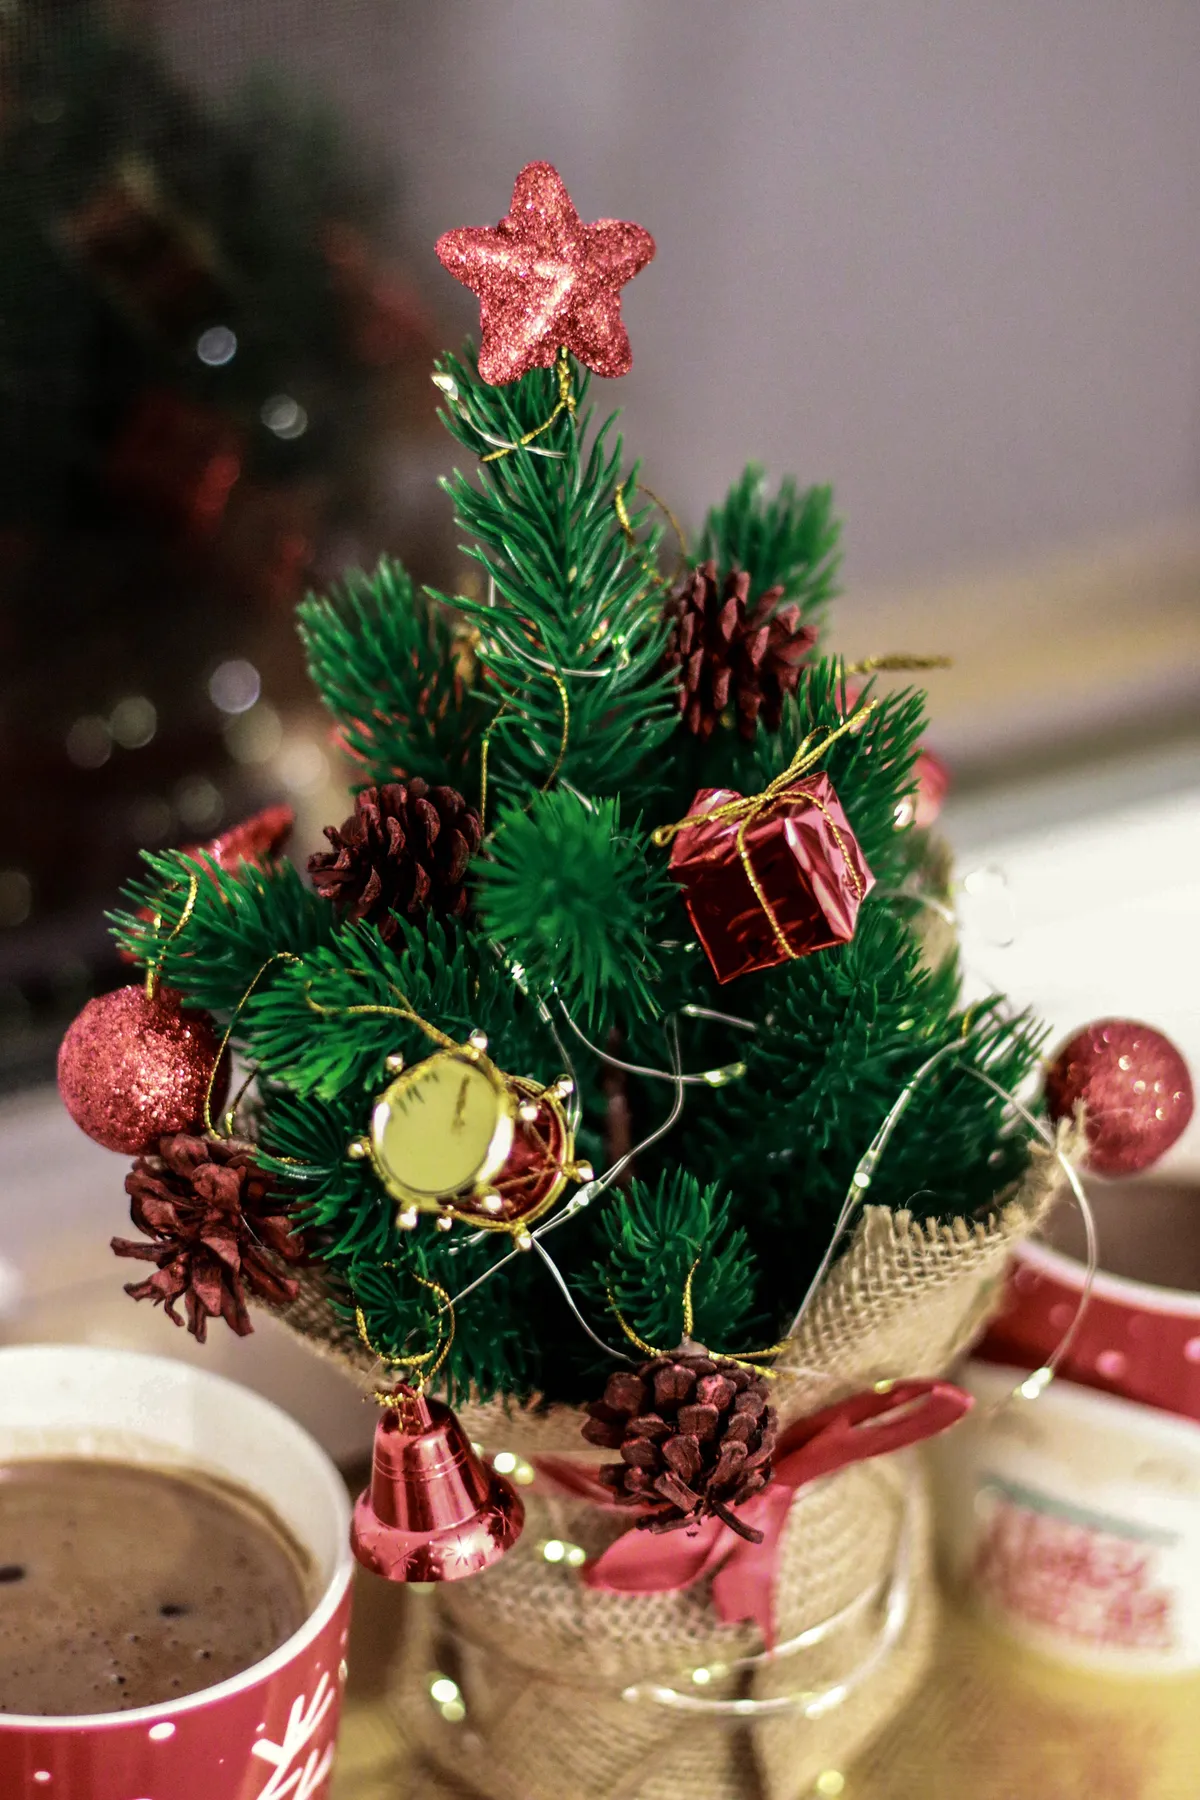
This is a dollar-store win. A small tree, a burlap remnant, and a spool of red ribbon can come in under $25. Use a red glitter ornament as the topper instead of buying a special star, and wrap empty small boxes for the gifts. If you already have a tree, the update costs about $8 — and it is the kind of change you can do while the coffee brews.
24. Berry-and-Pinecone Branch Close-Up
Cluster berries in threes and place them at the outer tips where they catch light. Pinecones should sit slightly inside the branches so they look nestled, not glued on. If your tree is sparse, use berry stems to fill gaps before you add ornaments — they add color without visual weight. A 12-inch berry stem can usually be cut into three usable clusters.
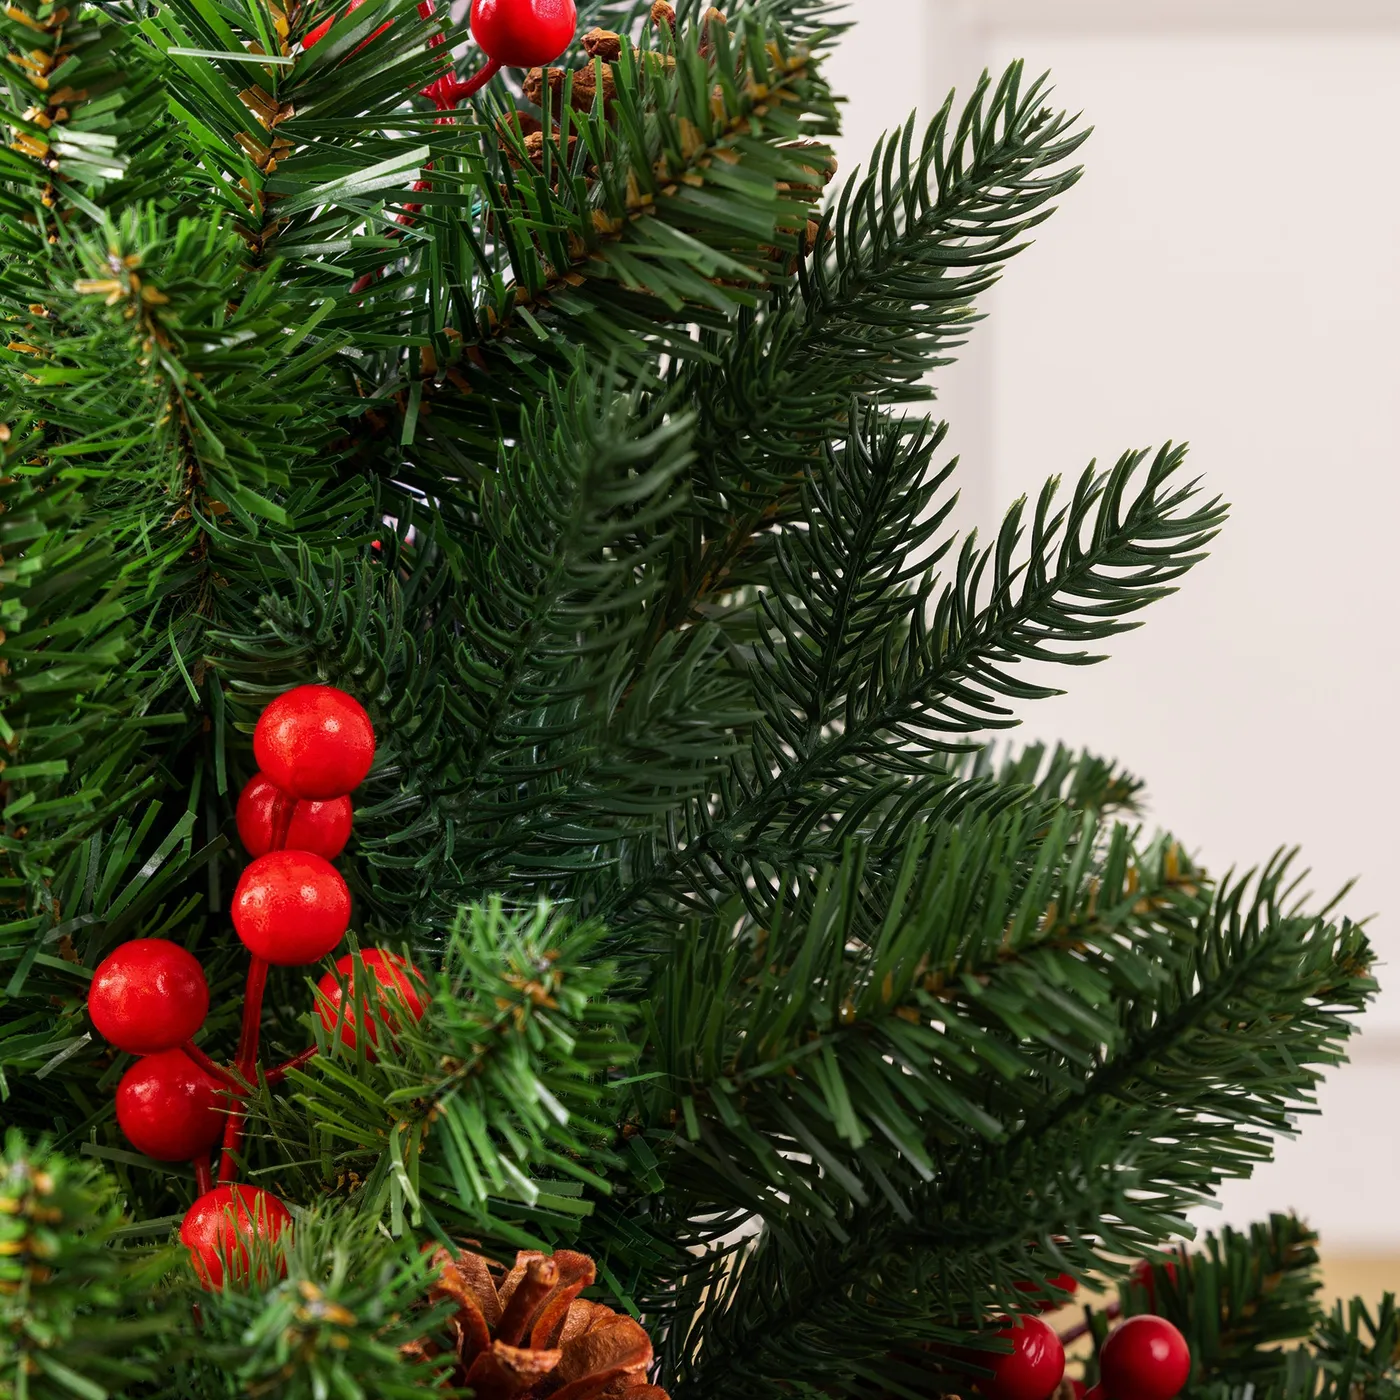
Real berries and pinecones are beautiful but messy. Real pinecones can leak sap near a warm light, and berries may stain if they get crushed. If you are using real pinecones, bake them at 200°F for 30 minutes first to dry them out. Faux berries are safer around kids and pets, but check that the paint does not flake before you buy.
25. Classic Red-and-Gold Tree by the Fireplace
The gold Merry Christmas sign is the element that makes this tree feel like a vignette rather than a decoration. It gives the eye a place to land and ties the gold star topper to the ornaments below. Without it, the tree is still festive, but it loses the cozy, fireside storytelling. Keep the sign small — no more than 6 inches wide — so it does not compete.

This tree works best on a hearth, console, or side table that is at least 36 inches wide. The fireplace behind it should be at least 12 inches away to avoid heat damage. In a small room, use a 24-inch tree and skip the sign; the glowing fireplace already provides the warmth. If your mantel is high, put the tree on a stack of books to lift it into view.
26. Twig Tree on a Burgundy Runner
To style a twig tree without it looking like a bundle of sticks:
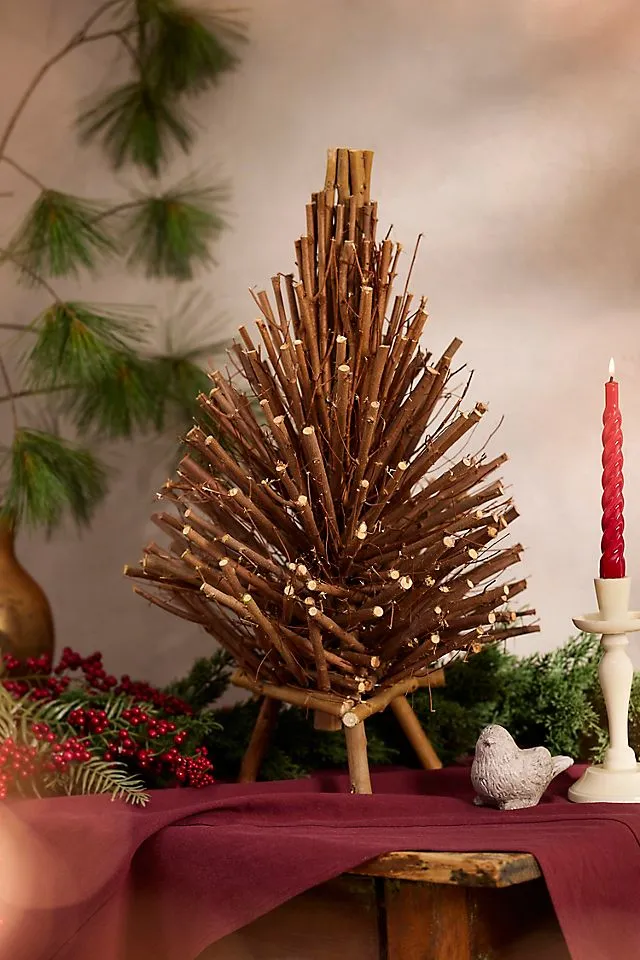
- Start with a pre-lit twig tree or wind 100 warm white lights through the branches.
- Lay a dark red runner on the table, letting it drape 6 inches over the edge.
- Add berry sprigs and pine needles at the base, not on the tree.
- Place a red taper candle in an ivory holder 8 inches to one side.
Time: 20 minutes. Cost: $15–$40.
Natural twig and branch trees are part of the larger 2026 move toward texture-first holiday decor. People are tired of plastic needles and want something that looks gathered from the yard — even if it is store-bought. The twig tree also works in a modern rustic room where a traditional green tree would feel too expected. It is a trend with legs because it is easy to store and hard to date.
27. Buffalo-Check Tiered Tree Trio
This is a craft-store special. Buy three wooden or metal tree cutouts at a dollar store or thrift shop, then cover one with kraft paper and add a buffalo-check fabric cutout. A quarter-yard of buffalo check is about $3. The faux pine swag can be reused from year to year; just swap the bow. Total cost is usually under $35, and the tiered arrangement makes it look bigger than it is.
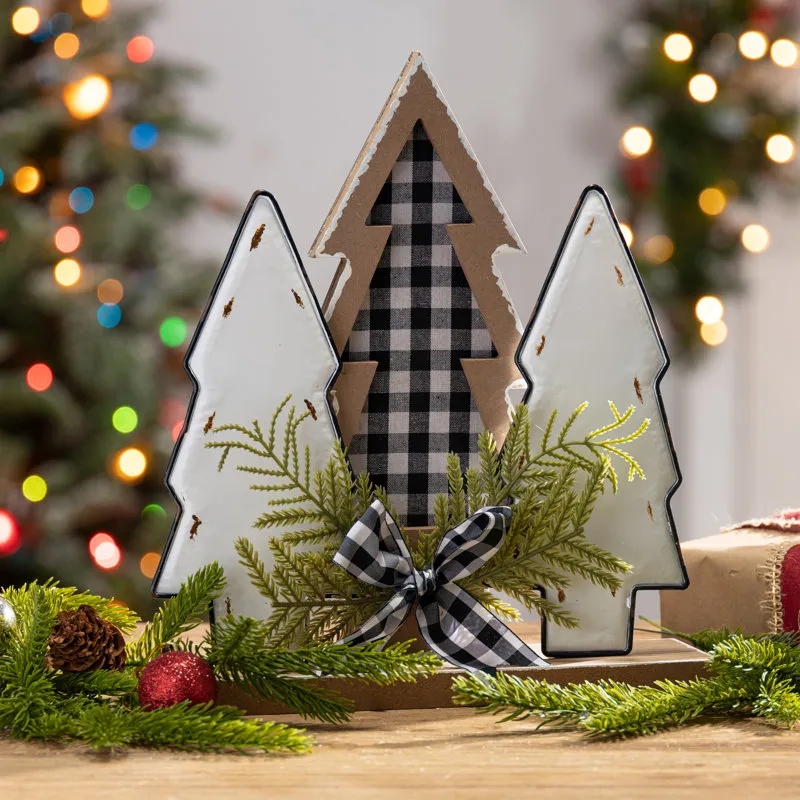
The trio works because it mixes finishes — distressed white metal, kraft paper, and black-and-white fabric — while keeping the shapes identical. That repetition of silhouette makes the different textures feel intentional. The buffalo-check bow ties the whole thing together and adds a graphic punch. Without the bow, the arrangement would still be cute, but it would lack a focal point.
28. Reclaimed Wood Chevron Tree
Reclaimed wood is charming until you bring home a piece with active pests or a musty smell. Inspect every board before you commit, and avoid wood that has been painted with lead-based paint. The chevron design also needs a flat, stable surface — a wobbly table will make the tree look crooked no matter how carefully you cut the angles. Measure twice, especially if you are using a miter saw for the first time.
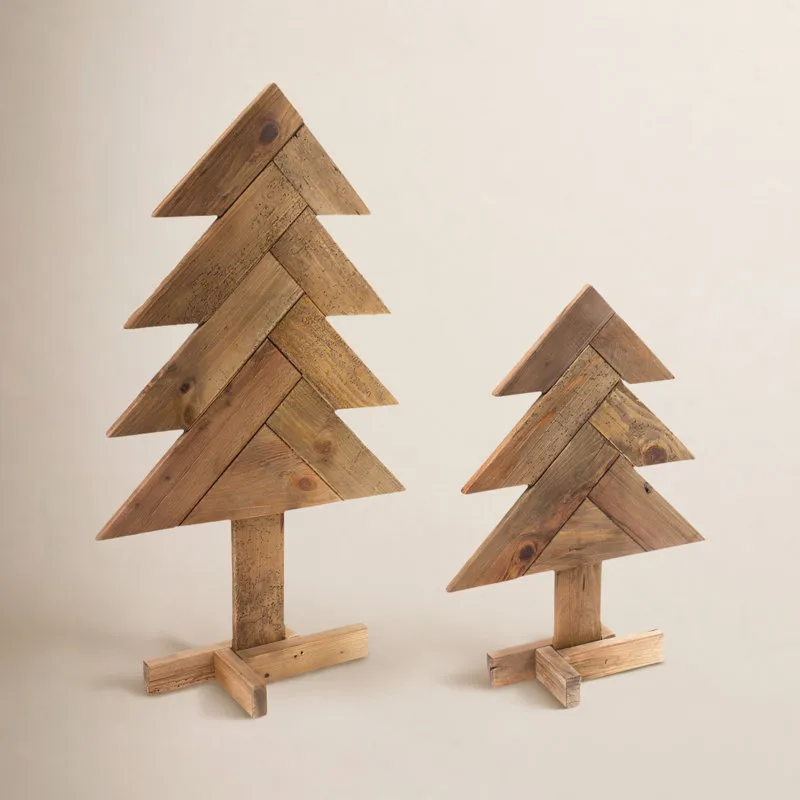
Reclaimed wood can have splinters, dust, and a rough finish. Sand the edges you will touch, then seal with a matte polyurethane to keep the rustic look without the mess. Dust it with a dry cloth, not a wet rag, which can raise the grain. If the wood has a strong smell, air it out for a few days before bringing it into the living room.
29. Wood-Grain Cutout Trees in Faux Snow
The tiny train is the detail that makes this scene feel like a story. Without it, you have three wood-grain trees in fake snow; with it, you have a little winter village. The train also adds a horizontal line that breaks up the vertical trees. It is a small thing, but it is the difference between a display and a moment.
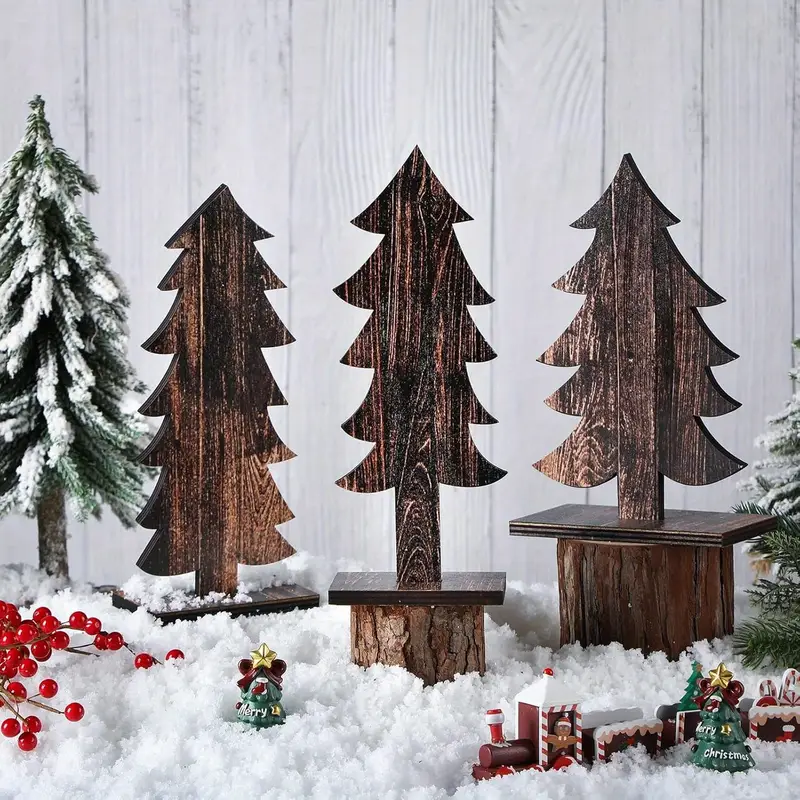
This arrangement needs a surface at least 24 inches wide and 12 inches deep, because the snow and figurines need room to spill. The tallest tree should be around 18 to 24 inches. It works on a console, a sideboard, or a deep windowsill. If your space is smaller, use one wood-grain tree and skip the train; see Idea #15 for a single statement tree with a similar rustic mood.
Little Trees, Big Holiday Energy
The best tabletop tree is the one that makes you smile every time you walk past it — not the one that matches a catalog. Pick a scale that fits your surface, borrow one idea from a photo, and let the rest be yours. If you try one of these, snap a photo and save this guide so you can find it again next December. 📌 Pin your favorites now — future you will be glad you did.