Still scrolling through DIY Christmas tree ornaments for 2026 without knowing where to start? Same. The saves folder fills up, the tree comes out of the box, and somehow it looks exactly like last year.
We spent real hours in Michaels, Etsy, and Target (plus one very long craft-store detour) narrowing hundreds of options down to 30 ornaments that are genuinely makeable — from a $3 scrap-felt project to a $65 kit worth the money. You’ll find macramé knots, needle-felted animals, miniature glass scenes, hand-painted baubles, and a few things that look expensive and cost almost nothing.
What ties them together is the 2026 shift toward trees that look collected rather than bought in one afternoon — small handcrafted pieces with texture, imperfection, and a story. And stay until the end — we break down the most common mistakes that can ruin these looks.
📌 Save this to Pinterest for later — you’ll want to revisit these ideas.
1. Snowglobe Ornament with Pastel Deer and a Pom-Pom Garland
A flat, clear snowglobe-shaped ornament is doing the heavy lifting here, and the trick is what’s inside it. Two small pastel deer stand in fine iridescent glitter with die-cut snowflakes suspended above them, so the piece reads as a scene rather than a sparkly blank. Set against a garland of white pom-poms and red beads and a spray of blue-green pine, the pale interior gets a jolt of saturated red that keeps it from vanishing on the branch.
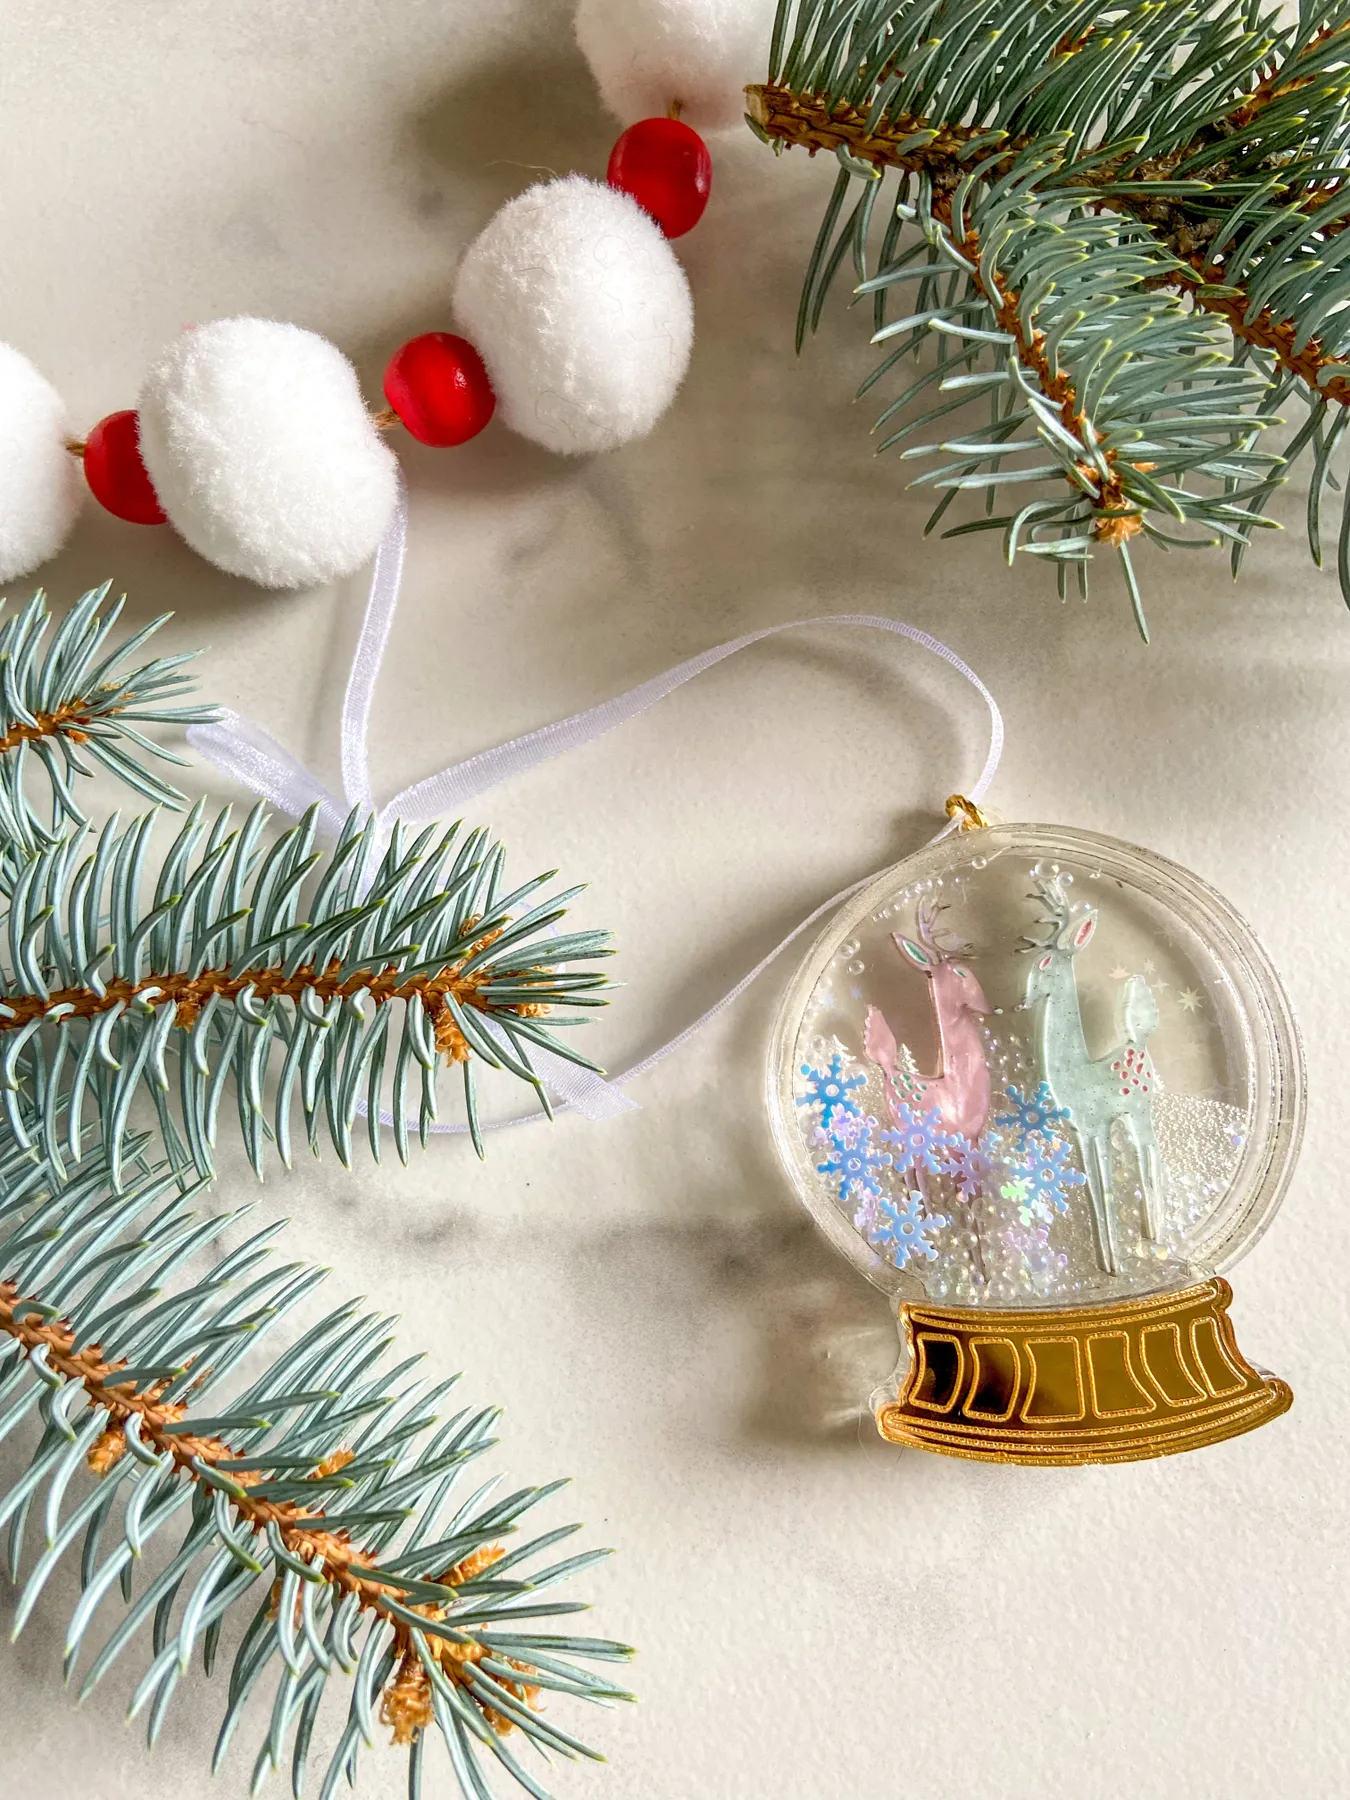
that makes it: the pom-pom-and-bead garland, not the ornament. Strip it away and you have a pretty little snowglobe floating in a sea of green. The garland gives the eye a path — pom, bead, pom — and the red beads echo the deer’s blanket. String a yard of your own and drape it so the ornament nests inside a curve instead of hanging alone.
Fill a shaker-style ornament no more than two-thirds full. Start with a pinch of fine glitter (about 1/8 teaspoon) plus six to eight larger snowflake confetti pieces, then seal the cap with clear-drying craft glue and let it cure a full 24 hours before it goes near a tree. Overfilled ornaments don’t sparkle — the flakes can’t move, so the whole thing looks like static.
2. Yarn-Wrapped Ball Ornament with Faux Mistletoe Berries
This one takes about 25 minutes and costs under $8, which is why it’s the project everyone actually finishes.

- Start with a 3-inch smooth foam or papier-mâché ball and a 6-foot length of medium-weight cream cotton yarn.
- Dot craft glue around the top, press the yarn end down, and wrap in overlapping bands, turning the ball a quarter turn every few passes.
- Keep the tension snug — loose wraps slide and leave bald patches that no amount of fluffing fixes.
- When you reach the bottom, glue the tail and tuck it under a wrap with a skewer.
- Hot-glue a small cluster of faux leaves and three red berries to one side, then thread twine through a glued loop at the top.
The Etsy versions of yarn-ball ornaments run $14–$22 each. A dollar-store foam ball, a $3 skein of cotton, and a $2 sprig of faux berries gets you six for roughly $12 total. Skip the fancy wooden bead toppers — natural twine looks better here anyway and costs nothing.
3. White Ceramic Nativity Ornament with a Gold Silhouette
What makes this work is restraint at the silhouette level. One icon — Mary, Joseph, the manger, a single star — rendered in gold on matte white reads clearly from six feet away, which is exactly the distance most people actually view a tree from. The gold catches warm bulb light without any sheen on the ornament itself, so the piece stays quiet while the tree does the talking. A plain twine hanger finishes the job; a satin ribbon would push it toward souvenir-shop territory.
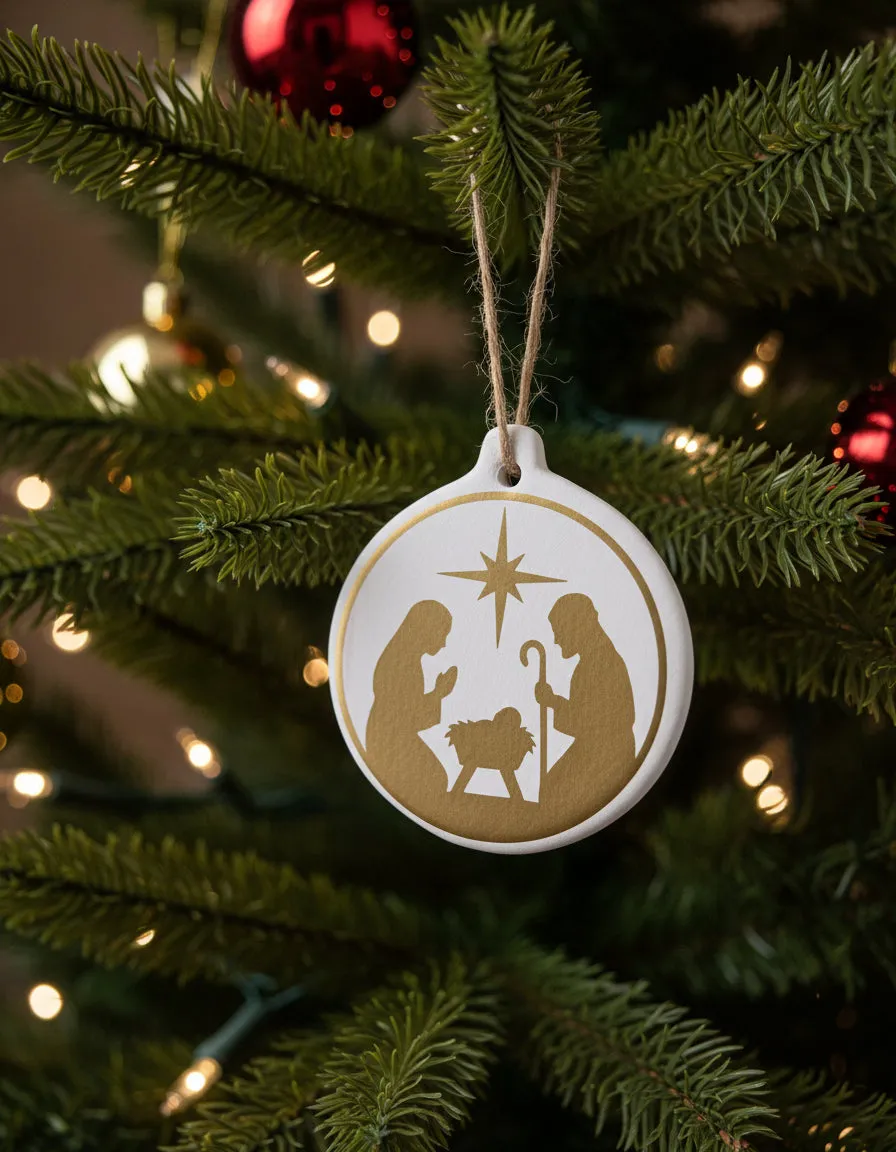
Here’s the honest part: white ornaments on a warm-lit green tree don’t stay white. They go cream, sometimes yellow, depending on your bulbs. If a crisp white silhouette is the whole point, hang this one on a branch near a window or use cool-white LEDs in that section. Gold paint also looks flat when a bulb sits directly behind it — position it so light hits the front face, not the back.
4. Pink Glitter Cat Snow Globe Beside Teal Bottlebrush Trees
This is a tabletop vignette more than a tree ornament, and it wants about 14 inches of surface. A console, a nightstand, or the top of a low bookshelf all work; anything narrower than 10 inches and the bottlebrush trees crowd the globe. Keep the grouping at least 8 inches off the wall so the string lights can bounce around it instead of flattening the glitter into one bright smear.
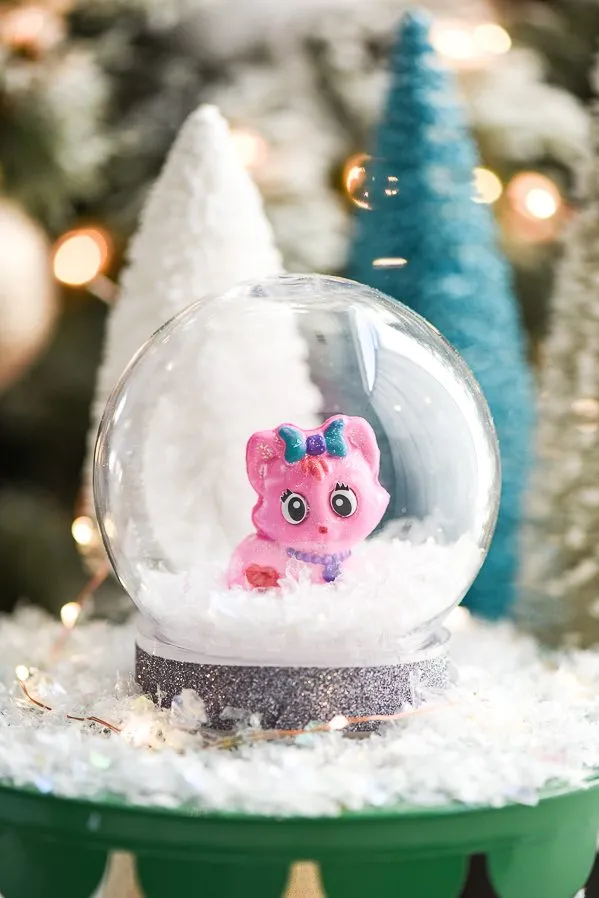
The formula is roughly 70 percent white — artificial snow, white bottlebrush trees, pale string light — 20 percent pink glitter, and 10 percent cool contrast from the teal trees and silver base. Swap the pink for lilac and the teal for mint and it still holds, because the ratio is doing the work, not the specific colors. Break the ratio and it turns into a candy shop. Compare with Idea #14 — same idea of a small curated cluster, totally different palette.
5. Felt Baby on a Crescent Moon Ornament in Pale Blue
Small, detailed ornaments need breathing room to register. Hang your best handmade pieces in the top third of the tree, at least 6 to 8 inches apart, and clear a 4-inch radius around them of any filler baubles. Most trees don’t fail because the ornaments are wrong — they fail because a $2 filler ball is hanging two inches from the piece that took you three evenings.
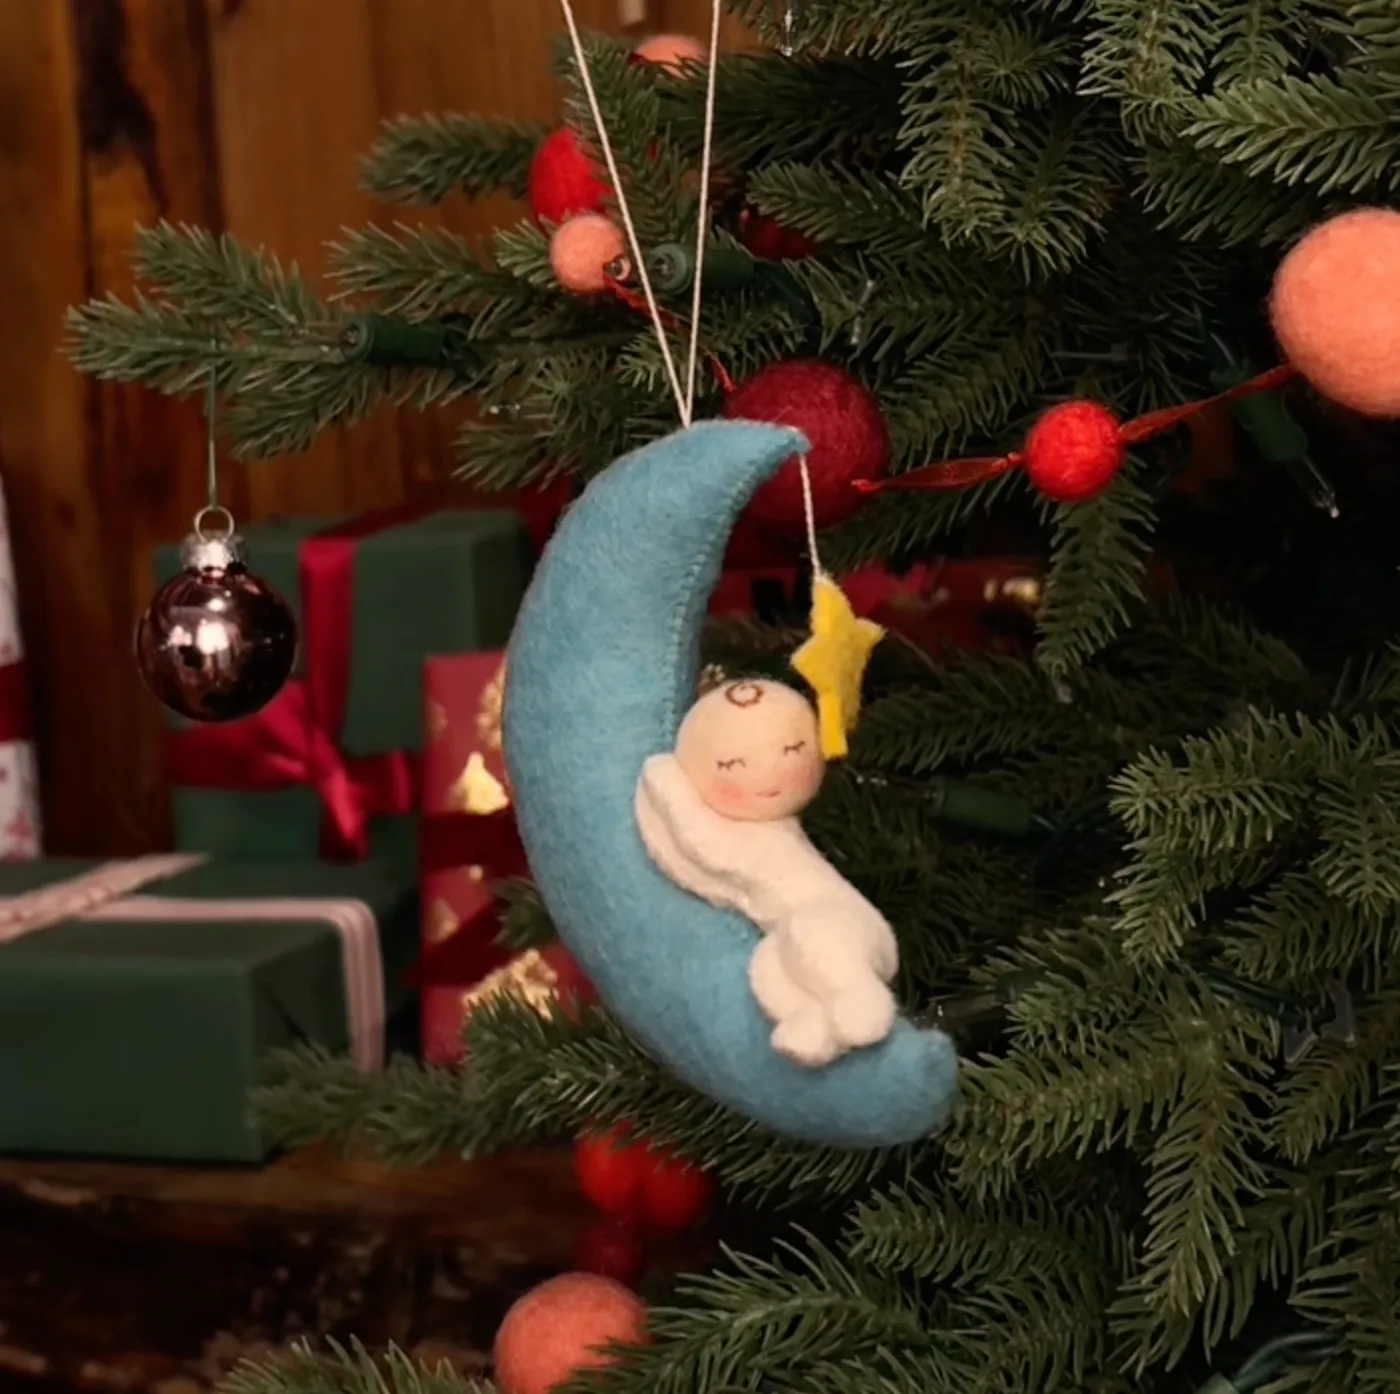
The peach-and-red felt ball garland is the reason this photo works. The moon alone is sweet but small; draped beside it, the garland repeats the ornament’s scale and gives all that pale blue something warm to sit against. Remove the garland and the moon floats in a green void. Make 4 feet of it, not 12 — it should frame the ornament, not wrap the entire tree.
6. Cookie Shaker Ornaments with Icing Edges and Glitter Centers
- Cookie blanks or laser-cut wood rounds: $8–$14 for six
- Clear shaker domes plus fine glitter: $6–$12
- Puffy fabric paint for the wavy icing edge: $4–$7
- Red-and-white baker’s twine and silver bells: $5–$10
- Warm-white mini lights, if you’re starting from scratch: $12–$25
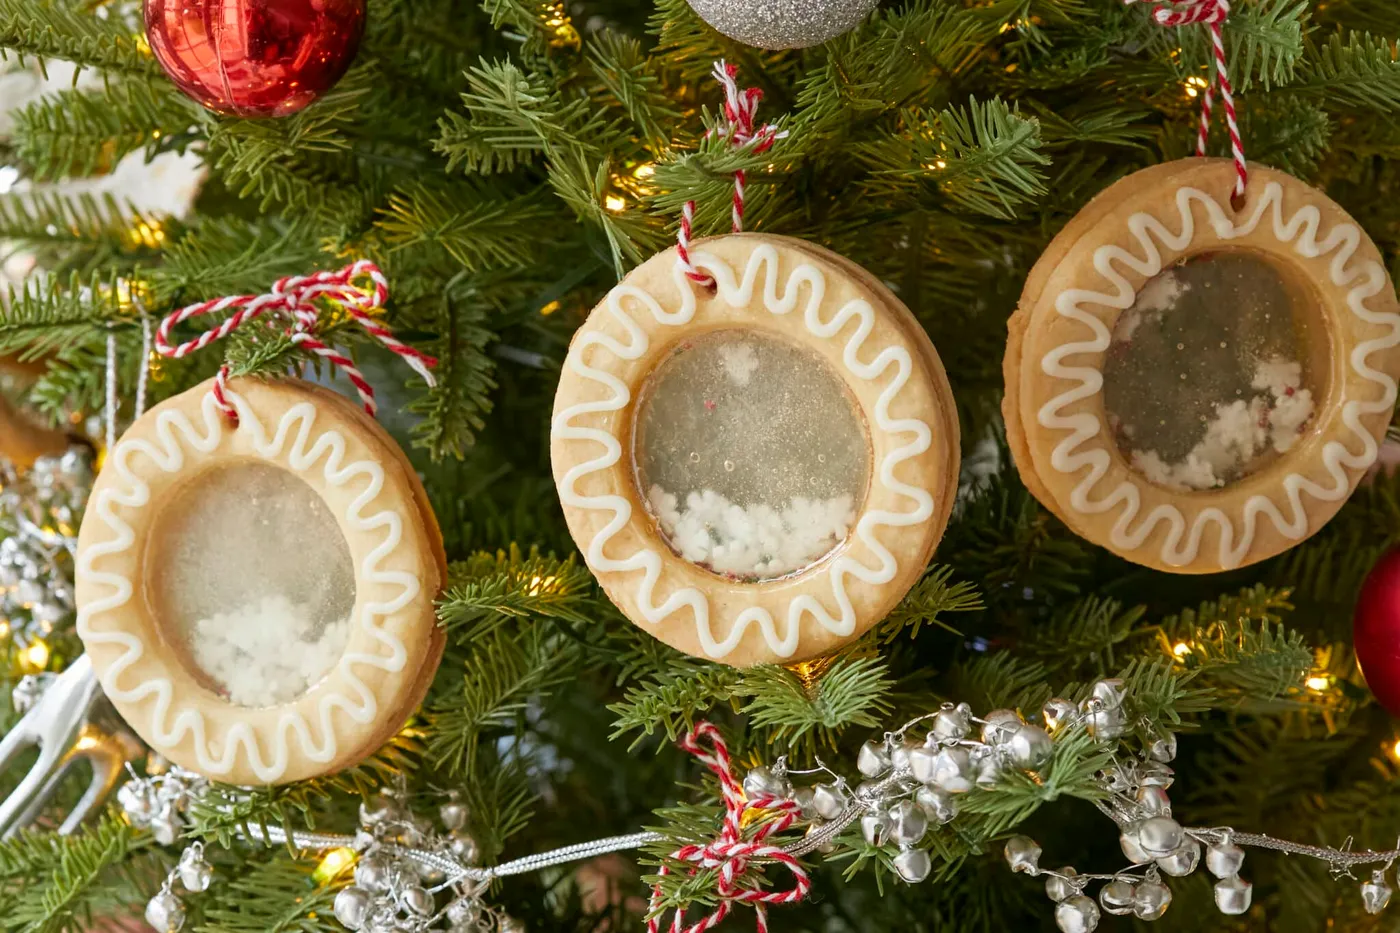
Total: $35–$68 for a half-dozen ornaments, roughly $6–$11 each.
Budget alternative: cut your own rounds from a $3 sheet of craft plywood, skip the domes, and glue a circle of glitter card behind a clear plastic lid. Same look, under $15.
Shaker ornaments leak. That’s not a maybe — glitter finds the seam within a week, and once it’s on the tree skirt it’s there until spring. Seal the dome with a thin bead of clear craft glue and let it cure overnight. Also reconsider hanging these at knee height if you have a toddler or a cat who bats at anything that rattles.
7. Knotted Macrame Snowflake with Fringed Edges
Macramé is more forgiving than it looks, but new cord fuzzes and sheds for the first week — brush it with your hand before it goes on the tree. After that, dust settles deep in the knots and a duster won’t reach it. Vacuum twice a season with a brush attachment held an inch away, and hit the fringe with a light spray starch to keep it from curling into itself by January.
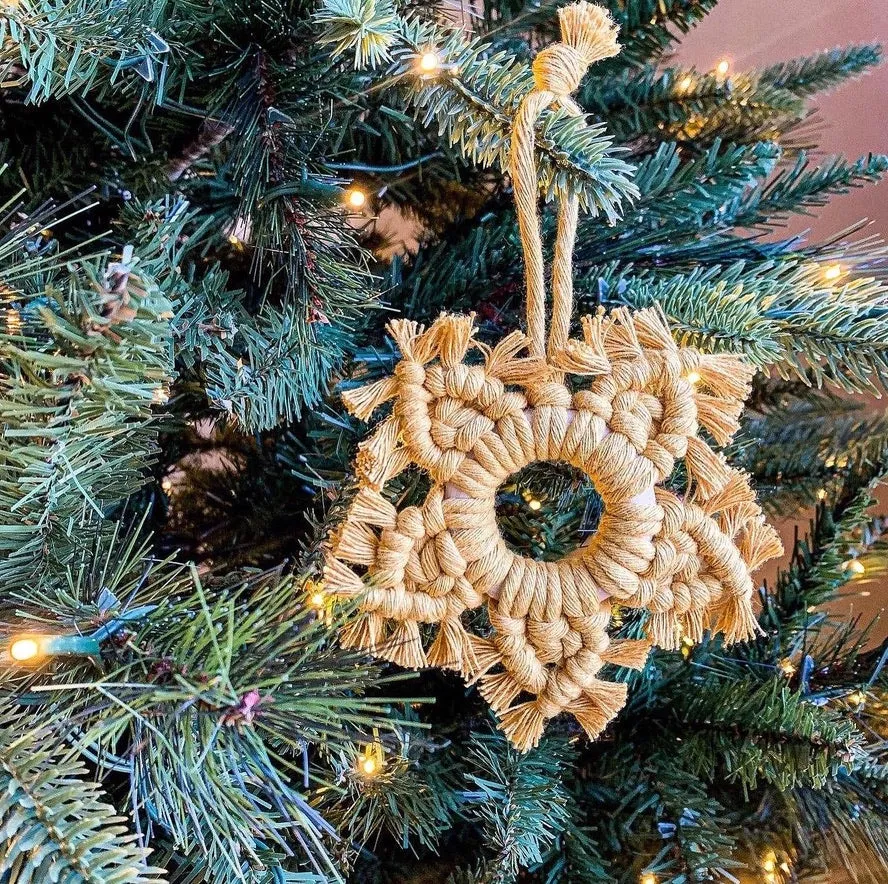
Macramé’s return isn’t really boho nostalgia — it’s part of the wider move toward ornaments that look made by a person instead of printed by a machine. In 2026 that shows up as craft-night culture and “slow decor” boards, where the imperfect knot is the point. This one has real staying power because the material ages instead of dating, which is more than you can say for most trends.
8. Needle-Felted Dog in Reindeer Antlers — A Pet Portrait Ornament
Its power is specificity. Brown-and-white markings, white paws, and a tiny red bow that match a real dog make this a keepsake; a generic felt fox from a kit reads as craft-fair inventory. The felt antlers are what push it from portrait to ornament without turning it into a cartoon — they’re small, slightly floppy, and attached at an angle that looks accidental.
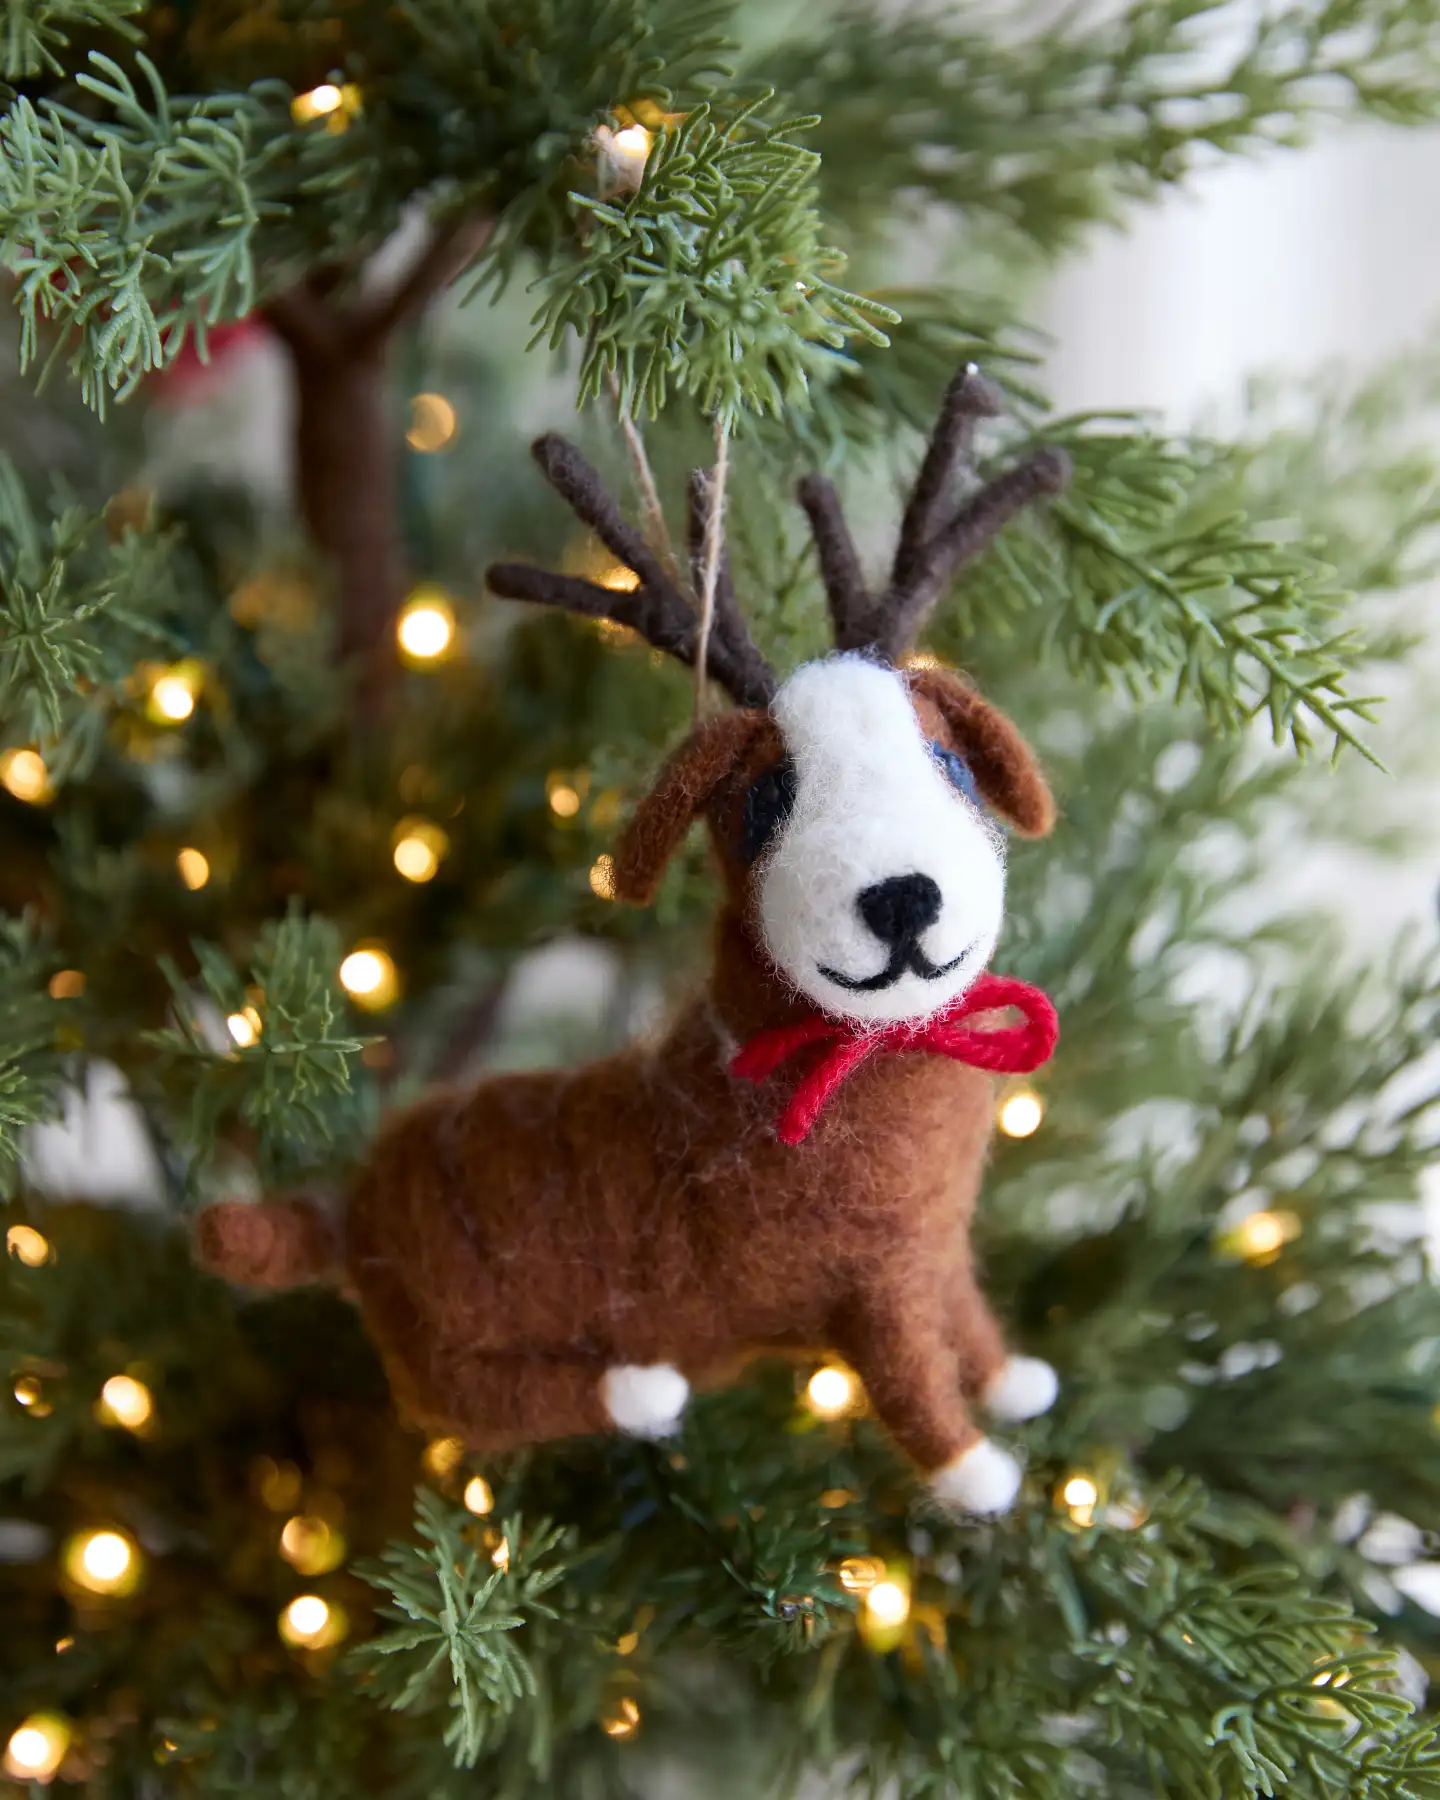
Needle felt in three passes: a loose 60-second tack pass to anchor the wool, a firm pass to build density, then a surface pass with a single needle to place markings. Stop when the piece feels like a firm marshmallow. Underfelted ornaments shed on the carpet; overfelted ones go shiny and stiff.
- A photo of the dog at eye level for marking reference
- Two roving colors plus white for the paws
- A 38-gauge felting needle and a foam pad
- A friend-scale check — finished ornament between 3 and 4 inches tall
- Waxed twine, not yarn, for the hanger
9. Macrame Gnome with a Dark Red Hat and Wooden Bead Nose
Budget about 40 minutes and $5 per gnome once you have the cord.
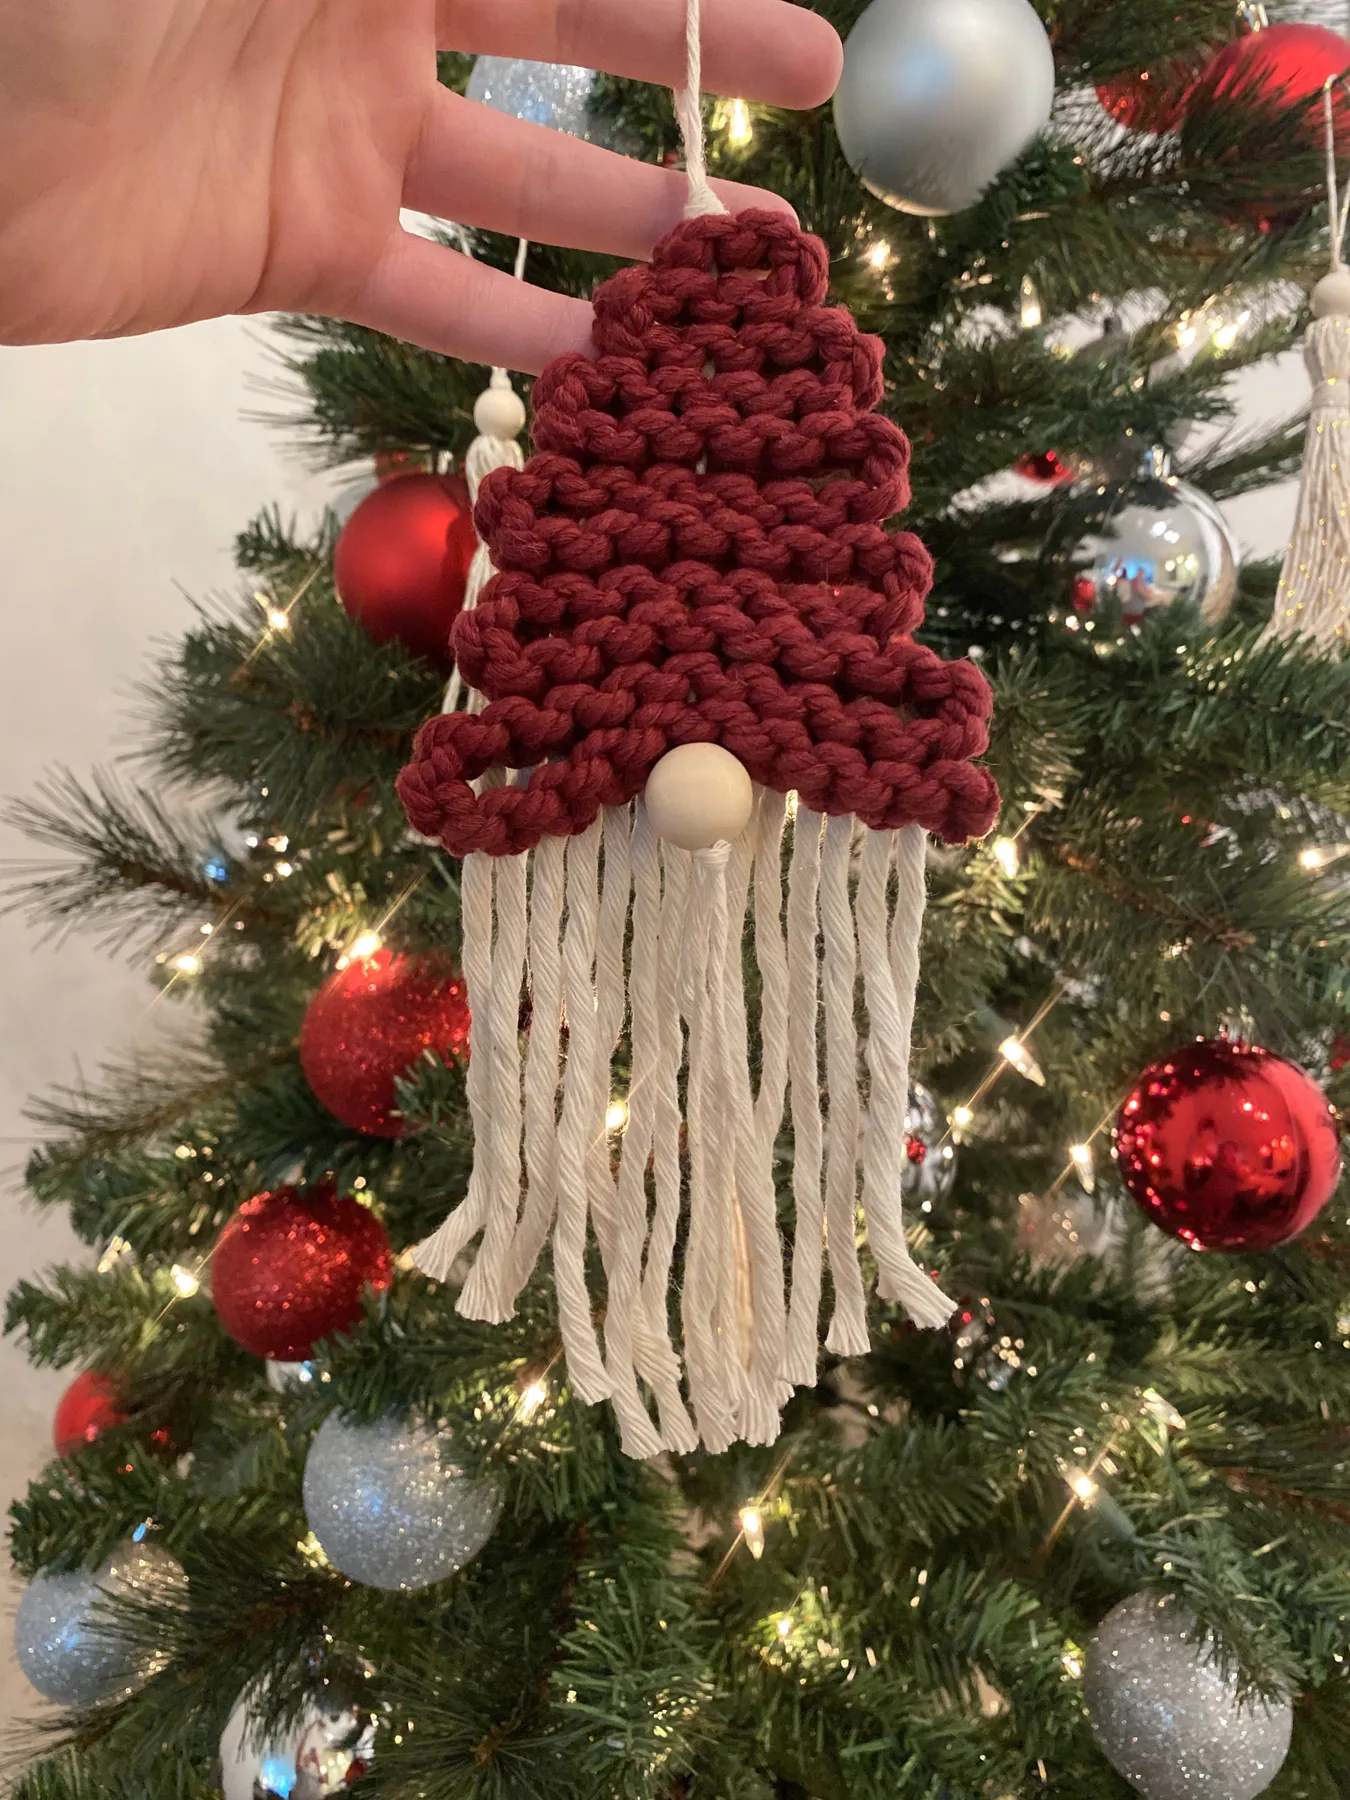
- Cut eight 24-inch lengths of 3mm off-white cotton cord and attach them to a 1.5-inch wooden ring with a lark’s head knot.
- Work three rows of square knots, then gather all cords below and tie off tightly to form the beard.
- Trim the beard into a soft triangle and unravel the ends with a needle to create fringe.
- Cut a 10-inch triangle of dark red felt, roll it into a hat, and hot-glue the seam.
- Glue a 12mm wooden bead just under the hat brim for the nose, then thread a white string through the ring.
A finished macramé gnome runs $16–$28 on Etsy. A $9 spool of 3mm cotton makes eight of them, and a bag of wooden beads is $4 at any craft store. That’s roughly $3 per ornament — and you’ll have enough cord left for the tree-shaped versions later in this list.
10. Glitter-Banded Yarn Rainbow with Macrame Tassels
Four bands, one rule: warm, sparkle, cool, neutral. The red outer arch with white yarn stripes takes about 40 percent of the visible area, the gold glitter band 20, the dark green inner arch 25, and the cream tassels 15. Keep that proportion and you can swap any color — navy for green, copper for gold — and it still reads as the same ornament.
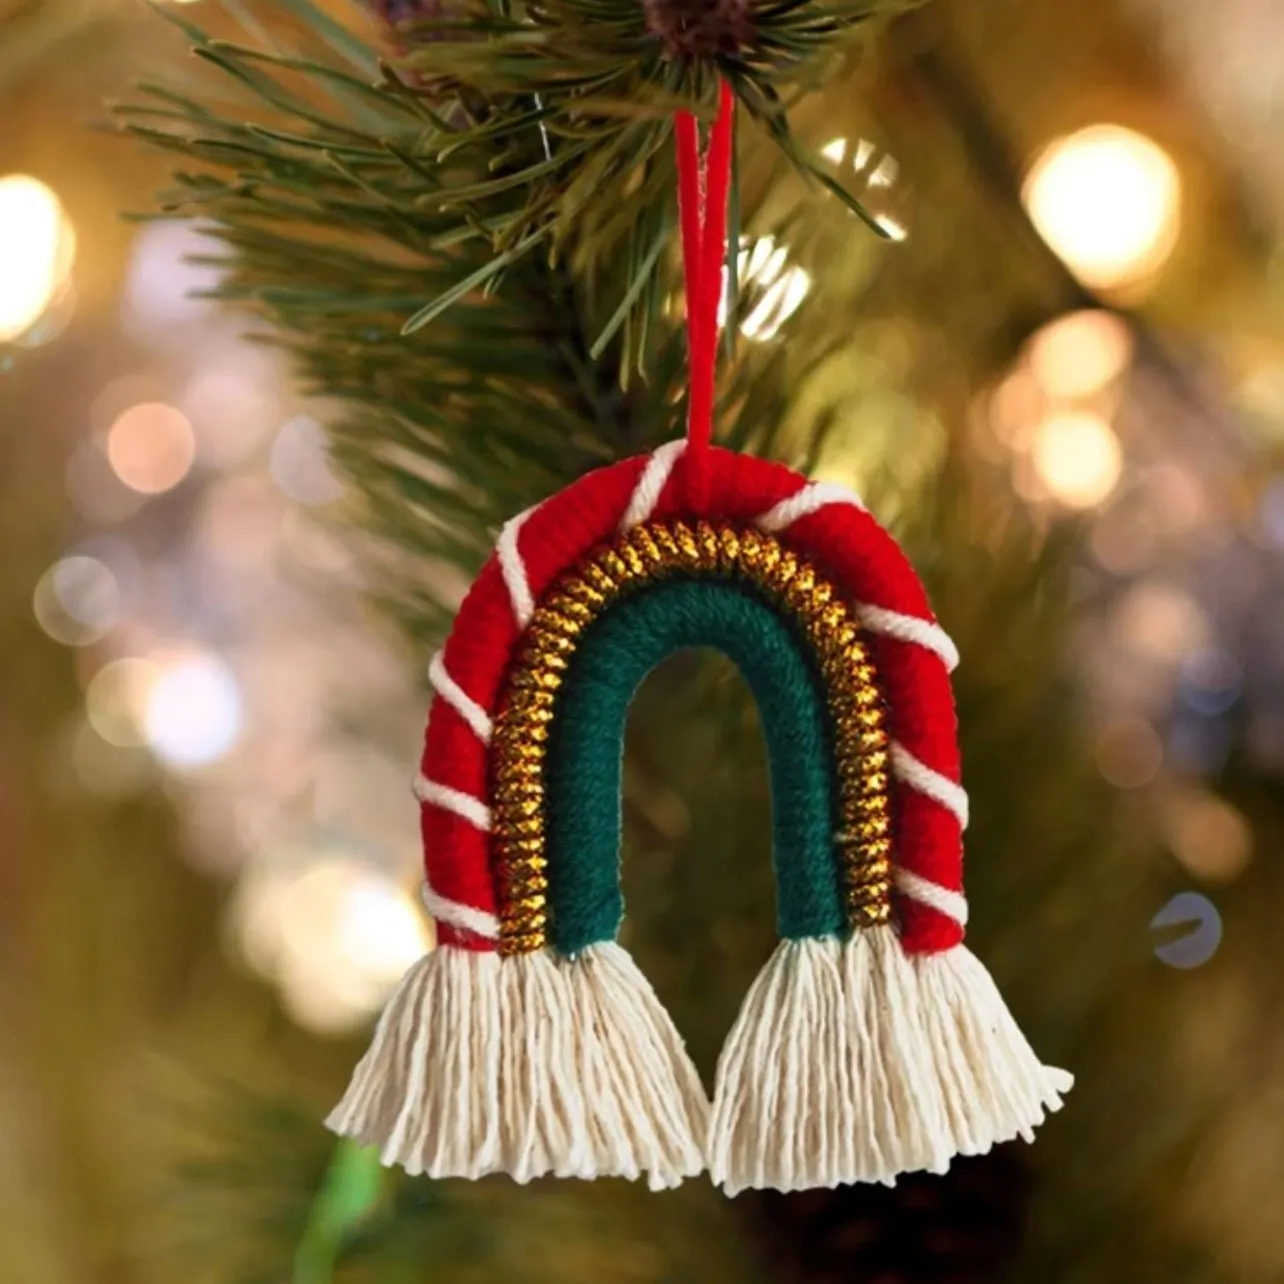
The rainbow works because it repeats a shape the eye already recognizes and then breaks it with texture at the bottom. The two cream tassels hang past the arch, which pulls the silhouette out of perfect symmetry and makes the piece feel made rather than molded. It’s also why this ornament photographs so well on a green branch: red and gold pop against needles, and the tassels soften the edge.
11. Disco Ball Ornament Wrapped in Rust Macrame Cord
Disco balls have been the tree’s loudest guest for a few years now, and the 2026 version is quieter: the mirror finish gets caged in cord so it glints instead of blasting. That’s the whole appeal — you get the sparkle without the party-store energy, which is why this shape keeps showing up on boards that otherwise lean very traditional. It’ll age fine. The mirror trend isn’t going anywhere; the wrapping is what dates.
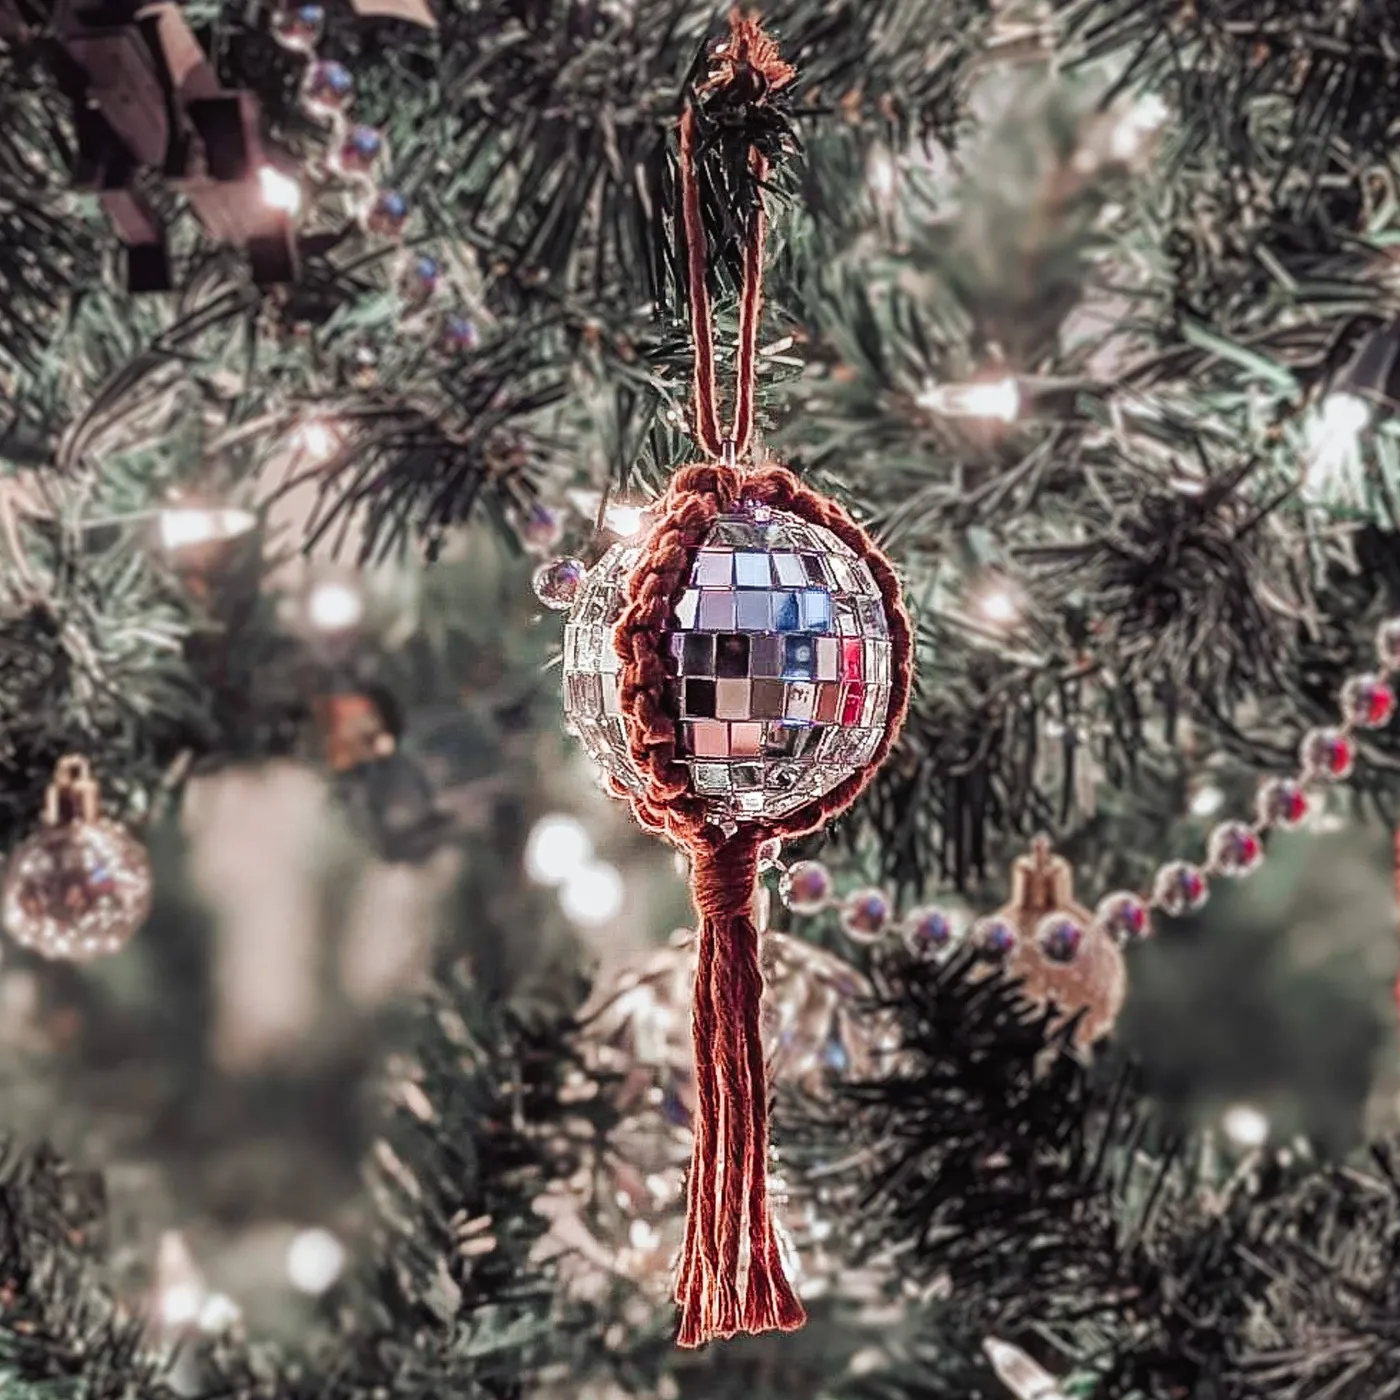
Use 4mm single-strand cotton, not jute. Jute is scratchy, sheds, and will dull the mirror finish as you wrap. Work from the top cap downward in snug half-hitch knots, leaving a 1-inch gap of exposed mirror on each side so the ball can actually reflect. Finish with a 2-inch tassel at the bottom, and hang the whole thing from the original silver cap rather than the cord.
12. Six-Point Macrame Snowflake on a Wooden Ring
Handmade macramé snowflakes sell for $22–$38 on Etsy, which is fair for the labor and steep for a tree that needs a dozen ornaments. A $9 spool of light cotton cord and a pack of 1.5-inch wooden rings makes six snowflakes for about $12 total. The six-point structure is the same technique as the fringed version in Idea #7 — the difference is a visible central ring and shorter tassel tips, which makes it read as a snowflake instead of a star.
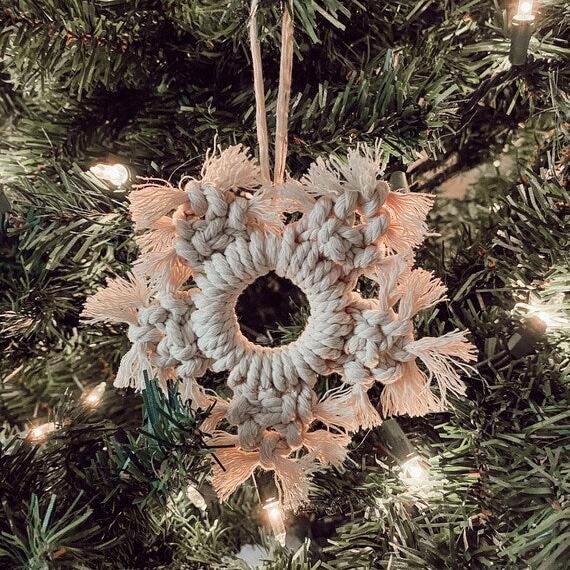
Keep it out of direct sun if you want the off-white to stay off-white; cotton yellows within a season or two near a south-facing window. The good news is these are washable — a 10-minute soak in cool water with a drop of dish soap, pressed flat to dry on a towel, and the fringe straightens right back out.
13. Felt Lamb in a Lime Green Coat and Hot Pink Collar
Neon lime and hot pink on a green tree is a gamble, and it only works here because the lamb’s body and limbs are white. That white is the buffer — it separates the saturated coat from the needles so the two greens don’t blend into a muddy blur. If your tree is already loaded with red and gold, this piece will fight everything around it. Give it a quiet corner or skip it.
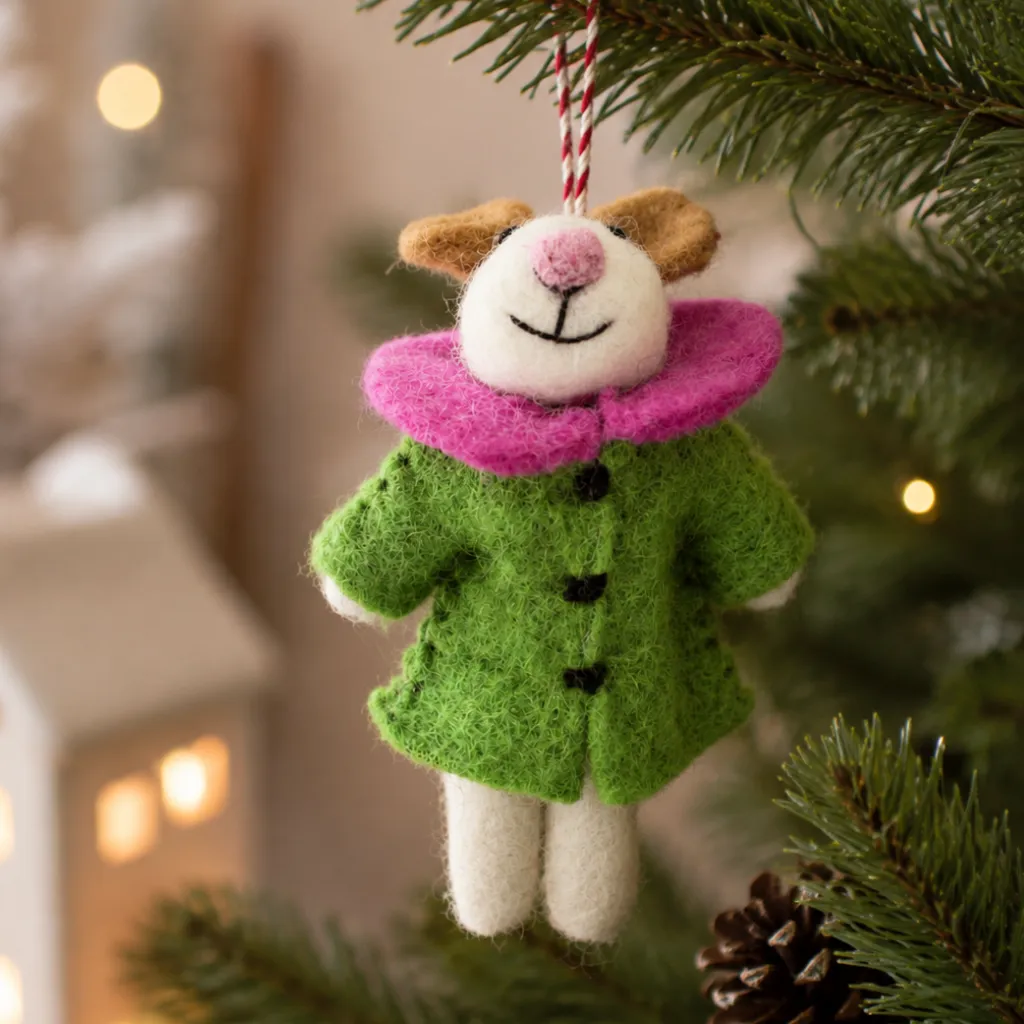
Felt also drinks pine sap and holds it forever. Keep natural-felt ornaments off the lower branches where sap beads up, and never hang them directly against a bulb — felt near a hot light goes brittle and the color goes dull by New Year’s.
you can’t remove: the bright pink ruffled collar. Take it off and the lamb becomes a plain felt animal in a green coat. That single ruffle is what makes the whole piece feel like a character instead of a craft project.
14. Felted Mice in Santa Suits on a Marble Side Table
- Wool roving in white, red, green, and brown: $18–$30 for four colors
- Felting needles (36 and 38 gauge) and foam pad: $12–$20
- Tiny accessories — mini gifts, trees, lights: $8–$16
- Twine for hanging loops: $3
- Display surface: free if you already own one
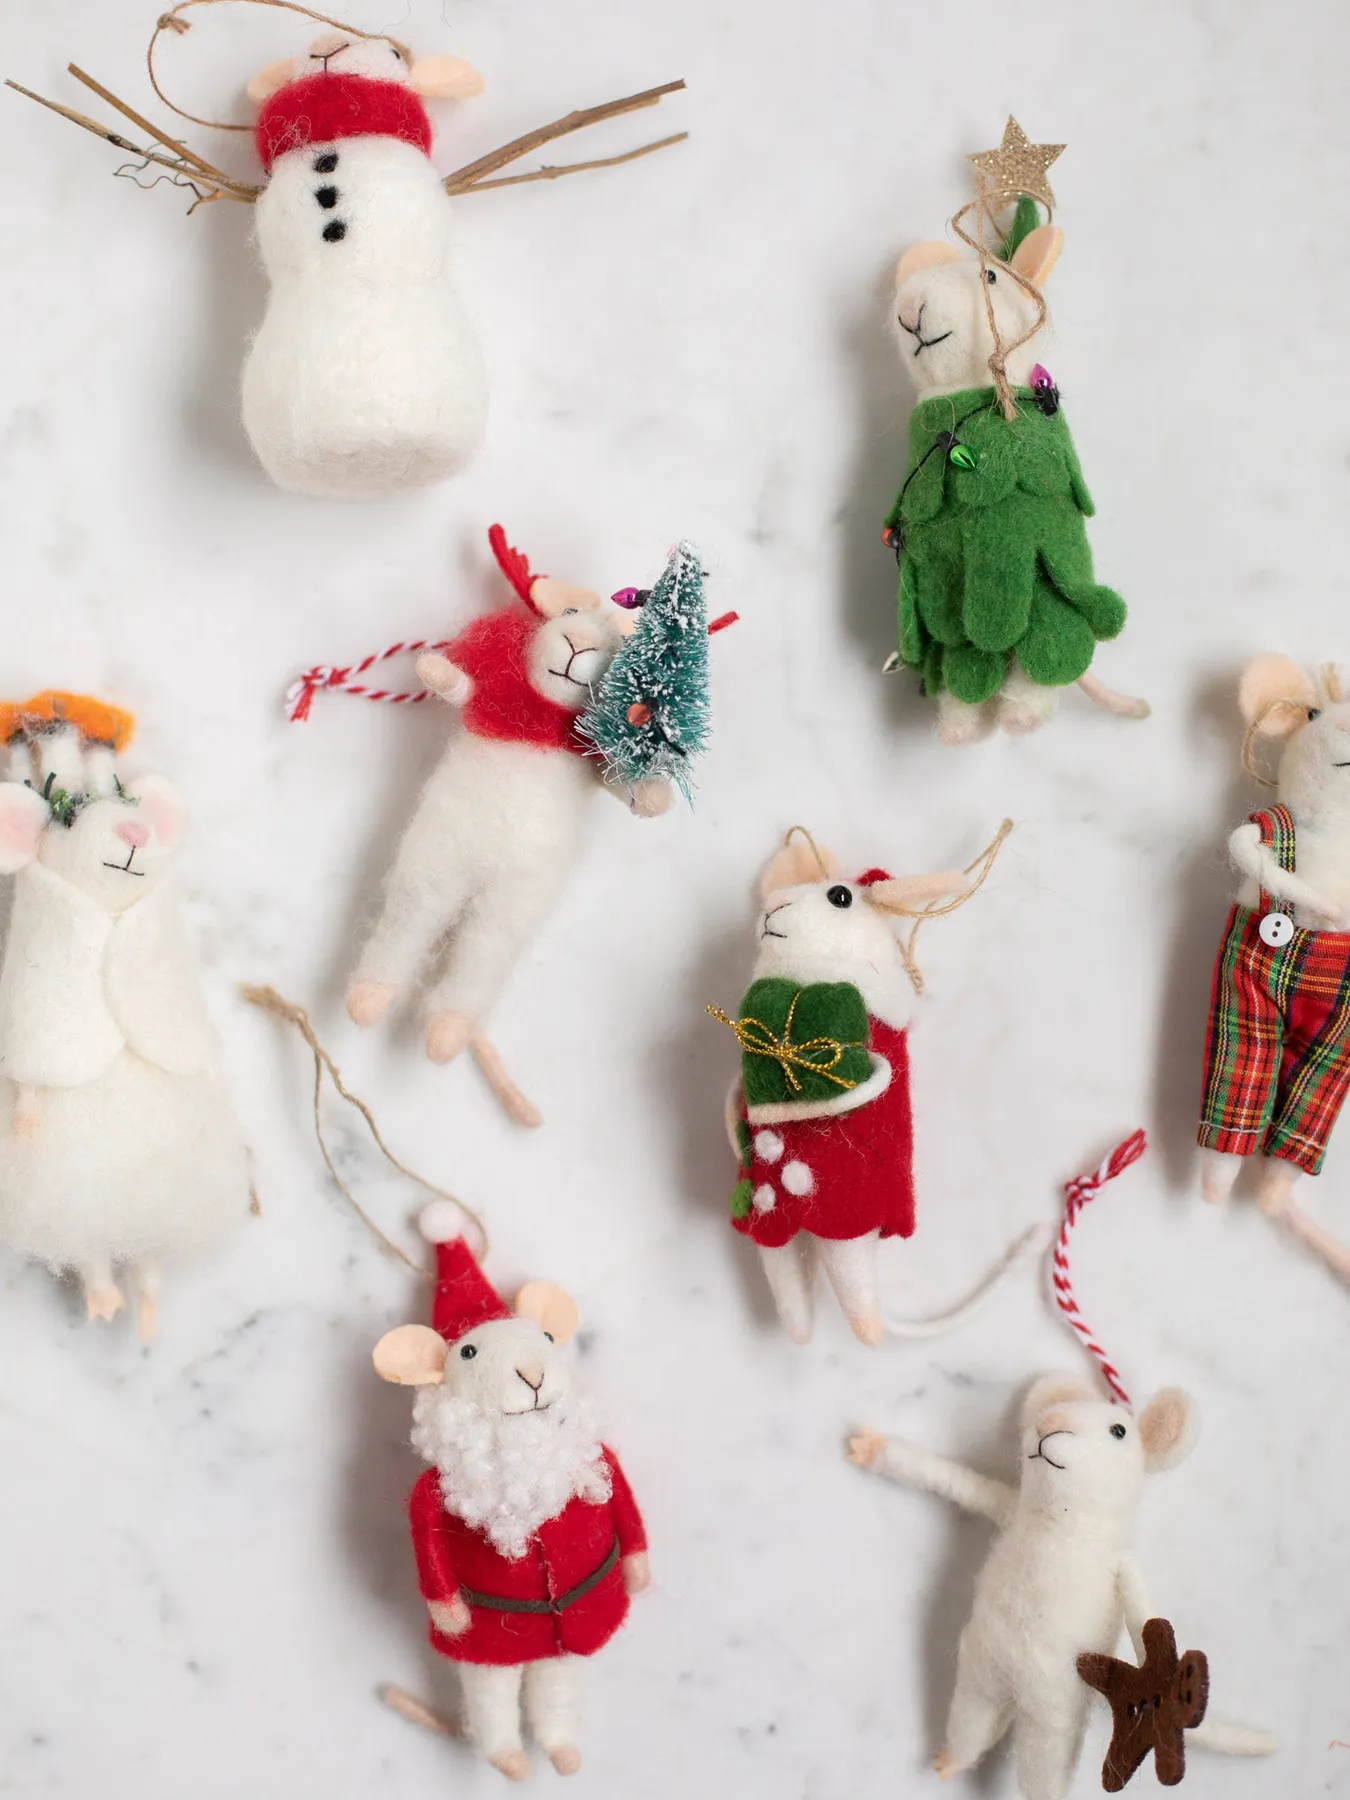
Total: $41–$69 for a set of five, and the supplies stretch to eight or nine mice.
Budget version: buy a $15 needle-felting starter kit and make three mice instead of six. Fewer, larger, better-detailed pieces read as a collection; six rushed ones read as a craft-fair bin.
These want a display surface, not a branch. An 18-inch marble side table, a dresser top, or a shelf gives the group the museum feel the photo is going for. On a tree they’d be lost — the whole charm is the lineup of tiny characters at eye level.
15. Hand-Painted Botanical Ornaments on Pink Velvet Ribbon
Check these five things before you start painting:
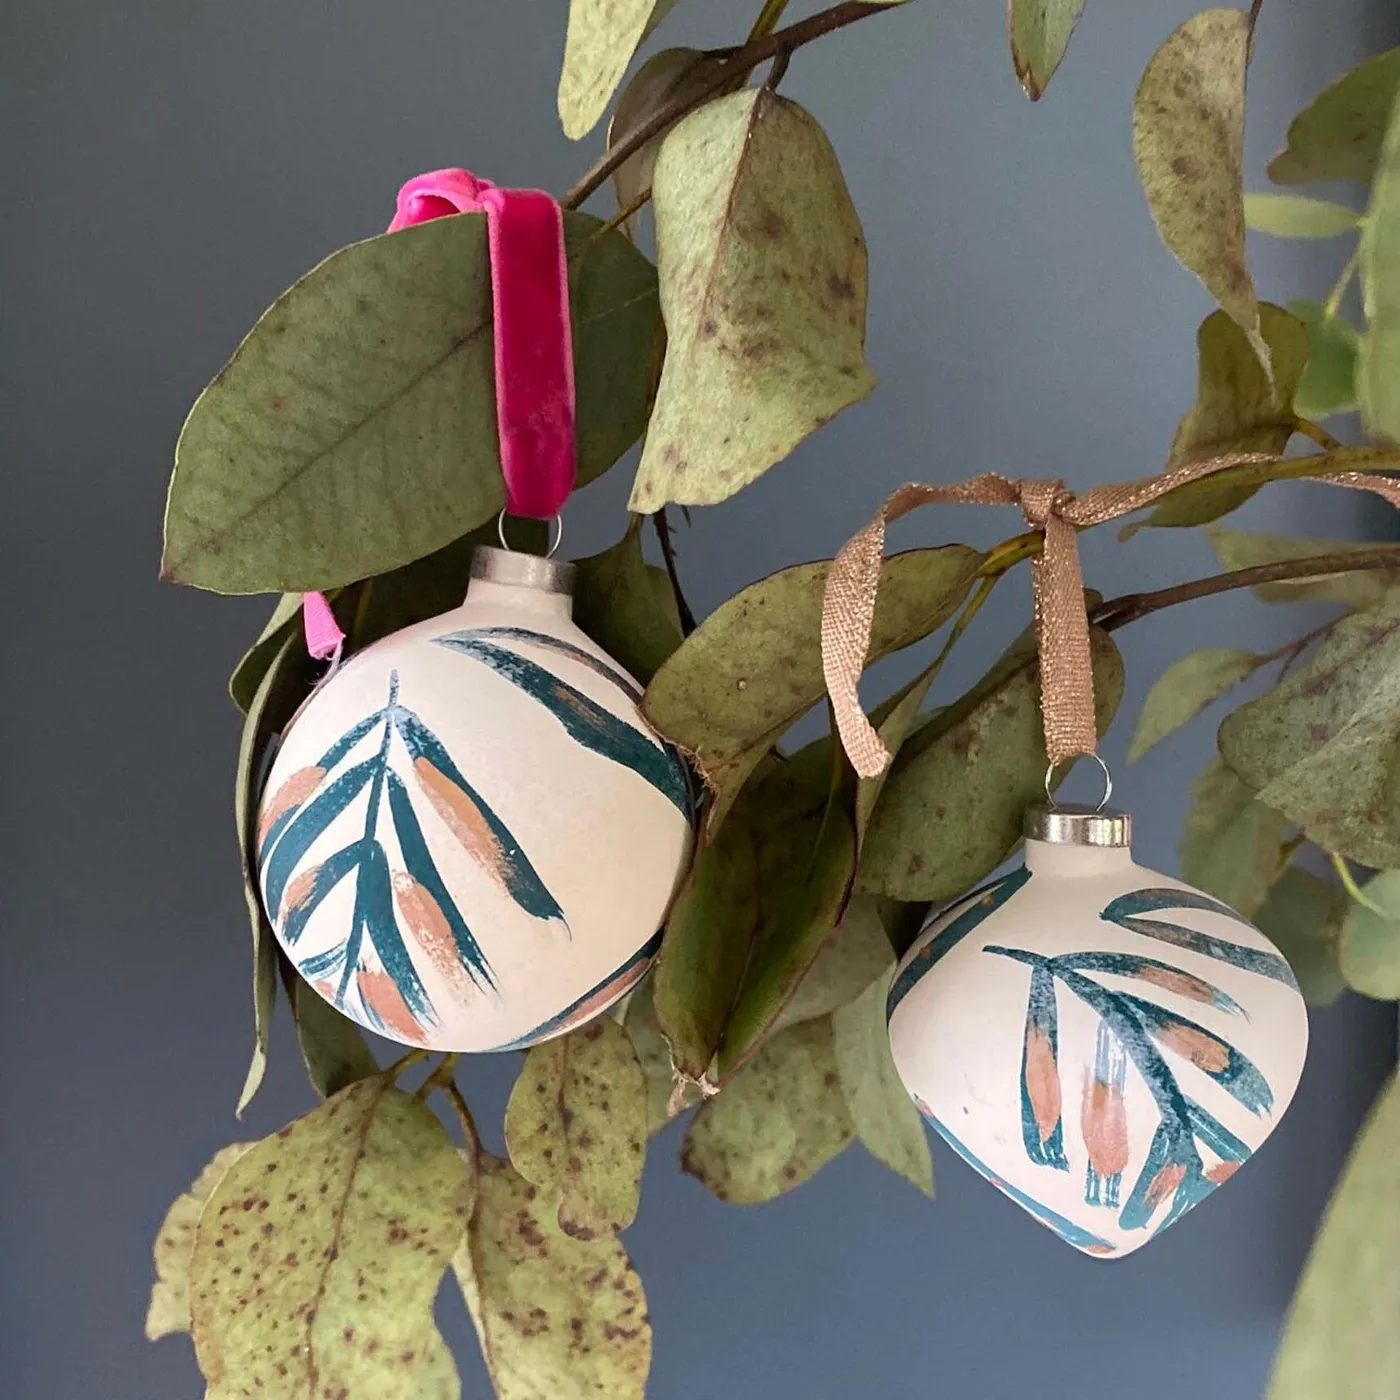
- White glazed or matte ceramic blanks, 2.5 to 3 inches — glossy plastic repels acrylic
- Acrylic paint in teal and peach plus a fine liner brush
- Ribbon wide enough to knot cleanly — 1-inch velvet, 1/2-inch gold woven
- A branch or dowel to hang them from while drying
- Matte sealer, because acrylic on ceramic chips at the cap
The palette math here is unusual and worth copying: 60 percent bright white blank, 25 percent teal and peach brushstrokes, 15 percent hot pink velvet and gold ribbon. The ornament stays white-dominant so the ribbon can be loud. Reverse that ratio and it becomes a decorated bauble instead of a painted one.
16. Matte Ornaments with Gold Script Names and Painted Sprigs
Write the name with an oil-based gold paint pen with a 0.8mm tip, not a brush. Trace it in one continuous pass from the first letter to the last, keep cap height around 1.5 inches, and don’t stop to fix a wobble mid-word — you’ll see the seam. Practice twice on the back of the ornament, which nobody will ever look at.
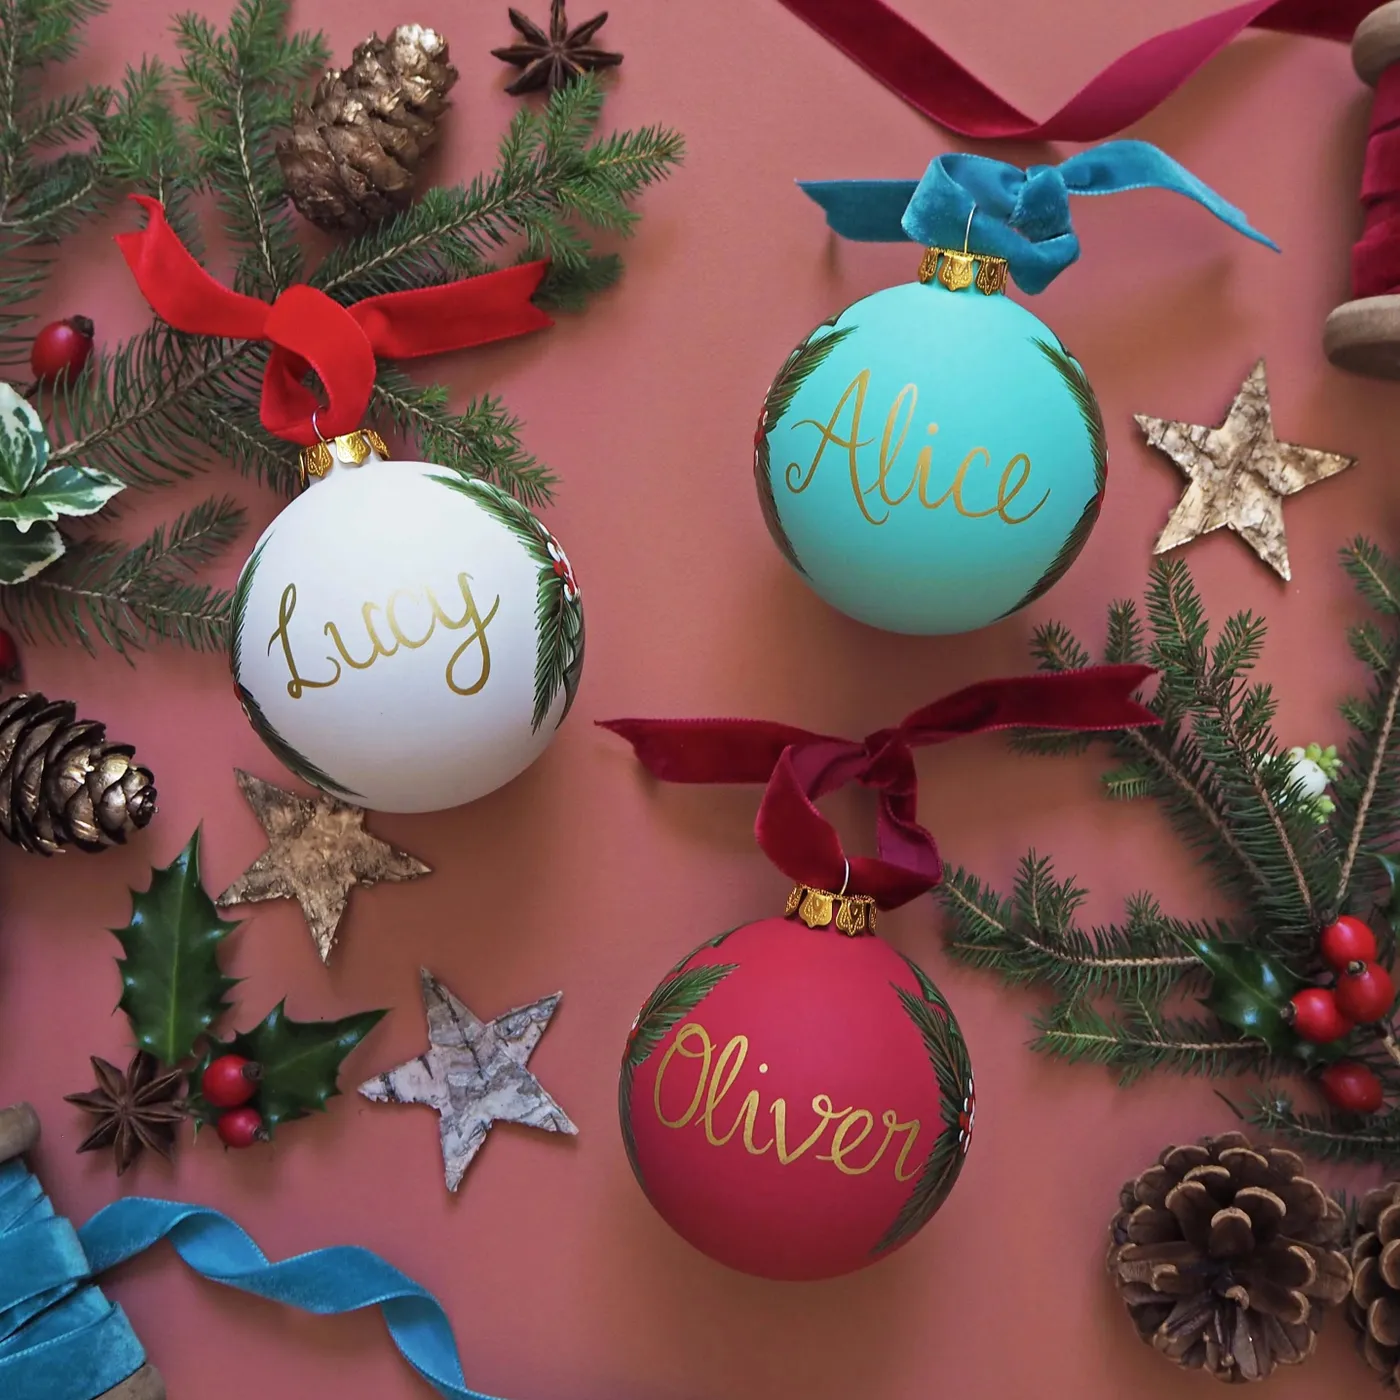
What holds this grouping together is that every element is matte except the names. Hand-painted foliage, velvet ribbon, pinecones, rustic star cutouts — all of it absorbs light, which lets the gold script glow without any glitter anywhere in the frame. Three ornaments share a palette of deep red, teal, and warm white, so each name reads as part of a set rather than an odd one out.
17. Felt Horse Ornaments in Red, Cream, and Grey
Three horses need a 20-inch span to look intentional. They work on a mantel garland, on a 36-inch tabletop tree, or hung from a single branch over a doorway — anywhere you can control the spacing. On a full-size tree, buy six and place them 8 inches apart in the top third. The whole effect depends on repetition, so three scattered around a seven-foot tree just looks like you ran out.
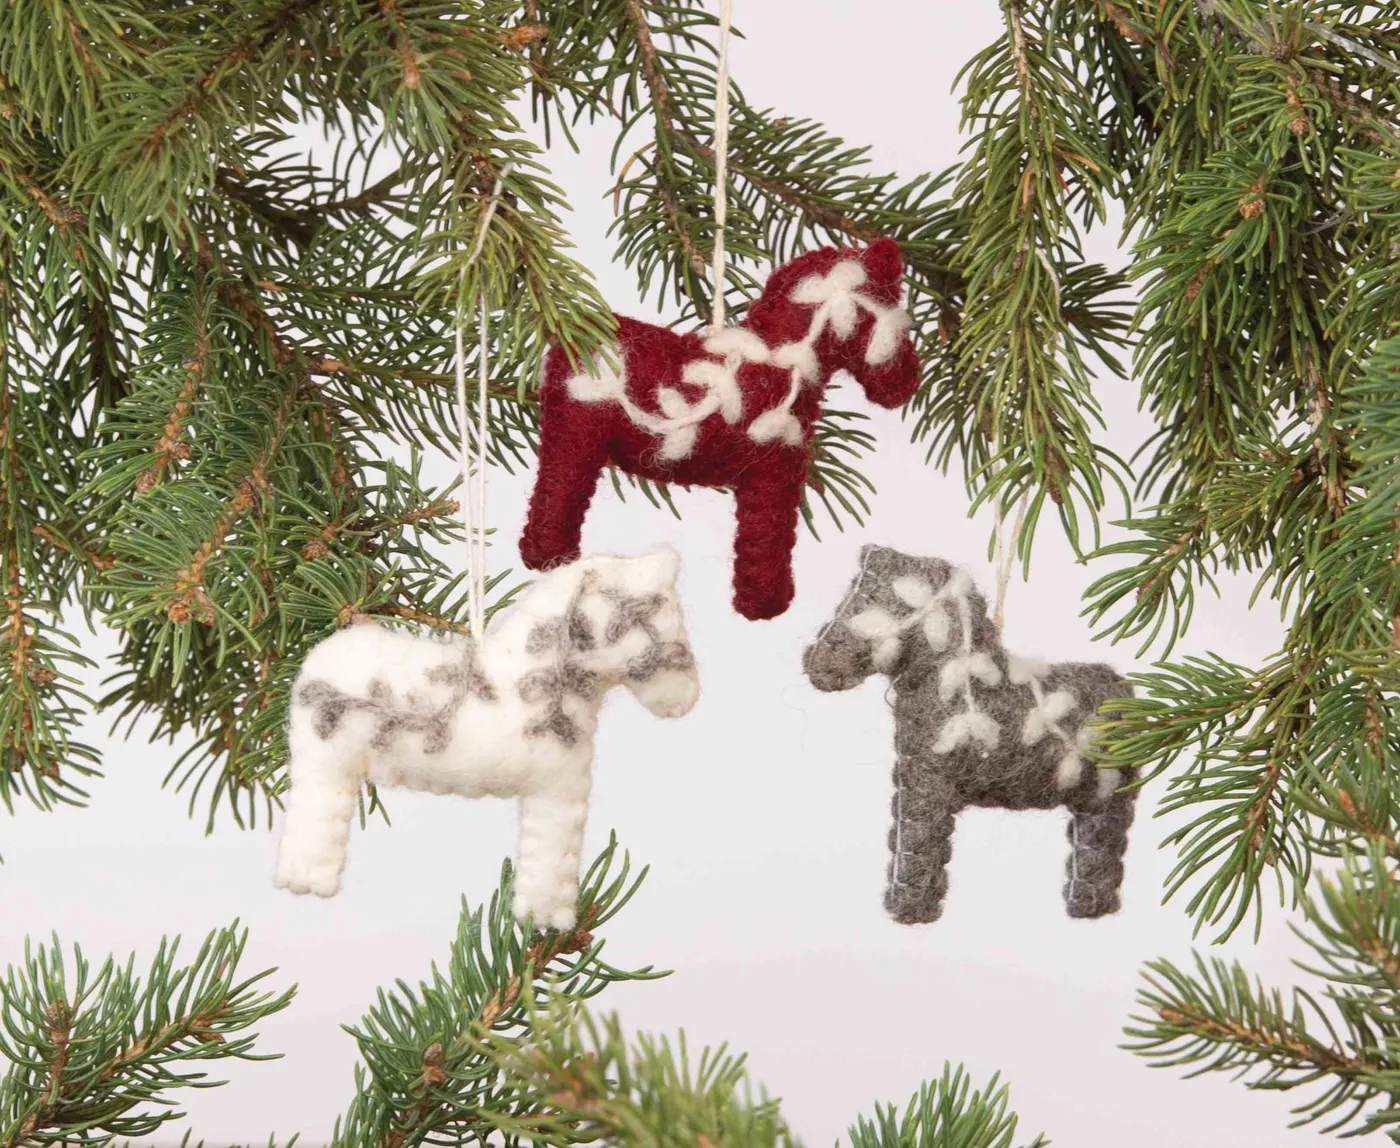
Felt horse ornaments retail for $12–$18 each, which adds up fast. A $6 sheet of wool-blend felt yields four horses if you cut carefully, and the contrasting white and grey patterns are simple appliqué — cut, pin, and blanket stitch around the edge. Figure $2 per ornament plus an evening. The rustic look in Idea #14 uses the same trick: a natural material, repeated three or four times, beats one expensive piece.
18. Photo-in-a-Jar Ornament with Cork Stopper and Snow Beads
Twenty minutes, about $6, and one of the few handmade ornaments people actually ask about.

- Print the photo at 1.5 inches wide on matte paper, not glossy — gloss catches the glass and turns the face into a glare.
- Roll the photo loosely around a pencil and slide it into a 2-inch clear glass jar.
- Pour a teaspoon of small white beads around the base to look like snow, filling no more than a quarter inch.
- Seal the jar with a cork stopper and a dot of hot glue.
- Twist red, white, and silver string around the neck, then wire a small wooden star charm onto the knot.
The cork is the thing. A screw cap or a ribbon-wrapped lid turns this into a craft-fair favor; the cork makes it feel like a tiny bottle someone kept on purpose. Buy corks in a multi-size pack — jar mouths vary more than you’d expect.
19. Pink Felt Triceratops with Hand-Stitched Spots
- Wool-blend felt in pink, cream, and brown: $8–$14
- Polyester fill: $4–$6
- Embroidery floss and a size 5 needle: $4
- Jute twine for the hanger: $3
- Pattern: free, or $3–$5 on Etsy
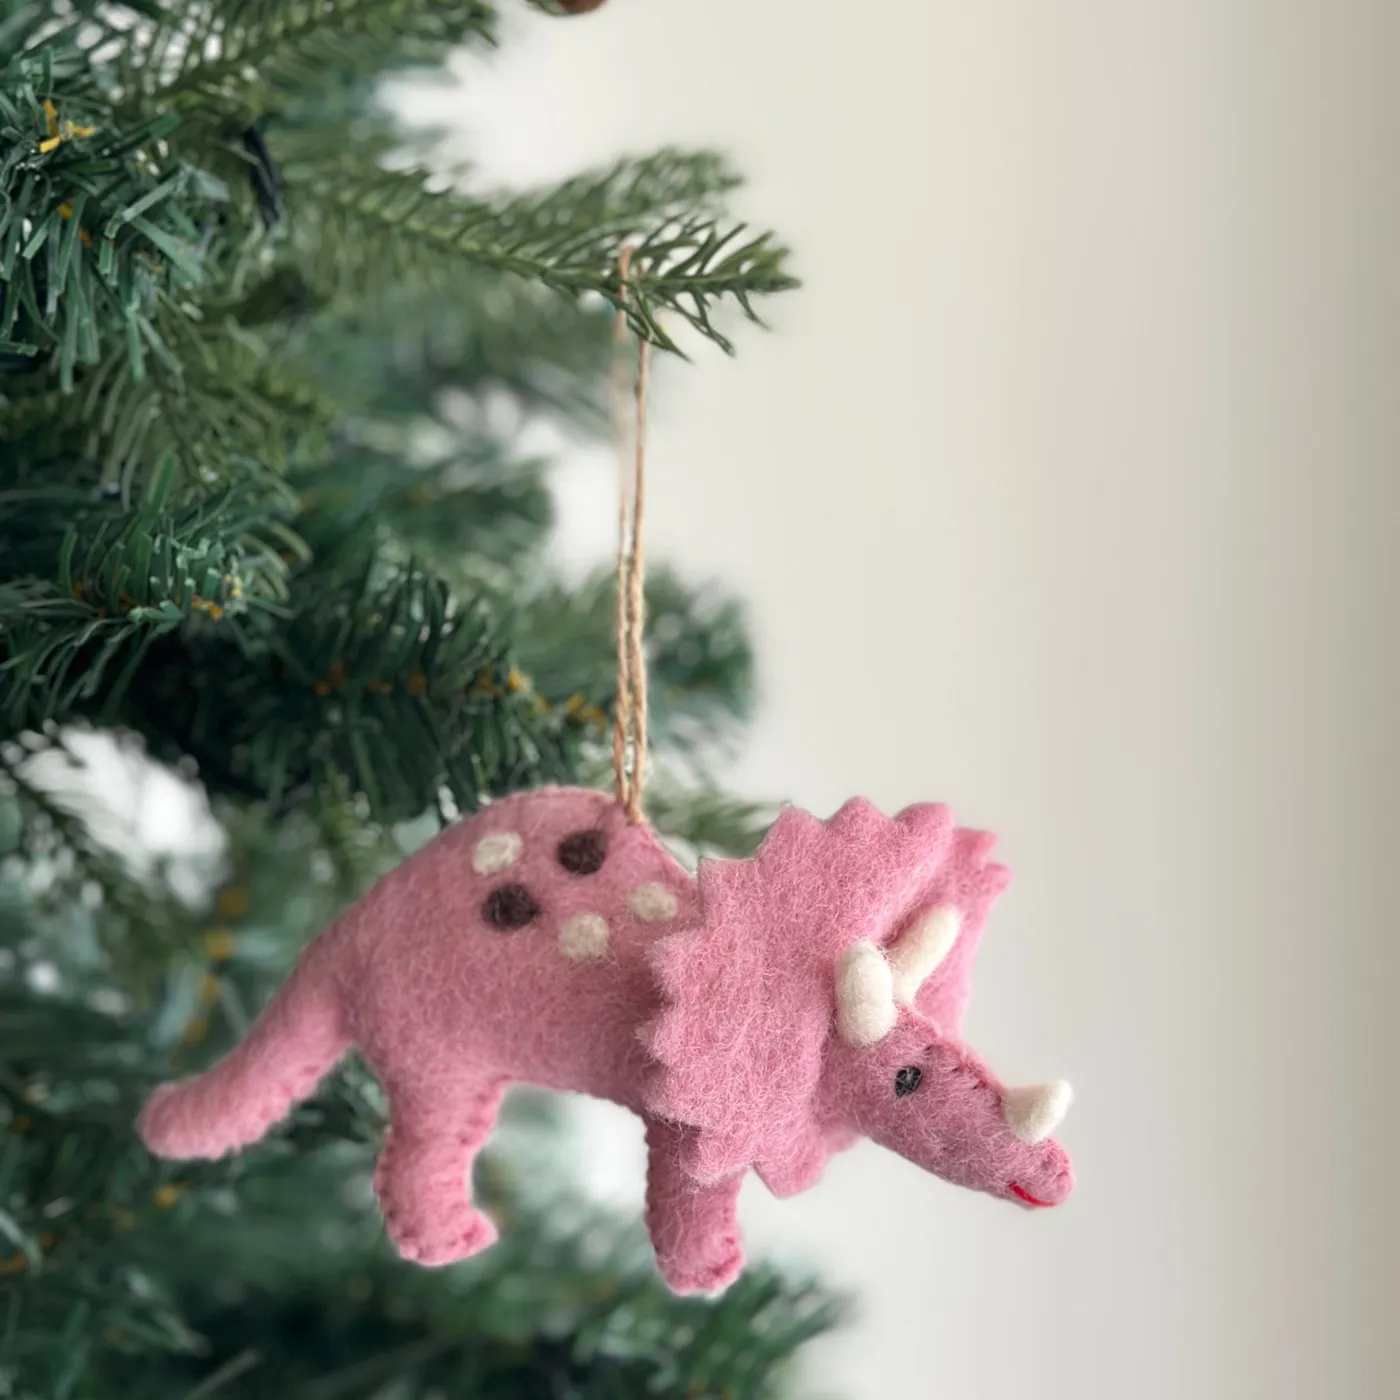
Total: $22–$32 for one, and the felt and floss easily cover three.
Budget swap: craft-store acrylic felt is $1 a sheet versus $5 for wool blend. It pills after a season and the edges won’t hold a blanket stitch as cleanly, but for a kid’s tree, nobody will notice.
Two things bite you here. First, glue the spots instead of stitching them and they’ll peel by February — stitch, don’t glue. Second, keep the finished dinosaur under 4 inches and light on fill. Felt gets heavy fast, and a lopsided dinosaur on a drooping branch is the fastest way to make handmade look homemade in the bad sense.
20. Wall-Hung Macrame Trees in Sage and Forest Green
The formula is 55 percent sage green, 25 percent forest green, 15 percent light wood beads and stars, 5 percent pinkish-beige wall. That near-neutral wall is doing quiet work — a white wall would make the sage look grey, a warm cream would turn it yellow. The wooden star toppers tie the two greens together because they match the beads running down each trunk.
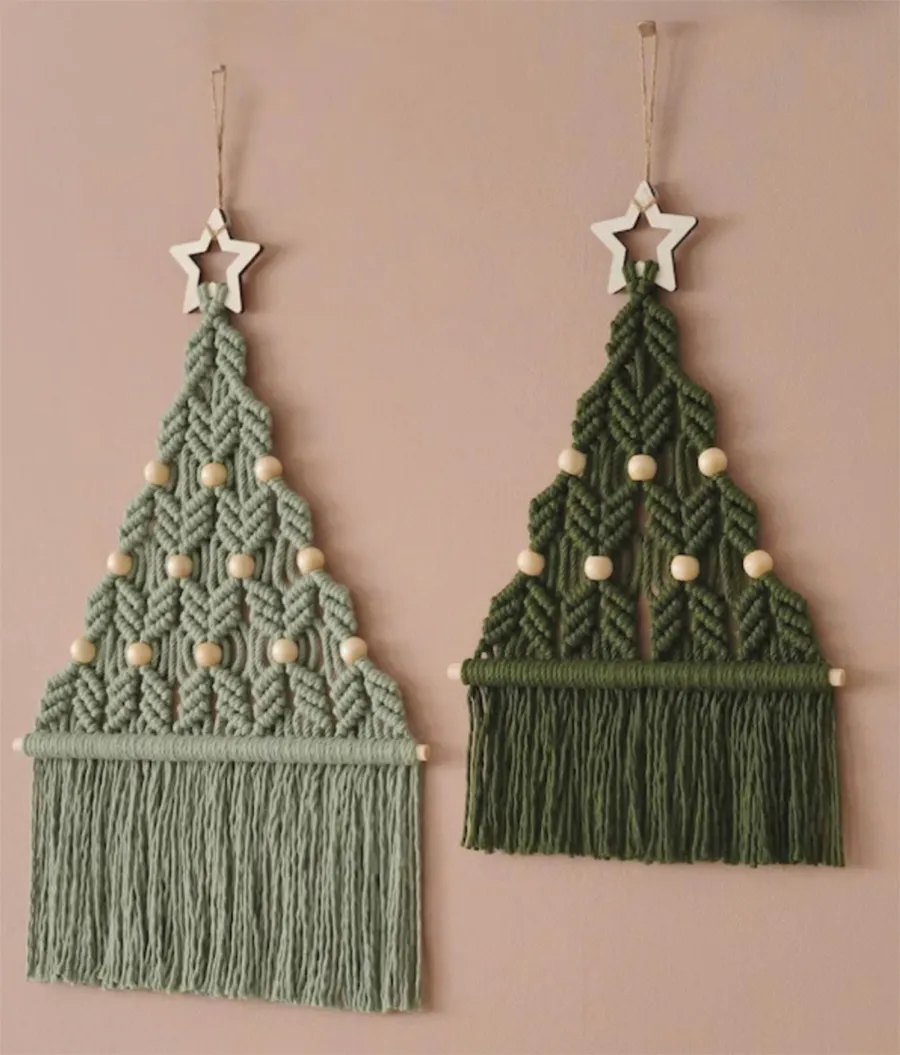
Wall hangings collect dust in a way tree ornaments never do. Take them down twice a season and shake them out, then hit the fringe with a lint roller on low tack. Keep them out of a steamy bathroom and away from a heating vent or the cotton will sag and the fringed bottoms will start curling within a couple of months.
21. Off-White Macrame Tree Ornament with Wooden Beads
Bead placement is what separates a good macramé tree from a messy one: one 10mm bead every 1.5 inches of trunk, alternating sides. Slide each bead on before you tighten the knot, not after — forcing it afterward stretches the cord and the whole trunk goes wobbly. And leave the bottom two rows undecorated so the fringe reads as branches.
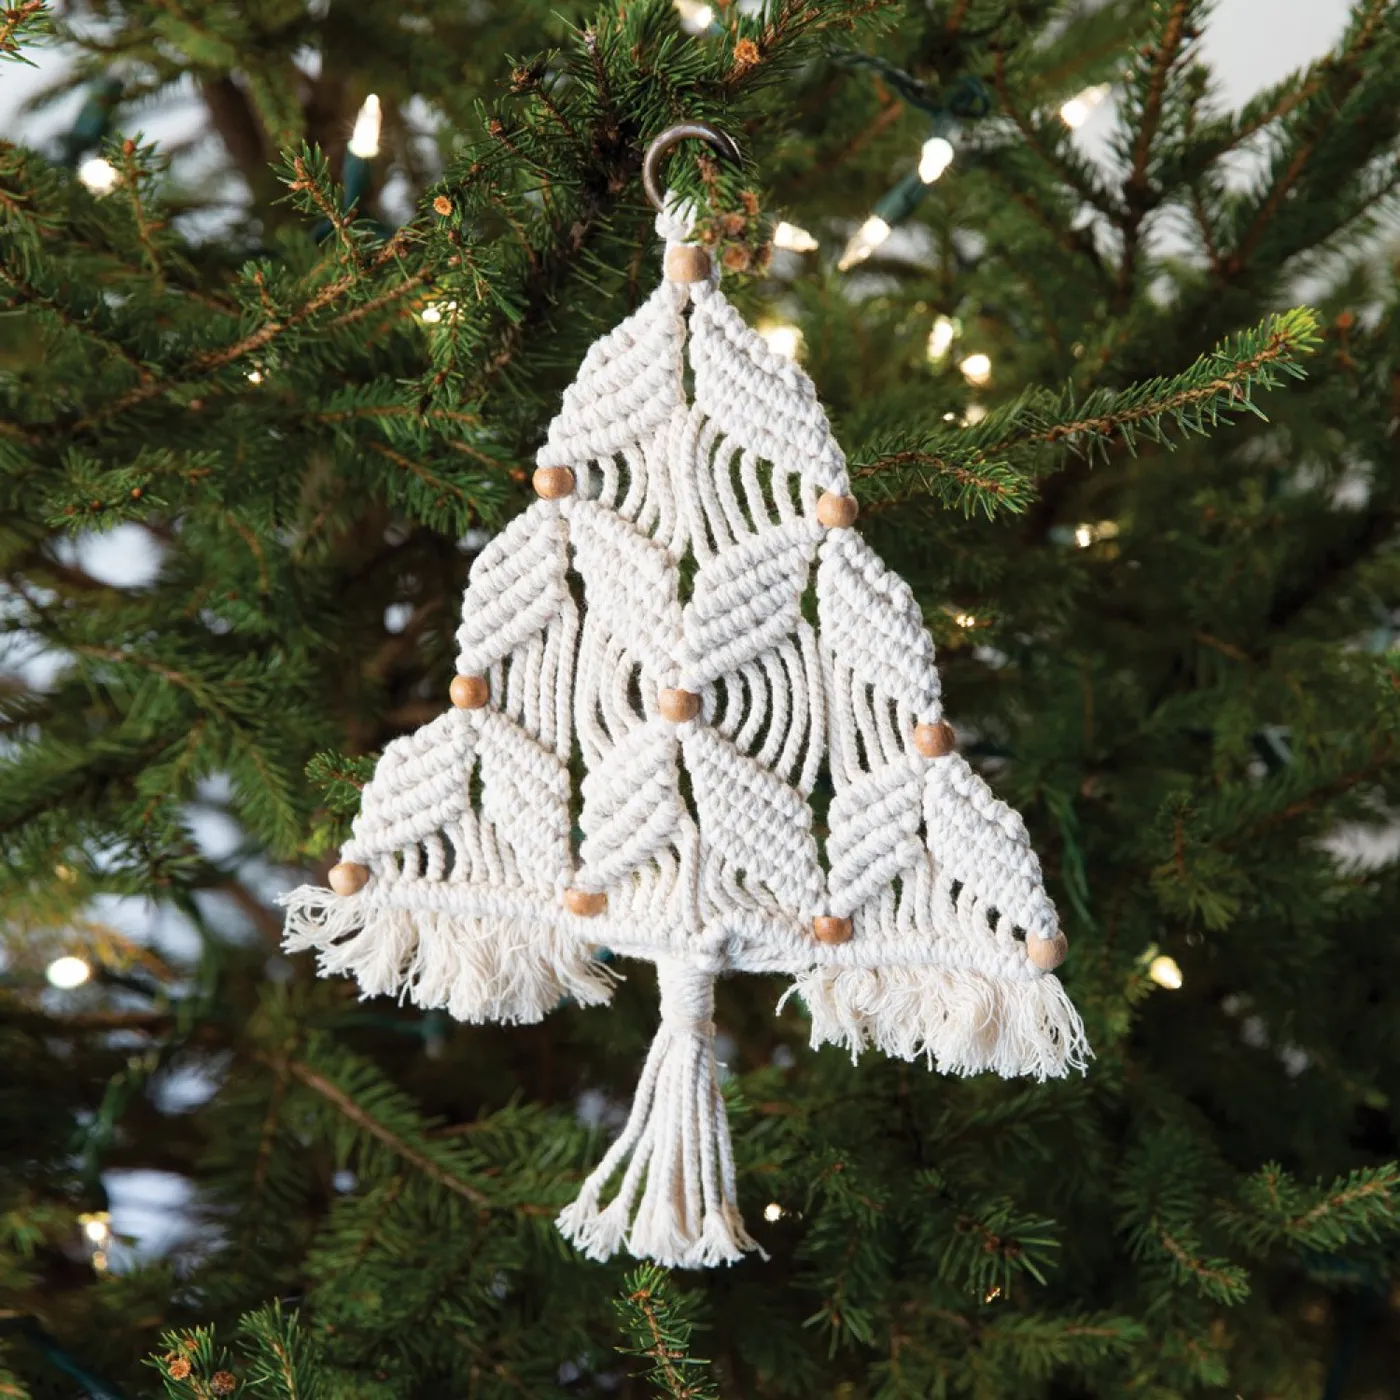
This is a true tree ornament at 4 inches, so it wants a 6-foot-plus tree to make sense. On anything smaller than 5 feet, it disappears. The wall-hung versions in Idea #12 are the answer if you’re working with a tabletop tree or a small apartment and want the same knotted texture at a scale that actually reads from across the room.
22. Toy Cars and Bottle Brush Trees in Glass Cloches
Three containers, one rule: each one is a complete little world. The two spheres and the cylinder don’t match, but they share snow, a bottle brush tree, and a vintage-style car, and two of them sit on wood slices — so the group reads as a collection rather than a set. That’s the difference between a display and a shopping haul.
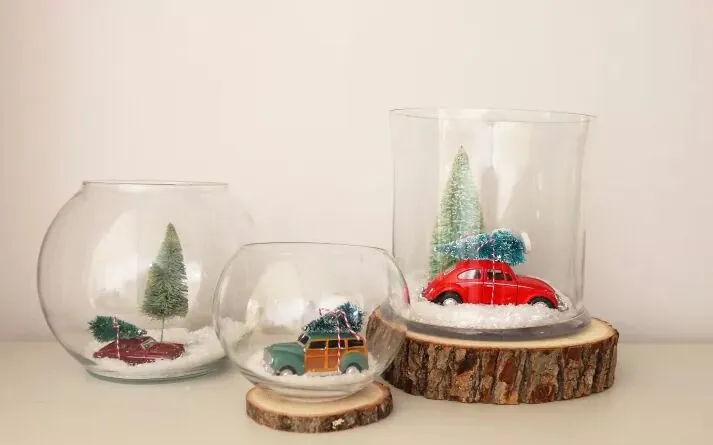
Nostalgia is driving this one. The die-cast car is the same shape people remember from a 1970s tree, and miniature worlds inside glass have been climbing Pinterest boards for a couple of years now. It’s a safe bet: the components are small, replaceable, and unfashionable in the best sense, so you won’t be redoing them in 2028.
23. Clear Ornament with a Wooden Deer and a Tiny Forest
Fifteen minutes and about $8 once you have the trees.
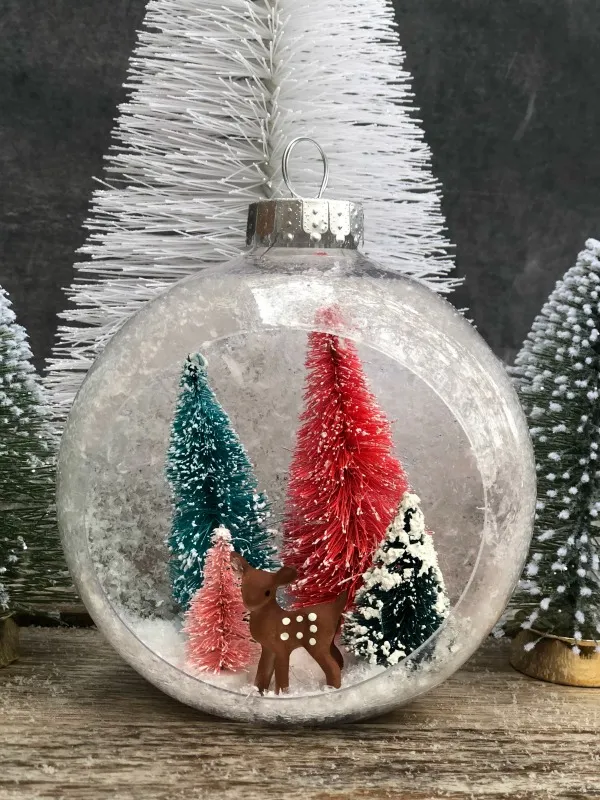
- Pop the cap off a clear 3-inch plastic ornament and set it aside.
- Pour in a quarter inch of faux snow, then add a small pinch of loose glitter for sparkle.
- Stand four bottle brush trees in the snow — tallest in back, 1 to 2 inches high — and press their bases down.
- Glue the tiny wooden deer to the base with a dot of hot glue so it can’t slide when the ornament swings.
- Replace the cap, hook it on, and give it a gentle shake to settle the snow around the bases.
Inside the sphere, hold the color ratio to roughly 70 percent white snow, 20 percent trees, 10 percent deer and glitter. Four tree colors is the ceiling — red, teal, pink, and green already borders on busy. Add a fifth and the miniature scene turns into confetti.
24. Miniature Forest Ornament Hanging on a Bright Green Tree
Made versions of these sell for $18–$35 on Etsy. The DIY version lands around $7: a $4 clear plastic sphere, $6 for a pack of twelve small bottle brush trees, a couple of dollars of faux snow. That’s a quarter of the price, and you can match the tree colors to your own ornaments instead of someone else’s.
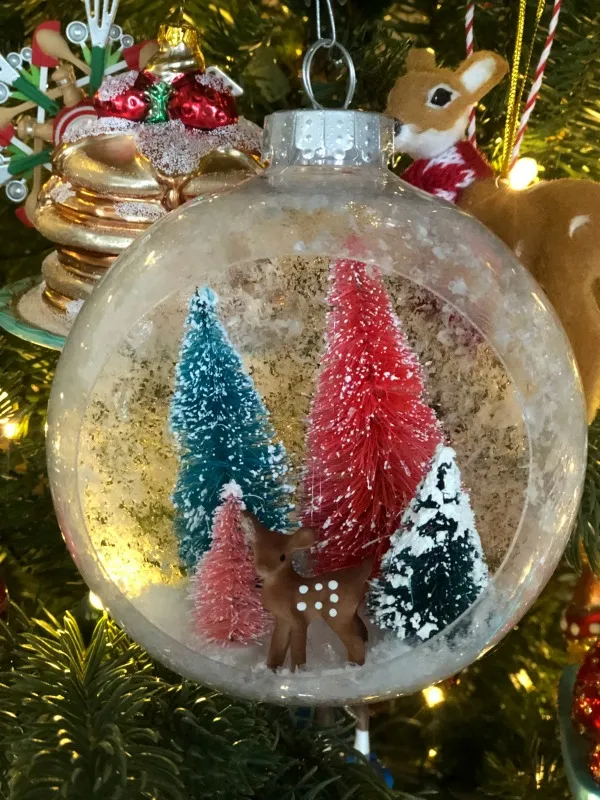
Two honest warnings. Clear plastic clouds over two or three seasons — it goes slightly hazy, and no amount of cleaning fixes it. Glass stays clear but weighs three times as much, so hang it on a sturdy upper branch. And the scale is unforgiving: a 3-inch sphere full of tiny trees is invisible from more than four feet away. Cluster three together and treat them as one ornament, the way Idea #23 treats the deer scene, or they’ll vanish in the greenery.
25. Knitted Penguin in a Fair Isle Sweater
The sweater is the entire ornament. Take it off and you have a grey-and-white bird that could be any felt animal on any tree. The chunky red knit with white, blue, and yellow stitches is what makes it read as a character with a personality — and it’s why the natural twine hanger matters, since anything shinier would compete with the pattern. If you knit, that band of Fair Isle is roughly 12 rows and takes an evening.
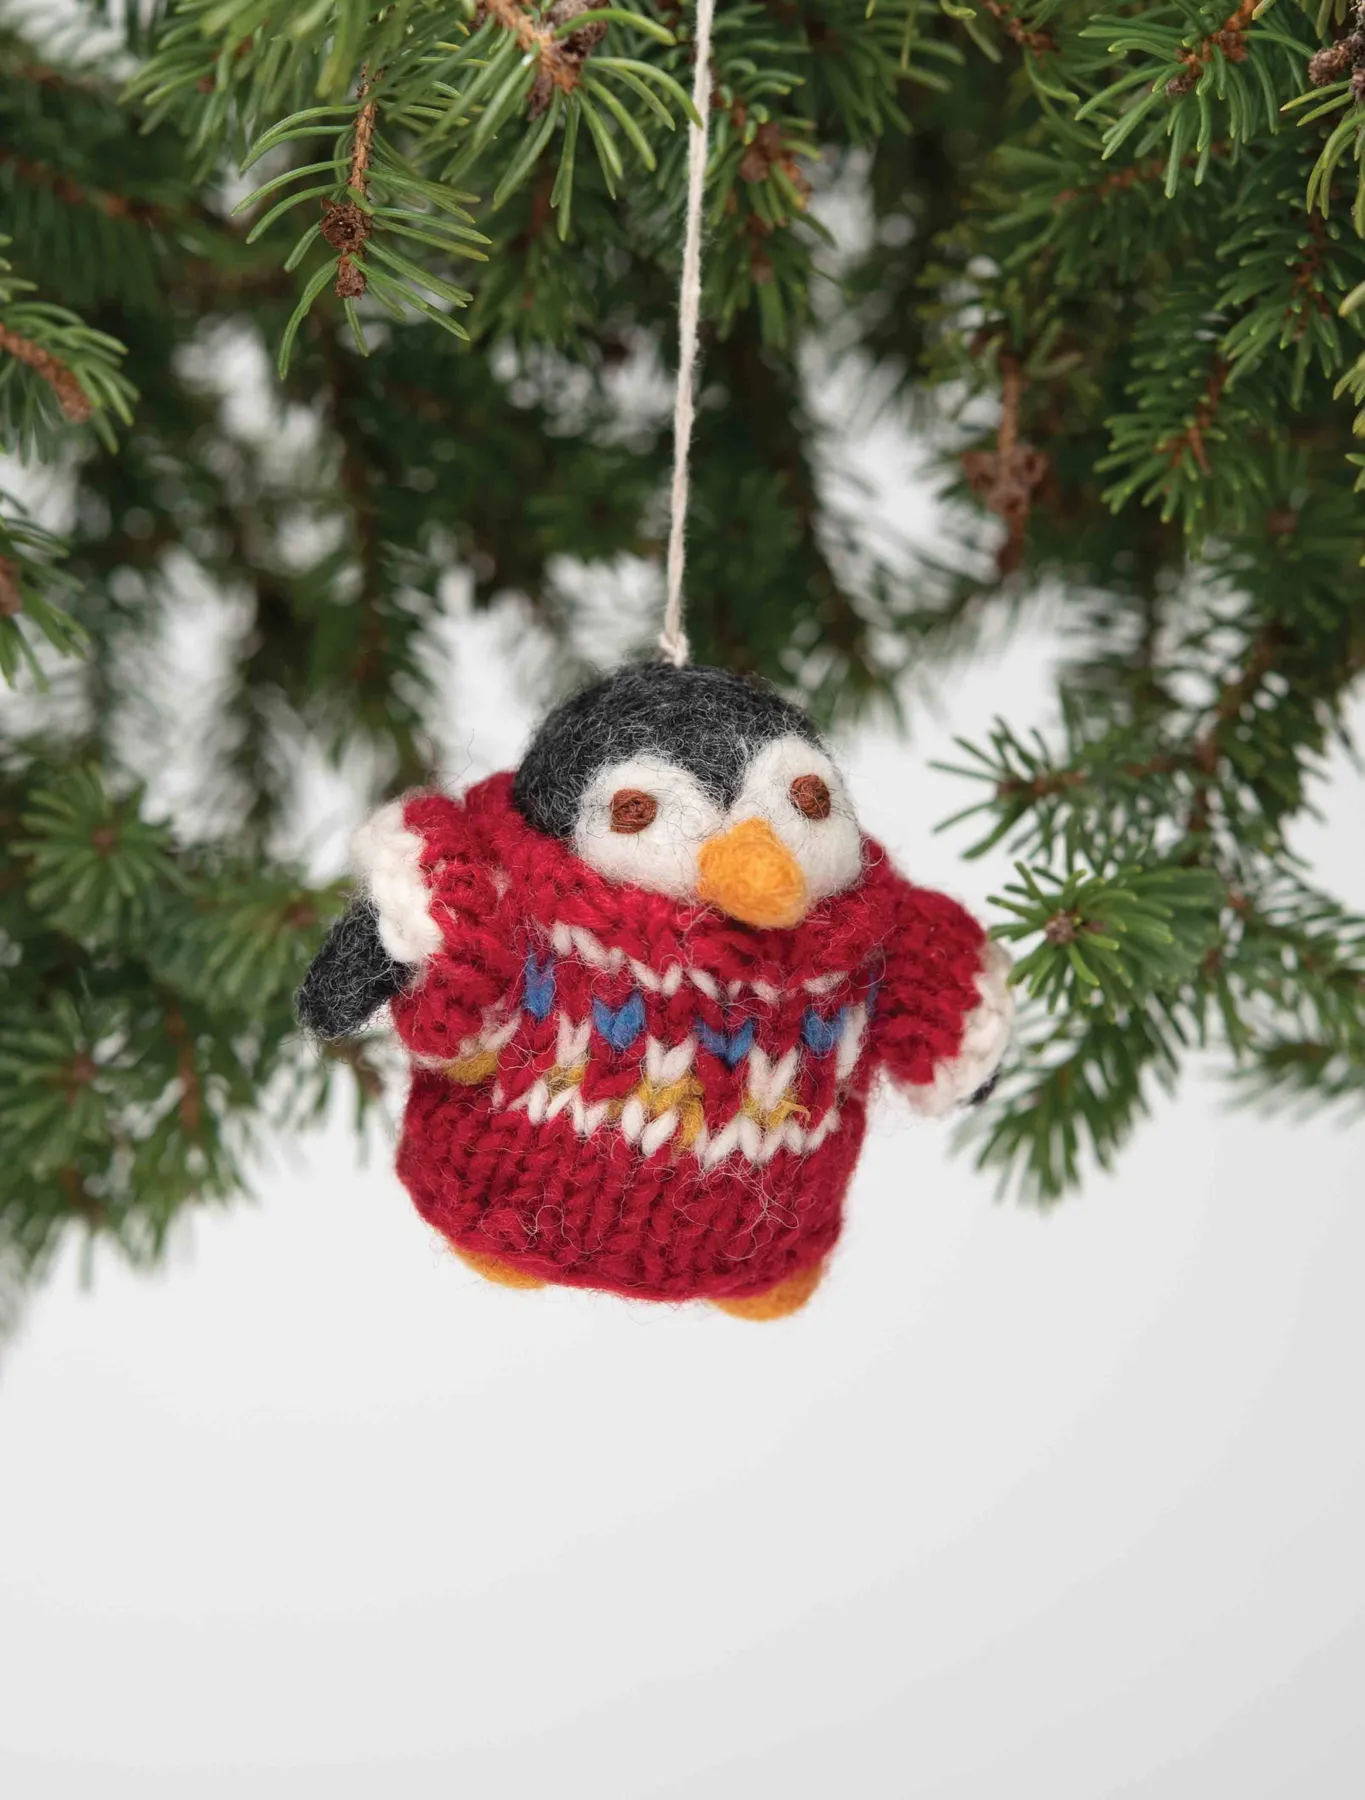
Knit at a tighter gauge than feels comfortable. For an ornament this size, aim for about 9 stitches per inch — worsted weight on 2.5mm needles — and stuff firmly so the sweater pattern doesn’t stretch out of shape. Loosely knit ornaments look baggy within a month of hanging, and the stitches blur at three feet.
26. Grey Felt Seahorse with Visible Blanket Stitch
- Grey and white wool-blend felt: $6–$10
- Black glass bead for the eye: $3 for a pack
- Embroidery floss in grey: $2
- Polyester fill: $4
- White cotton string for hanging: $2
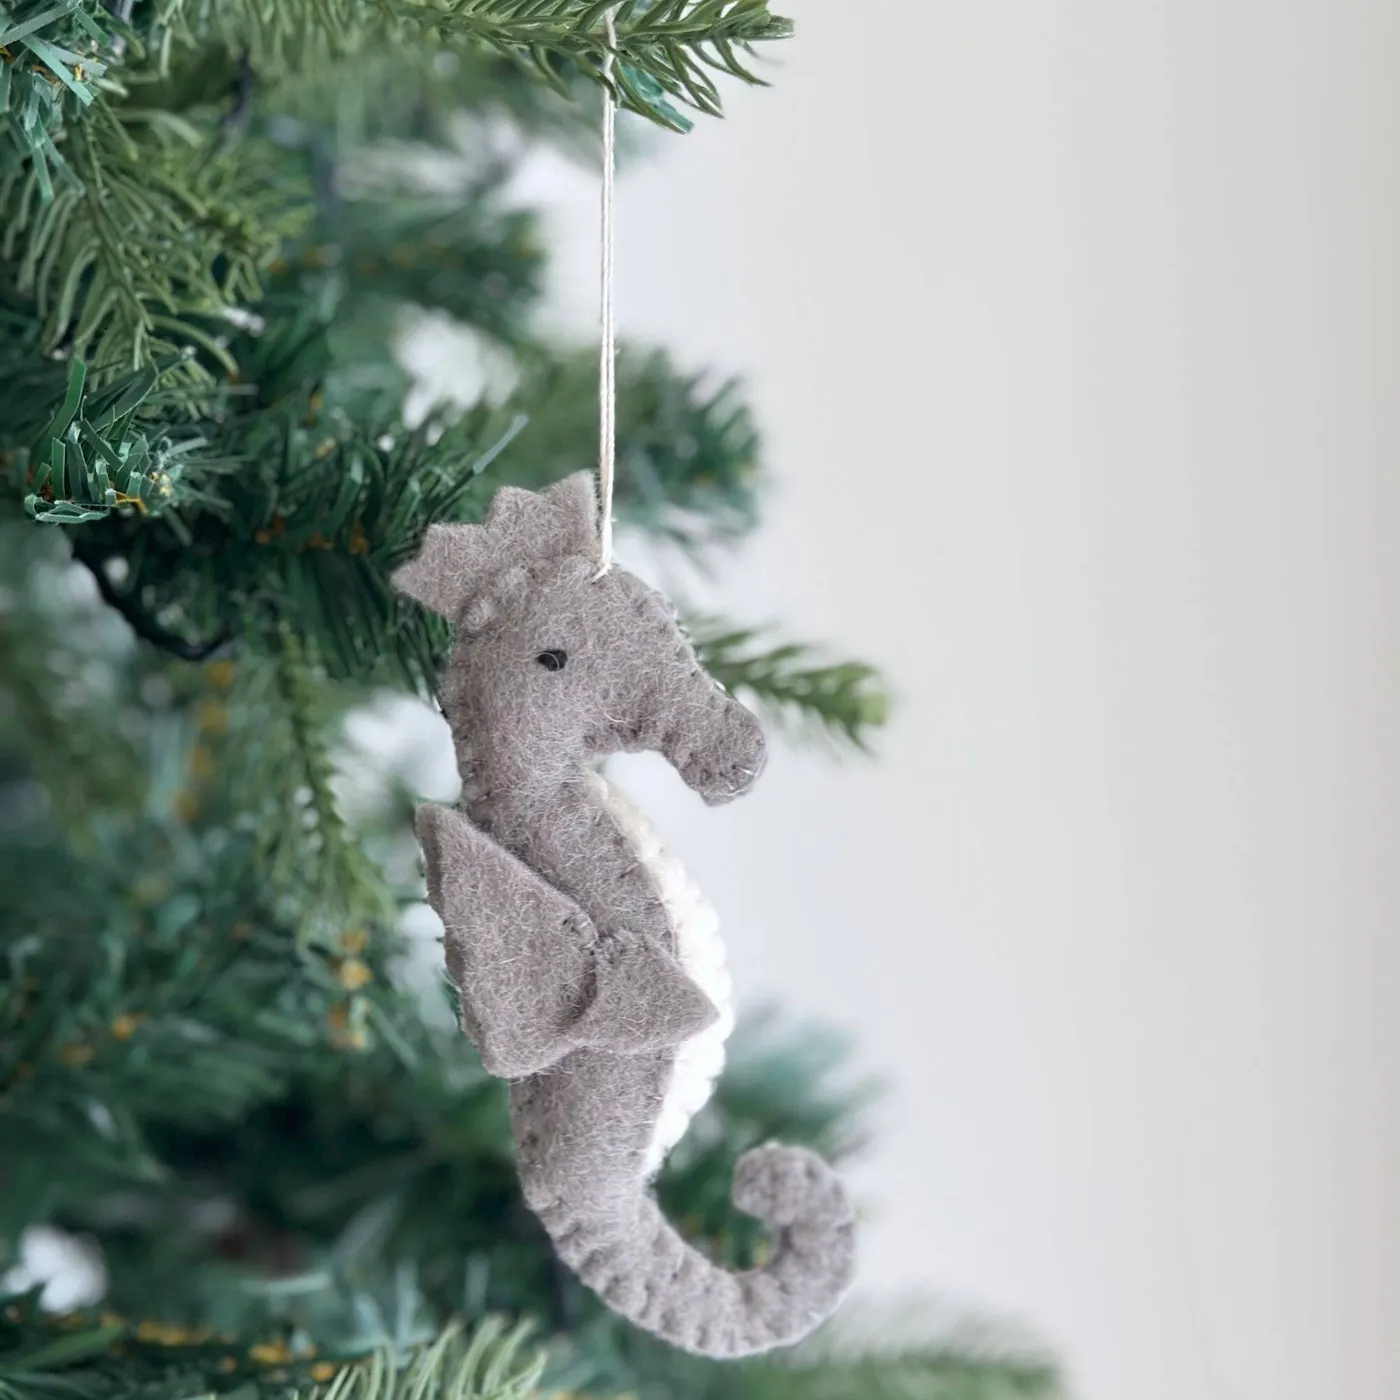
Total: under $20 for the first one, about $4 for each after that.
Budget alternative: a single $1 sheet of craft felt and a needle you already own gets you a version nobody will inspect closely. Just don’t skip the bead eye — it’s what makes the seahorse look alive rather than sewn.
Felt this light collects lint like a magnet and the raised stitching snags on pine needles. Brush it with a soft toothbrush every couple of weeks during the season, and store it flat in a tissue-lined box rather than tossed in the ornament bin — the visible stitch is the charm, and a crushed one won’t press back out.
27. Felt Cone Trees with Red Bead Accents on a Lace Doily
Three trees, three heights, one palette: forest green, red, and warm beige at roughly 60/25/15. The gold chain garland is barely 5 percent of the total area but it’s the element that makes the group feel finished, because it repeats on all three trees at different lengths. Swap red beads for white and you get a completely different mood without changing a single construction step.
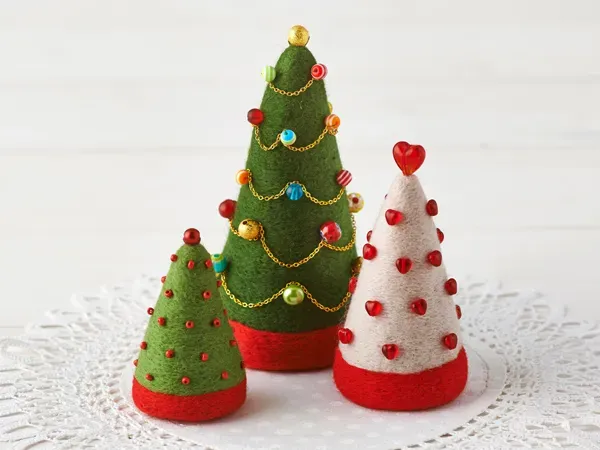
What makes the arrangement work is the graduated scale — tallest in back, smallest in front, each one about 75 percent the height of the last. That’s a classic rule-of-thirds trick borrowed from photography, and it’s why three random trees on a shelf look like clutter while three graded ones look styled. The lace doily underneath softens the wood surface and gives the group a base.
28. Coiled Rope Tree with a Mini String of Lights
About 40 minutes and roughly $6 per tree.
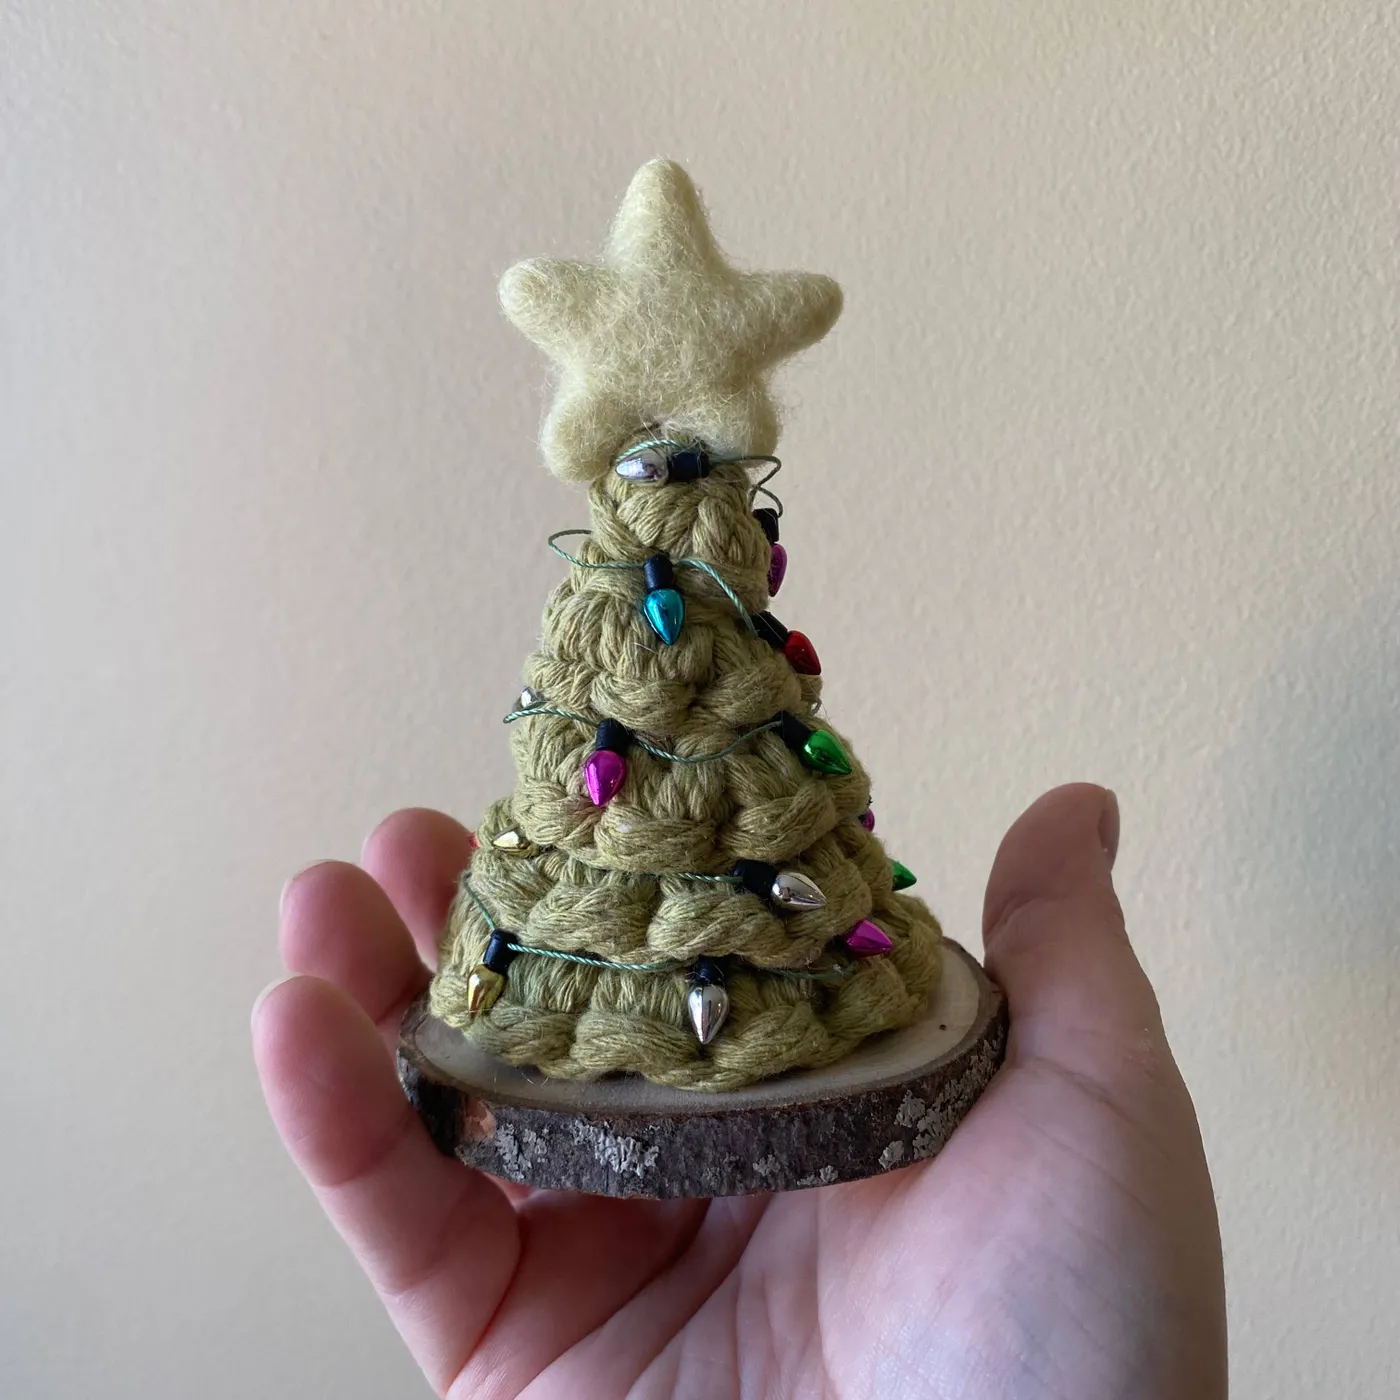
- Cut a 3-inch wood slice with the bark left on and drill a small pilot hole in the center.
- Coil olive green cotton rope from the outside in, gluing each ring to the one before it with hot glue.
- Build upward in shrinking rings until you have a cone about 5 inches tall.
- Wrap a miniature battery string of lights around the cone, tucking the wire between rope rings.
- Glue a small felt star to a toothpick and set it into the top hole.
Use 6mm cotton rope, not sisal or jute — the coarser fibers don’t coil tightly and the gaps show. And keep the battery pack at the back base of the tree, hidden behind the bottom ring, so you can switch the lights on without lifting the whole thing. Hot glue sets in seconds, so press each ring for a full five count before moving on.
29. Matte Painted Ornaments on Leather Straps and a Dowel
Matte finishes have quietly taken over the ornament aisle because they photograph without glare — which matters more in 2026 than it ever did, since half of us are buying decor we first saw on a screen. The painted foliage motifs here lean into a second shift too: hand-painted detail over printed pattern, and leather straps instead of ribbon, which reads as considered rather than cute.
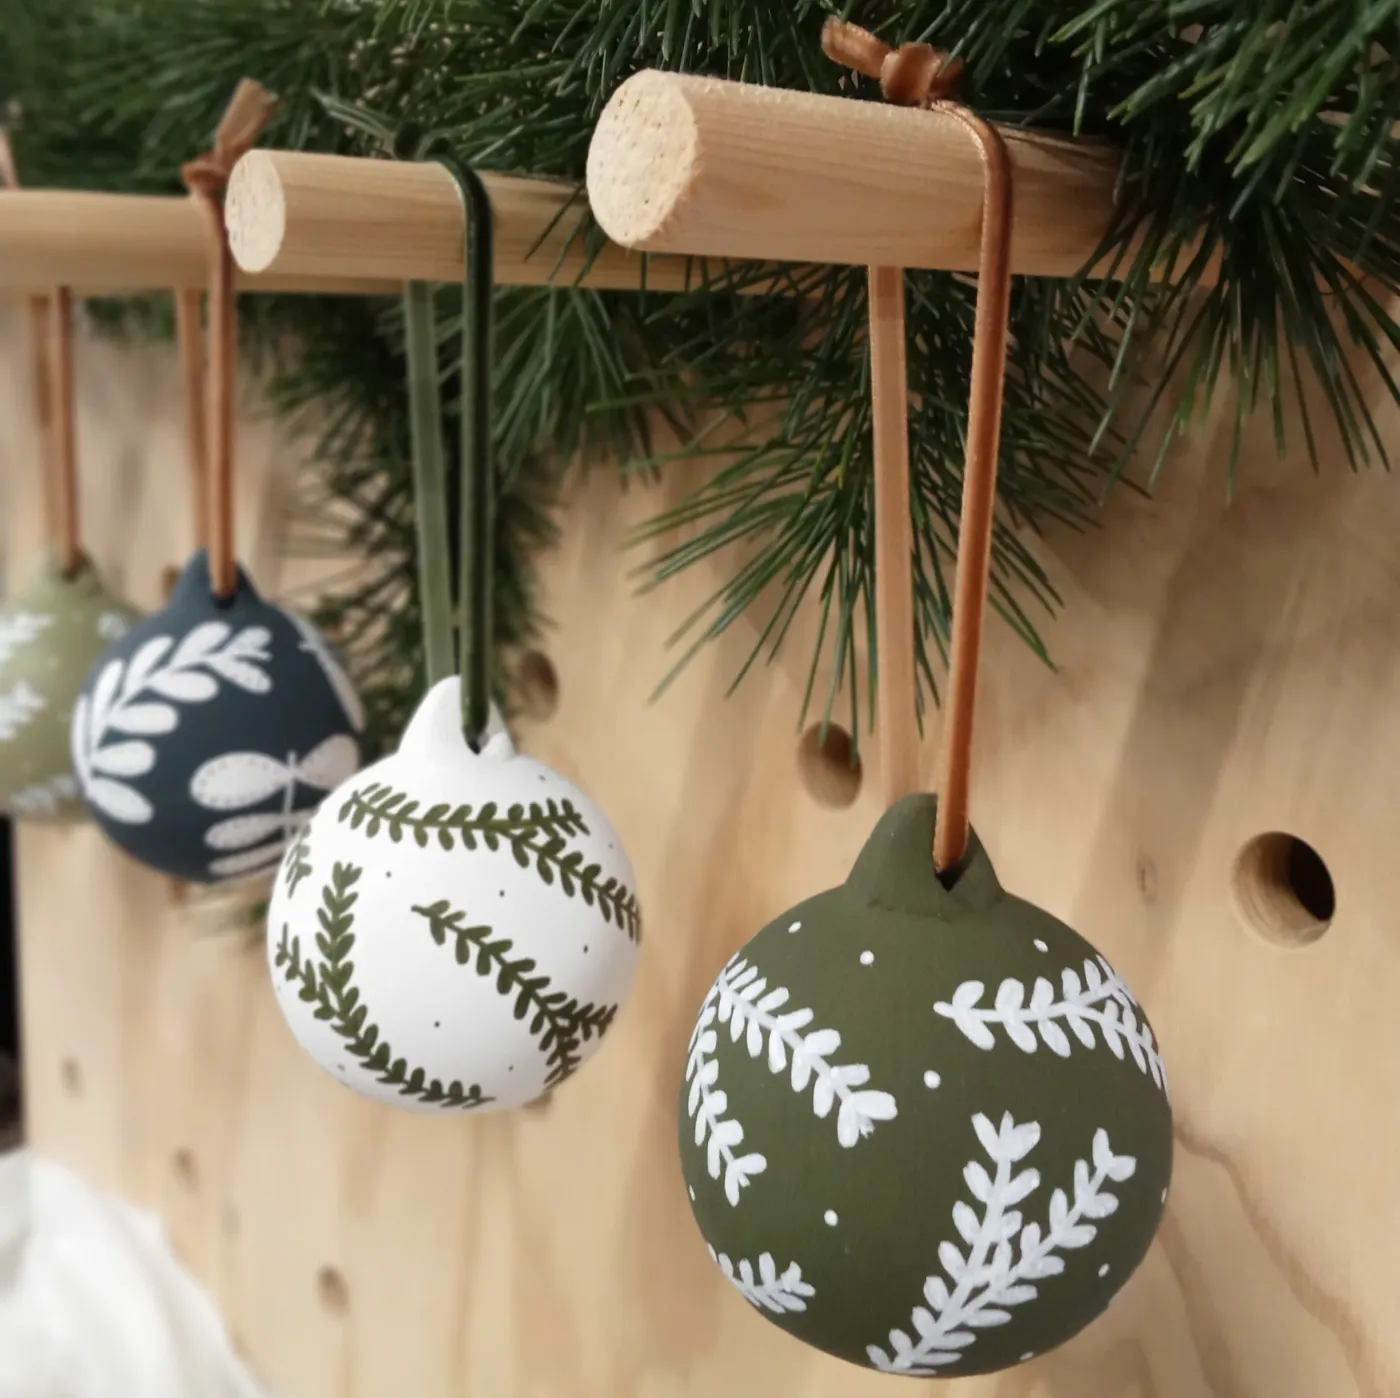
Five checks before you commit:
- Blanks in matte white, olive, and dark blue-gray — three colors, no more
- A light wood dowel and twine to hang everything while it dries
- Leather cord or thin straps, cut to 6 inches
- Matte sealer, applied in two thin coats
- A test ornament you’re willing to ruin learning the brushstroke
Skip the sealer and the paint will scuff off in the ornament box by next December.
30. Knitted Mouse in a Santa Hat and Snowflake Sweater
The blue snowflake sweater is the piece that makes this mouse. Everything else — taupe body, black whiskers, pink inner ears — is standard issue for knitted animals, but a blue Nordic snowflake on a red-hatted mouse is a specific, slightly odd choice, and specific choices are what people remember. Take the sweater away and you have a nice mouse. Leave it and you have a character.

The honest math: a knitted ornament this detailed is 4 to 6 hours of work plus roughly $15 in yarn, so it’s a one-per-year project, not a dozen. Knit three or four in the same family — same taupe body, different sweater colors — and place them within a foot of each other. The felt characters in Idea #13 work the same way, and both show up in our mistakes section for the same reason: scale and spacing decide whether handmade reads as charming or crowded.
Thirty Ornaments, One Very Personal Tree
Start with one. A single yarn-wrapped ball or a felt animal that looks like your own dog will tell you more about what your tree wants than an hour of scrolling ever will — and by December you’ll have a collection nobody else owns a copy of.
📌 Pin this guide to your Christmas board now, so next November you’re making instead of searching.