You know the feeling: you’ve saved forty small-tree photos to Pinterest and still can’t tell whether any of them will actually fit on your nightstand. That’s the whole reason small Christmas trees are the most forgiving decorating project of the season — you can change your mind every single year without a single regret.
We spent serious time browsing World Market, Target, and Etsy to bring you only what’s worth your attention this year, from $8 thrifted finds to $240 statement pieces. After filtering through hundreds of options, we narrowed it down to 31 ideas covering natural rustic, classic traditional, modern minimal, and full-on whimsical looks — with budget and luxury versions compared side by side and direct product links for every one.
The 2026 shift is real: smaller apartments, tabletop-scale trees, and a Pinterest-wide obsession with undecorated greenery that lets one great pot do all the talking. And stay until the end — we break down the most common mistakes that can ruin these looks.
📌 Save this to Pinterest for later — you’ll want to revisit these ideas.
1. A Live Mini Tree in a Woven Planter, Barely Decorated
It’s the woven planter, not the tree. Swap that basket for a standard green plastic stand and this whole corner collapses into “houseplant that got festive” — the texture is what says holiday. Choose a basket at least two inches wider than the nursery pot inside, low enough that the trunk still shows a good six inches above the rim, and skip the tree skirt entirely. The white metal stand lifts it just enough to feel deliberate rather than plopped on the floor.
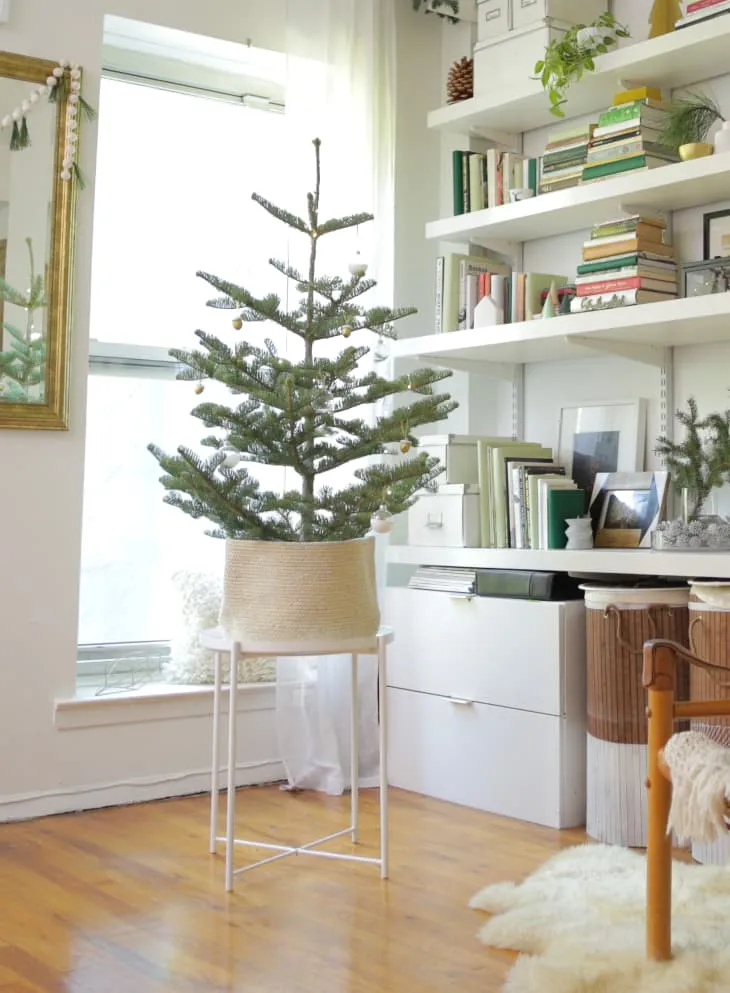
A live tree in a basket dries out faster than you think. Line the basket with a plastic bag or a snug nursery-pot liner, then water with a measuring cup — a 24-inch potted fir drinks about one cup every other day in a heated room, more if it sits near a vent. Push your finger two inches into the soil; if it’s dry there, water. And slide the basket away from the window glass at night, because the temperature swing between a sunny sill and a cold pane is what turns needles brown first.
2. Paper Honeycomb Ornaments and a Pastel Gift Stack
Three things are doing the heavy lifting here: color repetition, scale contrast, and one strong vertical. The pink, orange, and light blue in the felt pennant come back in the wrapped gifts, so the eye keeps traveling around the composition instead of stopping at the tree. The tall stack of white gift boxes beside a small tree creates a height the tree can’t manage on its own. And because everything else is white, the paper honeycomb balls read as deliberate confetti rather than clutter.
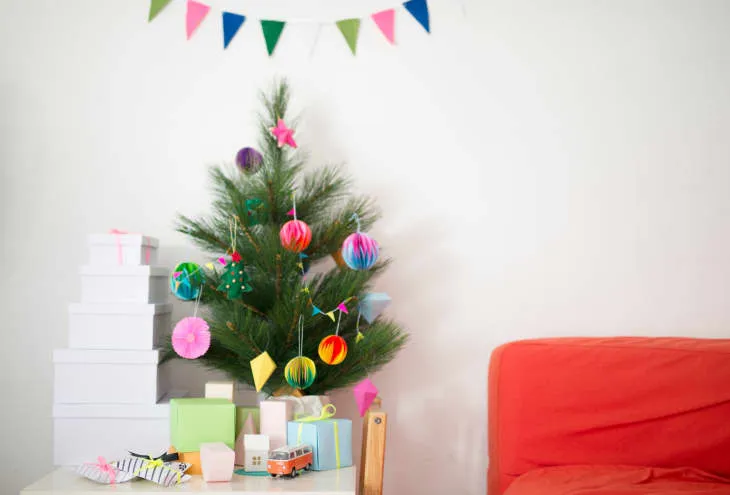
Honeycomb balls are the cheapest way to make a tiny tree look designed. Here’s the drill:
- Buy three sizes — 3″, 5″, and 8″ — in the same color family.
- Fan each one open fully, then pinch the edges into shape so they look round, not flat.
- Thread a 6″ piece of fishing line or thin ribbon through the center clip.
- Hang from the top third of the tree, spacing about four inches apart.
- Leave the bottom third bare so the ornaments can breathe.
About 25 minutes and $12 for a set of ten.
3. Tabletop Fir in a Glossy Red Pot With Patterned Baubles
- Main furniture: pre-lit 24″ tabletop tree in a textured red pot — $45-$90
- Lighting: extra multicolored string lights — $8-$18
- Textiles: red charger plates, white napkins, red ribbon — $20-$45
- Decor: patterned ball ornaments in mixed sizes — $15-$35
- Paint/wall: none needed
- Total: roughly $88 to $188
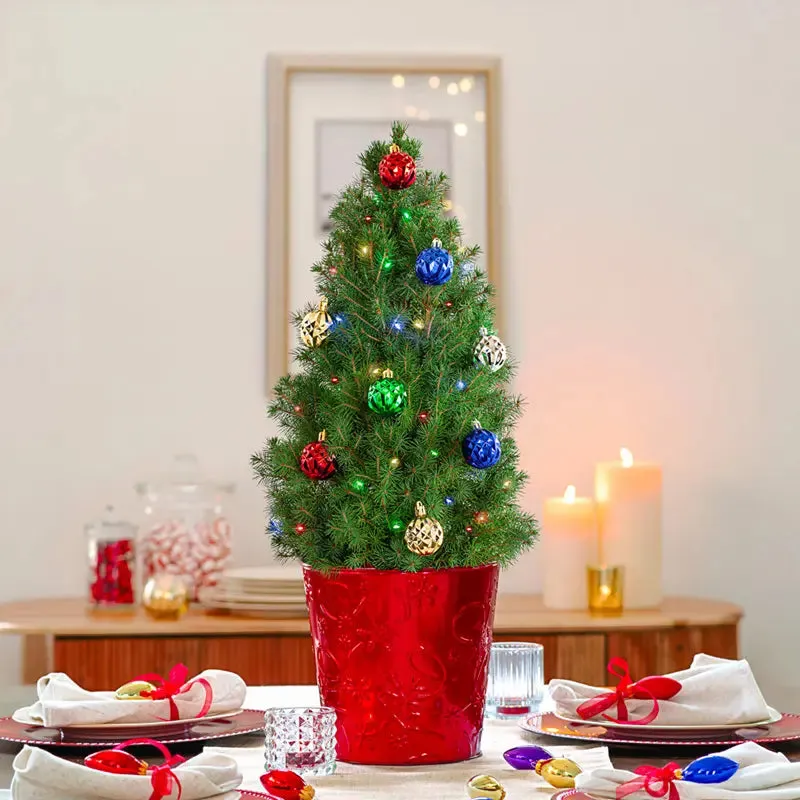
Budget alternative: skip the pre-lit tree, buy a plain 24″ unlit fir for $20 at a big-box store, and wrap it in two packs of $6 multicolor lights. Same glow, about 55% less.
The formula is 50% evergreen green, 30% bright red, 15% white, and 5% sparkle from gold and deep blue. That last 5% is the part people skip, and it’s why their tables look flat. Notice how the patterned ornaments mix all four colors on one ball — that’s what keeps a four-color scheme from splitting into four separate stories. To swap it, trade red for cranberry and blue for teal, keep the white constant, and the table still reads traditional. Idea #1 runs the same math with only two colors.
4. Plaid Ribbon and Glittered Pinecones on a Tabletop Tree
Plaid ribbon is gorgeous and completely unforgiving. It creases where you pinch it, it shows every fingerprint on the shiny baubles, and glittered pinecones shed onto whatever surface they sit on — which matters a lot if that surface is a dining table you actually eat at. Set it up where it won’t be brushed past, and expect to vacuum glitter for a week. If you have a toddler or a cat that treats ornaments as toys, move the shiny red balls to the top third and put the ragged natural pinecones down low where they’re less tempting.
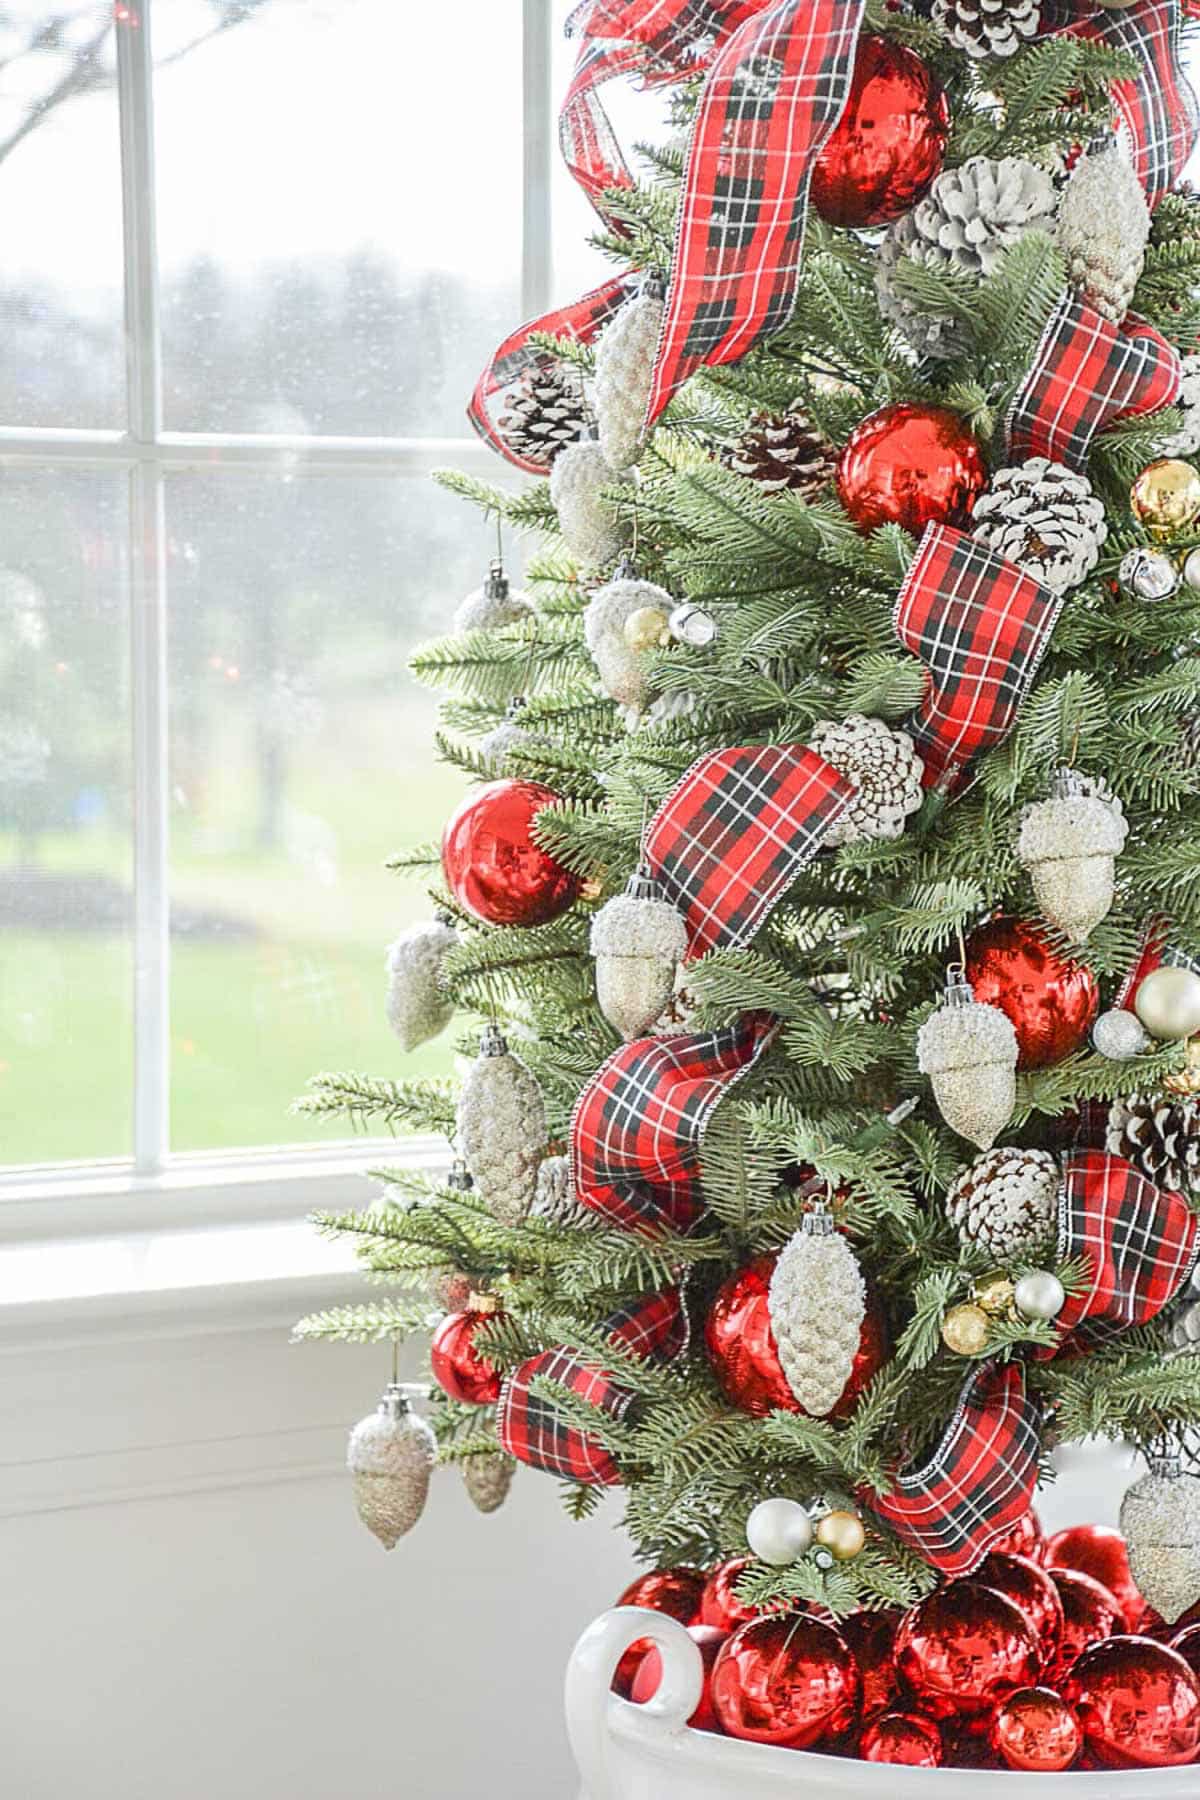
Wire-edged ribbon is the difference between “decorated” and “wrapped in a fabric snake.” Use 2.5″ wire-edge cut into 10″ lengths, fold each into a loop, twist the wire ends around a branch, then fluff the loop into a soft V. You need about 12 loops for a 24″ tree, and they should sit at roughly 10, 2, and 6 o’clock positions rather than spiraling evenly. Clip the wire ends short and tuck them behind needles so nothing scratches your hands next year when you unpack.
5. Mini Warm-Lit Tree With Red Berries and a Fabric Skirt
You can build this entire tabletop moment for under $40. Grab a 20″ unlit artificial tree at Walmart or Target for $15-$20, a two-pack of warm white string lights for $6, and a bag of jingle bells for $3. Red berries and pinecones come from a dollar store floral stem — one stem, cut apart, is plenty. The gift boxes are reused shipping boxes wrapped in paper you already have. Facebook Marketplace in early December is full of people selling last year’s tabletop trees for $10 because they upgraded.
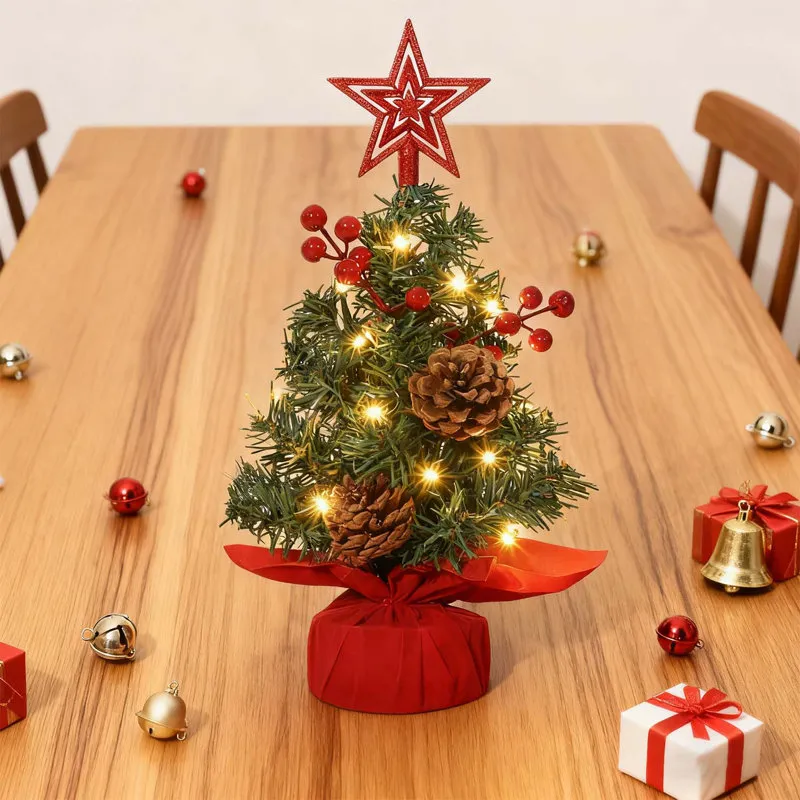
It’s the pleated fabric skirt. Everything else here is standard — red berries, pinecones, a star — but the gathered fabric gives the base weight and turns a bare pot into a finished object. Remove it and the tree looks like it’s still in its packaging. The trick is pleating rather than draping: pinch the fabric into soft folds every few inches and let them fall unevenly so it reads handmade instead of fussy. Then pile the gift boxes at the front edge so the pleats peek out behind them.
6. Bedside Mini Tree With Dried Orange Slices
A bedside tree wants to stay between 18 and 24 inches — tall enough to register when you’re lying down, short enough that it doesn’t compete with a lamp. The round side table here is about 18 inches across, which is the sweet spot: the tree’s branch spread (usually 14 to 16 inches) still leaves room for a book and a glass of water. If your nightstand is under 16 inches wide, drop to a 12-inch tree or move to a wall shelf. Compare with Idea #23, where the trees are under 6 inches and clip anywhere.

What makes this work is a conversation between textures, not colors. The grey bedding, the textured grey wall, and the dark metal table are all matte, so the tree’s shine — warm bulbs and glossy dried orange slices — reads as light rather than as a competing color. The red and white pillows repeat the ornament palette without matching it exactly. And the tree sits at eye level when you’re in bed, which is why it feels intimate instead of decorative.
7. Silver Tinsel Mini Tree on the Windowsill
Vintage silver tinsel has come all the way back, and 2026’s version is small and quiet instead of floor-to-ceiling. The shift started with the resale market — thrifted tinsel trees from the 60s and 70s sell for $30 to $80 on Etsy, and saves for “retro tinsel tree” have climbed every season since 2023. What makes it stick: tinsel reflects every light source in the room, so even a 12-inch tree on a windowsill glows at night. It’s also the lightest possible holiday decor, which matters in rentals.
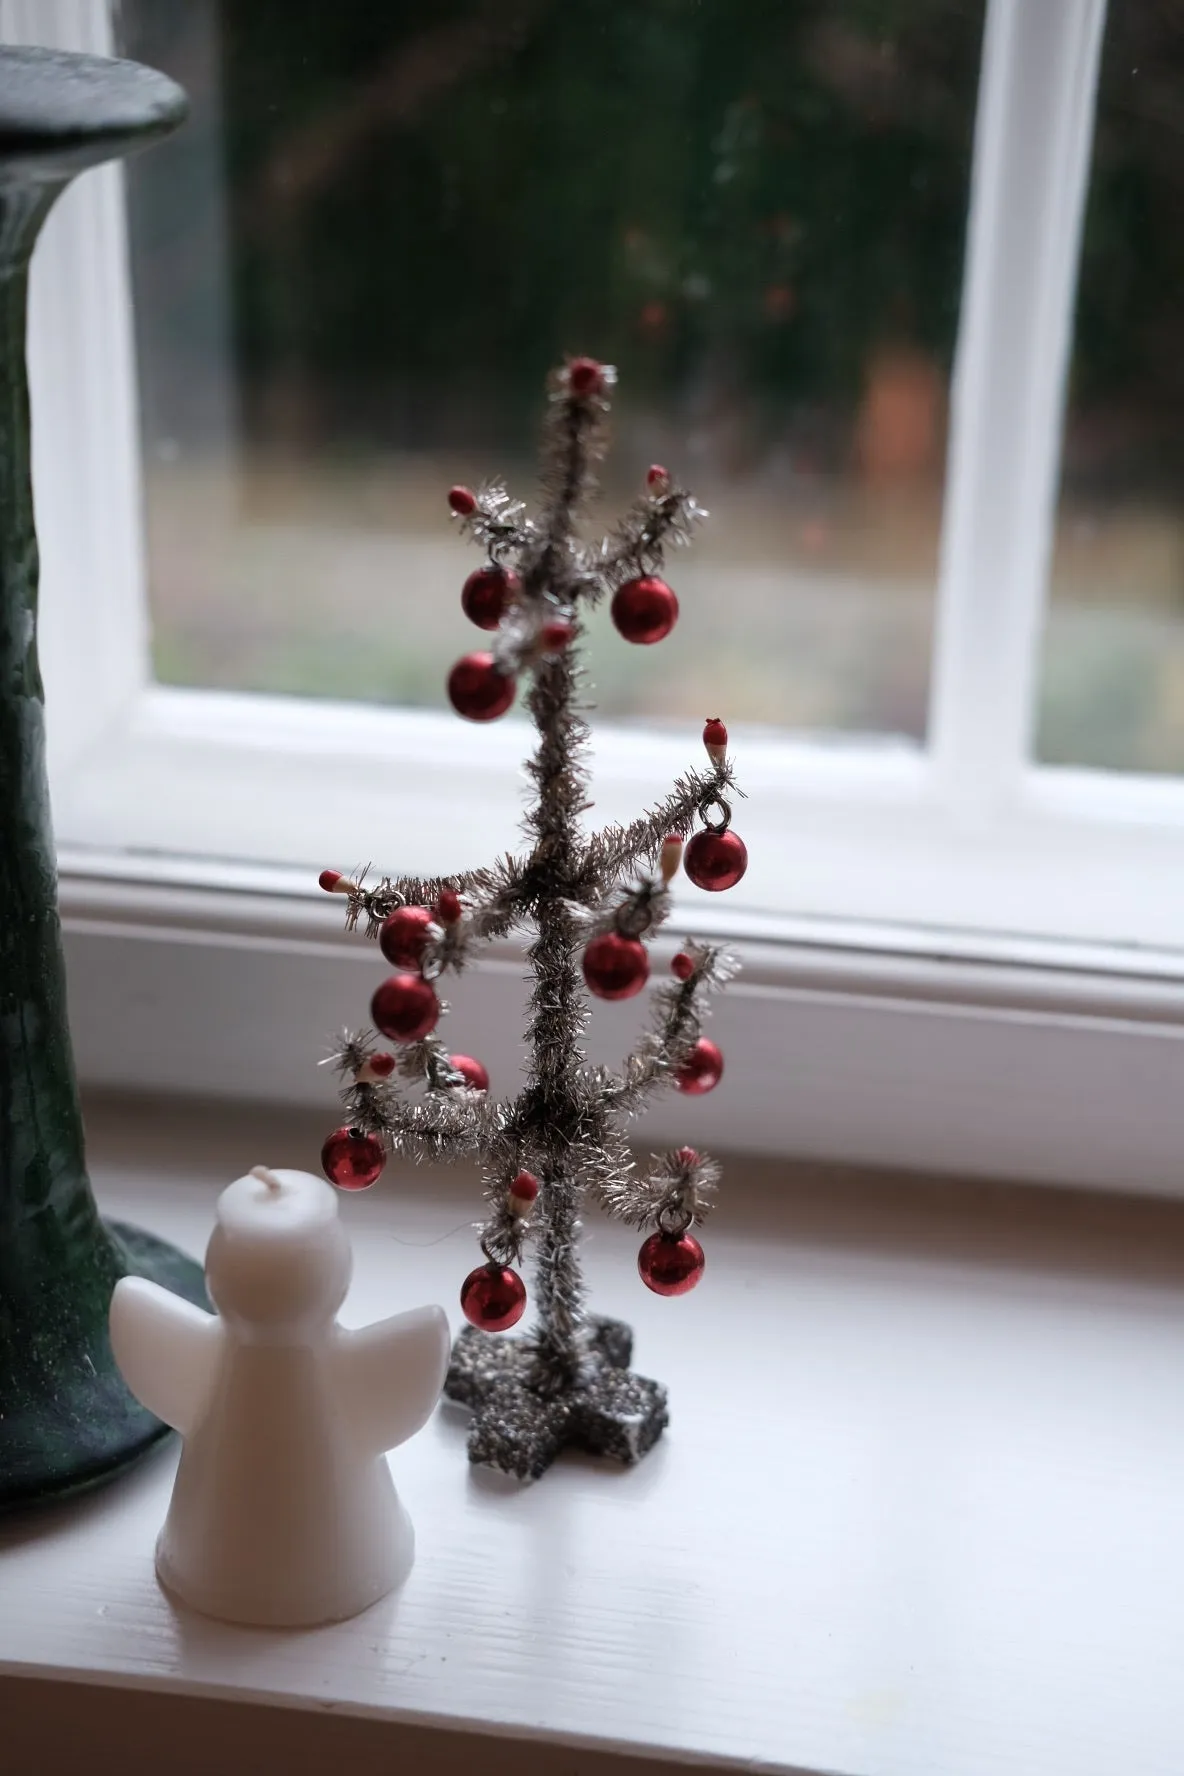
Tinsel shows every gap, so decoration has to be dense and consistent. Aim for 40 to 60 tiny ornaments on a 15-inch tinsel tree — more than feels reasonable on a real fir. Use one ornament size only, about 1″ balls, so the eye reads sparkle instead of individual objects, and skip the garland entirely; tinsel plus garland is visual noise. If the branches look sparse near the top, bend the wire arms slightly upward with your fingers, which also makes the tree look taller in a narrow window.
8. Three Champagne Glitter Cone Trees on a Snowy Base
- Main decor: three glitter cone trees, 8″ to 16″ — $24-$60
- Lighting: none required, these are decorative forms
- Textiles: white fabric or faux snow base — $6-$18
- Accessories: patterned gift box, silver and gold baubles — $8-$20
- Paint/wall: none
- Total: roughly $38 to $98
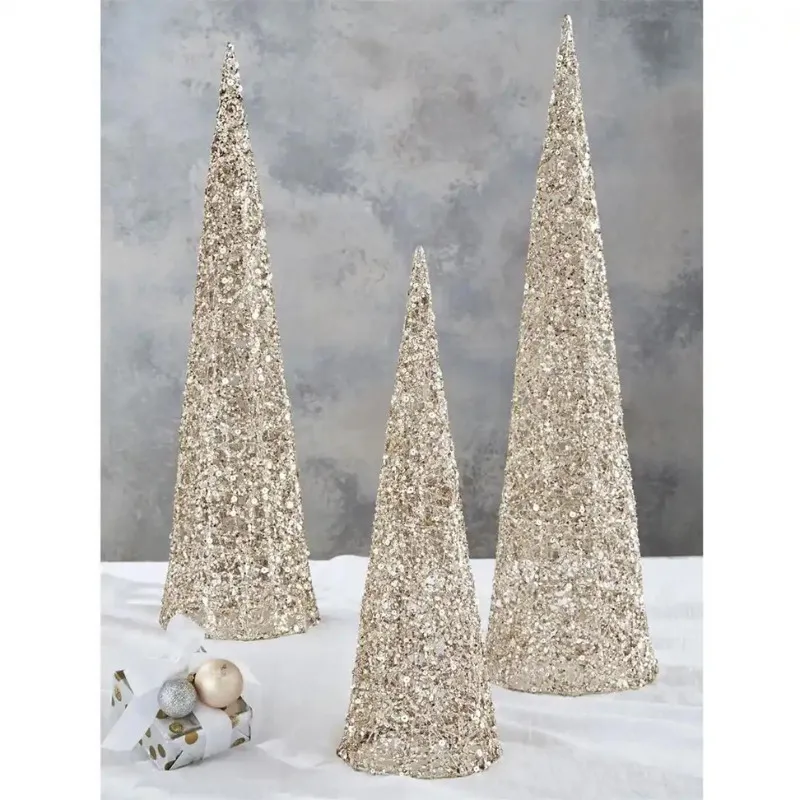
Budget alternative: one $6 styrofoam cone, half a jar of champagne glitter, and a can of spray adhesive gets you a 10″ version for about $12. Make three in an afternoon and you’ve got the full set.
Read this as 70% champagne gold, 20% white, 10% silver. The gold carries everything, which is why it works on a plain surface with almost no other decor — there’s no color competition. Swap champagne for matte copper and silver for brushed brass and the mood turns warmer and slightly more modern. Add a third metallic and it falls apart; three textures of the same tone is the ceiling. Idea #19 uses the same trio but in clear acrylic instead of glitter.
9. Twin Porch Trees Wrapped in Burlap
Outdoor trees on a porch need to survive weather, and small artificial ones are usually not built for it. Warm white lights are fine, but the burlap wrap around the base will wick moisture and stay damp for days after rain, which is what attracts mildew. If your porch isn’t covered, swap the burlap for a woven resin or metal basket with drainage holes. Check that your porch outlet is GFCI-protected before you plug in two lit trees. And don’t run extension cords across a walking path.
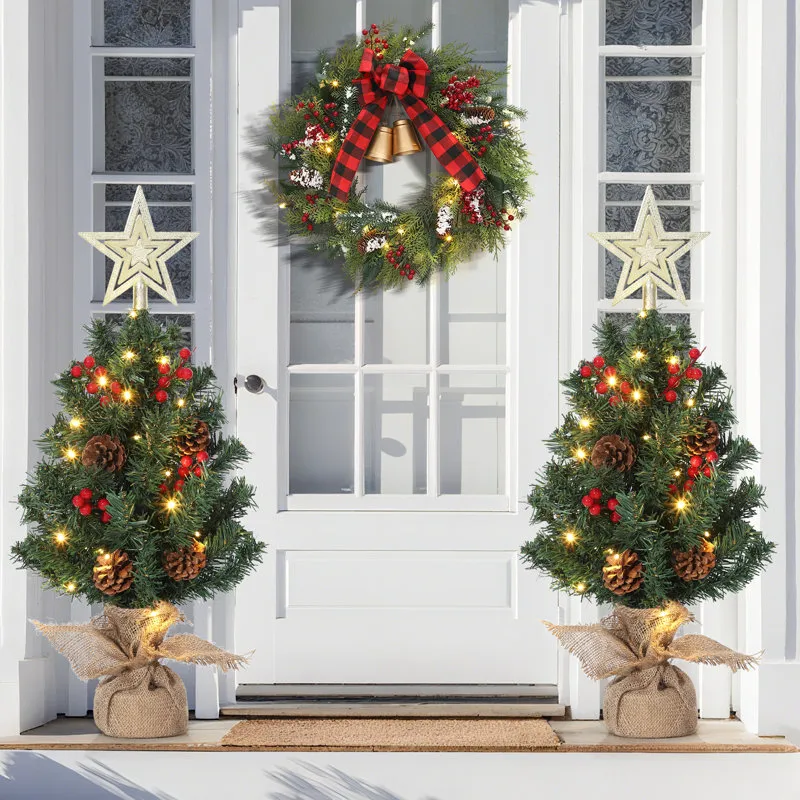
Two flanking trees want to be roughly one-third the height of the door — for a standard 80-inch door, that’s 24 to 30 inches each. Set them about 12 inches out from the door frame so the wreath doesn’t visually crowd them. This pairing works on porches from about 4 feet wide up; on anything narrower, use one tree on the handle side and put the wreath off-center. Inside the house, the same two-tree symmetry works flanking a fireplace, which is closer to what you’ll see in Idea #16.
10. A White LED Tree Candle Among Frosted Pine
Styling one LED tree candle so it looks like a scene instead of a nightlight:
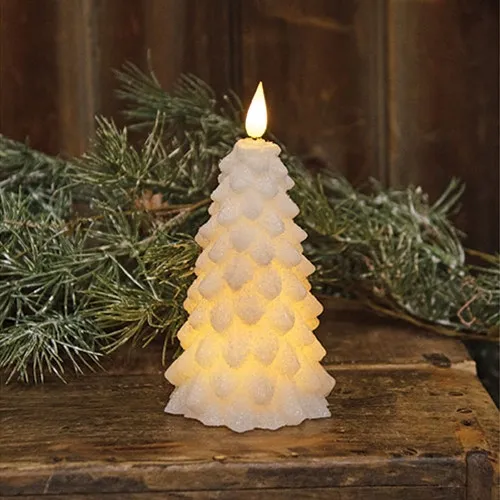
- Set the candle on a dark wood slice or a low rustic tray — contrast is what makes the white glow read.
- Lay three or four pine sprigs behind and slightly below the candle, never in front.
- Dust the sprigs with a little faux snow, or leave them plain; either way, keep them matte.
- Keep everything within a 10-inch footprint so the grouping reads as one object.
Ten minutes, about $20 if you already have the candle, and no cords to hide.
The whole look costs less than a nice candle. Bath & Body Works and Target both sell tree-shaped flameless candles for $12 to $25, and dollar stores carry pine sprigs and wood slices for $1 to $3 each. If you’d rather have real flame, a $6 white pillar candle behind a pine sprig gets you 80% of the warmth — just never leave it burning unattended near dried branches. For the glow-on-a-bigger-scale version, look at Idea #18.
11. Black Mini Tree With Pumpkin and Black Cat Ornaments
It’s the black tree. Take away the black needles and this is just an orange-and-gold autumn display with a Christmas star on top. The black gives the felt pumpkin, the black cat, and the jack-o’-lantern lantern something to sit against — it turns a seasonal mashup into a deliberate palette. It also means the warm white lights do all the holiday signaling, so you don’t need tinsel, garland, or a themed ribbon. If you can’t find a black tree, a can of matte black spray paint on a thrifted small tree works.
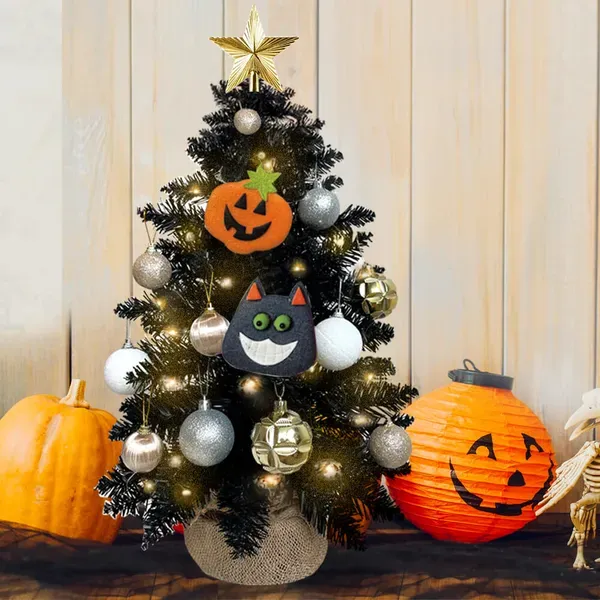
Two principles carry this. First, a limited palette — black, gold, silver, white, orange — means Halloween and Christmas share a color language instead of fighting. Second, the metallic baubles pull double duty: they could belong to either holiday, so the transition reads smooth. The scale helps too. The pumpkin outside the tree is nearly as tall as the pot, which anchors it and stops the whole thing from floating. It’s a two-month display dressed as one season.
12. Bottle Brush Village Around Tiny Ceramic Houses
Bottle brush trees are the lowest-maintenance decor in this entire roundup — they don’t shed, don’t need light, and don’t fade. Flocked versions are the exception: that white coating is basically fine powder, so handle them over a surface you can wipe, and don’t store them loose in a bin where the flocking rubs off against other pieces. Wrap each in tissue and expect a two to three year lifespan before they start looking bald. Ceramic village houses should be dusted with a dry brush, never a wet cloth, since glaze plus water plus storage equals mildew in a humid basement.
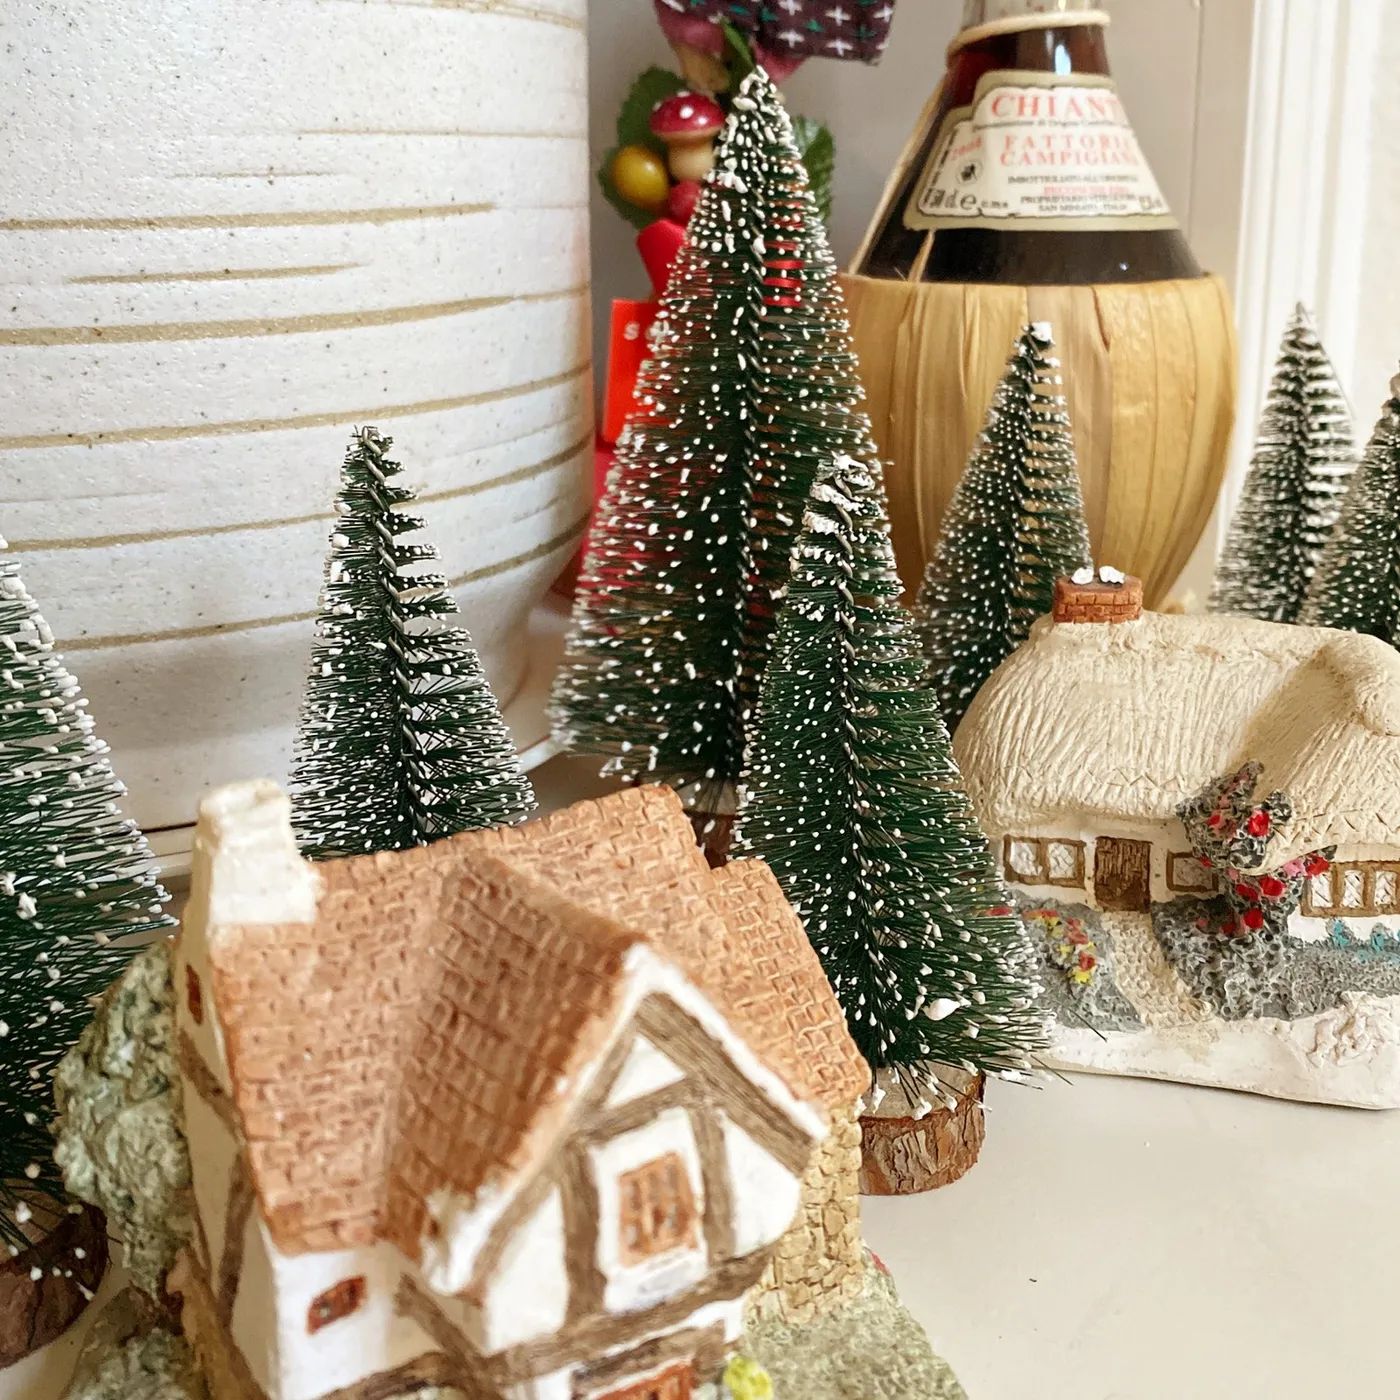
Grouping is everything with miniatures. Odd numbers read as a collection, even numbers read as a display — so use three, five, or seven trees, never four. Vary heights by at least 2 inches between neighbors, and put the tallest at one end rather than dead center; it keeps the eye moving. If you’re mixing flocked and plain trees, alternate them so the snow looks scattered rather than segregated. And keep the whole vignette inside a 16-by-10-inch rectangle so it still reads as one scene instead of a spread.
13. Frosted Tabletop Tree With Vintage Books and Pinecones
Frosted trees paired with old books is pure cozy academia, and it’s the fastest-growing Christmas vignette style for 2026. The appeal is partly practical: artificial snow, pinecones, and a stack of thrifted books cost under $30 combined, and the look survives being photographed badly. It also taps the broader shift toward nostalgic, low-shine holiday decor — people are moving away from high-gloss ornaments toward matte, textured, slightly dusty-looking surfaces that don’t scream in photos.

Formula: 45% warm neutral (wood, yellow light, beige wall), 30% forest green, 15% white, 10% brown. Nothing metallic except a hint of muted gold. That ratio is why it feels like an old photograph rather than a store display — the warmth comes from the light source, not from shine. To swap the mood, shift the neutral to cool grey and the books to white-spined paperbacks, and you get a Scandinavian version with the same structure. Keep the snow constant; it’s the connector.
14. An Undecorated Green Tree on a Distressed White Cabinet
- Measure the cabinet top — you need at least 14 inches of depth for a 24″ tree base.
- Check what’s above: a floating shelf or ceiling light will make a tall tree feel cramped.
- Confirm your outlet reach before you commit to a lit tree.
- Decide the palette first — an undecorated tree reads as unfinished until you have a plan.
- Weigh the base: an empty stand on a slick painted surface slides.
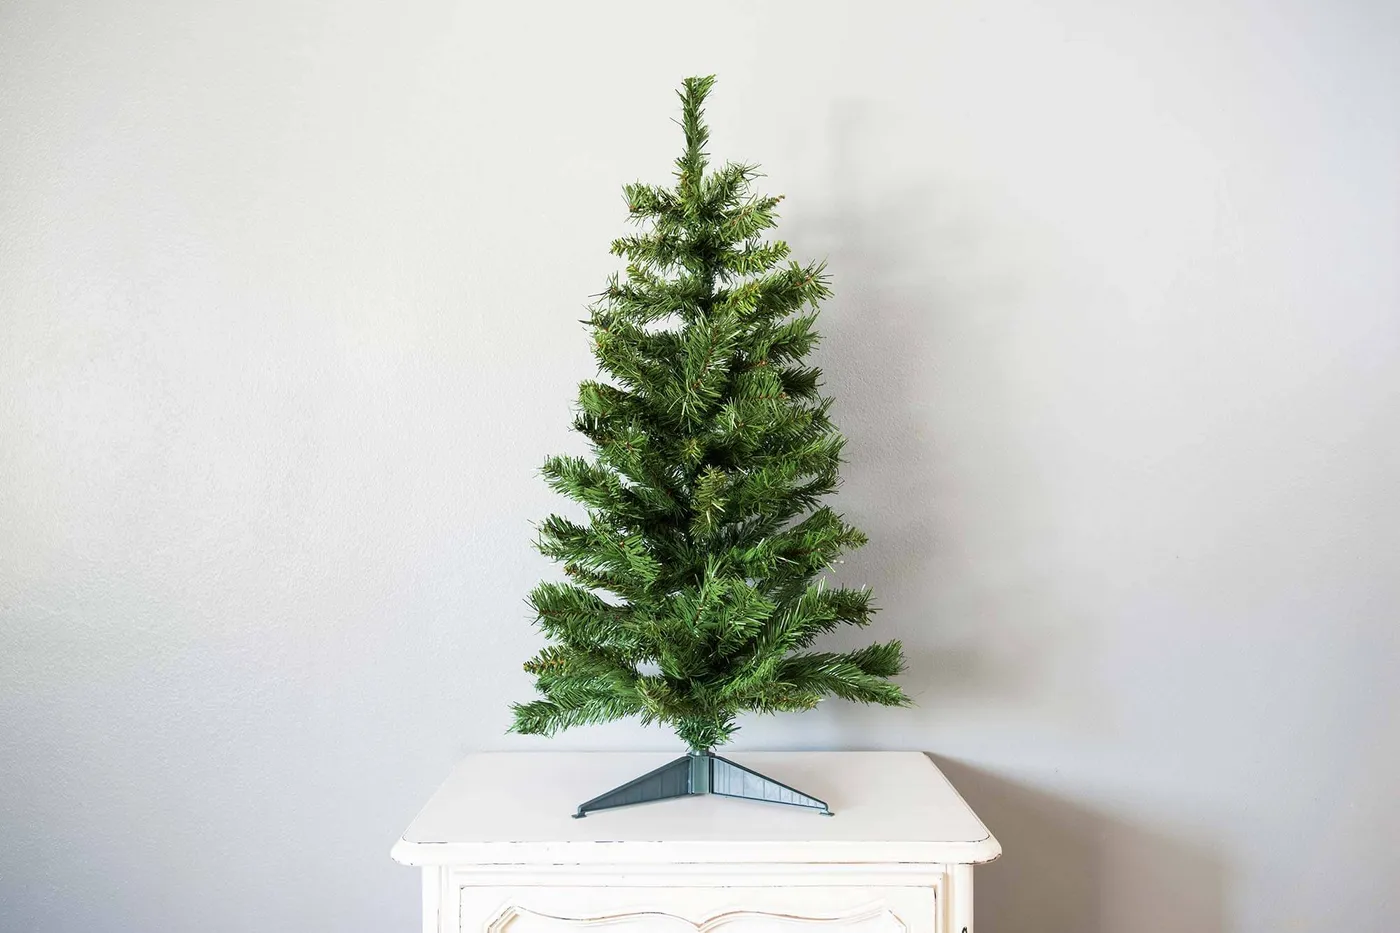
Taken further at Idea #17, where the same green tree gets gold, wood beads, and a basket base.
A bare tree on a cabinet looks intentional for about a week and unfinished after that. The dark grey plastic stand is the giveaway — set the tree in a basket, crate, or ceramic pot before you do anything else, or move the whole thing to a corner where the base is hidden. Also think about sightlines: an undecorated tree at eye level in a hallway reads as forgotten, while the same tree at the top of a tall bookcase reads as minimal.
15. Potted Evergreen With Just Red and Green Baubles
This is a 12-to-16-inch tabletop tree in a pot that’s roughly 5 inches across — small enough for a console, a bathroom counter, or a kitchen windowsill. For a console or sideboard, keep the pot under 6 inches in diameter so it doesn’t fight with a lamp or a stack of books. Above a 24-inch surface, you can go up to 18 inches. If your counter is under 6 inches deep, skip this entirely and use clip-on bottle brushes instead.
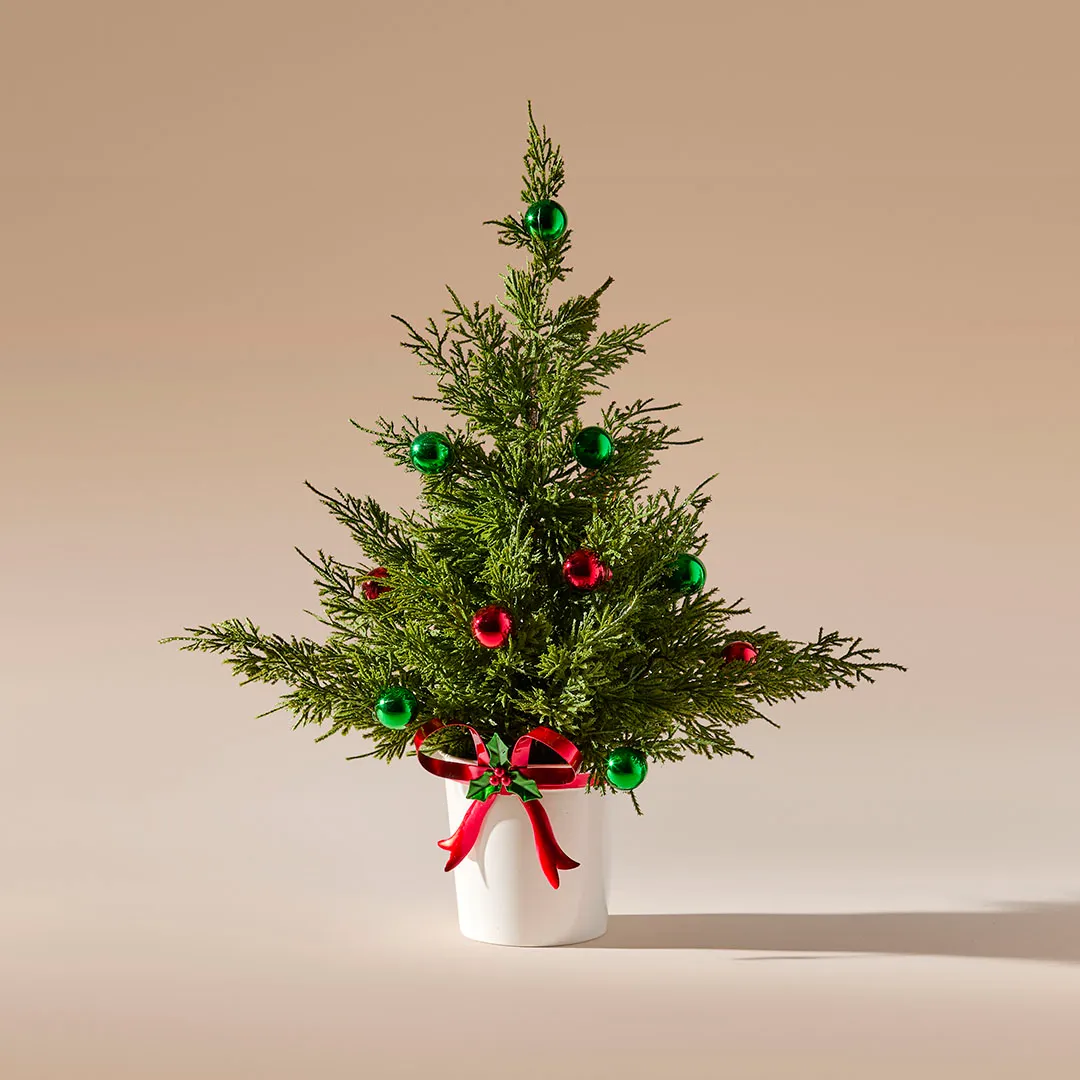
Sparse decorating is harder than dense. The rule: use six ornaments on a 15-inch tree, spaced evenly but never perfectly, and stop. Leave the trunk and the bottom branches bare so the green reads as a material, not a filler. Then choose ornaments that share one finish — all glossy, or all matte — because mixing them on a sparse tree makes each one look accidental. The red ribbon and holly cluster on the pot is the only other decorative element you need.
16. Gilded Tree Figurines Beside a Pillar Candle
- Main decor: two gilded tree figurines, 6″ and 10″ — $22-$60
- Lighting: white pillar candle plus glass holder — $10-$24
- Textiles: none
- Accessories: pinecones and evergreen sprigs — $6-$15
- Paint/wall: none
- Total: roughly $38 to $99
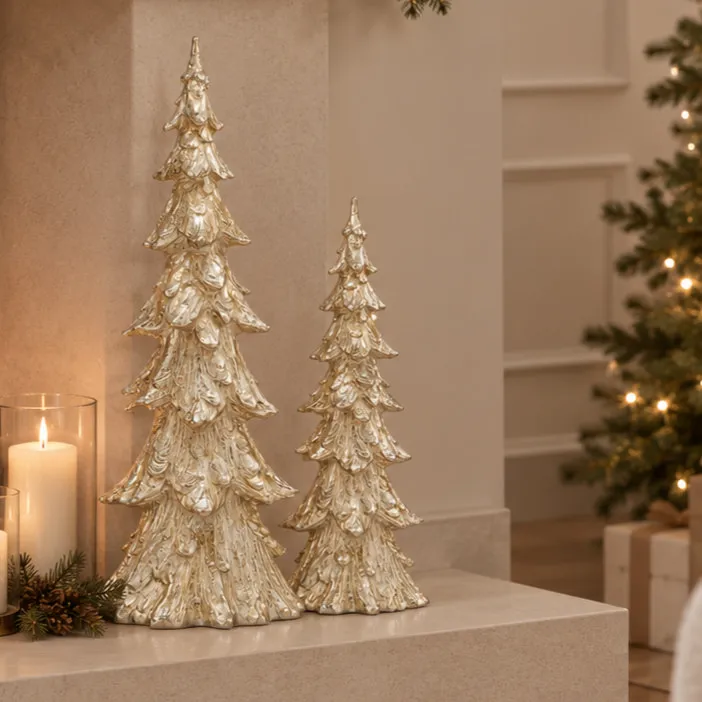
Budget alternative: spray-paint two thrifted ceramic cone trees with $8 champagne metallic spray. From 12 inches away the finish is indistinguishable from the store version.
The pillar candle. Without it, two gold cones on a mantel are just objects. The flame adds the only movement in the scene, and its warm light bounces off the gilded surfaces so the trees appear to glow from two directions. It also gives the eye a vertical to compare against — the candle is taller than the small tree and shorter than the large one, which creates a staircase of heights. If real flame isn’t an option, a flameless pillar with a moving wick does the same job from three feet away.
17. Gold and Wood Bead Garland in a Woven Basket Base
Wood bead garland looks expensive and costs almost nothing to make. A 16-foot strand of unfinished wood beads runs $8 to $12 online, and a spool of jute twine is $3 — string them yourself in about 45 minutes while watching something. For the baubles, buy a mixed pack of gold and rose gold at Target for $10 and skip the glittered snowflakes entirely; the beads already give you texture. The woven basket base is the one thing worth buying new, and $15 to $30 gets you a good one that will outlast the tree.
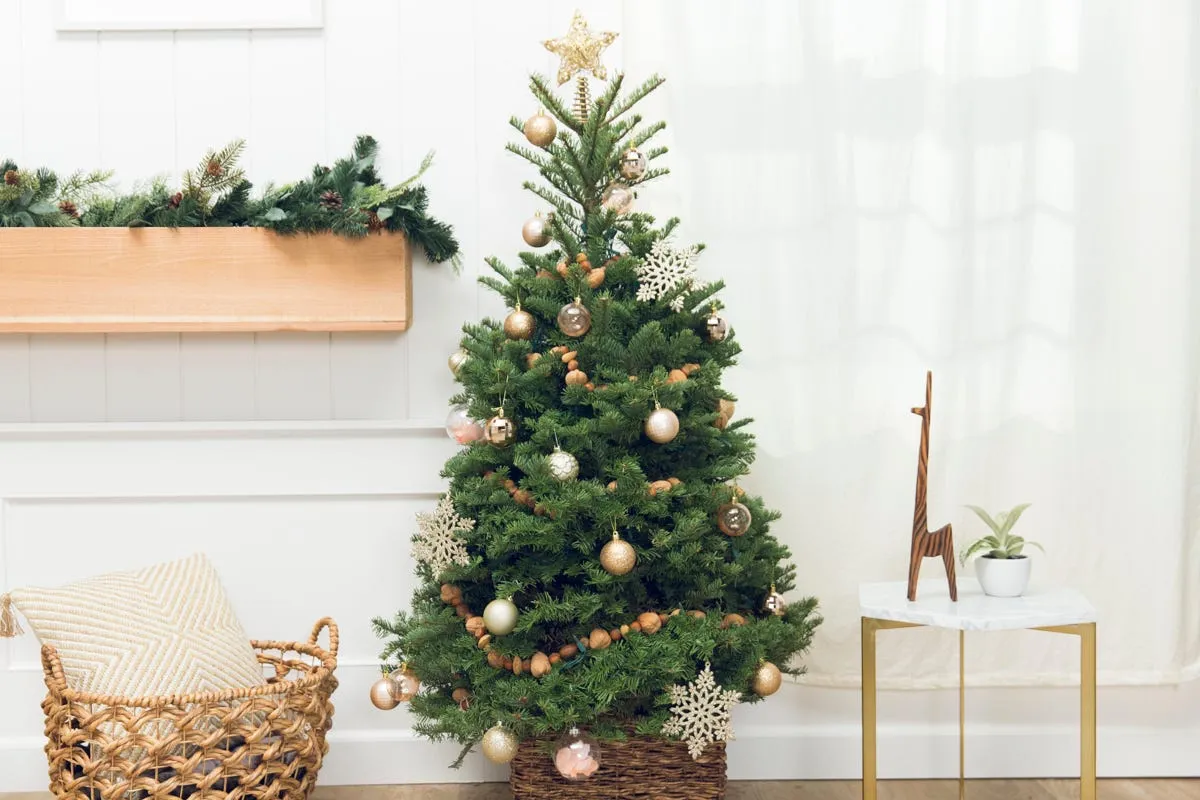
60% green foliage, 25% gold and rose gold, 10% natural wood, 5% white. Notice there’s no red at all — that’s what separates this from a traditional tree and why it works against a white paneled wall. To shift it warmer, swap rose gold for copper and the bead garland for raw cinnamon sticks. To shift it cooler, go all gold with silver accents and use a linen ribbon instead of wood. The green stays constant; it’s the anchor. Idea #13 runs the same green anchor with a frostier finish.
18. A Translucent Golden Cone Tree That Glows From Inside
Backlighting is the trick. The cone glows from inside, so its silhouette is defined by a soft halo rather than by contrast against the wall — that’s why it reads as a lamp and not as a figurine. The dark wood surface underneath absorbs light instead of bouncing it, which keeps the glow contained. And the silver ornament and brown wrapped gift catch just a fraction of that light, giving the eye two small anchors without competing for attention.
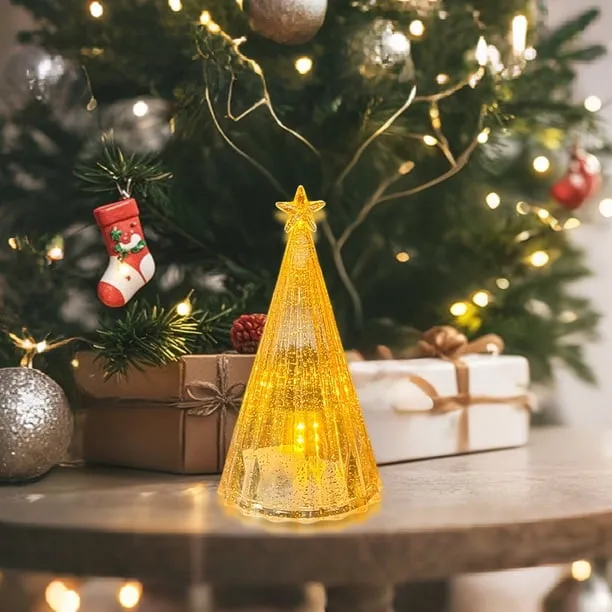
To recreate the glow without buying the lamp:
- Find a translucent plastic or frosted acrylic cone — craft stores sell them for about $5.
- Cut a 1″ hole in the base with a craft knife and sand the edge smooth.
- Drop in a battery-operated fairy-light strand, taped to a small disk so it stays centered.
- Wrap the outside with a single coat of translucent gold glass paint and let it cure overnight.
- Top with a small star ornament held on with a dot of museum putty.
Roughly 40 minutes of work and $15 in materials.
19. Clear Crystal Trees Lit From Within on a Stump Slice
Acrylic shows dust more than any other material here, and it scratches if you wipe it with anything abrasive. Use a microfiber cloth and a dry brush on the internal surfaces; never spray cleaner directly onto acrylic, and never use ammonia-based glass cleaner, which clouds it permanently. Battery-operated versions need fresh batteries every three to four weeks if you run them nightly — buy rechargeables, because cheap batteries leak and the corrosion is what actually kills these trees. Also keep them off radiators; heat warps thin acrylic.
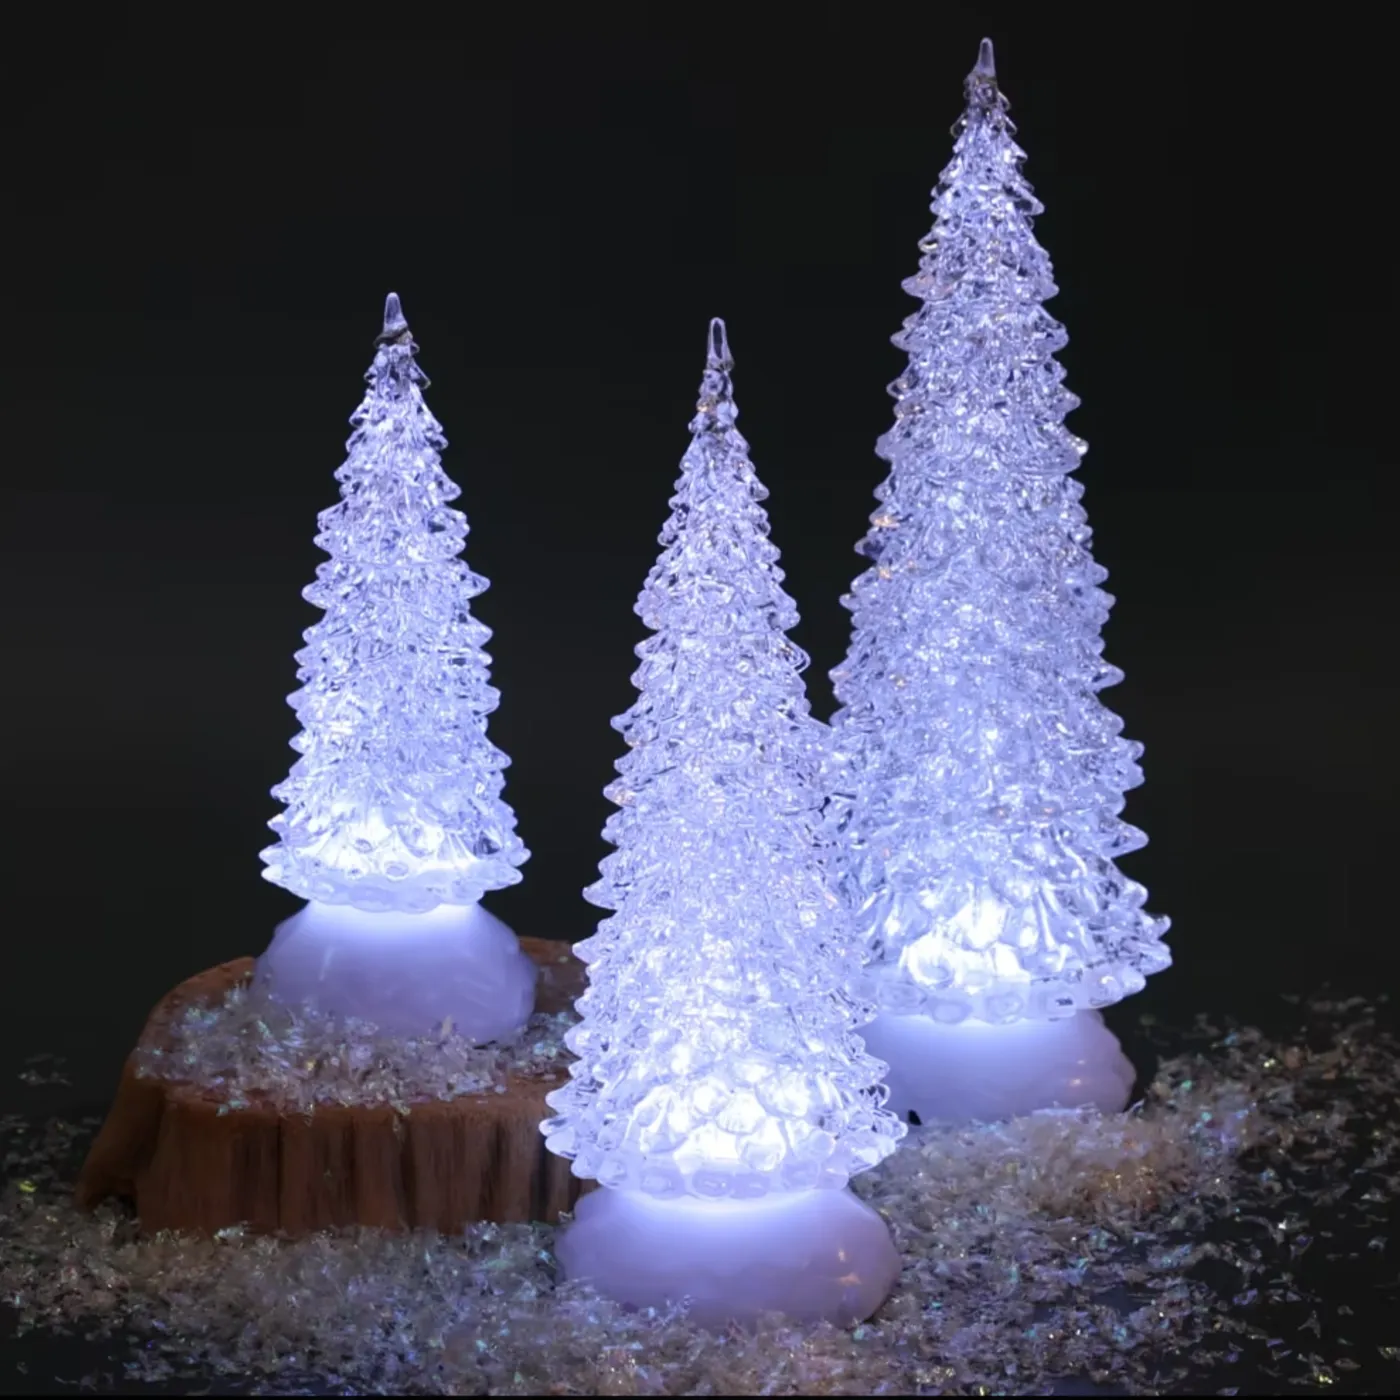
Three illuminated trees need about 24 inches of linear space and a surface at least 10 inches deep. They’re at their best on a console, a fireplace hearth, or a low shelf where the dark background is real. At 8, 12, and 16 inches tall, the lineup works in a room as small as 60 square feet, including entryway nooks and open shelving. Ceiling height barely matters here — this is a tabletop composition — but a dark wall behind them is worth planning for. See Idea #22 for the same glow in an opaque white finish.
20. Heavily Flocked Tree With Red, Gold, and Pink Baubles
Heavy flocking is beautiful and it sheds. Expect a fine white dust on the table for the first two weeks, and don’t set it over a dark wood surface you care about without a runner. Flocked trees also can’t be stored in a hot attic — the coating softens and glues itself together. And if you have pets, skip the flocked version entirely; the coating is harmless but the shedding is relentless. Dry indoor air makes it worse, so a humidifier in December actually helps.

On a flocked tree, the white coating replaces your neutral, so ornament color has to carry the warmth. Use a 5:3:2 ratio — five parts red, three parts gold, two parts pale pink — and place the reddest pieces deepest into the branches, where the flocking frames them. Bells and pinecones go on the outer tips at hip height on a tabletop tree, and the candy cane ornament should hang alone near the top. Aim for about 30 ornaments on an 18-inch flocked tree, and don’t stack two on one branch.
21. Snow-Dusted Bottle Brush Trees on Hot Pink
Bottle brush trees are the rare decor you can make yourself in a batch. A pack of six blank trees runs $8 to $12 online, and a bag of faux snow or a can of white spray paint is another $5. Dip the tips, let them dry overnight on a sheet of parchment, and you’ve got a dozen for the price of two. The red ornaments are thrift-store finds — buy a mixed bag of vintage Christmas balls for $4 and pick out the glossy reds. The wooden bases are slices from a craft store or a fallen branch cut with a handsaw.
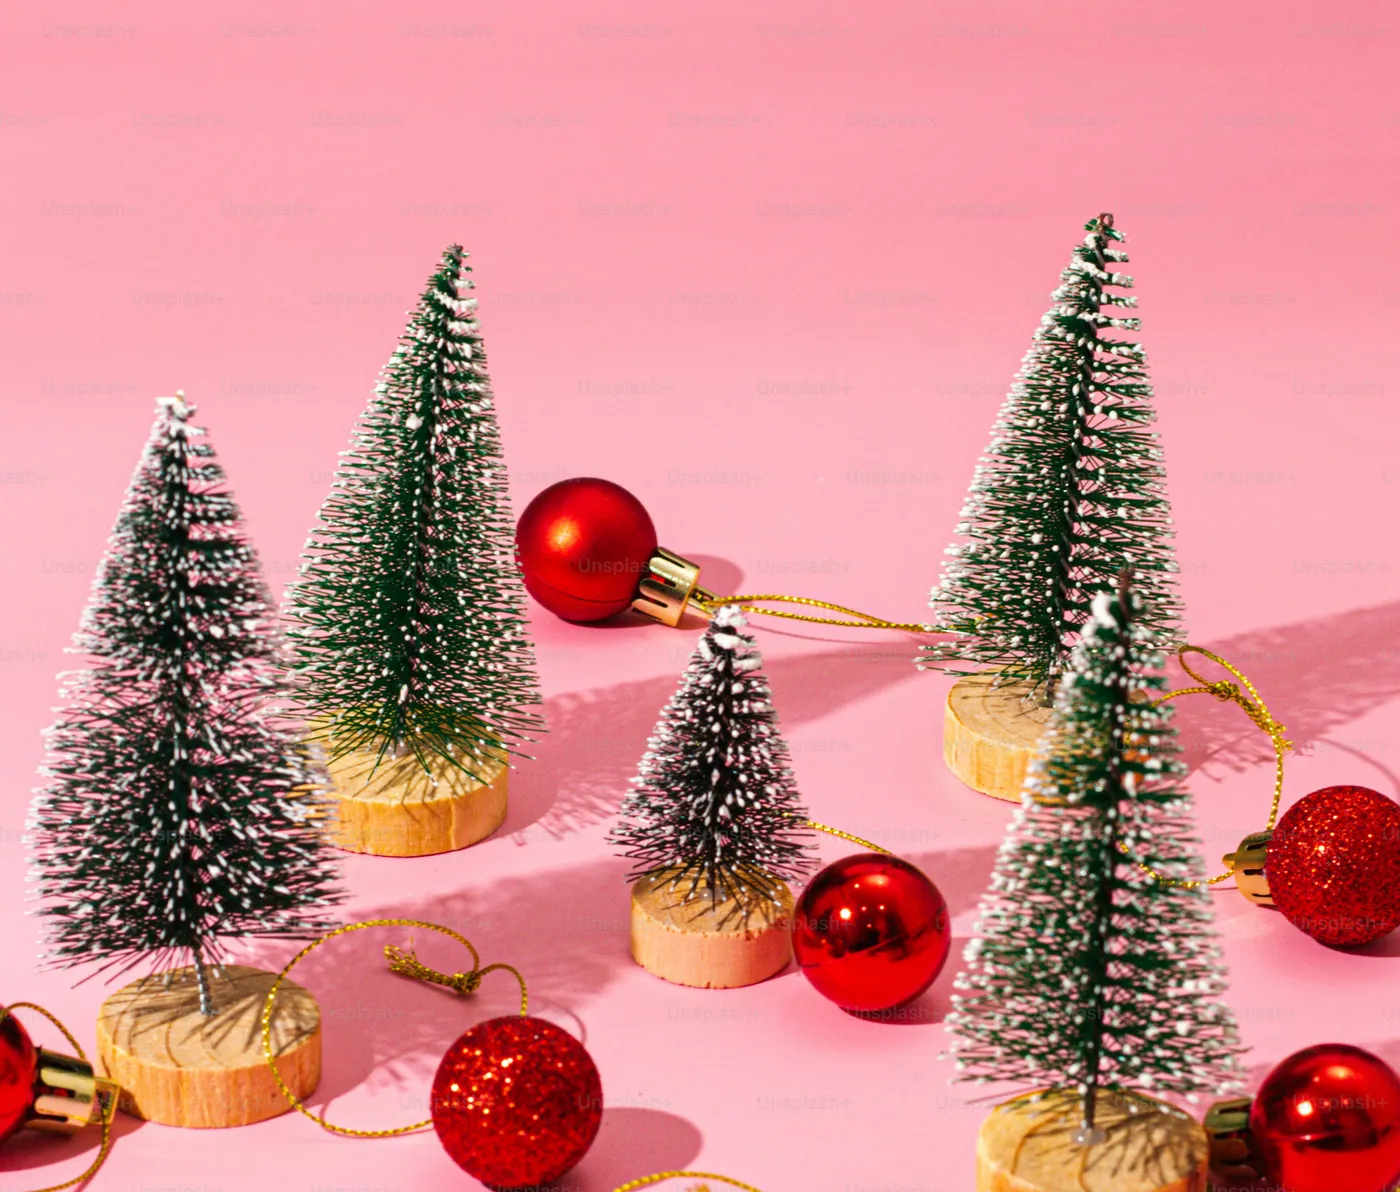
Setting miniatures on a saturated color like this pink is a 2026 move — it’s the same instinct behind color drenching that designers have been using on walls and cabinetry for two years, applied at tabletop scale. The long strong shadows give it a product-photography feel, which is exactly why it photographs so well. Expect this saturated-base approach to keep growing, especially for renters who can’t paint a room but can absolutely put a pink linen runner under their Christmas decor.
22. A Sculpted White Light-Up Tree With a Gold Star
The cutout. That illuminated opening in the center of the tree is what makes this a piece of decor rather than a small lamp, and it’s the reason the branches read as carved instead of printed. Take it away and you have a plain white cone with a light. It’s also what makes the piece work in daylight — the internal glow needs somewhere to escape, and the cutout gives the eye a focal point when the room is bright. If you’re DIY-ing one, cut the opening slightly off-center so it feels handmade.
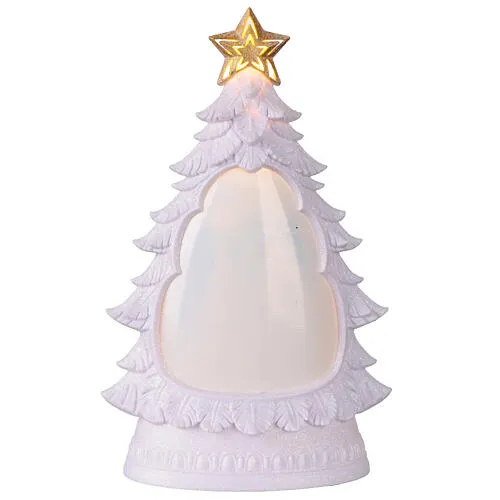
It’s a study in one color done many ways. The white stays constant, but the surface changes: matte sculpted branches, a glossy base pattern, a textured star, and warm light behind all of it. That variety does the job multiple colors would normally do. The gold star is the only accent, and it’s small enough to read as an exclamation point rather than a second theme. Scale matters too — at around 18 inches, it’s small enough to feel like a candle and big enough to light a corner.
23. Tiny Clip-On Bottle Brush Trees for Any Surface
Four-inch clip-on trees go almost anywhere: the edge of a bookshelf, the lip of a mantel, a curtain rod, a cake stand, or the rungs of a bar cart. Because they attach rather than stand, they need no footprint at all — the only requirement is an edge with something to clamp to, and about 1/2 inch of clearance. They’re the answer for studio apartments, dorm rooms, and any surface already claimed by other decor. For a real presence instead of an accent, step up to the tabletop sizes in Idea #12.
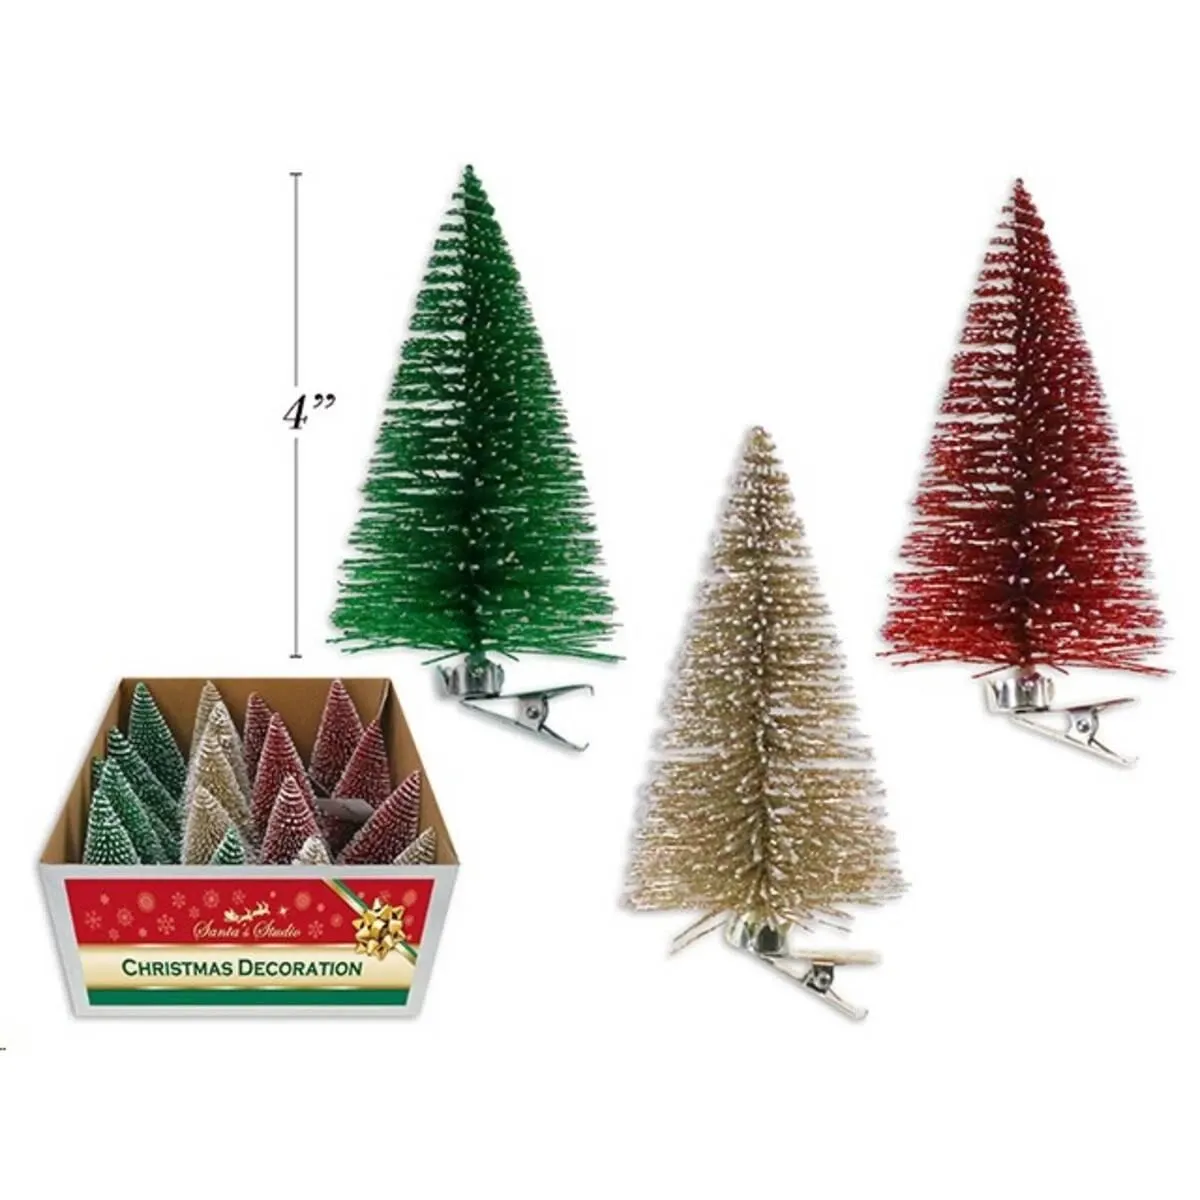
Clips mean you can distribute a single color story across a whole room. Buy the multipack, then split it: all the green trees go on the bookshelf, all the gold on the mantel, all the red on the bar cart. That reads as a coordinated home rather than one decorated corner. Space them 18 to 24 inches apart so they scan as a rhythm, and keep the heights consistent within each group — a green clip tree should be the same height as its neighbors, not taller.
24. Champagne Glitter Bottle Brush Tree With a Bow Topper
Glitter is a commitment. This one will shed every time it’s moved, and the coating dulls after about two seasons if it’s stored in a plastic bag where the glitter rubs off. Wrap it loosely in tissue paper — never bubble wrap, which pulls the glitter off — and store it upright. If the finish looks tired, a light coat of clear spray sealer brings back the sparkle for about $7. Also keep it away from open flame; glitter is essentially plastic dust and it burns fast.
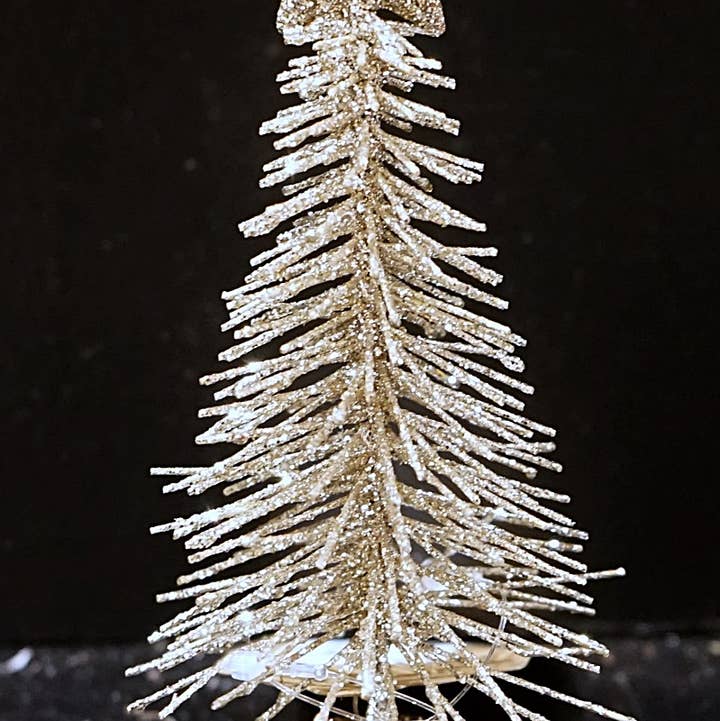
This is a one-note composition: roughly 85% champagne, 10% silver from the base, 5% negative space. It works because the dark background gives the glitter something to contrast against — without it, the tree would disappear into a light wall. To adapt the formula, put a matte white bottle brush tree in front of the glittered one and drop the ratio to 60/40; you get the same elegance with a built-in focal point. The bow on top replaces a traditional star, which keeps the palette unbroken.
25. A Flat Teddy Bear Tree Cutout With Painted Gifts
Making the painted gift boxes that circle the base:
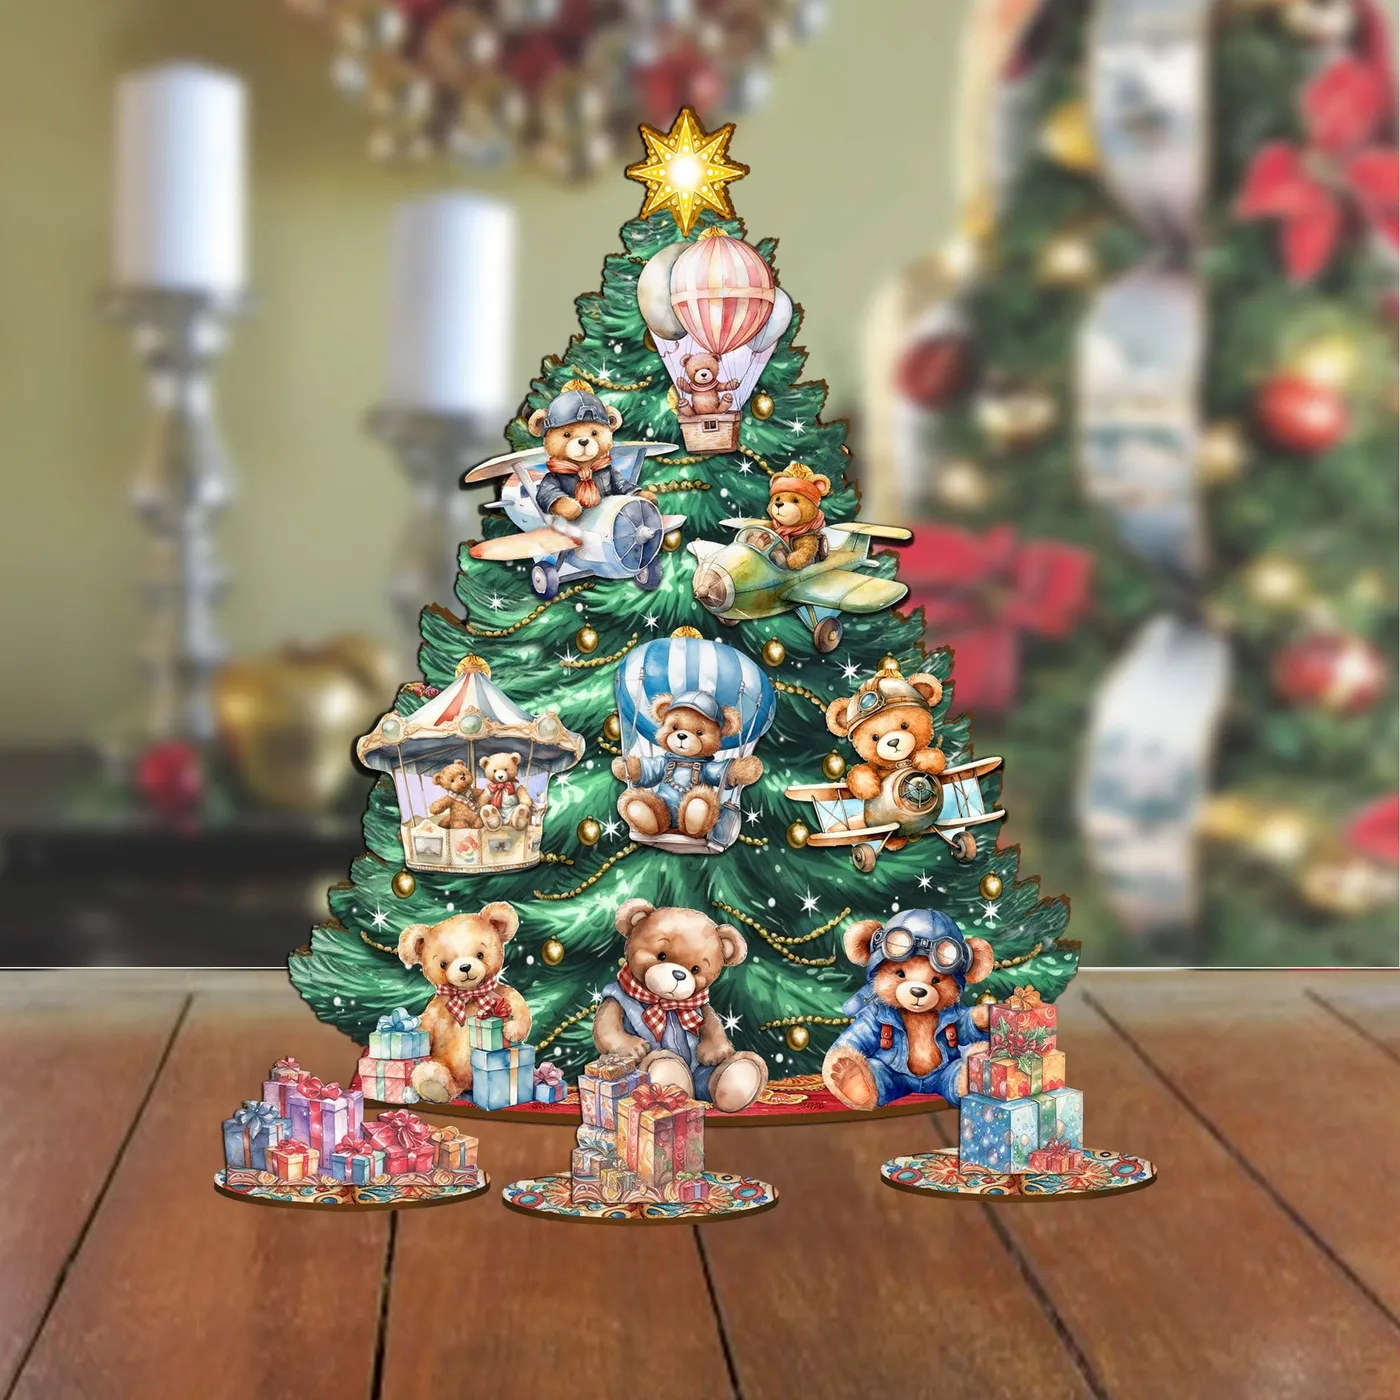
- Collect small cardboard boxes in three sizes and tape them shut.
- Base-coat each with two thin layers of craft acrylic in your main color.
- Let dry, then stencil or freehand a simple pattern — dots, stripes, stars.
- Add a thin gold line along each lid edge with a paint pen.
- Seal with matte varnish so the paint doesn’t stick to the platforms.
Two hours including dry time, about $18 in supplies for six boxes.
- Measure the shelf or table depth — these cutouts need 4 inches of clearance behind them.
- Check that the cutout has a stand or easel; flat cutouts tip easily.
- Decide if children will handle it — painted surfaces chip.
- Have a craft knife and cutting mat ready if you’re making the platforms.
- Confirm your paint colors before you commit to six boxes.
26. A Compact Silver LED Tree for Small Apartments
Slim, silver-lit trees solve a space problem, but they’re not for everyone. The cool white LED light in most of these reads blue in a warm room, and it will make nearby wood tones look orange by comparison. Plug it in before you buy it — the box almost never tells you the color temperature. If your apartment has warm bulbs everywhere, hunt for a warm white or soft white option. Also note these trees are usually 4 to 6 feet tall but only 18 to 24 inches wide, which means they need a wall behind them or they look unfinished from the side.

- Main decor: slim silver LED tree, 4-5 ft — $60-$150
- Lighting: built in; add a $12 floor uplight if you want more glow
- Textiles: none required
- Accessories: 20 unbreakable light ornaments — $15-$30
- Paint/wall: none
- Total: roughly $87 to $192
Budget alternative: a $25 tabletop LED tree on a plant stand gets you height without the price. Pair with Idea #23‘s clip-ons to fill the shelf above it.
27. Pom-Pom Felt Pot Cover on a Tiny Evergreen
The pom-pom pot cover is the entire design, and it’s a two-evening project. Cut a felt sleeve that wraps your pot with about 1 inch of overlap, hot-glue the seam, then glue pom-poms in a 2-inch grid — roughly 24 pom-poms for a 6-inch pot. Alternate red, white, and green in that order so the eye reads a pattern rather than random dots. Make the sleeve removable: stitch a velcro strip instead of gluing it closed so you can wash it or rotate the tree to face the room.
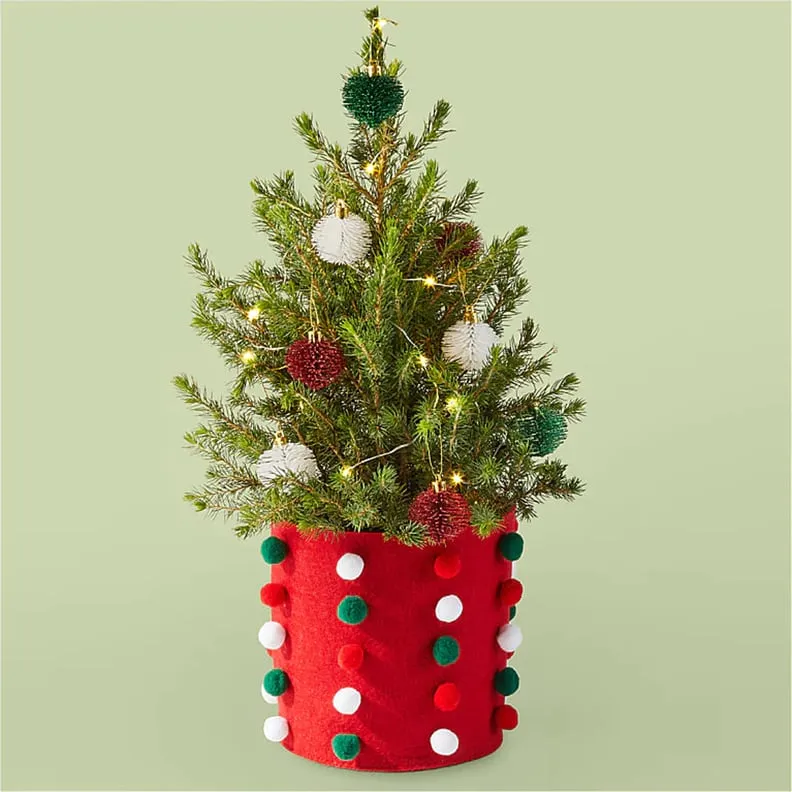
Formula: 50% evergreen, 30% red, 15% white, 5% gold. It’s the most classic ratio there is, and it works at any scale — the felt cover and the ornaments simply repeat the same three colors at different sizes. To modernize without losing the tradition, shift red to a muted brick and gold to brushed brass, and make the pom-poms smaller and denser. To brighten it, add a fourth color in a single place: one aqua ornament, no more, or the classic ratio collapses.
28. Bronze Bottle Brush Tree Buried in White Flocking
Flocked bottle brush trees are usually $8 to $15 each, which adds up fast if you want a cluster. Make your own: a plain bronze or gold bottle brush tree is $3 to $5, and a can of spray snow is $6 and does eight trees. Spray in light passes from 10 inches away, let each coat dry, and stop when the tips look frosted — heavy coats turn grey and clumpy. The flat irregular base is actually easier to fake than a neat round one, so imperfections work in your favor here.
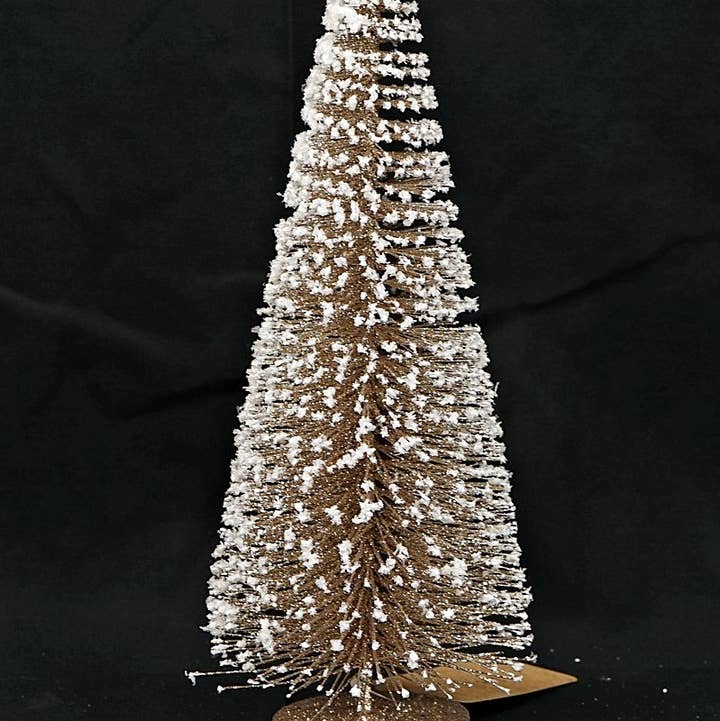
It’s the density of the flocking. Most flocked decor gets a light dusting that reads as dusty; this one is buried to the point where the bronze is only visible in shadow between the bristles. That heavy coverage is what makes it look like a found object instead of a craft store item, and it’s why it holds up against a dark background. If you’re making your own, the temptation is to stop too early. Keep going until you can barely see the base color, then stop.
29. Flocked Mini Tree in Burlap Against Painted Brick
Two things: the burlap base and the white brick. The rough, matte burlap against the polished wood table gives you a texture contrast within one small square foot, which is what stops a mini tree from looking like a toy. And the painted brick wall is bright enough that the dark green tree reads as a silhouette — a dark tree on a dark wall would disappear. The two frosted pinecone stars on the wall are doing the work of a gallery hang: they make the tree look intentional rather than placed.
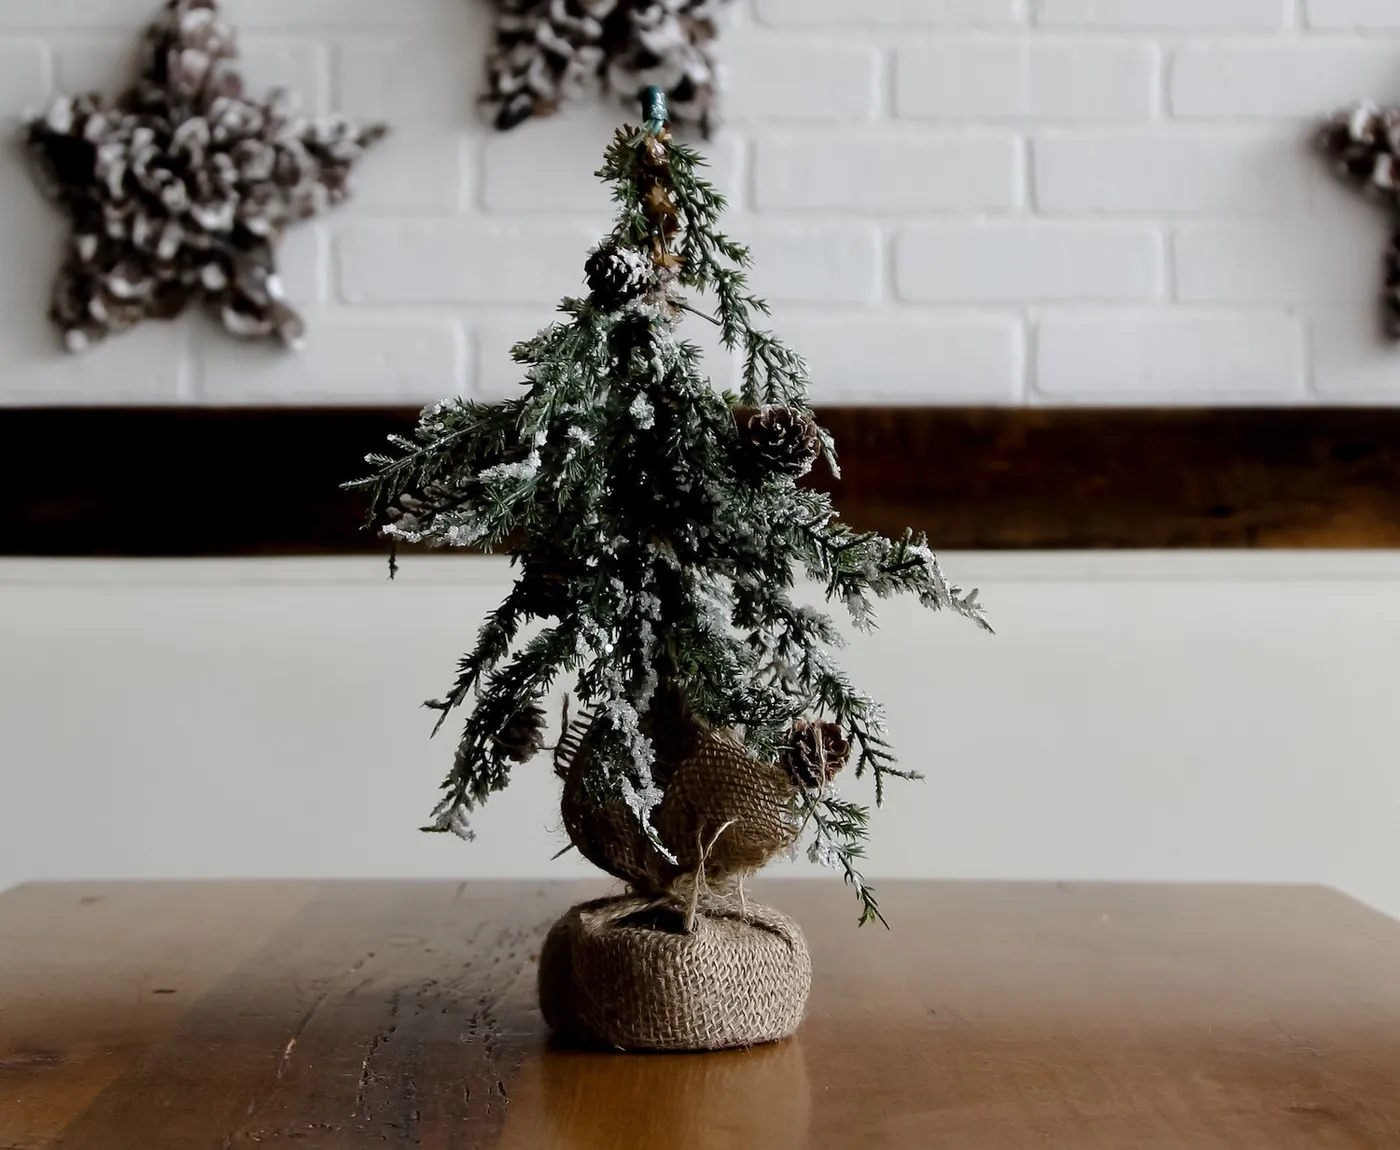
Making the pinecone star decorations behind it:
- Cut a 10-inch star from corrugated cardboard or foam board.
- Hot-glue pinecones around the perimeter, points facing out.
- Fill the center with smaller pinecones or a single large one.
- Spray the whole thing lightly with faux snow, holding the can 12 inches away.
- Attach a picture-hanging strip to the back and mount at eye level.
About 45 minutes each, roughly $8 in materials. Skip this step and the vignette loses its frame — one of the common mistakes below.
30. A Crocheted Tree You Can Hold in Your Palm
Handmade Christmas decor has moved from quaint hobby to a real interiors category, and crochet is leading it. Small yarn trees like this one are selling for $18 to $40 on Etsy, and the reason is simple: they’re soft, unbreakable, and safe on a shelf a toddler can reach. The striped garland in red, orange, and pink is doing something more modern than the usual red-and-green, echoing the retro-bright palette that’s been showing up in 2026 holiday collections. Expect more yarn-and-felt trees, not fewer.
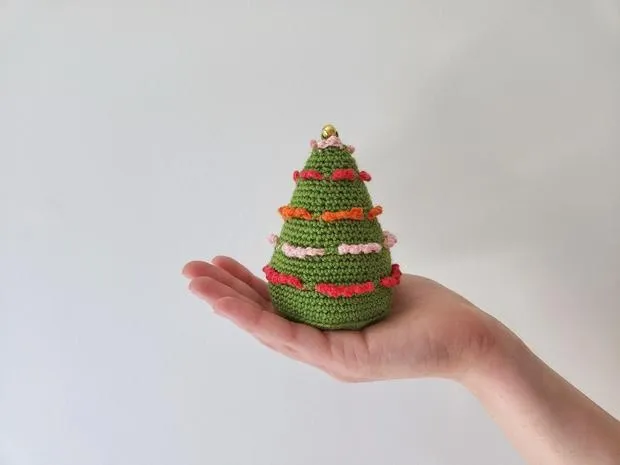
A crocheted tree is decor, not a centerpiece — at 6 to 8 inches it can vanish against a busy shelf. Give it a plain backdrop and a single companion object, or it becomes clutter. It’s also not machine washable; spot-clean with cold water and a drop of dish soap, then reshape it by hand while damp or it dries lopsided. And if you’re buying handmade, check the listing for whether the bell is sewn on or just looped — looped bells fall off and get swallowed.
31. Pine Sprig, Red Berries, and Wooden House Ornaments
- Main decor: pine sprig with berries and pinecones — $6-$14 per stem
- Lighting: none required
- Textiles: white linen runner or surface — $10-$25
- Accessories: two glossy red ornaments plus six wooden houses — $18-$40
- Paint/wall: none
- Total: roughly $34 to $79
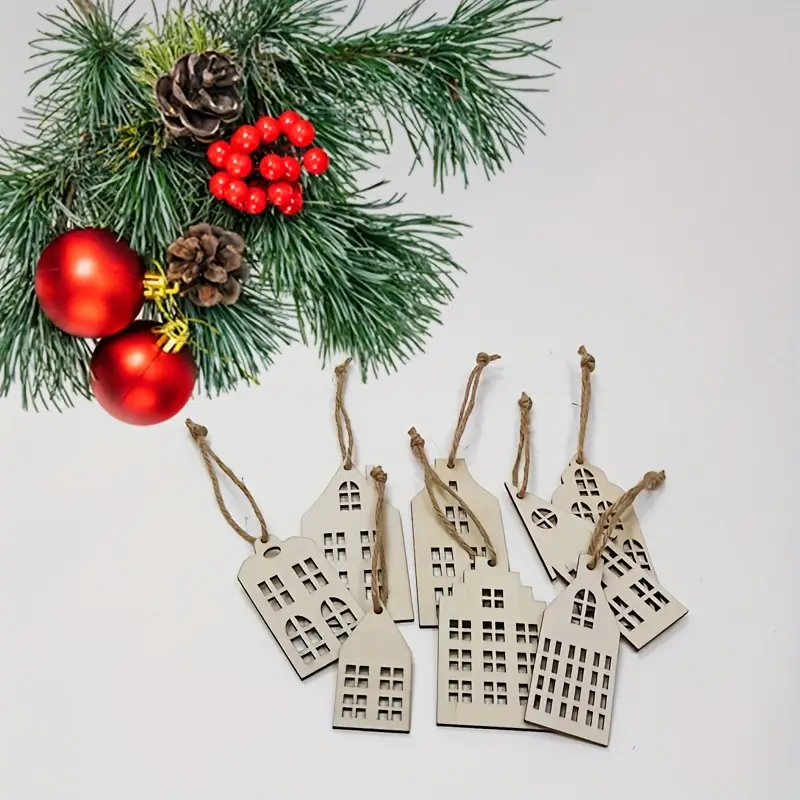
Budget alternative: buy a single faux pine garland for $8 and cut it into four sprigs. The wooden house ornaments are the one item worth keeping; a set of six runs about $12 on Etsy and works for years.
- Clear the surface completely — flat lays fail when there’s background clutter.
- Arrange near a window; this composition needs soft directional light.
- Sort your pieces by size before placing anything.
- Keep the tallest element off-center — it photographs better.
- Leave a strip of empty surface at the bottom of the frame.
Thirty-One Little Trees and One Very Small Corner
Here’s the good news about going small: you can change the entire look next December for the price of a couple of ornaments. Start with the pot, the basket, or the fabric base, because that’s what makes everything above it look intentional — and it’s the one piece you’ll keep year after year.
Pick the version that fits the corner you actually have, not the one you wish you had. 📌 Pin your favorite to Pinterest now so you’re not scrolling in a panic on December 20th.