You’ve pinned forty Christmas crafts before Thanksgiving and finished exactly none of them. We know the pattern — and this year we’re breaking it with 32 ideas that use supplies you probably already own, plus a few cheap ones worth buying. We spent serious time browsing Michaels, Target, Dollar Tree, Amazon, and Etsy to bring you only the projects actually worth a Saturday afternoon. Prices run from about $2 for a pack of raffia to $45 for a fully dressed tabletop tree, and most ideas come with a budget version and a splurge version side by side, plus the exact supplies and where to grab them. The styles in here lean rustic woodland, vintage red-and-green traditional, soft neutral Scandi, and the beautifully imperfect kid-made look Pinterest cannot get enough of in 2026 — because after years of sterile minimalism, people want handmade evidence on their shelves again. And stay until the end — we break down the most common mistakes that can ruin these looks. 📌 Save this to Pinterest for later — you’ll want to revisit these ideas.
1. Kraft Paper Books Tied With Baker’s Twine
Before you wrap, fold a 1-inch cuff of kraft paper over the top edge of the book — it hides the raw cut and gives the package that soft, rumpled look. Cut your paper 3 inches wider than the book on every side, and tape only on the underside; tape on top flattens the texture you’re paying for. For the twine, cut two 24-inch strands of red and white and twist them together before tying, so they read as one thick cord instead of two thin threads fighting each other.

The clear glass ornaments are doing all the heavy lifting here. Without them, two kraft-wrapped books and a strand of fairy lights are just books and lights. The glass bounces those warm bulbs into little pools of yellow and adds a third texture — smooth, cool, slightly fancy — against the matte paper and rough grey wood. Swap them for plastic, or skip them, and the whole vignette flattens into beige. Thrift stores sell clear glass ornaments by the bagful for almost nothing.
2. Frosted Pinecone Ornaments With Red Satin and Fir Sprigs
- Bake your pinecones at 200°F for 45 minutes on a foil-lined sheet to dry them out and kill anything living inside.
- Dip the tips only into white craft paint, then roll them in fine clear glitter while the paint is still wet.
- Hot-glue a 4-inch twine loop between the top scales.
- Tie a 1-inch red satin ribbon into a bow and glue it just below the loop.
- Tuck one sprig of fir or rosemary behind the bow.
About an hour plus drying time, and under $12 for a set of six.
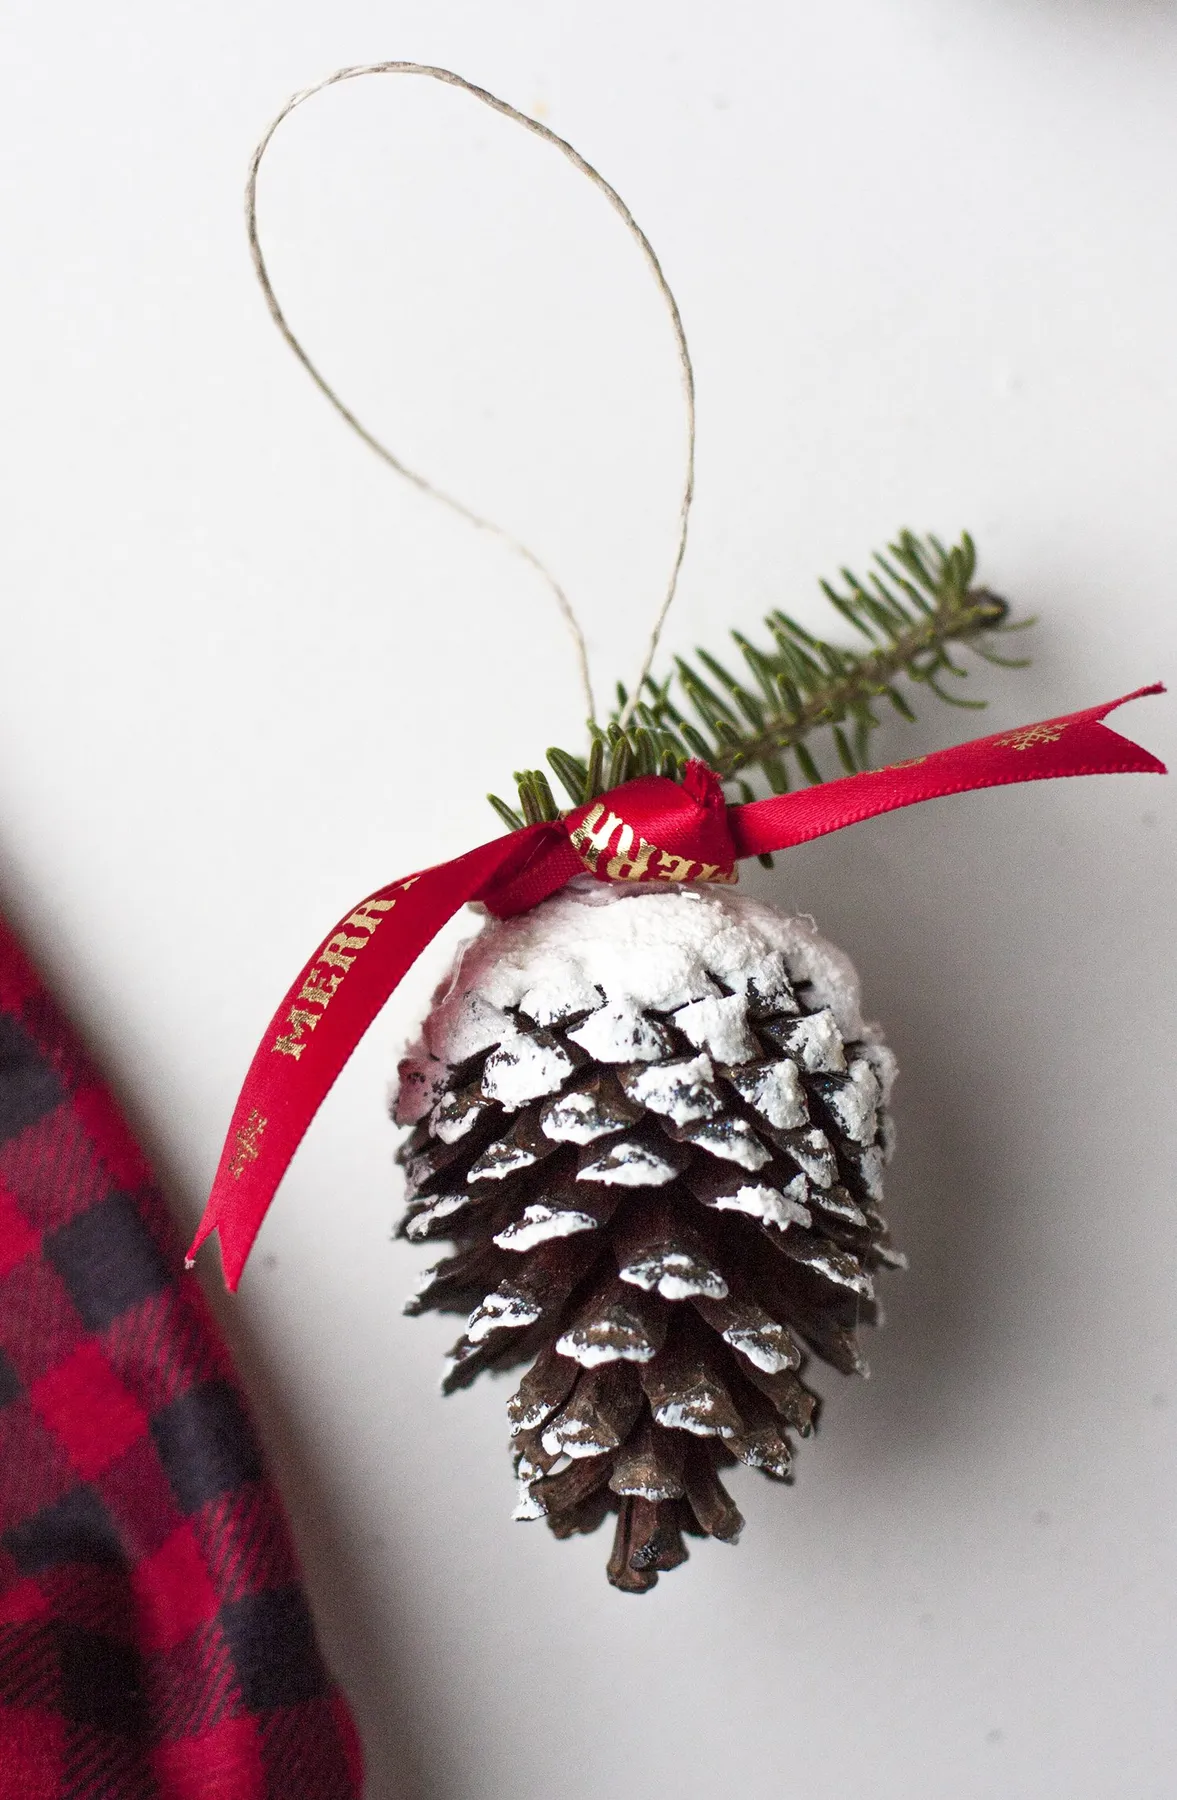
What makes this pair read as expensive isn’t the pinecone — it’s the light hitting three different surfaces at once. The frosted tips scatter light softly, the satin ribbon throws a sharp highlight, and the fir needles add a dark green note so the whole thing isn’t monochrome. That gold print on the ribbon is the detail nobody consciously notices and everybody feels. Sit one next to the kraft-wrapped books in Idea #1 and you’ve built a whole scene for about eight dollars.
3. Handprint Ornaments Kids Can Actually Make Themselves
Clear plastic fillable ornaments run about $8 for a dozen at Dollar Tree or Walmart, and a six-pack of acrylic craft paint is $5 at Target. Skip the fancy ornament kit entirely. Press a small hand into paint, stamp it onto the ball with the fingers pointing up, then turn that print into antlers, a snowman’s arms, or tree branches with a fine-tip marker. Google eyes and a red pom-pom nose finish the reindeer. Twenty dollars gets you a whole tree’s worth of keepsakes, and the kids do most of the work.
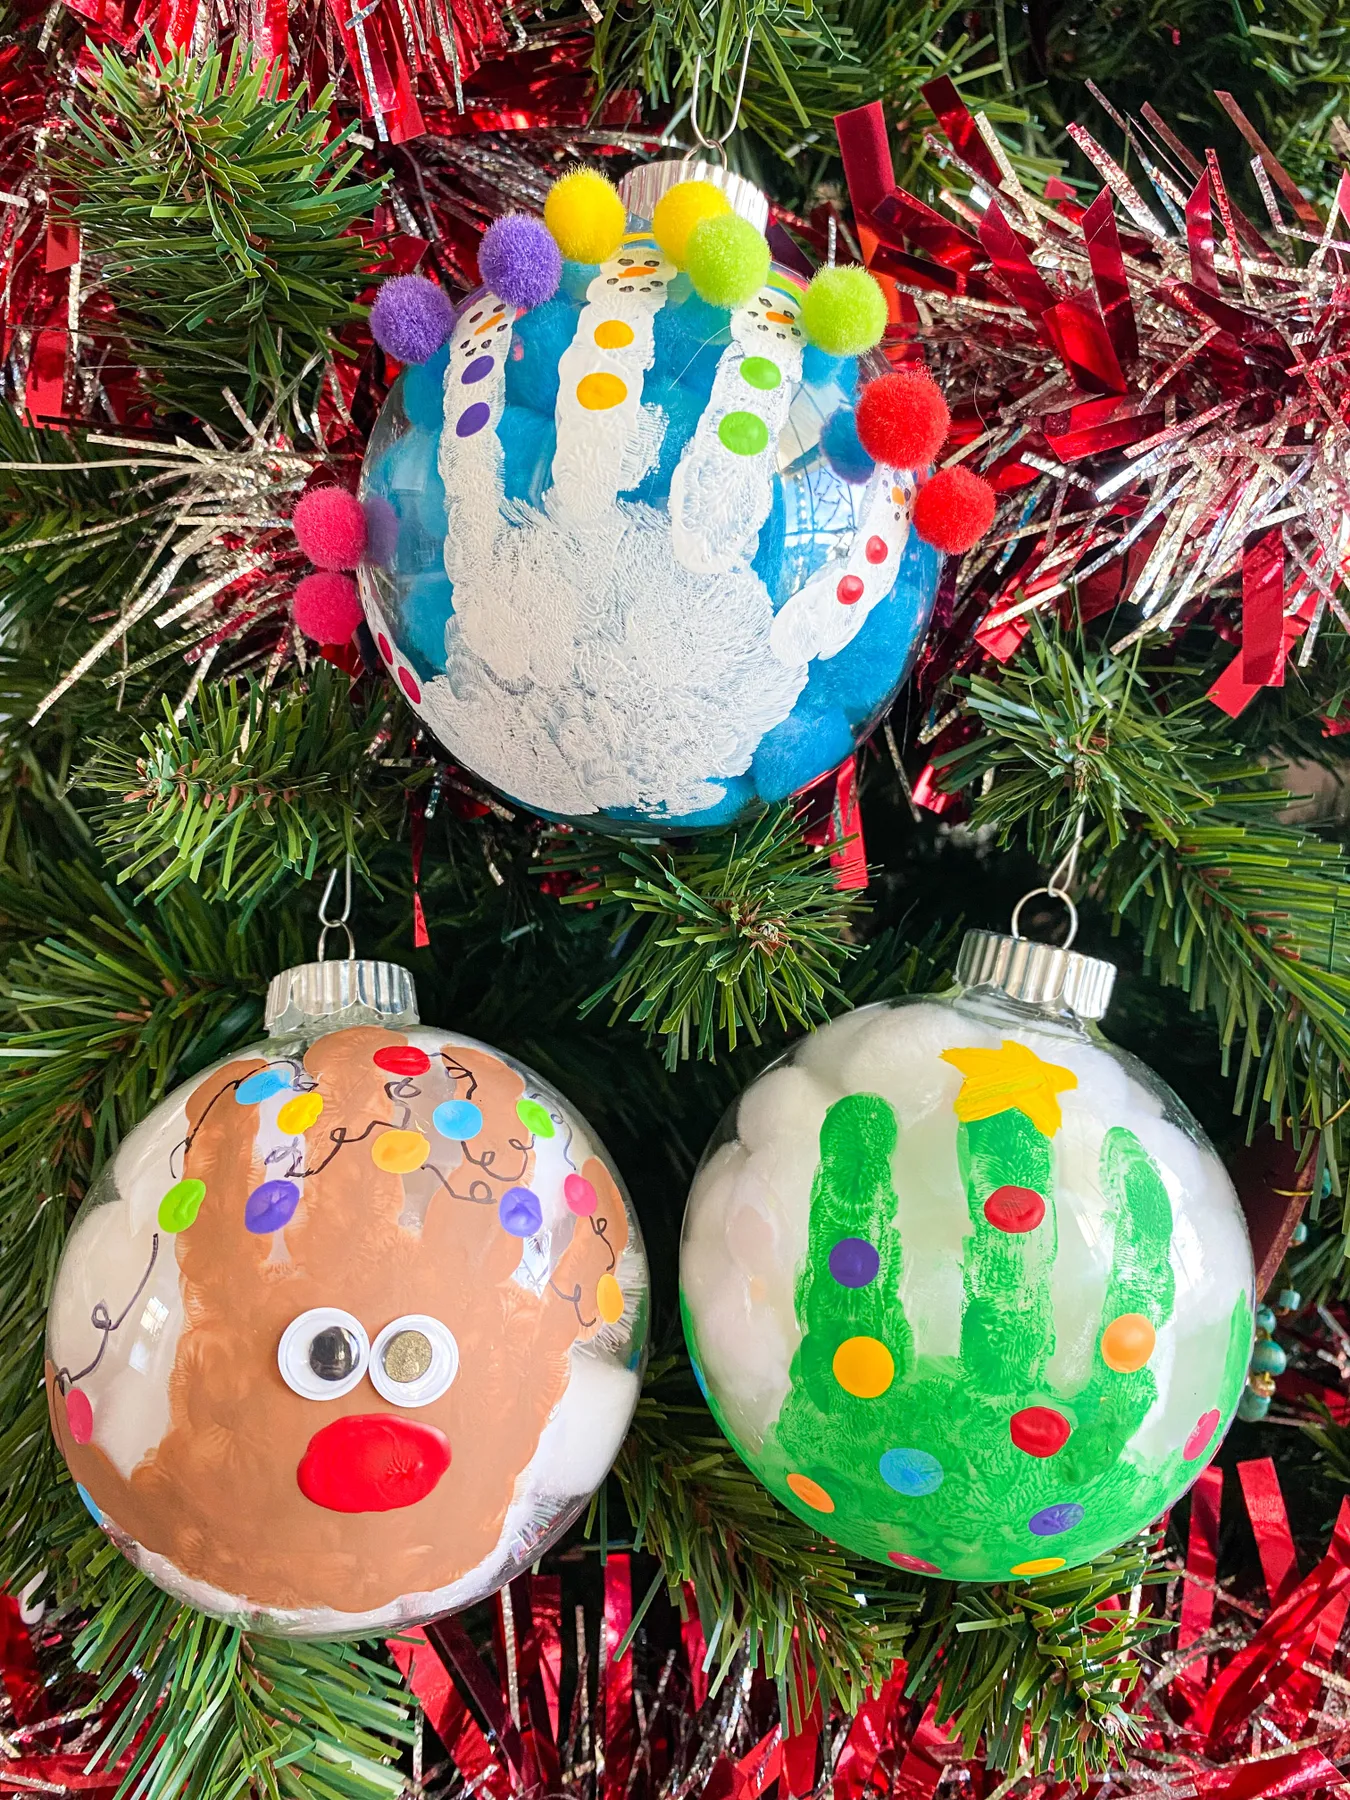
Acrylic paint on a curved glass ball is slippery, and a toddler hand is not a stamp pad. Work over a paper-covered table, keep a wet rag within reach, and accept that the first three attempts will look exactly like fingerprints — because they are. Also worth knowing: handprint ornaments are one-and-done. You get one clean press per ball, so buy a few extras and let them practice before you commit the good ones.
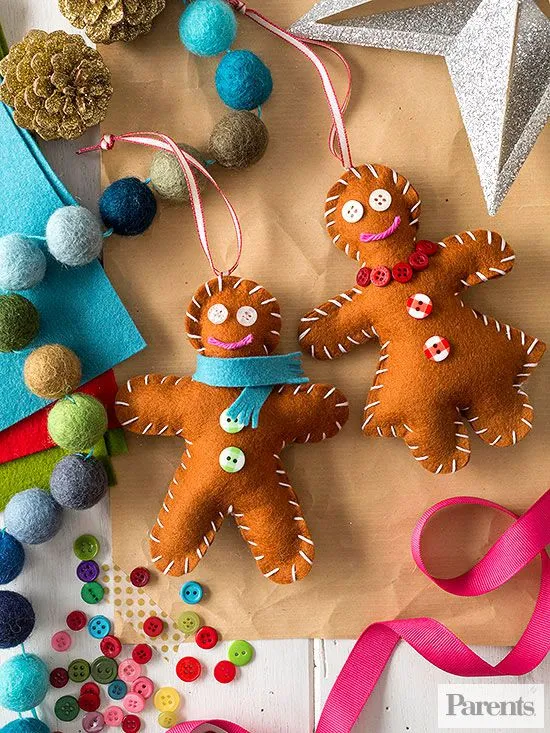
4. Hand-Stitched Felt Ornaments in Gingerbread and Mitten Shapes
- Print a gingerbread or mitten template at 4 inches tall and trace it twice onto wool-blend felt.
- Whip-stitch around the edge with white embroidery floss, leaving a 1-inch gap at the top.
- Stuff lightly with fiberfill — about a golf ball’s worth — then close the gap.
- Stitch three tiny buttons down the front and a 4-inch red ribbon loop at the top.
- Trim the felt edges with sharp scissors for a crisp silhouette.
Roughly 25 minutes per ornament, and a $3 felt sheet makes four of them.

The visible white stitching is the entire personality of this set. Machine-perfect edges would make those gingerbread figures look store-bought and slightly sad; hand stitches that wobble a little announce that these came off somebody’s kitchen table. Use two strands of floss, not six, so the stitches stay delicate, and let the thread contrast against the brown rather than matching it. That one decision is the difference between a craft and a keepsake.
5. Painted Pinecone Trees Dotted With Tiny Pom-Poms
The formula here is roughly 70% green base, 20% white snow accents, and 10% scattered bright color. The green comes from spray paint, the white from tipped edges, and the color from pom-poms no bigger than a pencil eraser. Keep that ratio and you can swap the palette entirely — navy base with silver tips and pearl beads, or cream base with blush pom-poms for a nursery tree. Break the 10% rule and the pom-poms stop reading as snow-dusted berries and start reading as confetti.
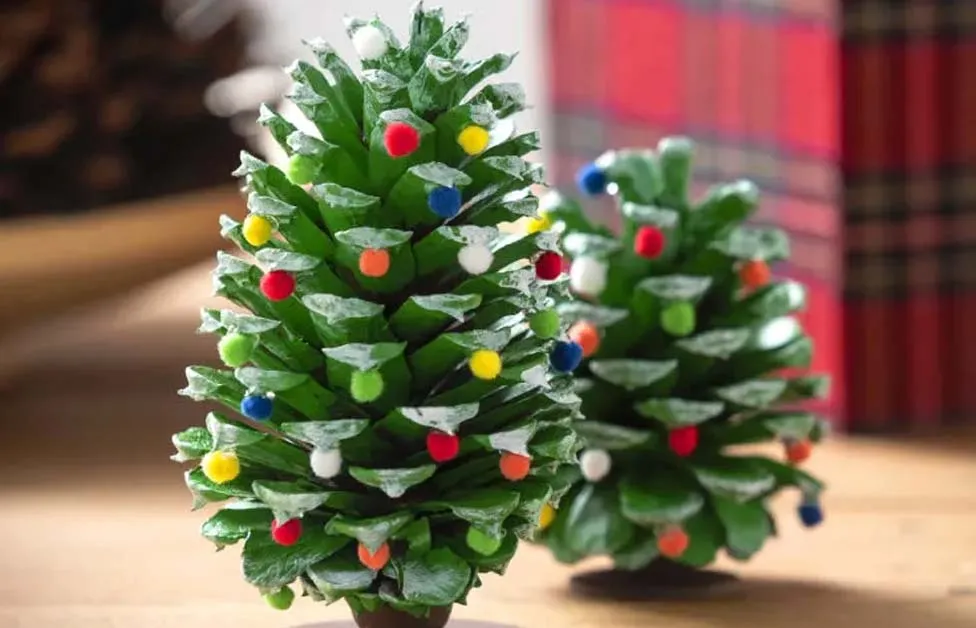
Spray the pinecones in thin coats from 10 inches away and let each coat flash off for 15 minutes before the next pass. One heavy coat clogs the scales and you lose the shadow lines that make a cone look like a tree at all. For the pom-poms, hot glue beats craft glue every time — they stay put when things get knocked around in a storage bin. Set each cone on a wood slice at least 2.5 inches across or it tips. Next to the felt ornaments in Idea #4, these are the green note that keeps a brown-and-cream shelf from going flat.
6. A Flocked Evergreen Ring With Brown Tapers and Brass
- Flocked evergreen wreath, 24-inch: $25–$60
- Two 10-inch taper candles and brass holders: $12–$35
- Pinecones, gilded leaves, and berries: $8–$20
- Woven natural fiber placemat: $6–$18
- Floral wire and candle adhesive: $5–$8
Total: roughly $56–$141 for a centerpiece you’ll pull out every December for years.
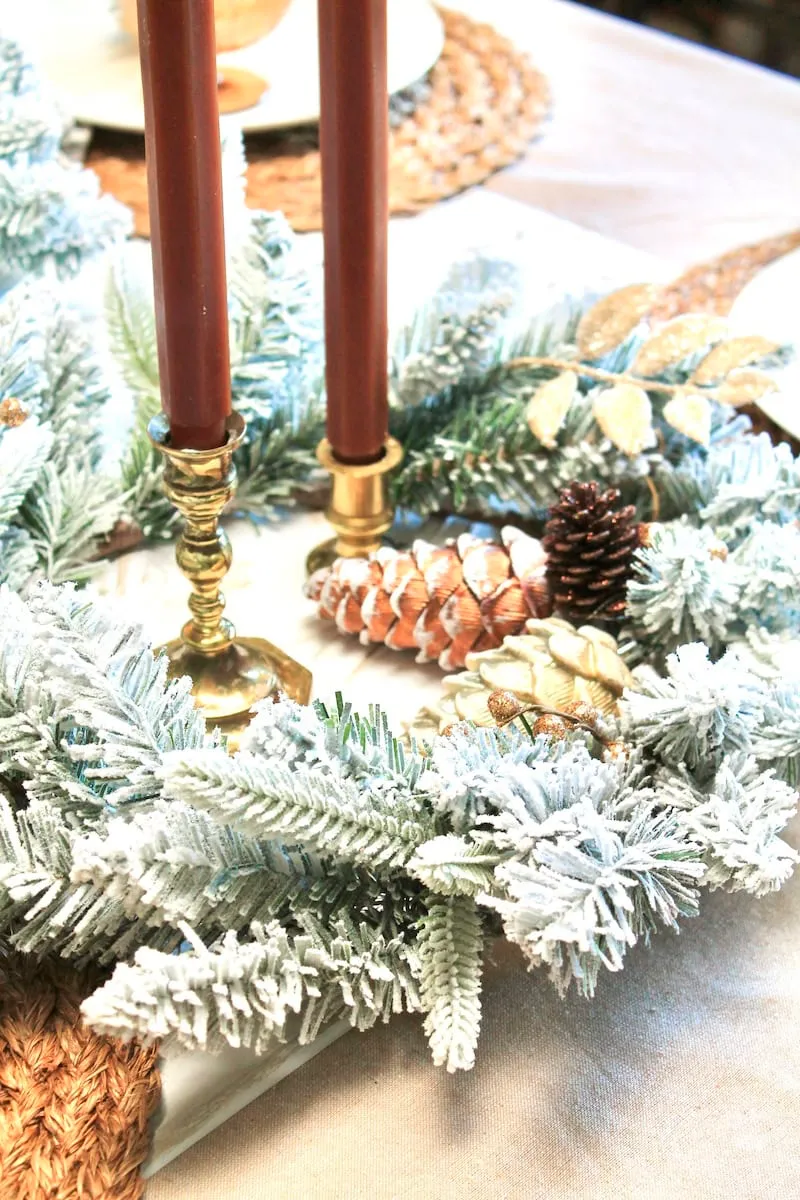
Two tall tapers set inside a wreath do something a bowl of ornaments can’t: they pull your eye upward and give a flat table vertical presence. The flocking keeps the green from looking heavy, and brass adds a warm metal note against all that white. It works because nothing competes — one texture, one warm metal, one natural brown. Just place it where people can walk all the way around, or the candles will feel crowded.
- Measure the table — the wreath needs 6 inches of clear space on every side.
- Check sightlines: tapers over 10 inches tall block conversation across a small table.
- Never leave a lit taper unattended, and skip real flame entirely if kids or cats share the room.
- Confirm the wreath is flocked, not just dusty, or you’ll be vacuuming glitter through February.
Swap to LED tapers for a high-traffic table, and rest the arrangement on a felt pad so the brass doesn’t scratch the finish.
7. Yarn and Jute Cone Trees on Wood Slice Bases
- Cut a 12-inch cone from poster board and tape the seam flat.
- Hot-glue the yarn end at the base and wrap upward, keeping rows tight and touching.
- Every 10 wraps, press the rows down with your palm so they don’t gap.
- When you reach the tip, glue the end inside the cone and trim.
- Poke a twig into the top and hot-glue the cone onto a 3-inch wood slice.
About 40 minutes per tree, and one skein of yarn covers two cones with leftovers.
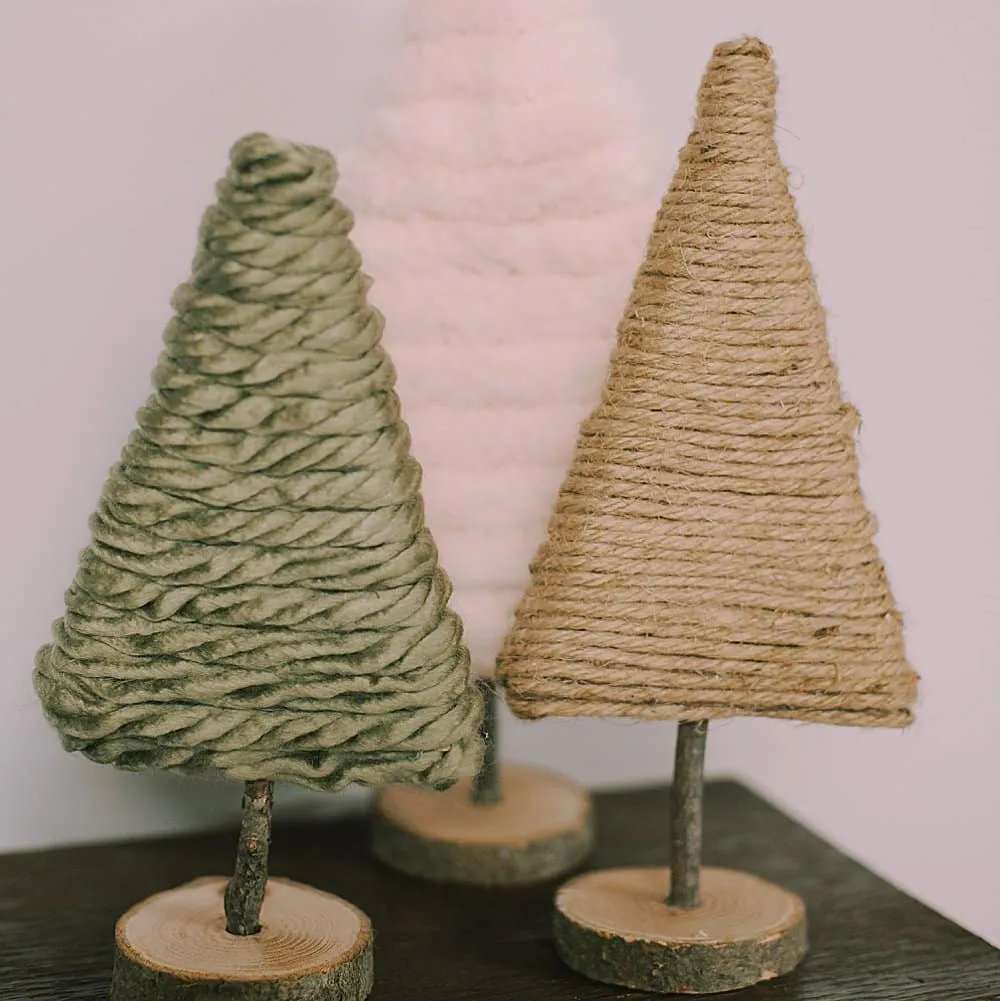
One sage green skein, a roll of jute twine, and a bag of wood slices from Dollar Tree will run you about $10 total and make three trees. Want the chunky pink version in the back? Buy super-bulky yarn and use a smaller 6-inch cone — thick yarn covers it in fifteen minutes flat. Branch clippings from the yard replace the twig stems for free, and no chop saw required; any wood slice with a flat face will do.
8. Cookie Ornaments, Iced by Small Hands
Real cookies on a tree are charming for about nine days, and then they soften, drop crumbs, and attract every ant in the county. If you want them to survive to next December, bake them at 250°F for two hours until they’re rock hard, then seal both sides with two coats of matte polyurethane. They’ll still look baked rather than lacquered, and they’ll be intact when you unpack the box in 2027. Keep the edible ones on a plate, not on the branches.
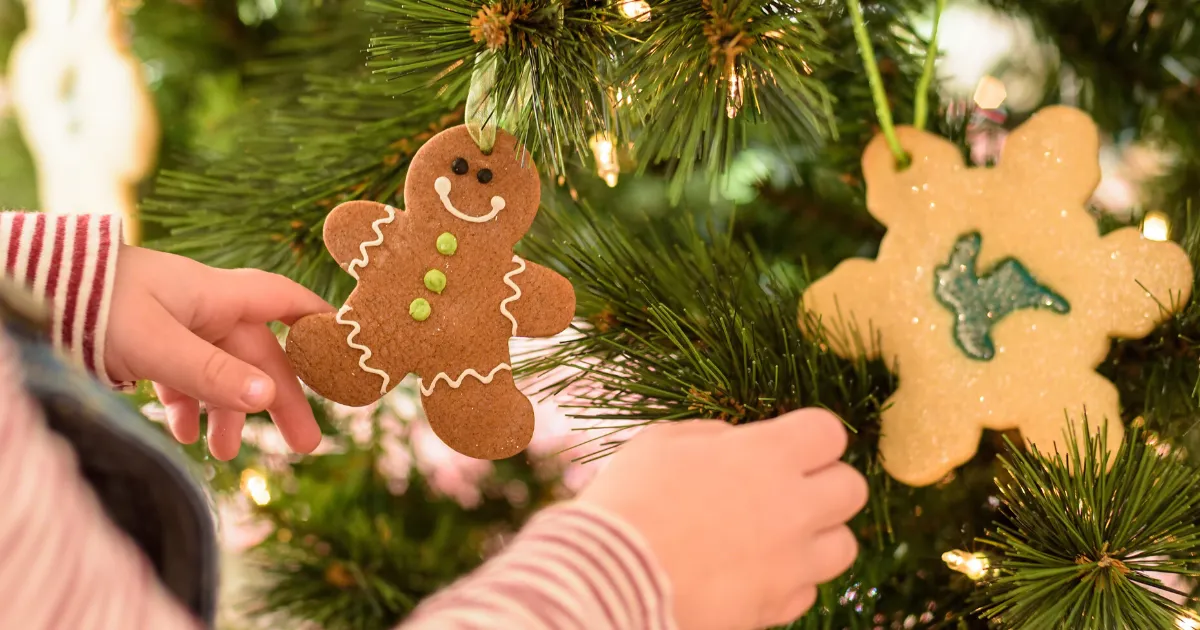
Handmade ornaments have been creeping back for a few seasons, and this is the year the gingerbread silhouette fully took over. Part of it is the ongoing pull toward nostalgic, warm-toned Christmas styling; part of it is plain economics, since six cookie ornaments cost a few dollars in dough versus thirty dollars for a boxed set. It also photographs beautifully, which is exactly why it keeps resurfacing on Pinterest boards next to vintage Santa mugs and plaid ribbon.
9. Red and Silver Painted Pinecones in a Black Basket
The black woven basket is the unexpected hero here. Dark containers make red and silver look intentional instead of accidental — swap in natural wicker or white and the whole arrangement washes out into generic holiday filler. The cardinal tucked in back adds a flash of the exact same red, which quietly ties the two halves together. Take the basket away and you have painted pinecones on a table. Keep it and you have a styled corner.
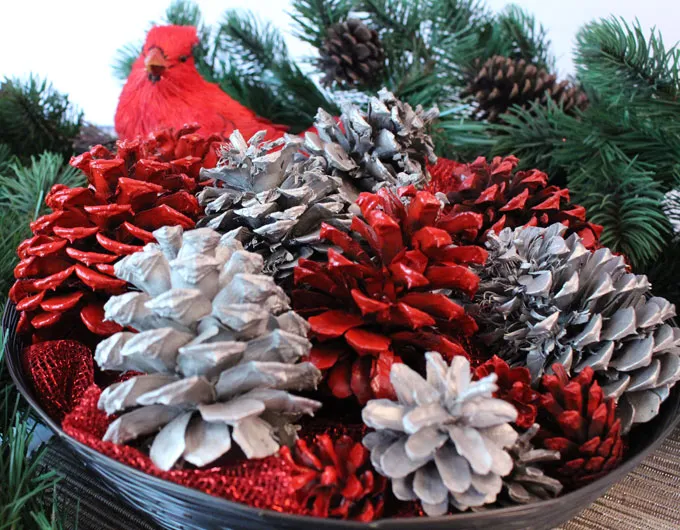
Read it as 45% red, 35% silver, 15% black, and 5% green. The red mesh tucked underneath is what keeps the cones sitting up instead of sinking, so don’t skip filler. To shift the mood entirely, swap the silver for matte gold and the cardinal for a small brass deer. Keep the black basket either way — it’s the anchor that stops the metallics from looking cheap, and it works just as well with a copper-and-cream palette.
10. Five Mini Trees, Five Different Trims
This is the craft-store clearance bin’s greatest hits. Green foam or cardboard cones run $1 to $3 each at Dollar Tree, wood bases sell in packs of twelve for about $5, and the trims — red buttons, white pom-poms, flat-backed jewels, foil pieces — come out of whatever’s already rattling around your craft drawer. Total for all five trees: under $25. Starting from zero? A $10 mixed embellishment pack at Michaels covers every tree with plenty left for next year.
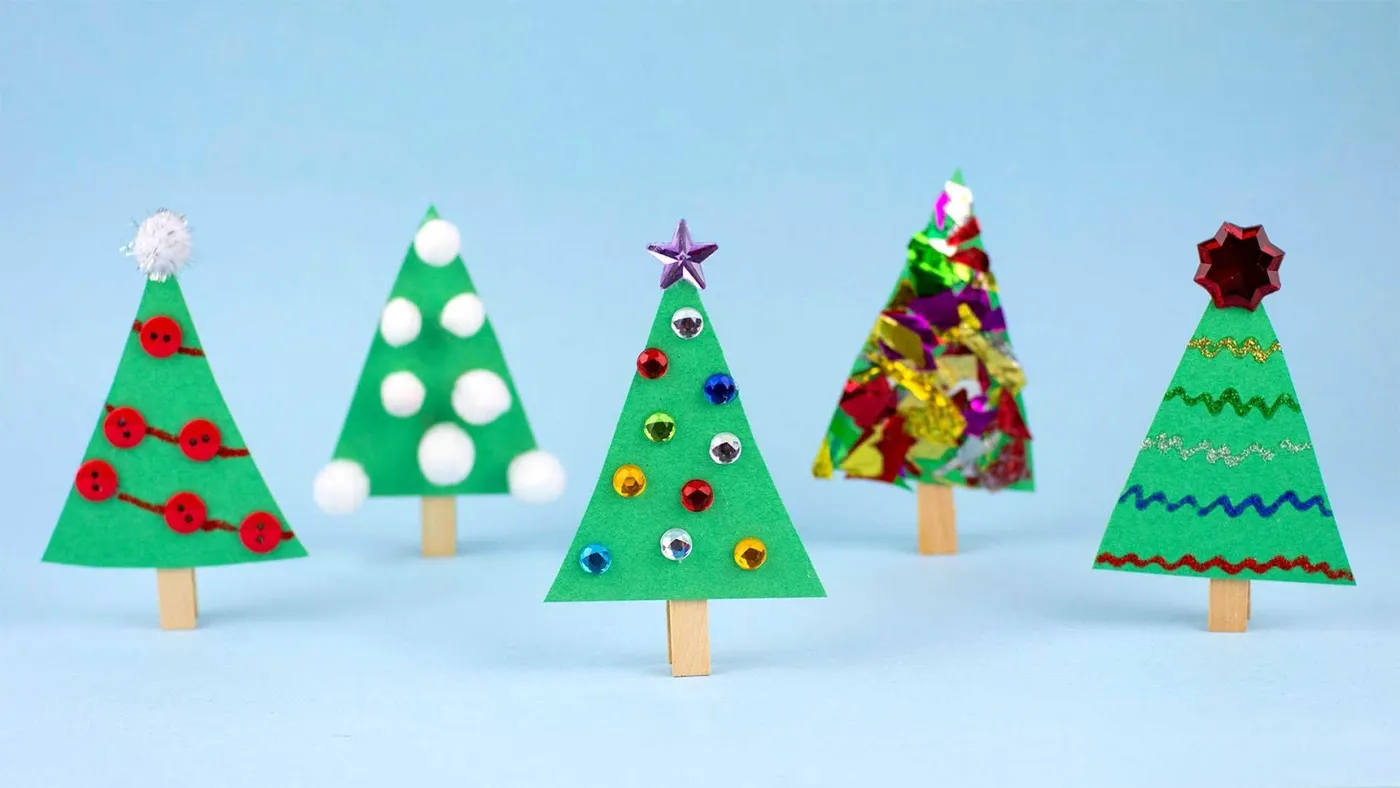
Give each tree one trim, and one only. The reason these five look like a collection instead of a craft-fair table is that no cone mixes buttons with jewels. Choose a single embellishment per tree, repeat it in a steady pattern — three across, three down — and let the shapes do the talking. Glue the trims while the cone is lying flat, not standing; gravity is not on your side with flat-backed rhinestones.
11. Wine Cork Snowmen With Scrap Ribbon Scarves
- Save three corks per snowman; rinse them and let them dry for a day.
- Dot two black eyes and three mouth dots with a fine-tip paint pen, or a toothpick dipped in acrylic.
- Glue on a small orange foam cone for the nose.
- Tie a 6-inch ribbon scrap around the top and knot it once — that’s the scarf.
- Hot-glue a twine loop to the back if you plan to hang them.
Ten minutes per snowman, and the ribbon scraps are ones you already own.
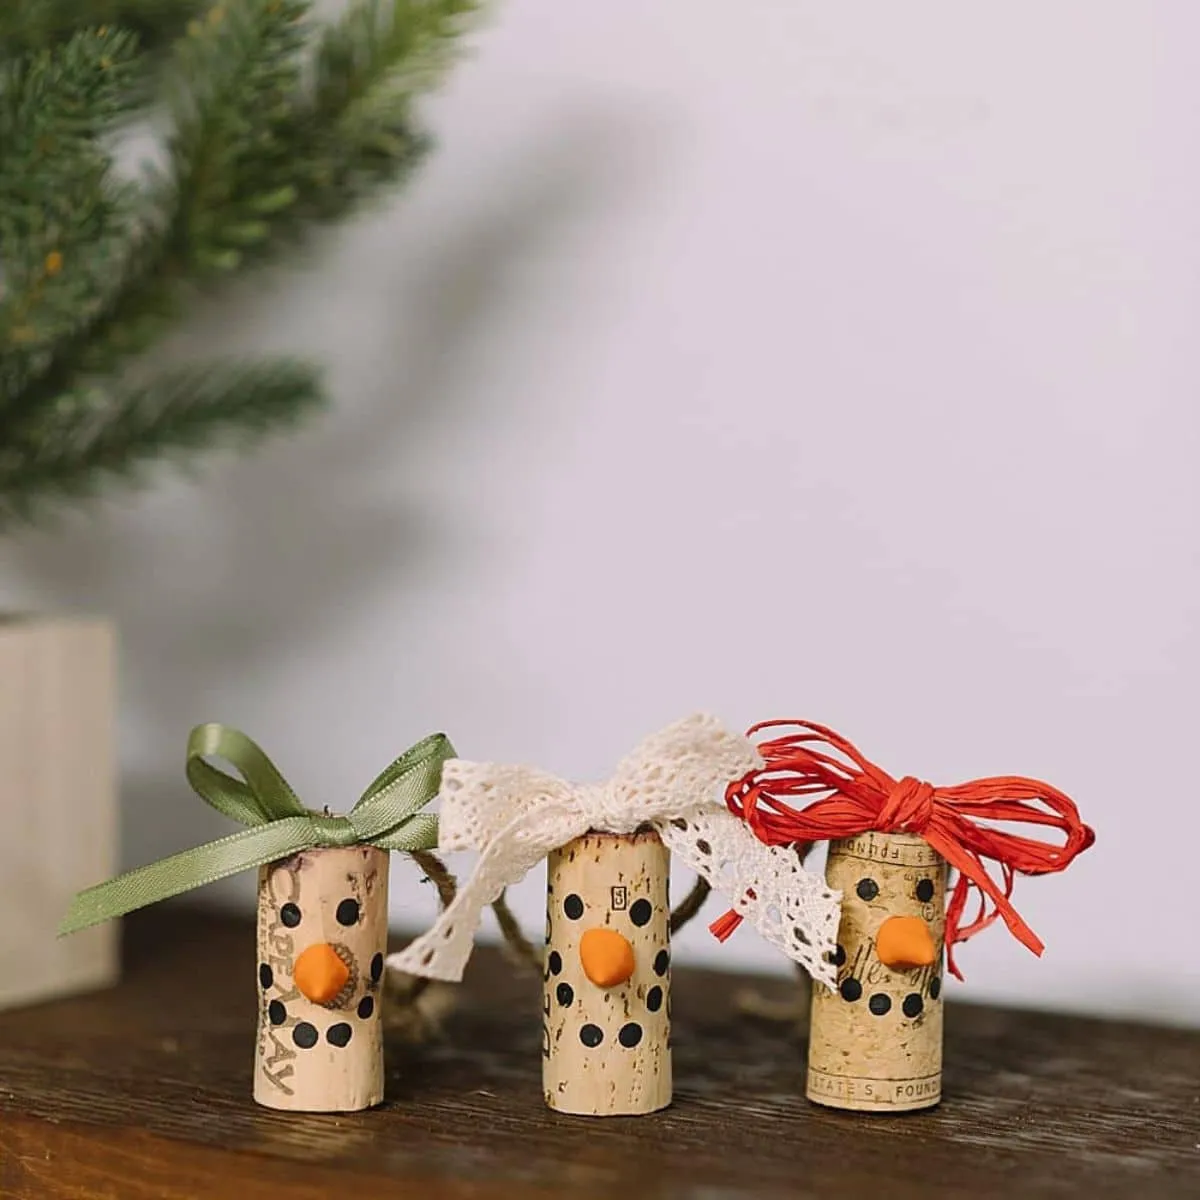
- Wine corks: free if you drink wine, or $6 for a bag of 25 at a craft store
- Orange craft foam for noses: $3
- Black paint pen: $4
- Ribbon scraps in green satin, lace, and red raffia: $0–$8
- Hot glue sticks: $3
Total: about $10–$24 for a dozen snowmen — and the corks are the only part that ever runs out.
12. Fingerprint Lightbulb Ornaments You’ll Keep Forever
- Buy flat white ornaments, not glossy — matte takes a fingerprint cleanly.
- Test your paint pen on the back first; some bleed on ceramic glaze.
- Keep baby wipes within reach, because fingerprints spread fast on a curve.
- Decide the year now and write it in one confident stroke before you hang it.
One fingerprint per bulb, pressed straight down and lifted straight up, gives you a clean dot. Anything more becomes a smear.
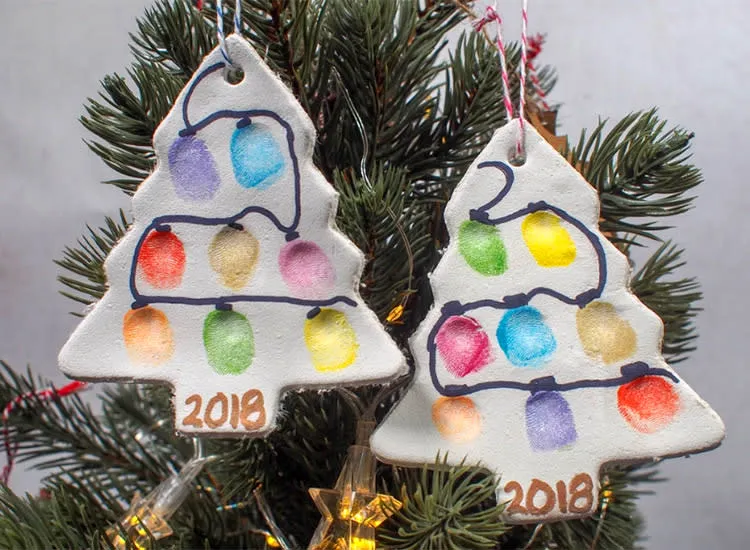
The black outline is what turns a smudge into a string of lights. Without it, those fingerprints read as random color; with it, your brain instantly finishes the picture. The dark green needles behind the ornament do the rest of the work — a white ball against a bare wall disappears, but against deep green it pops. And that handwritten year is the detail that makes people stop and hold it instead of hanging it and moving on.
13. A Speckled Mug Stuffed With Pine, Berries, and a Candy Cane
Use floral foam, not water, and cut it 1 inch below the rim so the greenery can drape over the edge. Push the pine sprigs in first at a 45-degree angle, then the berries, then mini pinecones to fill the gaps. Tie the buffalo check ribbon around the handle, not the rim — a bow at the rim fights the foliage for attention. One candy cane tucked at the front-left adds a diagonal line the eye follows. Six minutes of assembly, tops.
Mugs from the back of your cabinet, pine clippings from the tree’s bottom branches, and a $5 bag of mini pinecones from Walmart get you 90% of the way there. Buffalo check ribbon is $3 a spool at Dollar Tree and wraps a dozen mugs. Skip the florist completely. If these are gifts, thrift stores sell mismatched white mugs for a dollar apiece, and each finished mug still lands under $4. It’s the same idea as Idea #6, just scaled down to something you can hold.
14. The Felt Ornament Table, Mid-Project
Felt sheds. Fuzz gets on everything — your sweater, your coffee, the dog. Cut on a tray or a sheet of parchment so cleanup is one motion instead of twenty. Cheap craft felt also pills and stretches, so buy wool-blend felt at about $1.50 a sheet for anything you want to keep more than one season. And be honest about your hands: if you haven’t hand-sewn in a decade, start with a 3-inch mitten before you commit to a thirty-piece set.
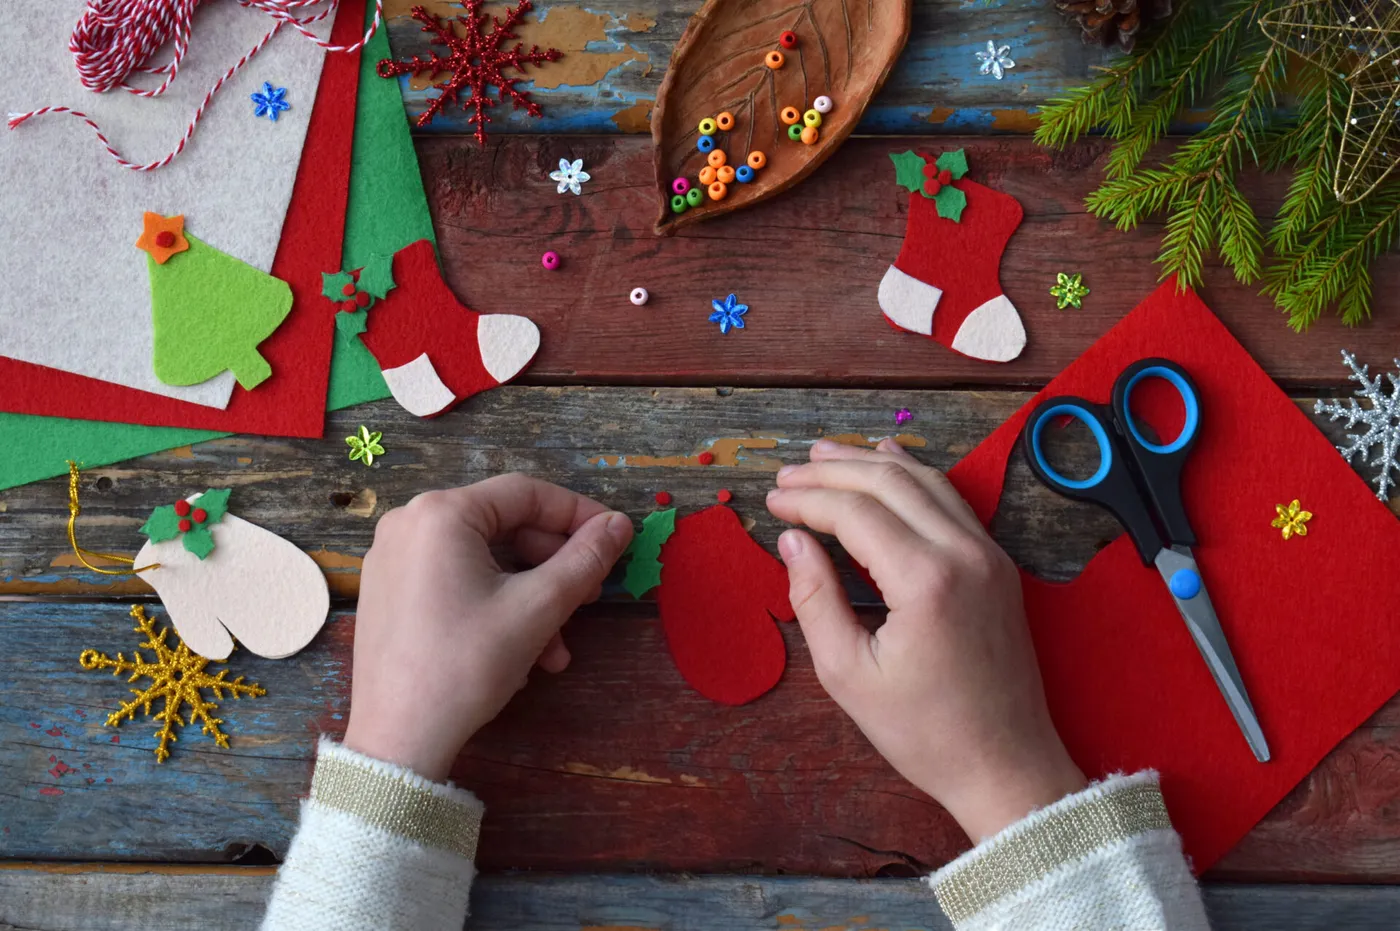
- Lay out every shape before you sew a stitch — you’ll spot gaps and duplicates instantly.
- Sort beads into a shallow dish, not a bag, so you can pinch them without dumping the lot.
- Cut two of every shape; the back piece hides knots and gives the ornament weight.
- Keep a scrap bowl on the table — offcuts become tiny holly leaves later.
- Stop at 80% and clean up. Finishing everything in one sitting is how you burn out.
Set aside two evenings for a full set.
15. Felt Stockings With Holly, Berries, and Tiny Hearts
- Red and green wool-blend felt, four sheets each: $12–$20
- Embroidery floss and needle set: $6–$10
- Felt appliques (hearts, holly, berries) or scraps: $0–$8
- Craft punch tool for the holly shapes: $9–$15
- Ribbon loops and twine: $4–$6
Total: about $31–$59 for eight stockings — roughly $5 each once you own the punch.
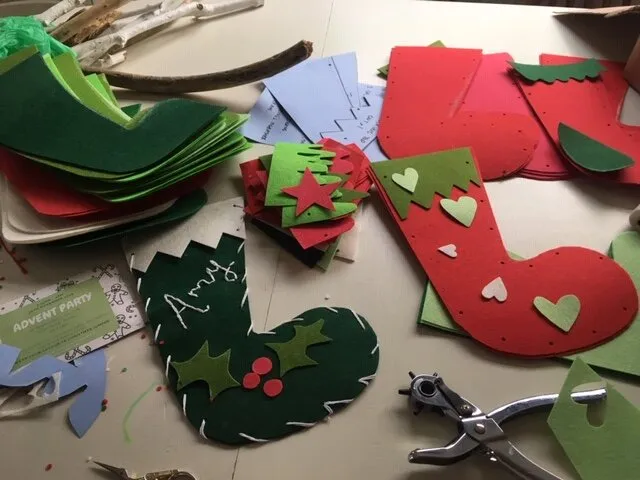
Scale is everything with appliques. Holly leaves on a 4-inch stocking should be no taller than 1.5 inches, or the whole thing reads as clutter instead of detail. Place the appliques before you glue, photograph the layout with your phone, then glue — that way you can rebuild the arrangement exactly when something shifts. And keep the palette to three values: deep red, dark green, cream. A fourth color turns handmade into homemade.
16. Clear Ornaments Filled With Pine Needles and Mini Cones
The ratio is 60% green filler, 25% brown cones, 15% empty space. Filling the ball completely kills the effect — you need those gaps so light passes through and the contents read as a tiny forest instead of a packed drawer. Swap the pinecones for whole star anise, cinnamon sticks, or dried cranberries and the same ratio holds. The red shredded paper underneath adds the fourth element: a hot-color base that makes the cool green inside look brighter purely by contrast.
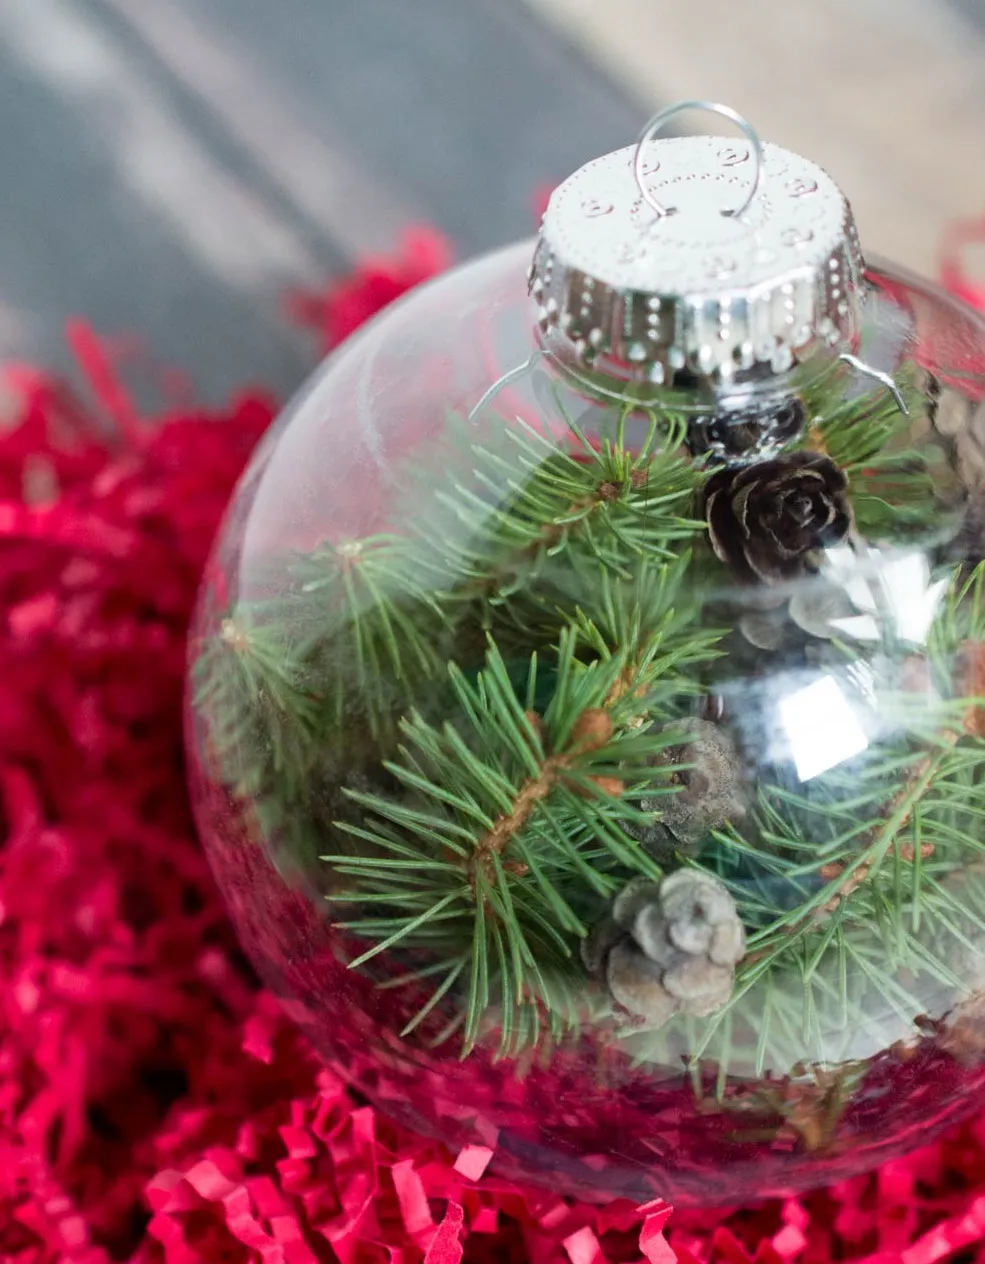
Fresh pine needles dry out and drop, and a glass ball full of brittle brown needles loses its charm by February. Either dry your needles first — 24 hours on a paper towel — or accept this as a one-season ornament. Glass balls also chip where the cap meets the neck, so carry them by the cap, not the sphere. With pets or toddlers in the house, use clear plastic fillables; same contents, survives the drop.
17. A Tabletop Tree in Gold, Red, and White
- 36-inch tabletop tree: $25–$60
- Gold, red, and white ornaments, about 40 pieces: $20–$45
- Warm white string lights: $8–$18
- Gold star topper: $5–$14
- Fabric tree skirt and woven basket: $12–$30
Total: about $70–$167 — and the ornaments last decades if you store them in egg crates.
This size works anywhere from a 30-square-foot apartment corner to a wide hallway, but the numbers matter: a 36-inch tree wants about 18 inches of clearance behind it so the lights read as a glow rather than a glare. Ceiling height isn’t a factor at this scale, which is exactly why it’s the right answer for a bedroom or a small entry. If you’d rather have a tabletop centerpiece than a tree, Idea #6 covers the same winter palette in a much smaller footprint.
18. Twig Trees With Button Baubles
- Gather 20 to 30 straight twigs, 3 to 5 inches long and about the thickness of a skewer.
- Cut a triangle base from cardboard and hot-glue twigs across it in descending lengths.
- Add a short twig trunk and let the whole thing set for 10 minutes.
- Glue three buttons on as ornaments — green, yellow, brown — keeping them small and few.
- Knot a twine loop to the back and hang.
Twelve minutes per ornament, and the twigs are free.
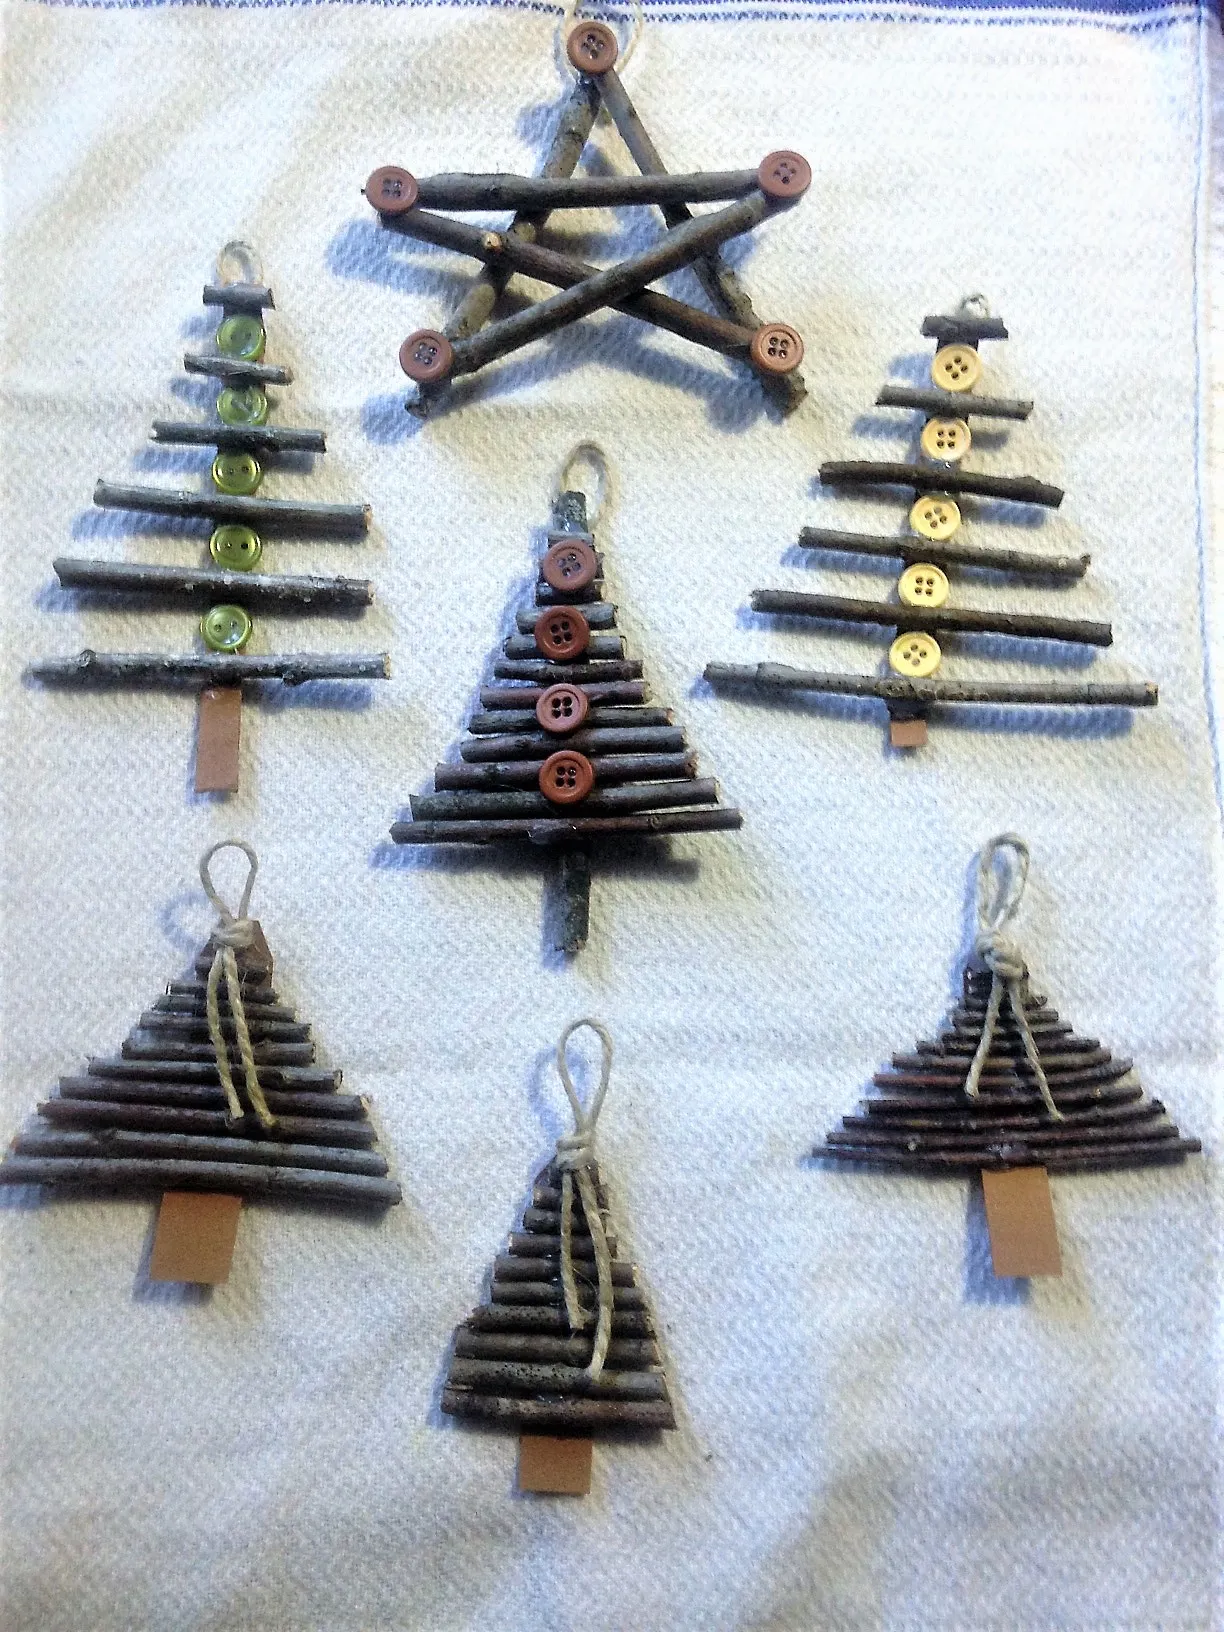
The buttons are what keep these from looking like a pile of sticks. Three is the number — one near the top, two staggered below — because four or five makes the shape busy and the tree disappears behind its own decoration. Mixed button colors matter just as much: green, mustard, and brown read as natural ornaments, while all-red buttons suddenly look like a primary-school project. It’s a ten-cent detail that decides whether this hangs on the tree or lives in the bin.
19. Wood-Block Gnomes With Snowflake Hats
Cut the hat from felt, not fabric — felt holds a crisp cone shape and won’t fray at the edge. Measure the block’s width and add half an inch so the hat sits down over the top edge and hides the seam between wood and beard. The beard is a half-circle of fluffy white felt, about 1.5 inches wide, glued so it overlaps the nose. Keep the snowflake pattern small, too: a 1-inch stamped snowflake reads as knitwear, while a big one reads as a sticker.
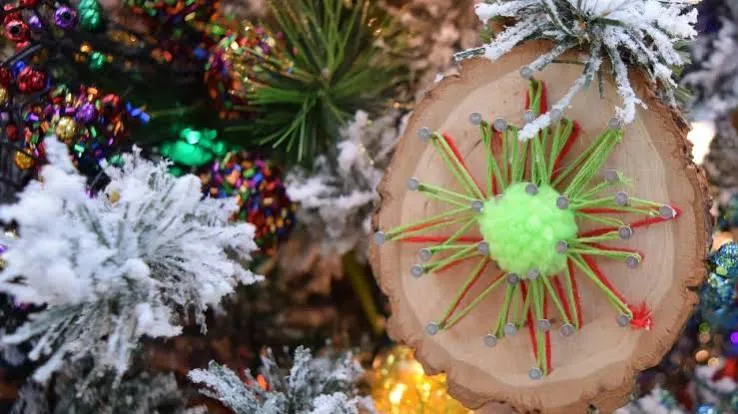
Wood blocks are the easy part — a dry cloth every few weeks and they last indefinitely. The fluffy white beard is what ages. It pills, yellows near sunlight, and collects dust like a lint trap. Store gnomes in a zip bag with a dryer sheet rather than loose in a box, and keep them off a windowsill that gets direct afternoon sun. If the beard looks tired after two seasons, peel it off, glue on a fresh half-circle, and the gnome is new again for about 50 cents.
20. Pillar Candles Wrapped in Berry and Snowflake Paper
The wrap is the entire ornament here. A plain white pillar candle is perfectly fine, but the moment you add that band of red berries, green leaves, and snowflakes, it becomes the kind of thing you’d pay $14 for at a boutique. The trick is that it’s removable — a paper band taped or tied around the candle rather than decoupaged onto it — so when the candle burns down, you rewrap a fresh one in the same paper. It’s the most reusable craft on this list.
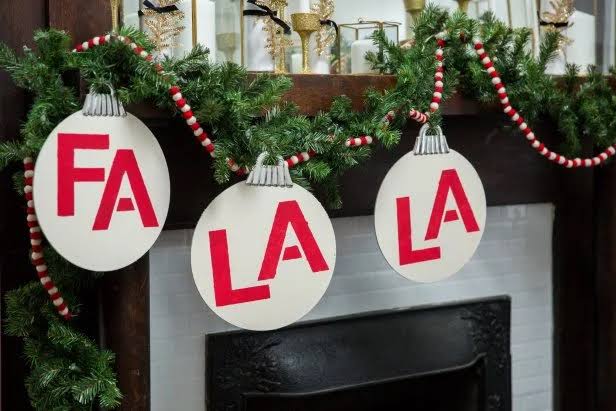
Print the pattern on your home printer, or grab a sheet of holiday paper napkins for $3 and peel off the top ply. Cut a band an inch shorter than the candle on each side, wrap it snug, and secure the back with double-sided tape. A three-pack of white pillars runs about $6 at Walmart, so six wrapped candles cost roughly $15 total. Same paper-craft logic as the crackers in Idea #21: cheap material, careful placement.
21. Kraft Paper Crackers Tied With Raffia
- Kraft paper roll: $5–$9 (enough for 20 crackers)
- Cardboard tubes saved from paper towel rolls: free
- Natural raffia: $4–$7
- Small gifts or candy to fill them: $10–$25
- Holly, pine sprigs, and candy canes for tucking: $5–$10
Total: about $24–$51 for a table of twelve, or roughly $2 to $4 per cracker.
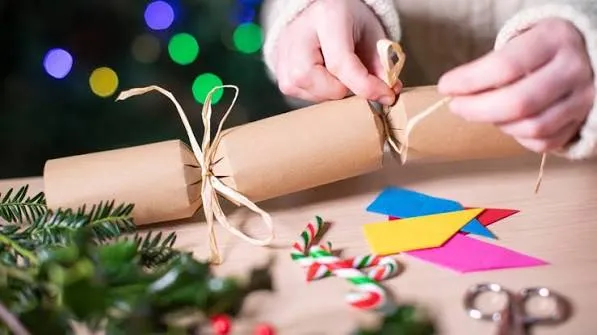
Brown paper everything has been climbing for a few seasons, and it finally reached the holiday table. The appeal is honest — it photographs as warm and tactile next to white plates and costs a fraction of glossy foil wrap. Some of this is a genuine shift toward natural materials; some of it is that everyone got tired of red-and-green paper that looks identical to last year’s. Kraft paper is the one trend here with real staying power, because it never really left.
22. A Branch Advent Calendar With Fabric Bags
Plan on 4 inches of branch per bag, plus 6 inches on each end for the hanging twine. A 24-bag calendar needs a branch roughly 9 feet long, which wants a wall at least 10 feet wide — a hallway or stairwell, not a narrow entry. Against that dark teal paneling, the natural twine and beige bags read as a deliberate contrast; on plain white drywall the same arrangement nearly disappears. If your wall is under 6 feet, split it into two shorter branches and hang them stacked.
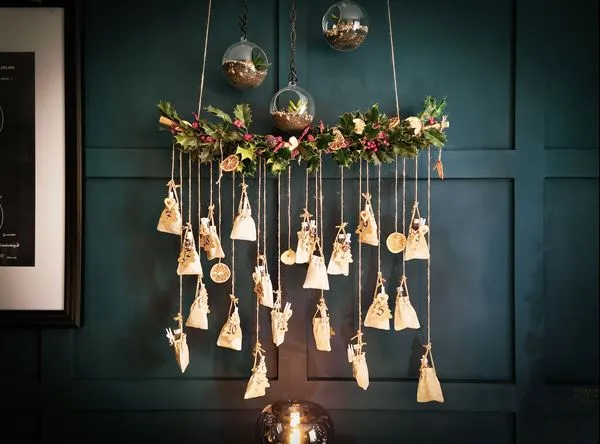
The palette works out to about 50% teal wall, 30% natural beige and twine, 15% green foliage, and 5% warm accents. That tiny warm slice — red berries and dried orange slices — is what keeps a cool teal scheme from turning chilly. Swap the teal for charcoal and the oranges get even more punch; swap it for cream and you’ll want to double the evergreen. Keep the dried citrus either way, because it holds for years.
23. Cupcake Liner Santas and Pinecone Reindeer
- Pre-paint the pinecones brown a day ahead — dry time is the real bottleneck here.
- Check your glue: school glue won’t hold googly eyes to pinecone scales, hot glue will.
- Cut the cupcake liners into three pieces before kids sit down, or the table becomes chaos.
- Set out one tray per kid so pieces don’t migrate across the table.
An hour of prep buys you two hours of quiet, absorbed crafting, which is the real return on this project.
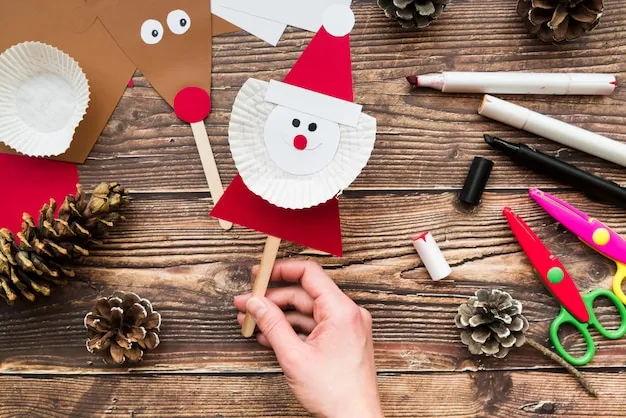
Everything here comes from the grocery store and the backyard. Cupcake liners are $2 a pack, googly eyes are $1.25 at Dollar Tree, and pinecones are free if you walk the block after a wet week. Wooden craft sticks run about $3 for a hundred. Total outlay for six Santas and six reindeer: under $15, markers included. Doing a class party? Buy in bulk and pre-cut every paper piece — assembly moves twice as fast.
24. Orange Slice Garland Hung With Wooden Clothespins
Dried orange slices keep for years if they’re genuinely dry — one under-dried slice will mold and take the whole batch with it. Bake at 200°F for 3 to 4 hours, flipping once, until the flesh is leathery and no juice beads appear. Store the garland in a paper bag, never plastic, and expect the evergreen sprigs to shed after about three weeks; replacing them each season costs a few dollars. Stick to LED fairy lights, since incandescent bulbs bake the citrus brittle from the inside.

Space your clothespins 5 to 6 inches apart and clip each slice so the rind faces outward — the bright flesh catches light, and the dark rind edge gives every slice a visible outline. Alternate one orange, one evergreen sprig, one orange, so the garland reads as a rhythm rather than a cluster. Clip the lights to the same twine underneath instead of wrapping them around, or the wire eats the delicate look you’re going for.
An 8-foot strand holds about 14 orange slices and 14 sprigs. For a standard 6-foot mantel, you want two strands overlapped at the ends for a full look; a doorway or stair rail takes three. If your ceiling is under 8 feet, hang it on a wall above a console rather than across a doorway, or you’ll lose head clearance. Small entryways do better with a single 4-foot swag than a long, stretched strand.
25. White Plates, Rose Gold Baubles, and Paper Tree Place Cards
What makes this setting feel expensive is restraint — three elements per plate, no more. The paper tree gives height, the rose gold orb gives shine, and the white confection gives texture. Rose gold is doing quiet work here: it’s warmer than silver, so it never looks cold against all that white, but it’s subtle enough that it never competes with the food. Nothing else on the table should be metallic. Add a second metal and the serenity evaporates.
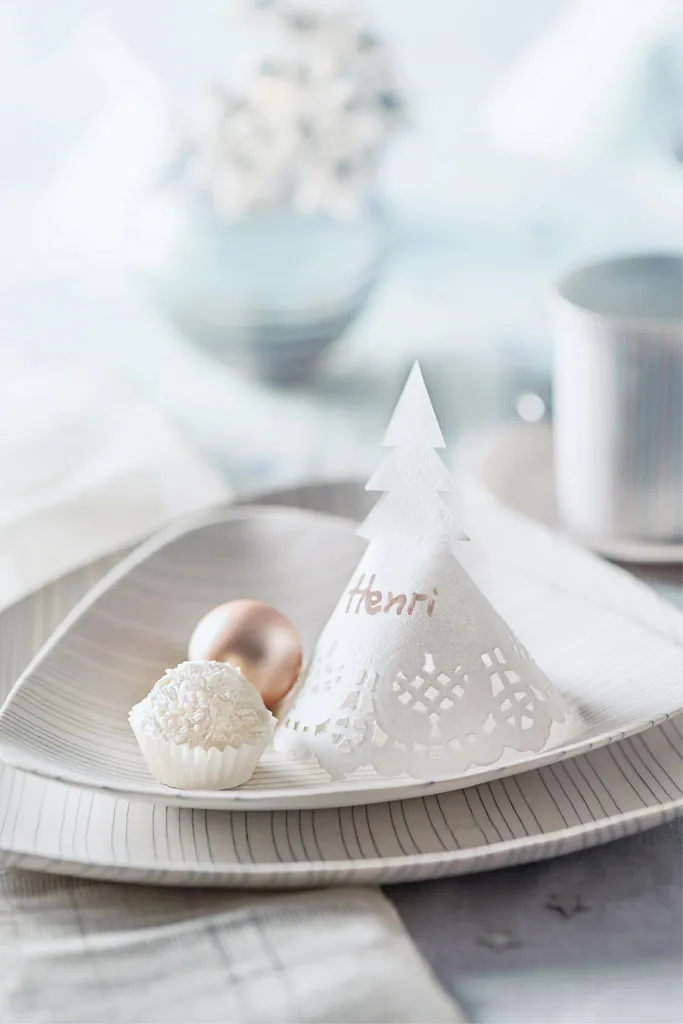
- White striped dinner plates, set of four: $30–$60
- Paper place cards and lace-cut tree template: $8–$15
- Rose gold ornament baubles, a dozen: $10–$22
- Patterned linen tablecloth: $25–$60
- Small confections in paper cups: $8–$15
Total: about $81–$172 for a table of four — or rent the linen and cut that number in half.
26. Glass Snowman Faces on Pine Branches
Glass balls with a snowman face are adorable right up until you realize the face is painted on the outside and anything greasy will smear it. Handle them by the cap only, and don’t store them loose in a bin with heavier ornaments. Skip the temptation to fill them with water, too — condensation turns the white interior grey within weeks. If kids will be handling these, buy clear plastic fillables and paint the features with acrylic plus a matte sealer.
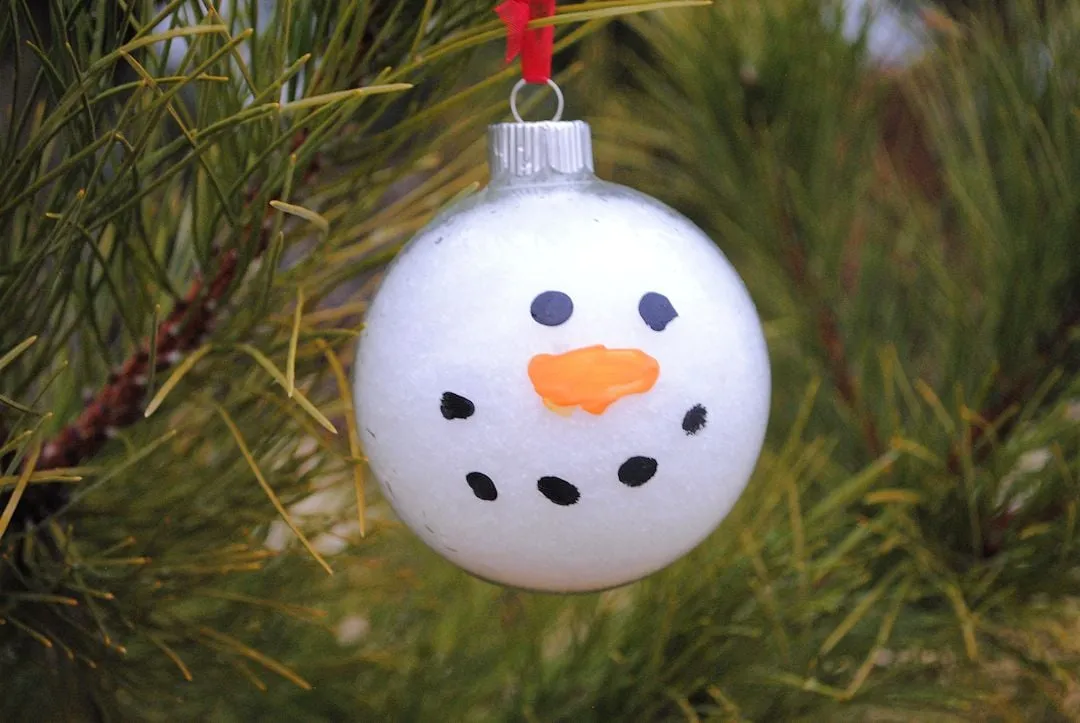
- Fill a clear glass ball three-quarters full with white polyester fiberfill through the top opening.
- Use the handle of a small paintbrush to nudge the fill away from the front.
- Dot two eyes and a curved smile in black acrylic on the outside, using a toothpick for control.
- Paint a small orange triangle for the nose and let it cure for 20 minutes.
- Replace the silver cap and add a red ribbon hanger.
Under 15 minutes per ornament, and about $2 each.
27. Snowman Heads With Earmuffs and a Teal Scarf
The color balance is roughly 65% white, 20% teal, 10% blue, and 5% orange. That tiny orange nose is doing the heaviest lifting of anything here — without it, a white cylinder with blue earmuffs reads as abstract rather than as a snowman. Teal and blue sit close enough to feel coordinated instead of clashing, and the silver tinsel pipe cleaner adds the metallic note the whole thing needs. Swap teal for forest green and you get a completely different, more traditional snowman from the exact same construction.
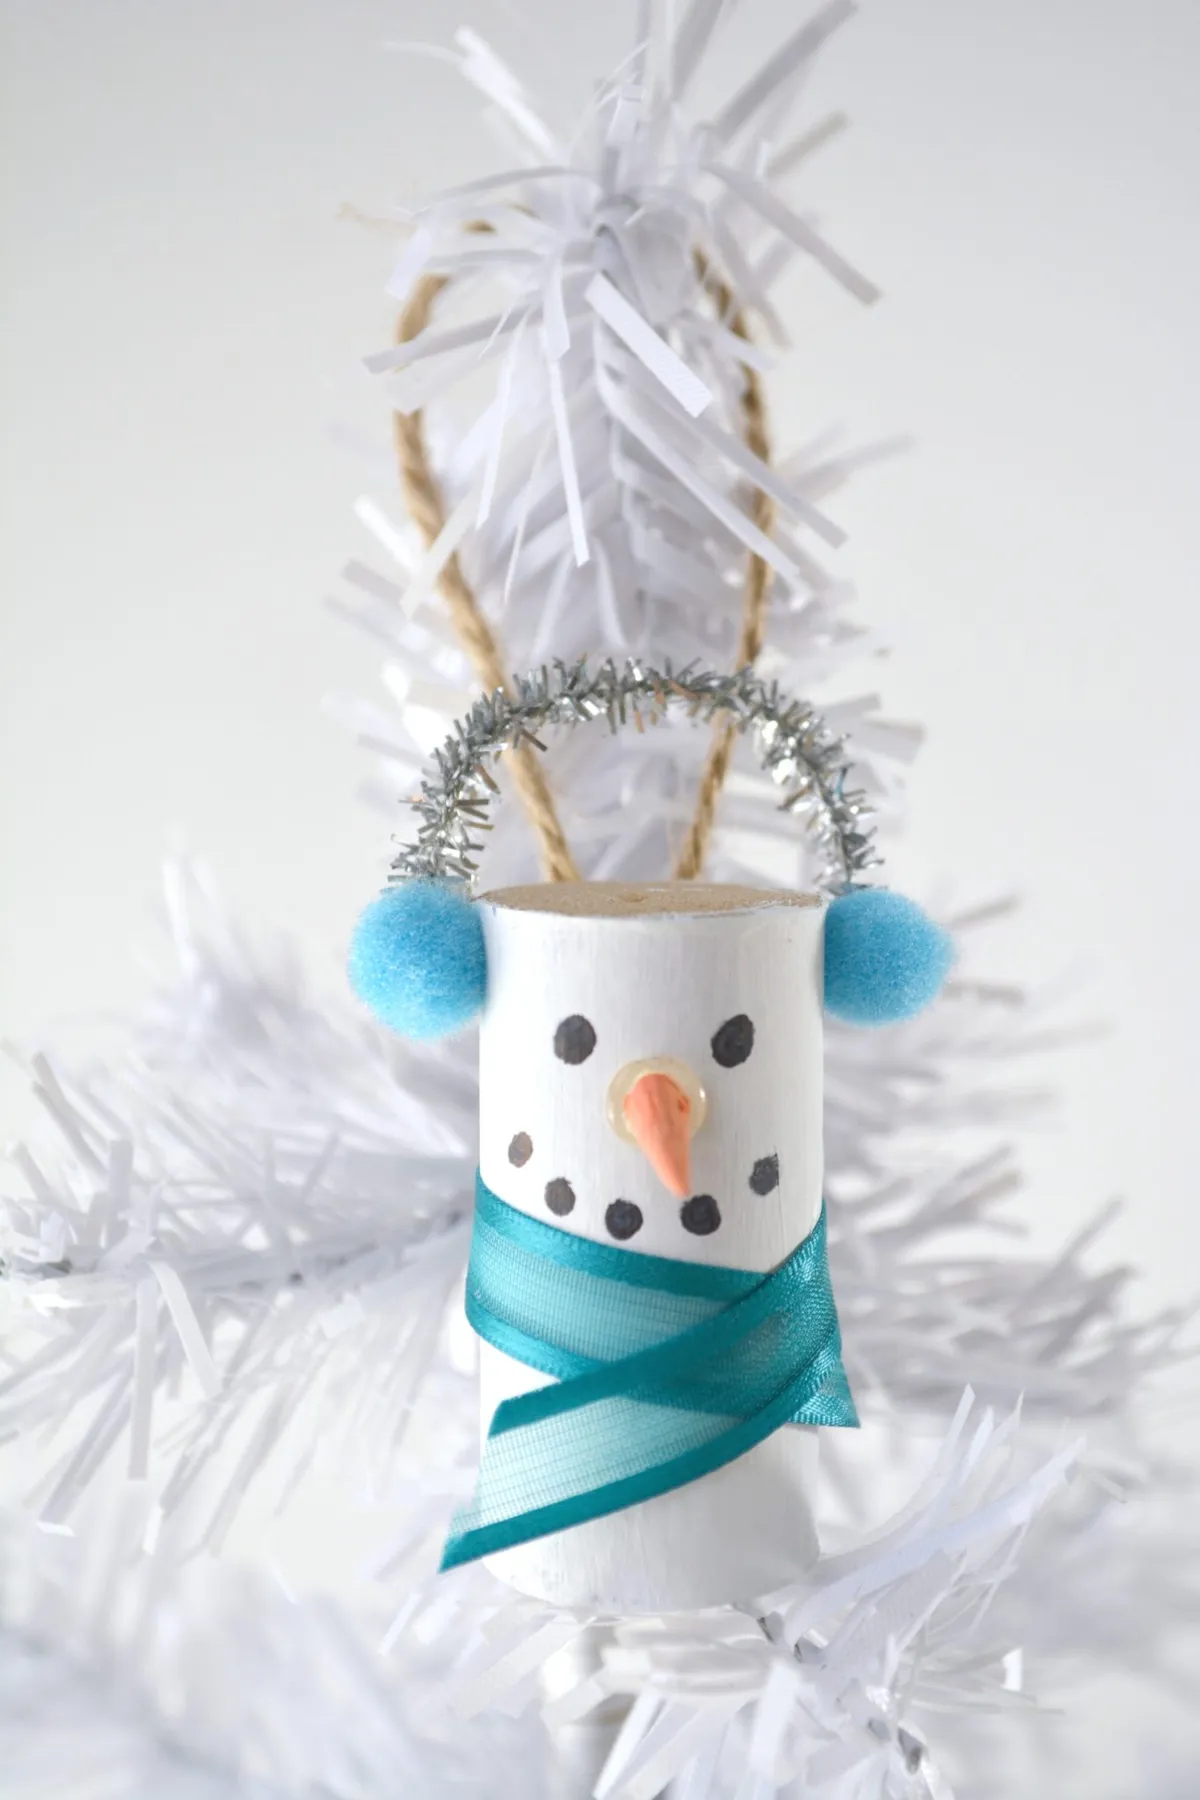
Bend the pipe cleaner into a shallow arch, not a tight U — the arch sits on top of the head like real earmuffs, while a tight U looks like a handle. To attach the pom-poms, poke the pipe cleaner ends about a quarter-inch into the side of the cylinder; glue alone pulls free once the ornament swings. Make the scarf ribbon 8 inches long so it wraps once and still shows a visible tail, which is what makes these look dressed instead of banded. Same build as the plain faces in Idea #26, just with more personality.
28. Tiny Fuzzy Wreath Ornaments With a Gold Bell
The whole thing is two pipe cleaners — one red, one green — twisted together and bent into a circle, with a small gold bell tied inside. Pipe cleaners are $1 a pack at Dollar Tree, bells run about $3 for fifty, and a plastic holly sprig adds a dime apiece. You can make twenty of these for under $15, which makes them the best friend of anyone handing out ornaments to a classroom, a church group, or a very large extended family.
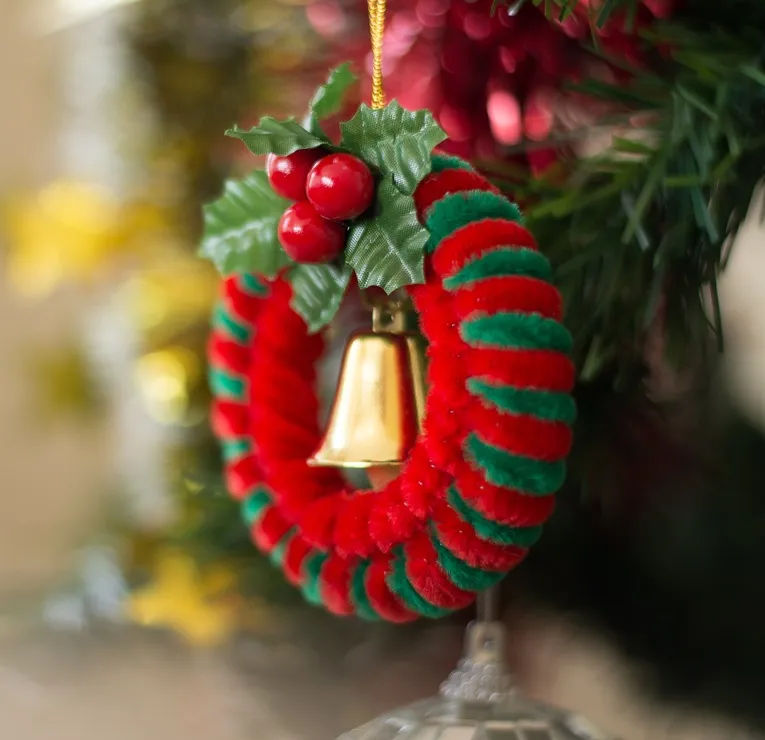
The gold bell is what separates a fuzzy circle from an ornament. It hangs dead center in the ring, pulling the eye inward and giving the wreath a focal point it otherwise wouldn’t have. The plastic holly sprig on top does something similar — it interrupts the circle at twelve o’clock so the shape reads as intentional rather than unfinished. Remove either one and the whole thing looks like a leftover craft supply.
29. A Mason Jar Lid Tree for the Front Door
- Mason jar lids, about 18 to 24: free if you save them, $8–$18 if you buy
- Assorted gold and silver ornaments: $15–$35
- Jute twine: $4–$6
- Pinecones and pine needles: $0–$10
- Hot glue and a hanging ring: $5–$8
Total: about $32–$77, and every lid is reusable next year once you own the ornaments.
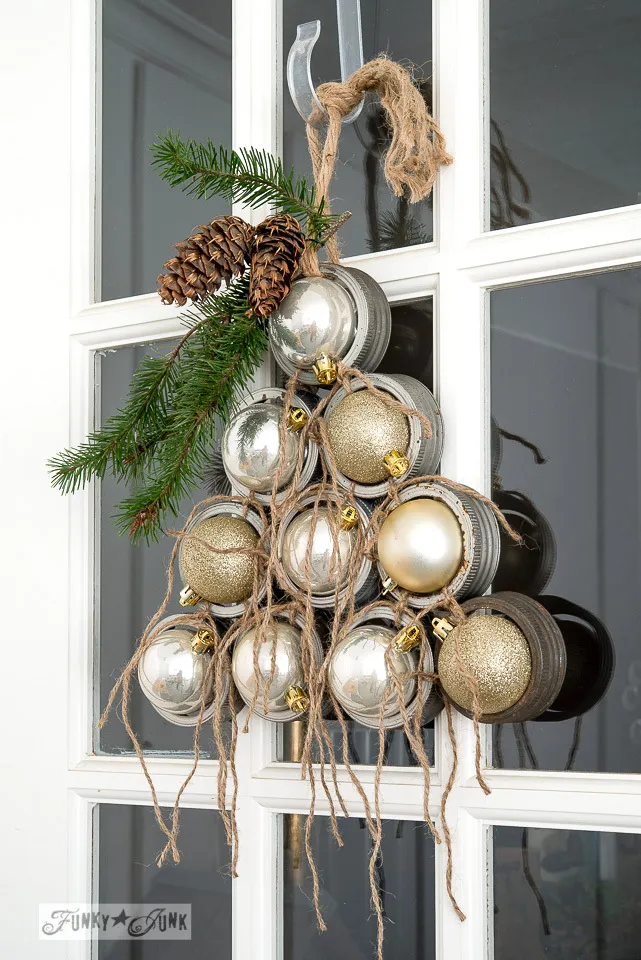
Build the tree so it covers roughly 60% of the door’s width — on a standard 36-inch door that’s a 20- to 22-inch tree, which uses about 18 to 24 lids. Wider and it fights the frame; smaller and it reads as a wreath, losing the tree silhouette entirely. A covered porch extends the materials’ life by years. A door in direct weather wants exterior-rated glue and a coat of clear sealer on the metal.
30. Miniature Trees With Red, White, and a Star on Top
The main risk with a small tabletop tree is scale confusion: full-size ornaments make a 24-inch tree look like it’s being swallowed. Keep every ornament under 1.5 inches and use no more than 30, or you’ll lose the branches entirely. Miniature gift boxes at the base solve a second problem — they give the tree visual weight so it doesn’t appear to be floating on the table. And use LED lights; a 24-inch tree has no room for heat to escape.

Red and white against green is the most legible color story in holiday decorating, and it works here because nothing else is competing for attention. The white ornaments run slightly larger and the red slightly smaller, so your eye reads dimension instead of flatness. The gold star adds a warm top note that keeps the scheme from turning into a fire truck. And the light wood tabletop underneath supplies a fourth, neutral value that grounds the whole thing.
31. Jar Snow Globes With Mini Trees and Loose Glitter
- Hot-glue a small bottle-brush tree to the inside of the jar lid and let it cure for 10 minutes.
- Fill the jar almost to the top with distilled water and one drop of glycerin.
- Add a pinch of fine glitter — a quarter-teaspoon is plenty; more just clouds the water.
- Run a bead of waterproof silicone around the lid threads before sealing.
- Shake it, then let it settle for an hour before you judge the snow.
About 20 minutes each, and jars run $2 to $4 apiece.

DIY snow globes are having a genuinely big year, partly because glycerin and fine glitter got cheap and partly because people want a craft that looks like it came from a shop. The broader pull is toward miniature worlds — terrariums, tiny trees, dollhouse-scale vignettes — which shows up everywhere from mantels to bookshelves. Snow globes fit that instinct perfectly. They’re also the rare craft that improves when you shake it, which is a nice thing to have at a holiday party.
32. A Distressed Wood Box Filled With Fir and Gold Stars
Four materials, four textures: rough green fir, matte brown pinecones, glossy red berries, and metallic gold. That’s the whole trick. The distressed wood box supplies a dark base so the greens read as bright instead of muddy, and the faux snow settles unevenly, which is exactly what makes it look like weather rather than product. Set it on a dining table and it echoes the flocked ring in Idea #6 — same winter palette, more rustic energy.
A 12-inch box works on a console or a narrow mantel; an 18-inch box wants a dining table at least 36 inches wide so guests still have room for plates. Measure the box against the table: it should take up no more than a third of the length, or every meal becomes a shuffle. Keep the arrangement under 10 inches tall to preserve sightlines, which matters a lot if this is a centerpiece rather than a shelf display.
Fresh fir in a box lasts about two weeks indoors before the needles drop; artificial branches last forever but collect dust in the gaps. Going fresh? Mist the greens every other day and keep the box away from heating vents. Faux snow is permanently messy — it sheds onto whatever it sits on, so set the box on a tray or a mat. Store the metallic ornaments separately in tissue so the gold finish doesn’t scuff against the pinecones.
Your Kitchen Table Is the Workshop This Year
None of this requires a craft room, a Cricut, or a weekend you don’t have. Pick one project, buy the four-dollar supplies, and let it look handmade — that’s the whole point. Start with the kraft paper books or the wine cork snowmen, and you’ll have something on the shelf tonight. 📌 Pin this guide now so it’s waiting for you next December, when you’ll absolutely want it again.