34 Jaw-Dropping Peppermint Christmas Tree Ideas That Will Elevate Your Holiday Decor in 2026

You know the moment — you’re six tabs deep into Pinterest, every peppermint Christmas tree you save looks sweeter than the last, and somehow none of them look like your living room. We spent weeks digging through Etsy, Target, and World Market to find the ones that actually hold up in a real house, from $8 candy cane ornaments to $450 statement pieces. Inside you’ll find 34 curated ideas, from full candyland evergreens and heavily flocked trees to handmade felt canes, crocheted ornaments, and tabletop gingerbread cones — with budget swaps sitting right next to the splurge versions so you can pick your number. Candy-themed decorating is dominating 2026 for a reason: after years of muted minimalism, people want nostalgic, glossy, unapologetically sweet holiday decor. And stay until the end — we break down the most common mistakes that can ruin these looks.
📌 Save this to Pinterest for later — you’ll want to revisit these ideas.
1. Frosted Gingerbread Men Meet Peppermint Swirls on a Candyland Tree
If you stripped this tree down to one thing, keep the peppermint swirl discs. The frosted gingerbread men get all the attention, but the red-and-white candy discs are what make the gingerbread, the candy canes, and the white snowflakes read as one family instead of three separate ornament sets. Pull them and you’re left with a perfectly nice tree that no longer tells a story — the swirl is the thread stitching red, white, and warm brown together.
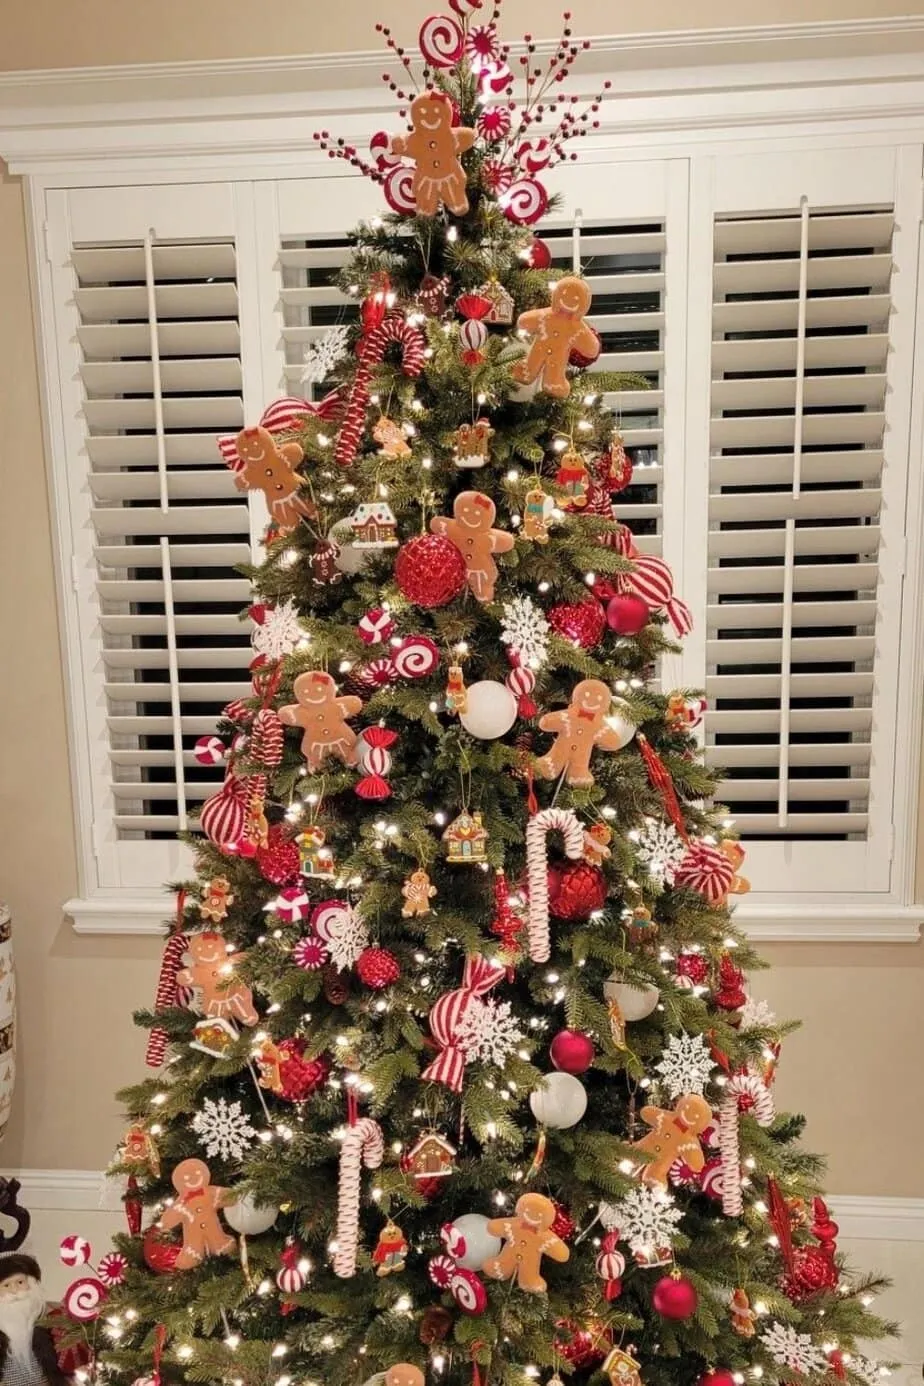
The formula here runs about 60% forest green evergreen, 30% candy red and white, and 10% warm brown gingerbread, all lifted by warm white string lights against those white window shutters. Swap the brown for soft pink and you land on the pastel version in Idea #11. Swap the red for silver and it turns distinctly grown-up. Hold the ratio and it still reads as candy; break it and it just looks busy.
2. Elves, Striped Ribbon, and a Lime-Green Wink on a Whimsical Candy Tree
Striped ribbon is the trick that makes candy trees look expensive. Use 3- to 4-inch wired ribbon, weave it vertically from the top down instead of spiraling it, and anchor every 8 to 10 inches by twisting the wire around an inner branch where nobody can see it. You’ll need about three rolls for a 7.5-foot tree, and the vertical lines add height that a spiral simply can’t.
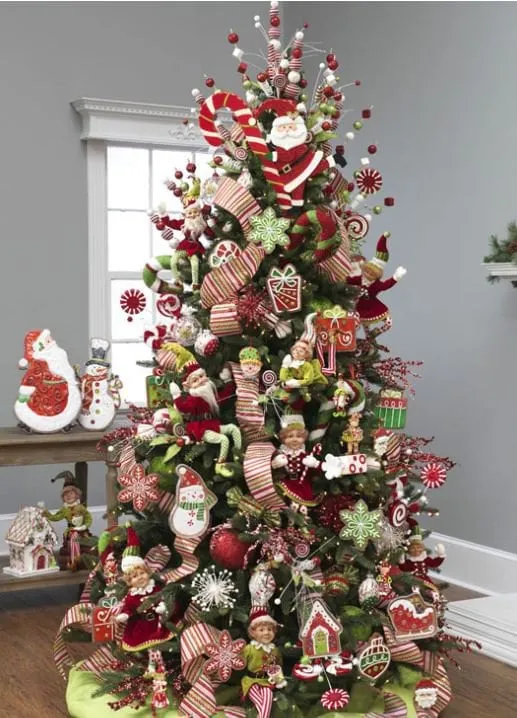
Two things are doing the heavy lifting here: repetition and one loud outsider color. The stripe motif repeats across ribbon, candy canes, and peppermint discs often enough to read as a theme rather than a collection, while lime green shows up in tiny doses on elf figurines and ornament caps. That small hit of unexpected green keeps the tree from sliding into full gingerbread house. Compare it with the warmer, browner Idea #1 — same candy idea, completely different energy.
3. A Hotel Lobby Christmas in Grey Stone, Red Baubles, and One Giant Wreath
This reads best with 12-foot ceilings and a tree at least 9 feet tall; anything shorter gets swallowed by the architecture. In a standard 8-foot room, drop to a 7.5-foot tree and skip the ceiling-height garland altogether — the proportions in Idea #17 are what you want in a living room with a sofa and a window. Corridors narrower than 6 feet should stay with tabletop styling.

Reception-desk garland isn’t a hotel-only budget line. Faux cedar garland from Target or IKEA runs $12 to $25 for a 9-foot strand, and a 24-inch wire wreath form with $10 of zip-tied greenery reads full from ten feet away. Skip real evergreen in high-traffic spots — it drops needles and gets crushed. The polished grey floor is doing half the visual work anyway.
The oversized circular wreath is what makes the whole space work. Everything else — garland draped across the desks, red baubles, the tree skirt — is support staff. A ring that large gives a high-ceiling room a center of gravity; without it, all that greenery floating fourteen feet up reads as decoration instead of design.
4. Oversized Candy Ornaments and Red Berry Garland on a Classic Evergreen
Candyland maximalism is peaking in 2026 for a fairly simple reason: after a long stretch of neutral, quiet holiday decorating, people want rooms that feel like an event. Oversized candy ornaments and red berry garlands photograph brilliantly and read instantly in a thumbnail, which keeps the trend alive on Pinterest. It also has staying power — peppermint stripes are one of the few motifs that never really left. They just moved from the candy dish to the tree.
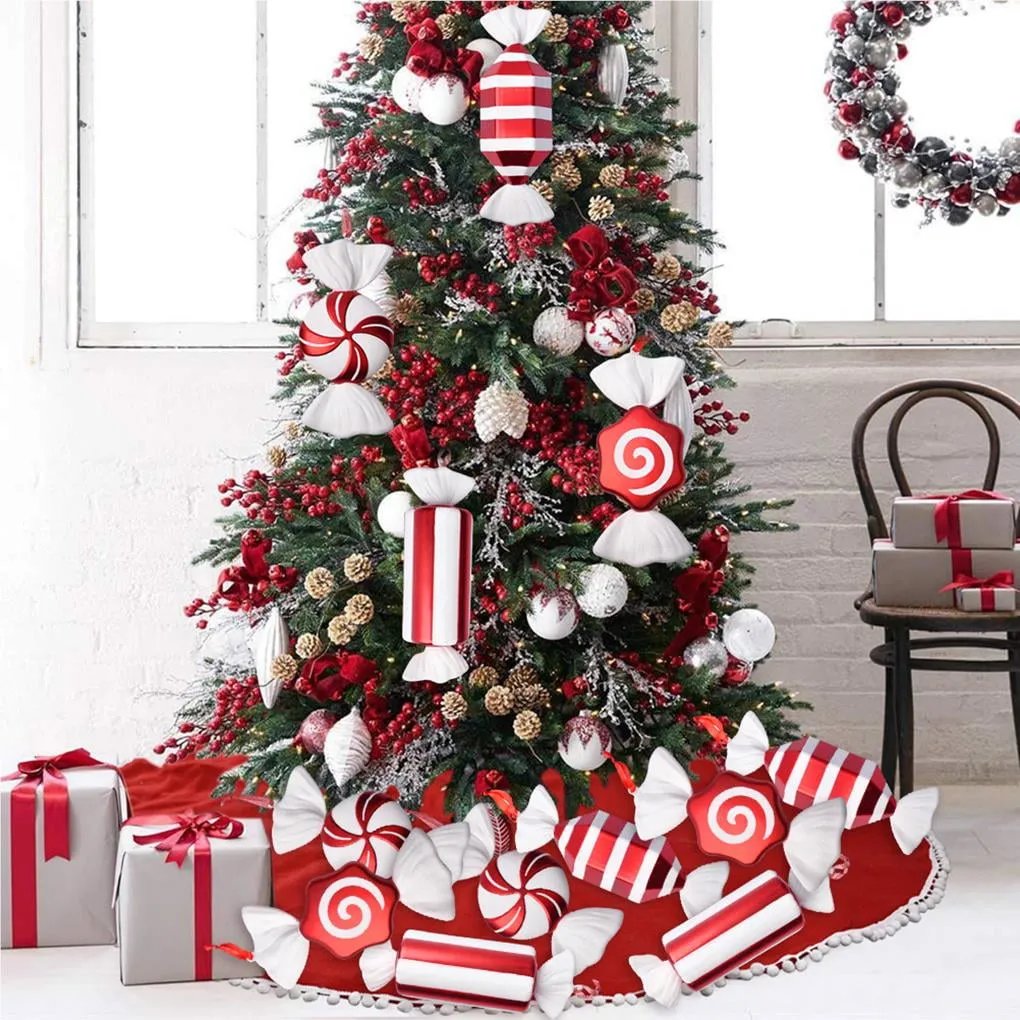
Big ornaments need air. For candy pieces larger than 5 inches, hang no more than 12 to 15 on a 7.5-foot tree and keep them at least 18 inches apart, on the outer third of the branches where light actually hits. Cluster them in odd numbers — threes and fives — and resist filling the gaps with smaller filler. The empty space is exactly what makes oversized ornaments read as generous rather than cramped.
5. A Glittered Snowflake Ornament with Red Gems and Gingerbread Edging
The red gems inset into the center of the snowflake are the difference between a nice ornament and one people pick up to inspect. Gold glitter already gives the white face sparkle, and the gingerbread-brown border grounds it, but those small stones add a hard, glossy finish against all that soft texture. That contrast of matte glitter and shiny stone is the entire trick.
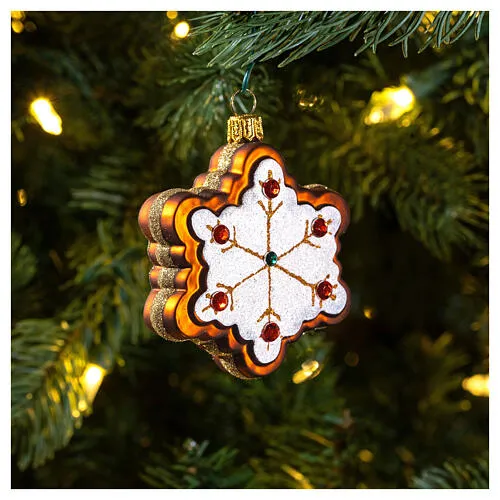
Glitter ornaments shed, and there’s no polite way around it. Seal new pieces with two light coats of matte acrylic spray before they ever hit the tree, and store them individually in tissue inside a rigid box — stacked glitter ornaments scratch each other and go dull within a season. Plan on resealing every second or third year.
The palette here is roughly 60% white glitter, 25% gingerbread brown, and 15% red and gold combined. That low percentage of red is why it feels warm instead of loud. Want a cooler version? Trade the brown border for silver and the red gems for clear crystal. Same sparkle, same proportions, entirely different mood.
6. Three Peppermint Lollipops in Striped Bows (Yes, You Can Make These)
Making a set is genuinely a two-evening project:
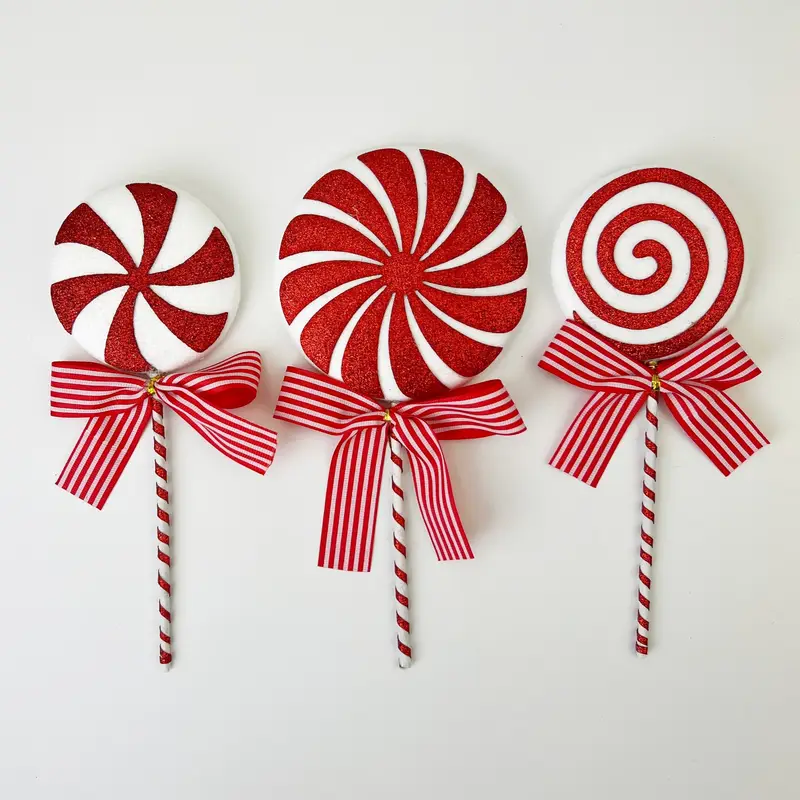
- Cut two 4-inch circles of white foam board and two of red for each lollipop.
- Paint spirals freehand with a fine brush, or lay down painter’s tape and paint the stripes.
- Glue the red and white layers together with the spirals offset slightly for depth.
- Wrap a wooden dowel in ribbon and attach it behind the disc with hot glue.
- Tie a striped bow at the base and add a hanging loop.
Roughly two hours for six, and about $15 in materials.
Six boutique lollipop ornaments run $45 to $70 online. The same look from foam board, acrylic paint, and dollar-store ribbon lands near $15 for six, and the handmade wobble actually helps — perfectly uniform lollipops read as mass-produced. Check the wooden tray display in Idea #7 if you’d rather buy than craft, since the two styling ideas work beautifully together on one table.
7. Glossy Red Peppermint Swirls Spilling Out of a Light Wood Tray
- Display tray or wood bowl: $25–$60
- Peppermint swirl ornaments (6–10): $18–$45
- Textiles, tissue, or shelf liner: $10–$25
- Filler greenery and small ornaments: $15–$40
- Shelf styling, risers, frames: $20–$70

Total: roughly $90–$240 for the whole vignette. Budget alternative: a thrifted wood tray at $8, dollar-store ornaments at $1 each, and greenery clipped off an old garland gets you to about $35 — a 60% savings with the same glossy explosion of red.
One honest warning: glossy red shows every fingerprint and reflects every light source in the room. Two feet from a lamp looks gorgeous; three inches from a TV screen is a nightmare of red glare. Keep them below eye level in a tray or bowl, and dust with a dry microfiber cloth rather than spray polish — solvents cloud the frosted stripes over time.
8. The Gingerbread Girl in a Santa Hat Clutching a Swirl Candy Cane
Figurine ornaments have faces, so treat them like portraits. Hang this gingerbread girl at 60 to 66 inches from the floor — roughly eye level — with the face angled about 15 degrees forward off the branch. Skip the wire hook and use a ribbon loop instead; wire lets figure ornaments spin, and nothing kills a cute face faster than finding it backwards every morning.

It works because of story plus scale. Santa hat, red icing bow tie, pastel buttons, oversized candy cane — every element adds a sentence to the character, which is what makes people stop and look. The pastel buttons are the quiet genius here. They repeat the pinks that show up in Idea #11, so a tree full of these stays cohesive instead of turning into a toy shelf.
9. A Stuffed Candy Cane Next to a Sheet-Music Paper Chain
Sheet music paper chains are having a real moment, and they’re part of a broader shift toward handmade, slightly imperfect holiday decor that started with cottagecore and never fully left. Vintage paper crafts read as sentimental rather than themed, which is why they survive trend cycles. Print a public-domain carol sheet, cut, loop, and you have the same energy for the price of paper.

Paper chains crush, fade, and yellow faster than anything else on a tree. Store them flat in a rigid box with tissue between layers, keep them out of direct sun, and expect a two- to three-year lifespan before the ink dulls. If you want something that survives a decade, choose heavier 80-pound cardstock and print with pigment ink instead of a home inkjet.
A boutique chain runs $25 to $35. Public-domain carol scans are free, cardstock is about $8 for fifty sheets, and the paper trimmer you already own does the rest. Budget ninety minutes of movie-watching time. The charm lives in slightly uneven loops anyway — a machine-perfect chain looks like party-store filler.
10. One Pink-Striped Candy Cane Against a Wall of Fairy-Light Bokeh
Roughly 70% dark green foliage, 20% red and white candy stripes, and 10% soft pink. That last ten percent is what makes a candy cane ornament feel nostalgic instead of generic — pink pulls the red toward something vintage and slightly faded. Swap the pink for aqua and you get the brighter, more graphic narrow tree in Idea #25. Same proportions, different decade.

Single-ornament styling like this works best on trees between 4 and 6 feet tall, where one candy cane can genuinely be the focal point. You also need depth behind it: that soft bokeh only happens when the fairy lights sit 18 to 24 inches behind the ornament on a separate strand. On a full 7.5-foot tree this same ornament disappears into the crowd — so group three together instead and let them echo each other.
11. Pastel Pink Striped Ornaments in a Ceramic Bowl, Peppermints Alongside
Target and Walmart both carry ceramic pedestal bowls for $12 to $20, and thrift stores turn them up constantly for under $5. The peppermint disks are the one place to spend — dollar-store versions have muddy stripes that go grey up close. Pale pink textiles come free if you borrow a throw blanket from the living room, and the frosted tree in the background can be any small artificial you already own and had forgotten about.
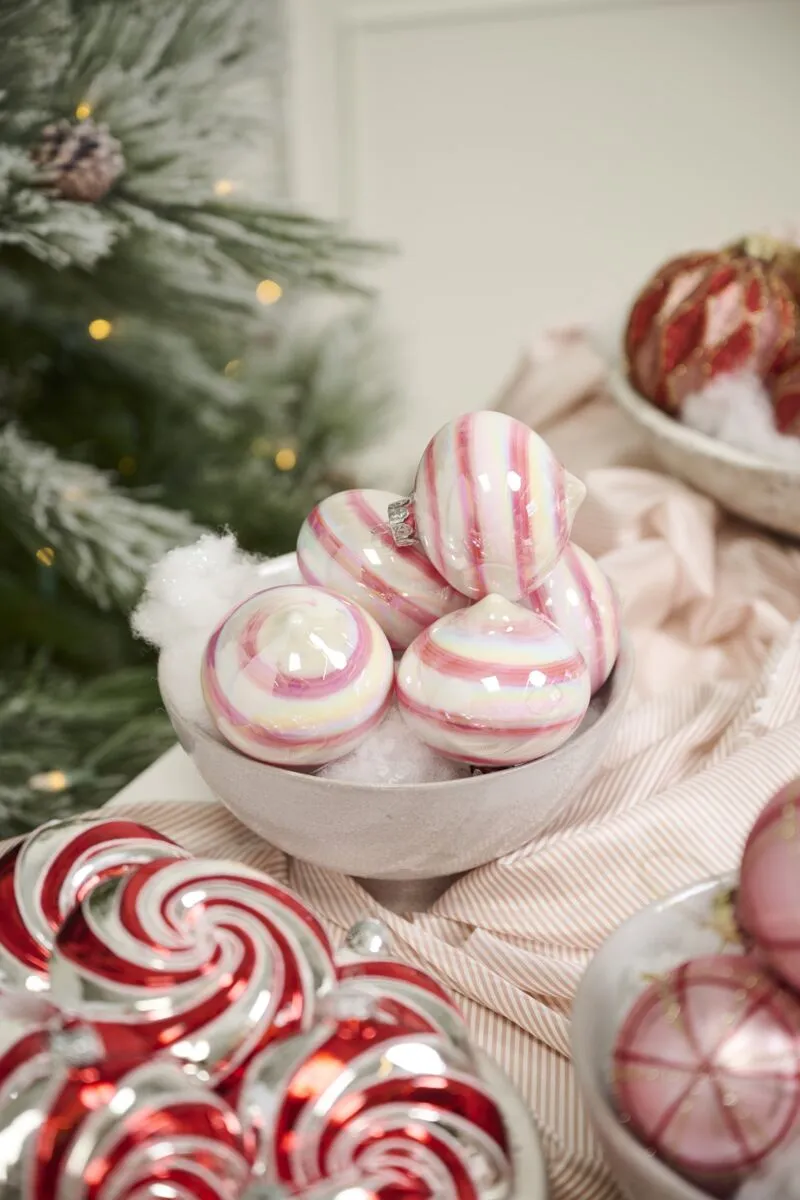
This vignette works because of tonal layering with one loud interruption. Everything in the foreground sits in a narrow pastel lane — pink, cream, soft grey — and then the red-and-white peppermint disks land like punctuation marks. It’s the same principle as a neutral room with one bright chair. Without those disks the whole arrangement risks going flat and sweet, like a nursery that never grew up.
12. Tabletop Gingerbread Cones with Icing Drips and Peppermint Toppers
- Buy two foam cones, one 14-inch and one 10-inch.
- Coat both in brown acrylic paint mixed with a little fine sand for gingerbread texture.
- Pipe white lightweight spackle or caulk around the top edge and let it drip down.
- Press miniature peppermint candies into the wet icing before it dries.
- Set each cone on a striped dowel stand, then top with a swirl ornament.
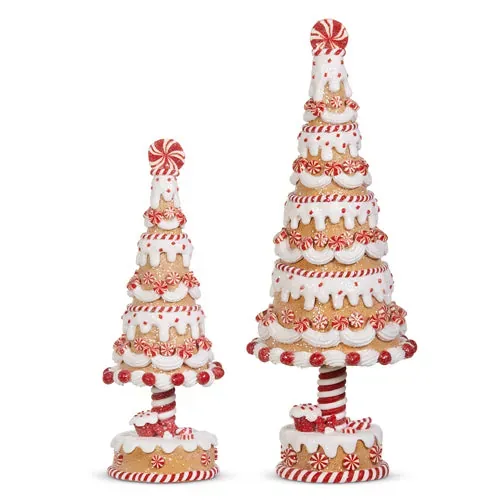
About 90 minutes and $22 for both.
The icing drips are everything here. Take them away and you have two brown cones with candy glued on — a craft project, not a centerpiece. The uneven, gravity-aware drip is what sells the gingerbread illusion, because our eyes read drips as soft and edible and straight edges as plastic. Pipe them thicker at the top and let them thin as they run down.
13. Hand-Stitched Felt Candy Canes with Holly and Red Berries
For felt ornaments that actually last, use 100% wool felt at about 1/16 inch thick and finish the perimeter with a blanket stitch in matching thread. Acrylic craft felt pills and goes fuzzy within a single season. Skip ribbon hangers in favor of a loop of embroidery floss or thin twine — it disappears against the branch and won’t fray the way satin does after a few Decembers.

Wool felt collects dust and holds onto it. Run a lint roller over each ornament once a month during the season, and store them in a zippered bag with a cedar block — moths love wool, and one larvae hatch leaves you with a box of holes. Never wash them. Spot-clean with a barely damp cloth and let them air dry flat so the stitching doesn’t pucker.
14. A Carousel Topper with a Tiny Blonde Doll Turning Under a Lit Star
The rotating carousel base is the one thing. A doll on a horse would already be charming, but the slow turn makes people stop mid-sentence and watch. Take the motor away and it’s a nice figurine. Keep it, and the top of your tree quietly performs all evening — which is exactly what you want from the most-ignored square foot of the holiday season.
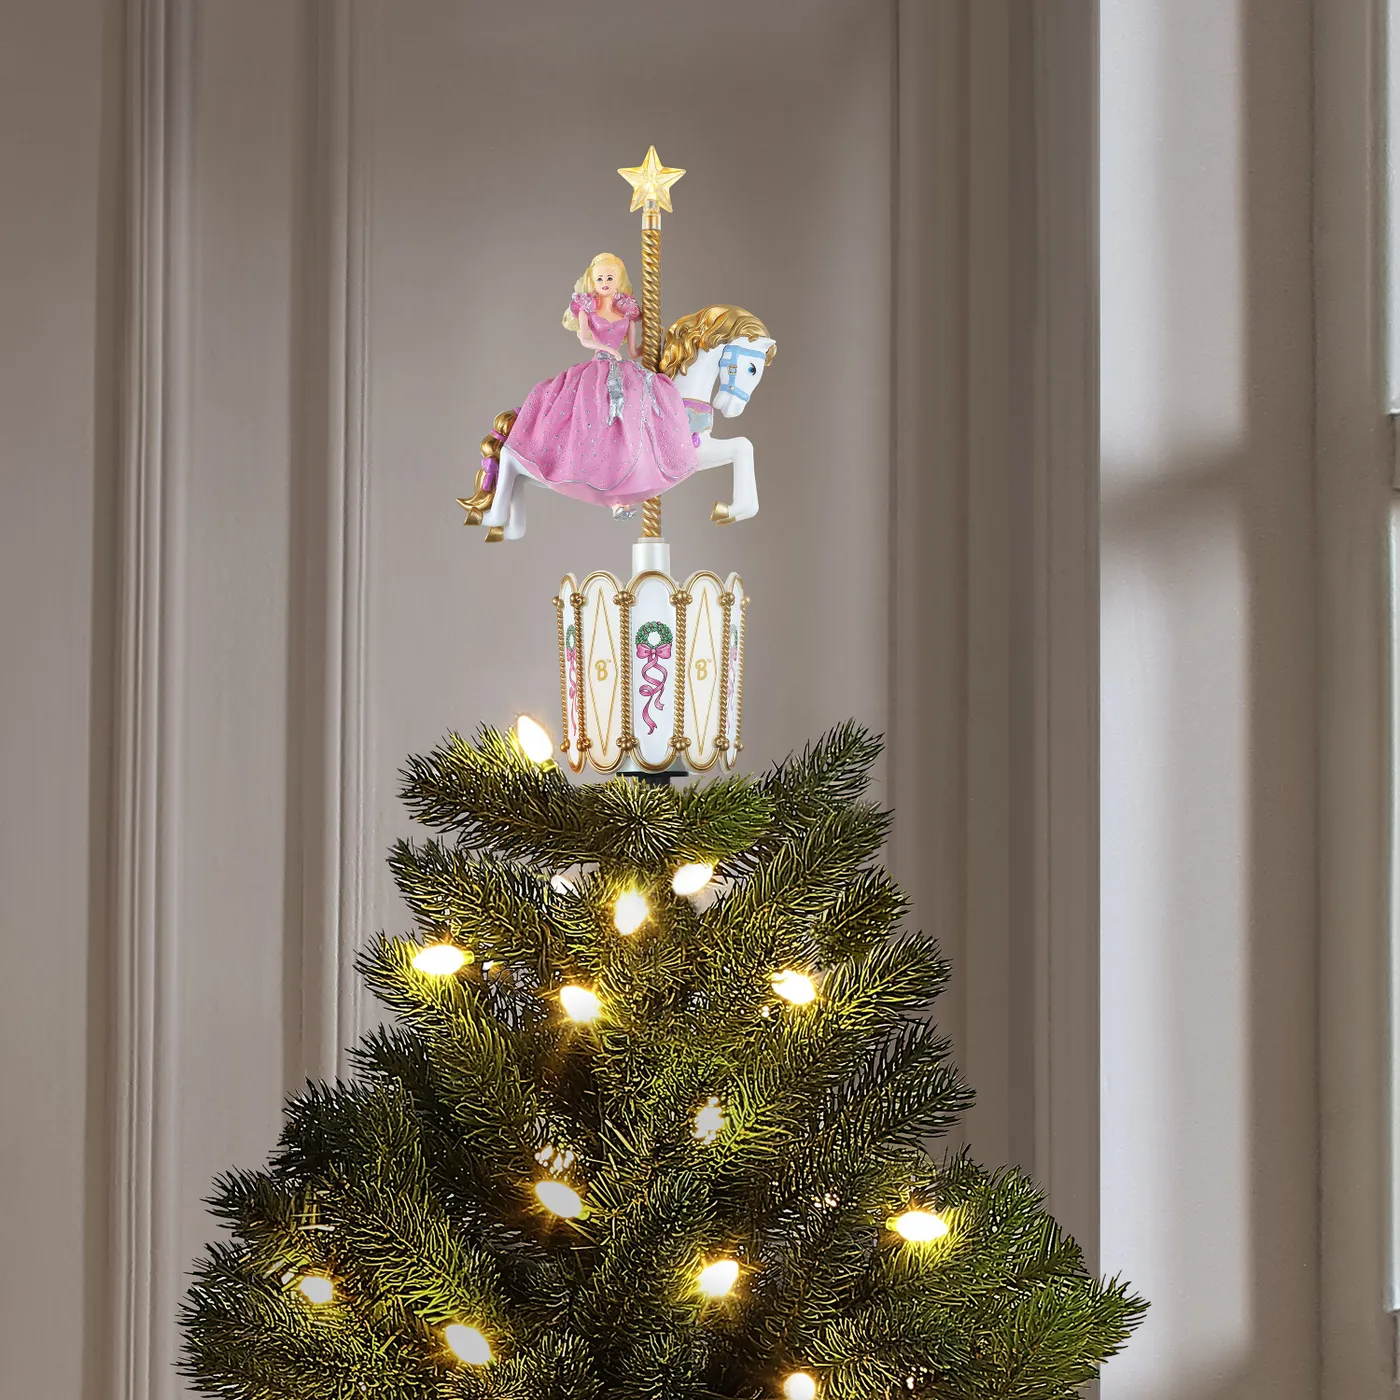
Two principles are at play: movement and a deliberate break in scale. Most toppers are meant to be about one-tenth of the tree height, and this one is closer to a fifth, which is why it reads as a destination instead of a finial. Movement draws your eye up from wherever you’re standing, and the warm string lights wrapped around the branches below act like stage lighting.
15. The Red Tin That Corrals Every Peppermint Ornament After Christmas
Metal tins look like perfect ornament storage and mostly are — with one catch. A sealed tin traps any moisture that comes in with your ornaments, and a damp basement or garage turns that into rust and mildew by spring. Drop two silica packets in the bottom, keep the tin in a climate-controlled closet, and don’t stack anything heavy on the lid.
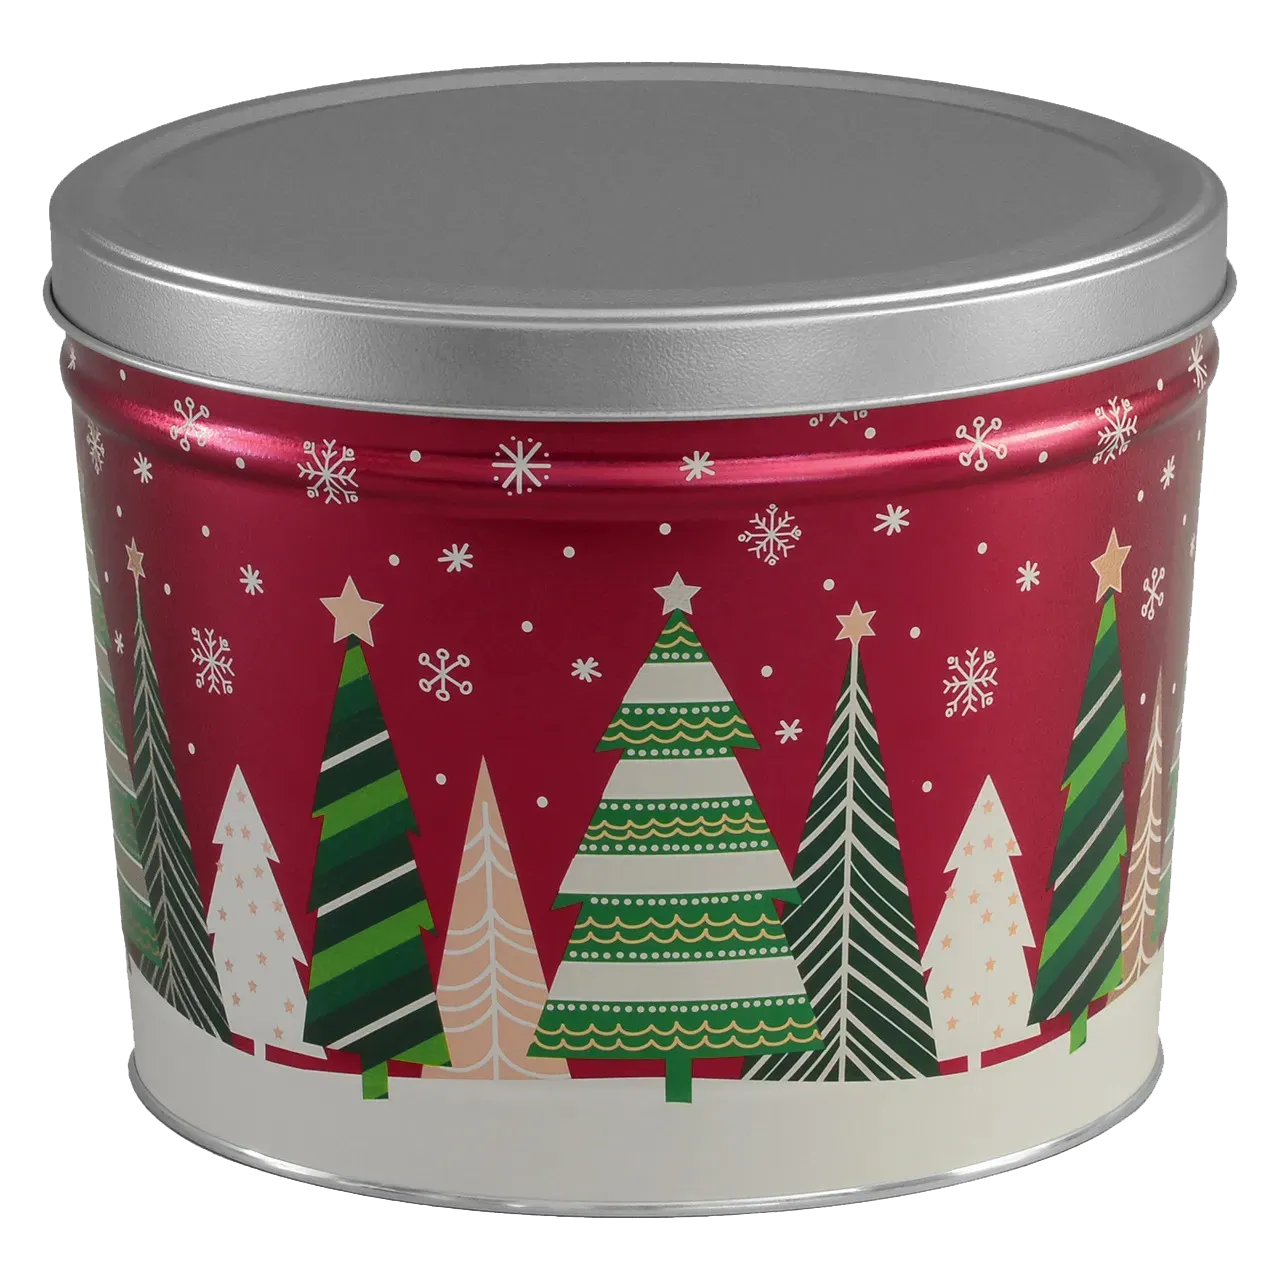
As a rule, a 12-inch cylindrical tin holds about 25 to 30 small ornaments, or 12 to 15 medium ones — enough for a tabletop tree plus a mantel. Larger collections need two, ideally a labeled set so next December isn’t an archaeological dig. Keep at least one tin on a waist-height shelf so you aren’t lifting the whole stack overhead every time you want a candy cane.
16. A Christmas Tree Built from Brown Beer Bottles and Green Tinsel
Identical objects in a taper is one of the oldest visual tricks there is, and it works here for free. Because every bottle shares the same shape and color, your eye reads the entire stack as a single silhouette — then tinsel and fairy lights break it up just enough to keep it festive. Brown glass also adds a warm transparency that green plastic can’t fake.
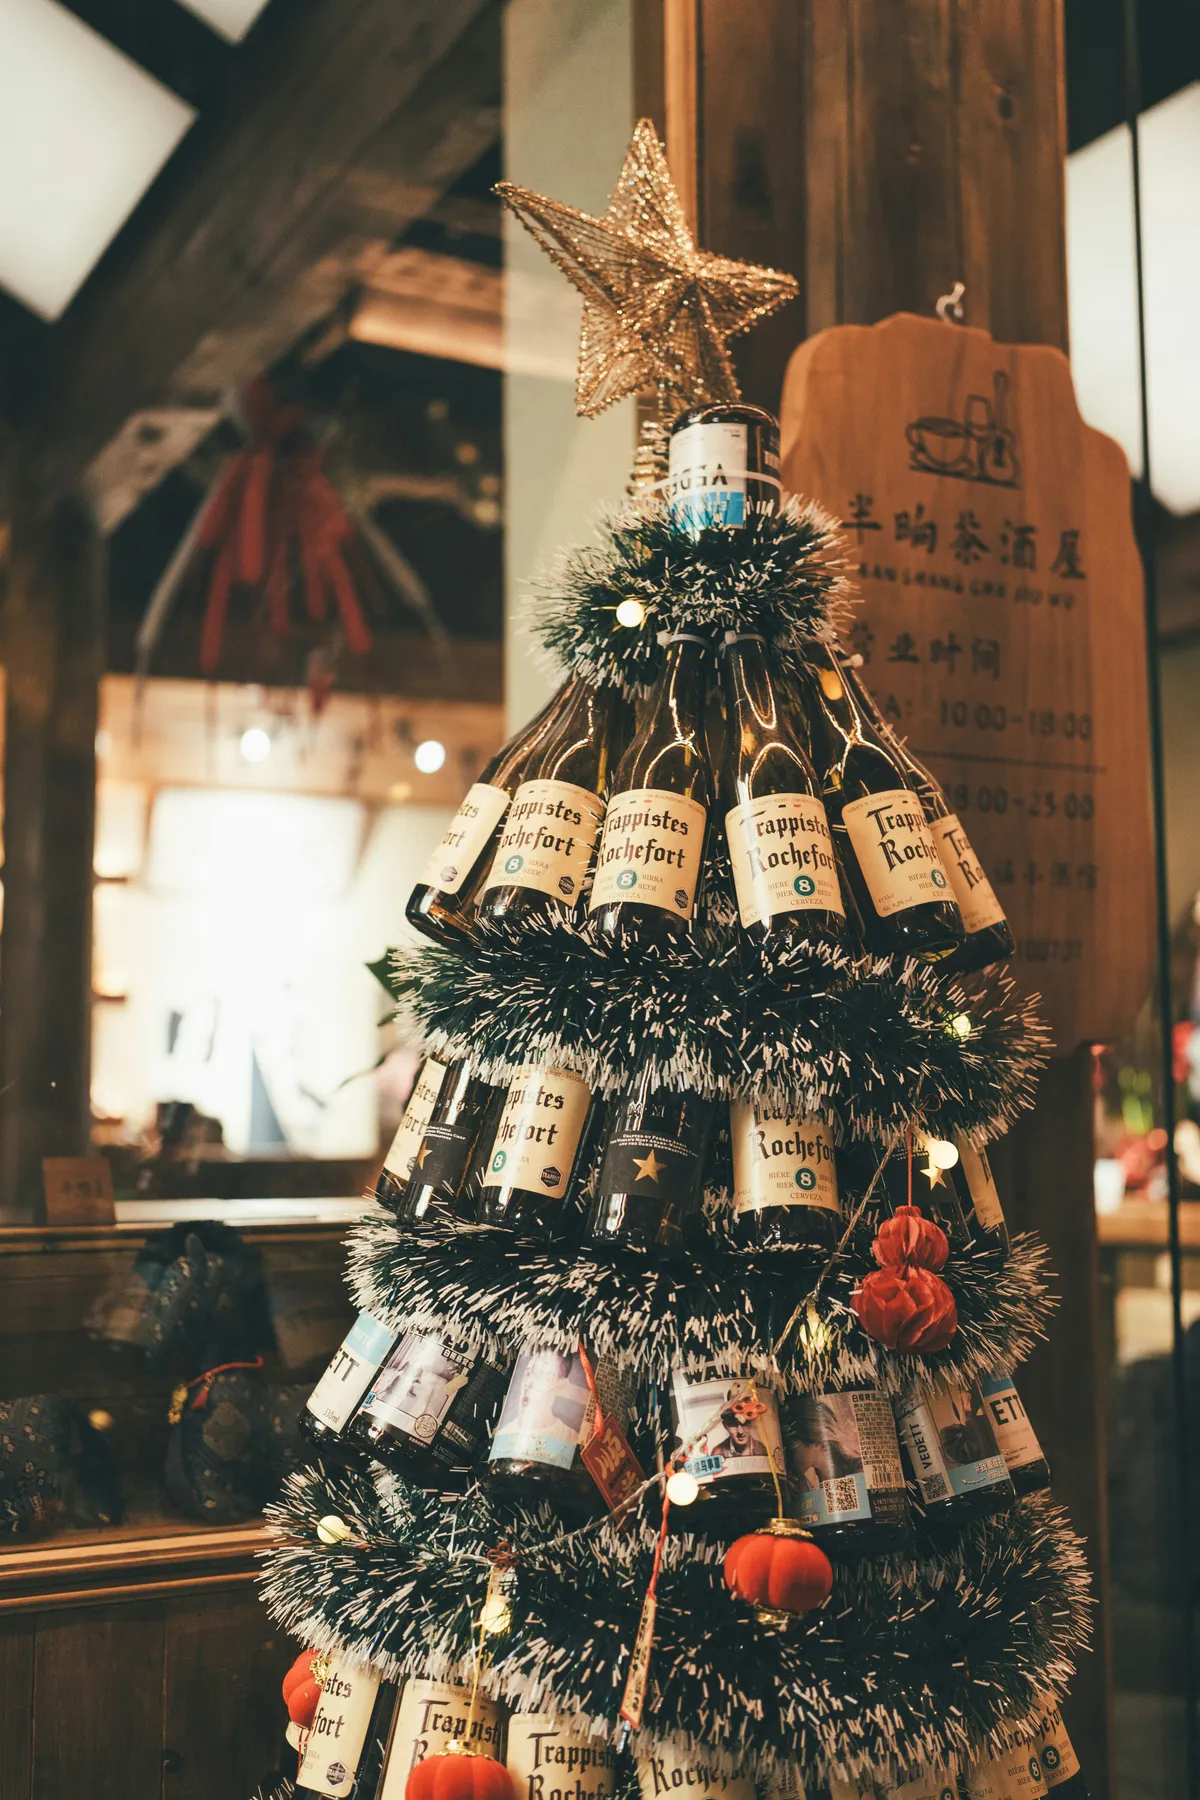
Bottle trees started in dive bars and dorm rooms and have quietly become a real holiday trend, especially for people in small apartments who don’t want to store a 7-foot tree eleven months of the year. It’s upcycling, it’s a conversation piece, and it photographs like nothing else. Staying power? Moderate — but the technique of stacking identical objects absolutely is.
The gold wire star is what upgrades this from a party trick to a display. Without it, the tinsel-and-bottles stack reads as a fun bar corner. With it, the whole thing becomes unmistakably a Christmas tree, and the glow makes brown glass look like amber. Anything simpler on top — a paper star, a bow — and the illusion falls apart.
17. Plaid Ribbon Garland and Silver Stars on a Tall Corner Tree
Plaid ribbon behaves differently than plain ribbon, so use 2.5-inch wired plaid and wrap it at a 15-degree downward angle, securing every 12 inches with floral wire hidden behind a branch. Three 10-yard rolls cover a 7.5-foot tree. Run it after the lights but before the ornaments — that way the plaid reads as structure rather than an afterthought laid on top of everything else.
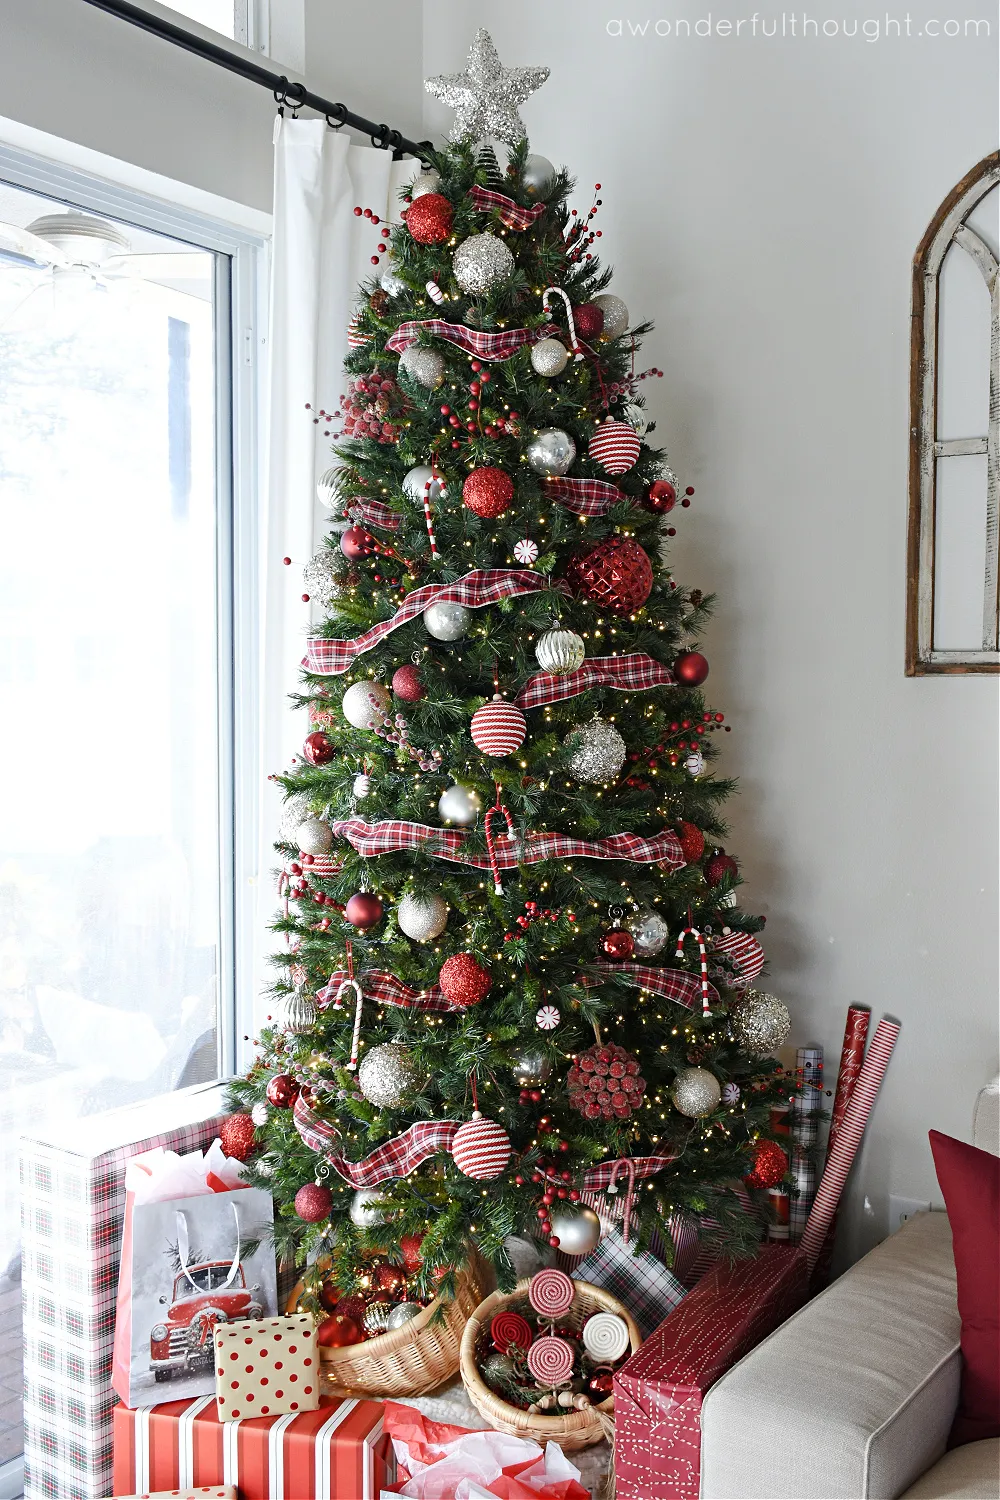
This look needs room to breathe: a space at least 12 by 14 feet, a 9-foot ceiling, and a tree between 7.5 and 9 feet in the corner beside a window. In a tighter room, the plaid plus the berries plus the silver gets heavy fast. If your living room is smaller, the flocked approach in Idea #18 gives you the same red-and-white candy story on a much slimmer footprint.
18. Heavily Flocked Branches Dressed in Wrapped Candy Ornaments
It’s the flocking — the fake snow coating every single branch. Those oversized wrapped-candy ornaments are lovely, but they would get lost on a plain green tree, because red would be the only texture in the room. The white flocking gives each candy shape something to sit against, so every one reads like it’s resting on actual snow. It also hides a sparse older artificial tree better than anything else you can buy.
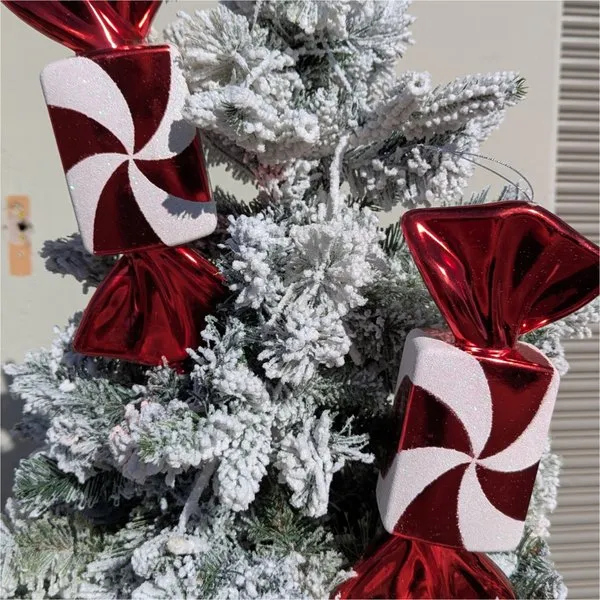
About 55% snowy white flocking, 30% metallic red, and 15% glitter and silver. That high white percentage is why the tree feels cold and sweet rather than aggressively holiday. Swap the red wrappers for pink and it turns into a candy shop; swap for mint and you’re in the aqua-and-red territory of Idea #25. Keep the white majority and almost any accent color works.
19. A Gingerbread Man Who Dispenses Candy from Four Little Drawers
- Stand a wooden gingerbread cutout upright against the wall or on a small easel.
- Attach four clear acrylic drawers with removable adhesive strips, stacked evenly.
- Fill each drawer two-thirds full — wrapped candies at the bottom, peppermints on top.
- Lay a red-and-green plaid runner underneath and tuck pinecones at the base.
- Add a Santa hat with a hidden clip so it stays put through the season.
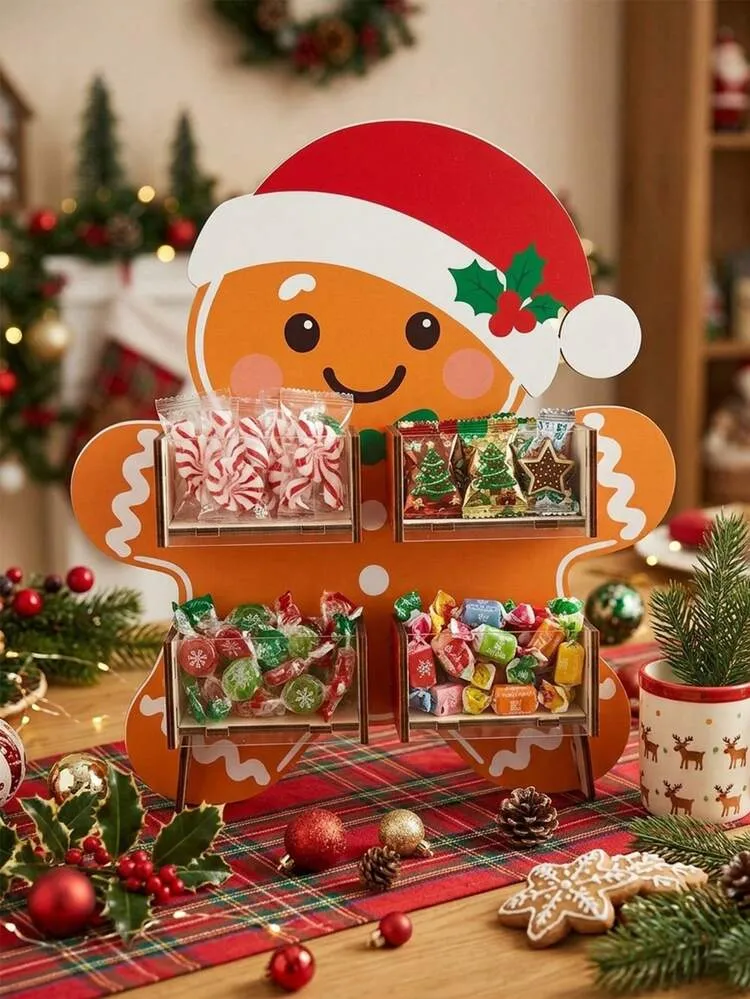
About 45 minutes and $25 in materials.
Candy displays fail when they’re overstuffed. Keep each compartment about two-thirds full, put the heaviest wrapped candies in the bottom drawer and lightest peppermints on top, and leave a visible gap between layers. Check adhesive ratings before sticking anything to painted walls — removable strips rated for 5 pounds are the safe choice for drawers you’ll be refilling all December.
20. A Glossy Candy Cane Tied with White Ribbon to a Pine Branch
Roughly 80% green foliage, 15% red and white stripe, 5% warm gold light. When the stripe itself is the decoration, proportion matters less than spacing. Cluster three candy canes in one spot and leave a six-inch gap of plain branches beside them. Repetition in groups reads as intentional; one candy cane every four inches reads as clutter, no matter how pretty each one is on its own.
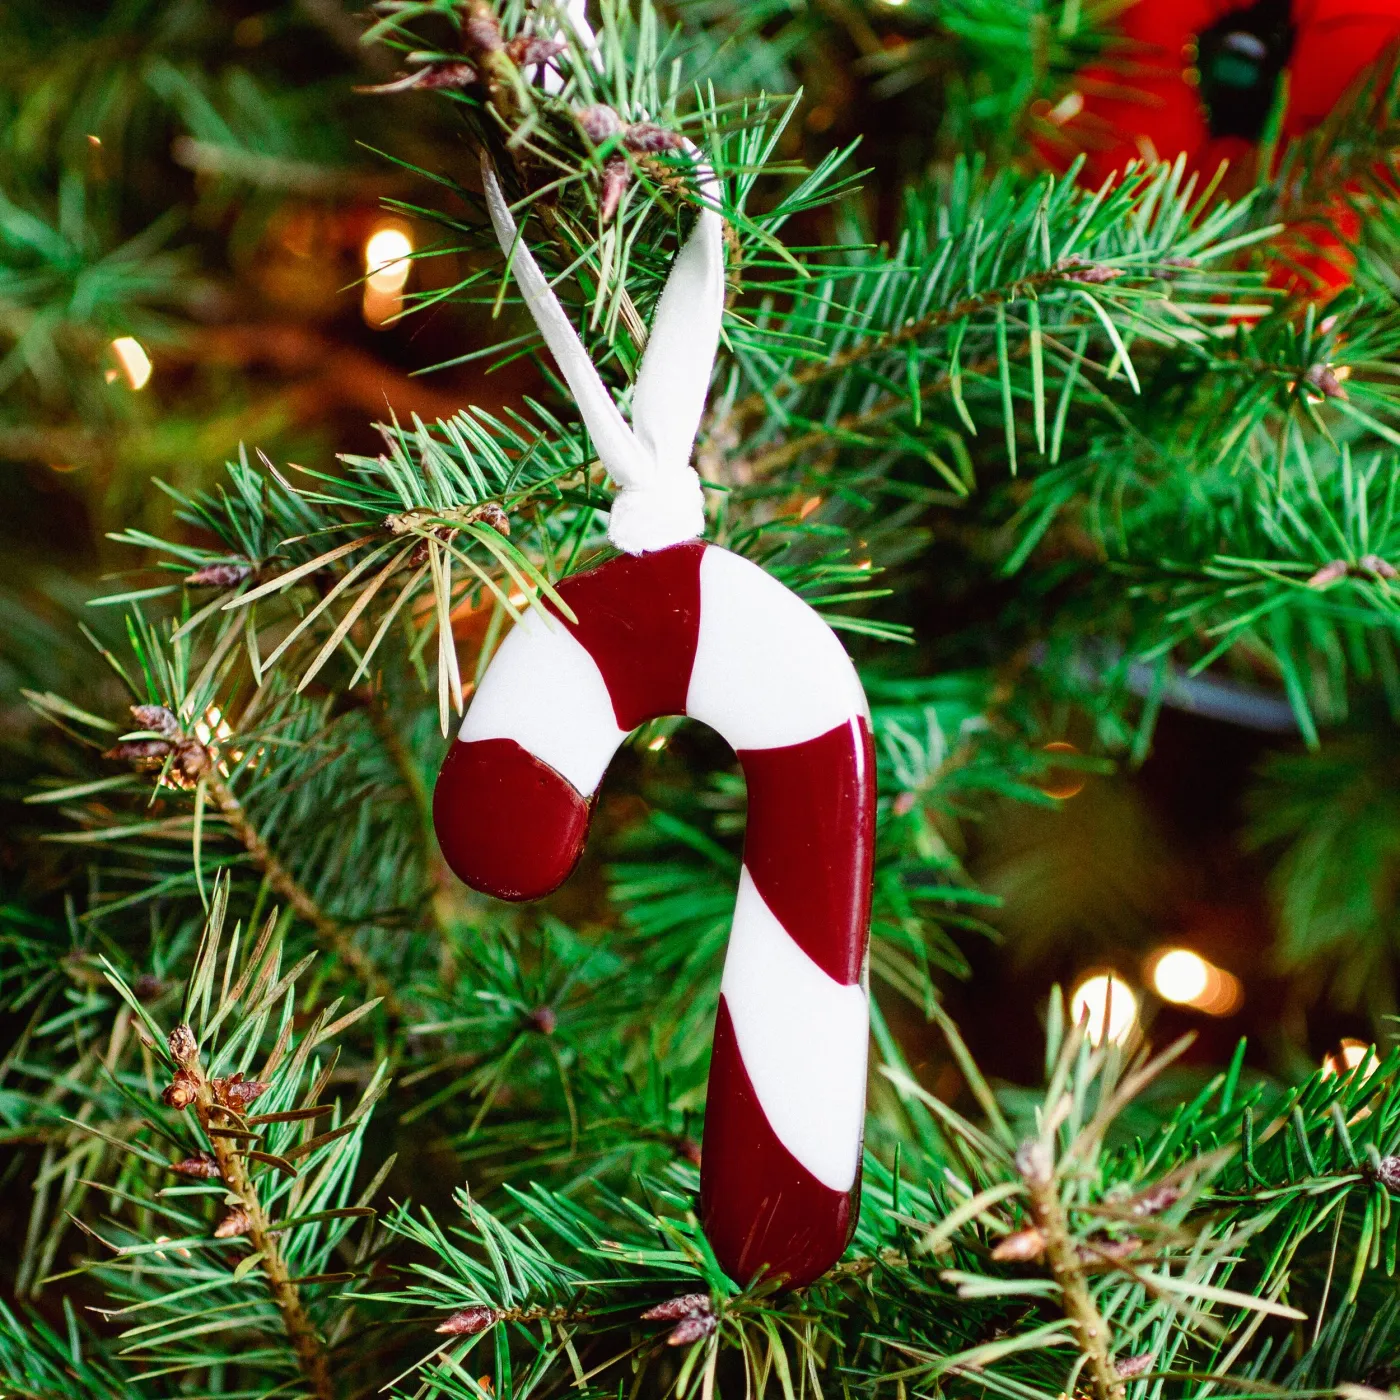
Glossy candy cane ornaments are stunning on a tree and a little miserable on a real one. Fresh pine sap is sticky and acidic, so a painted ornament pressed against needles can dull within a season, and anything sitting near a heat vent will craze and crack. Hang them on outer branches facing the room, away from vents, and wipe them with a dry cloth before storing.
21. A Distressed Metal Truck Parked Under a Pine Forest Mural
Two principles: scale contrast and fake depth. The truck is small, the trees are tall, and the gap between them gives the scene room to feel like a story rather than a shelf display. Meanwhile the mural does the job a window would — it makes a corner read as outdoors, which is why this works so well in a basement, a hallway, or any room without a decent view.
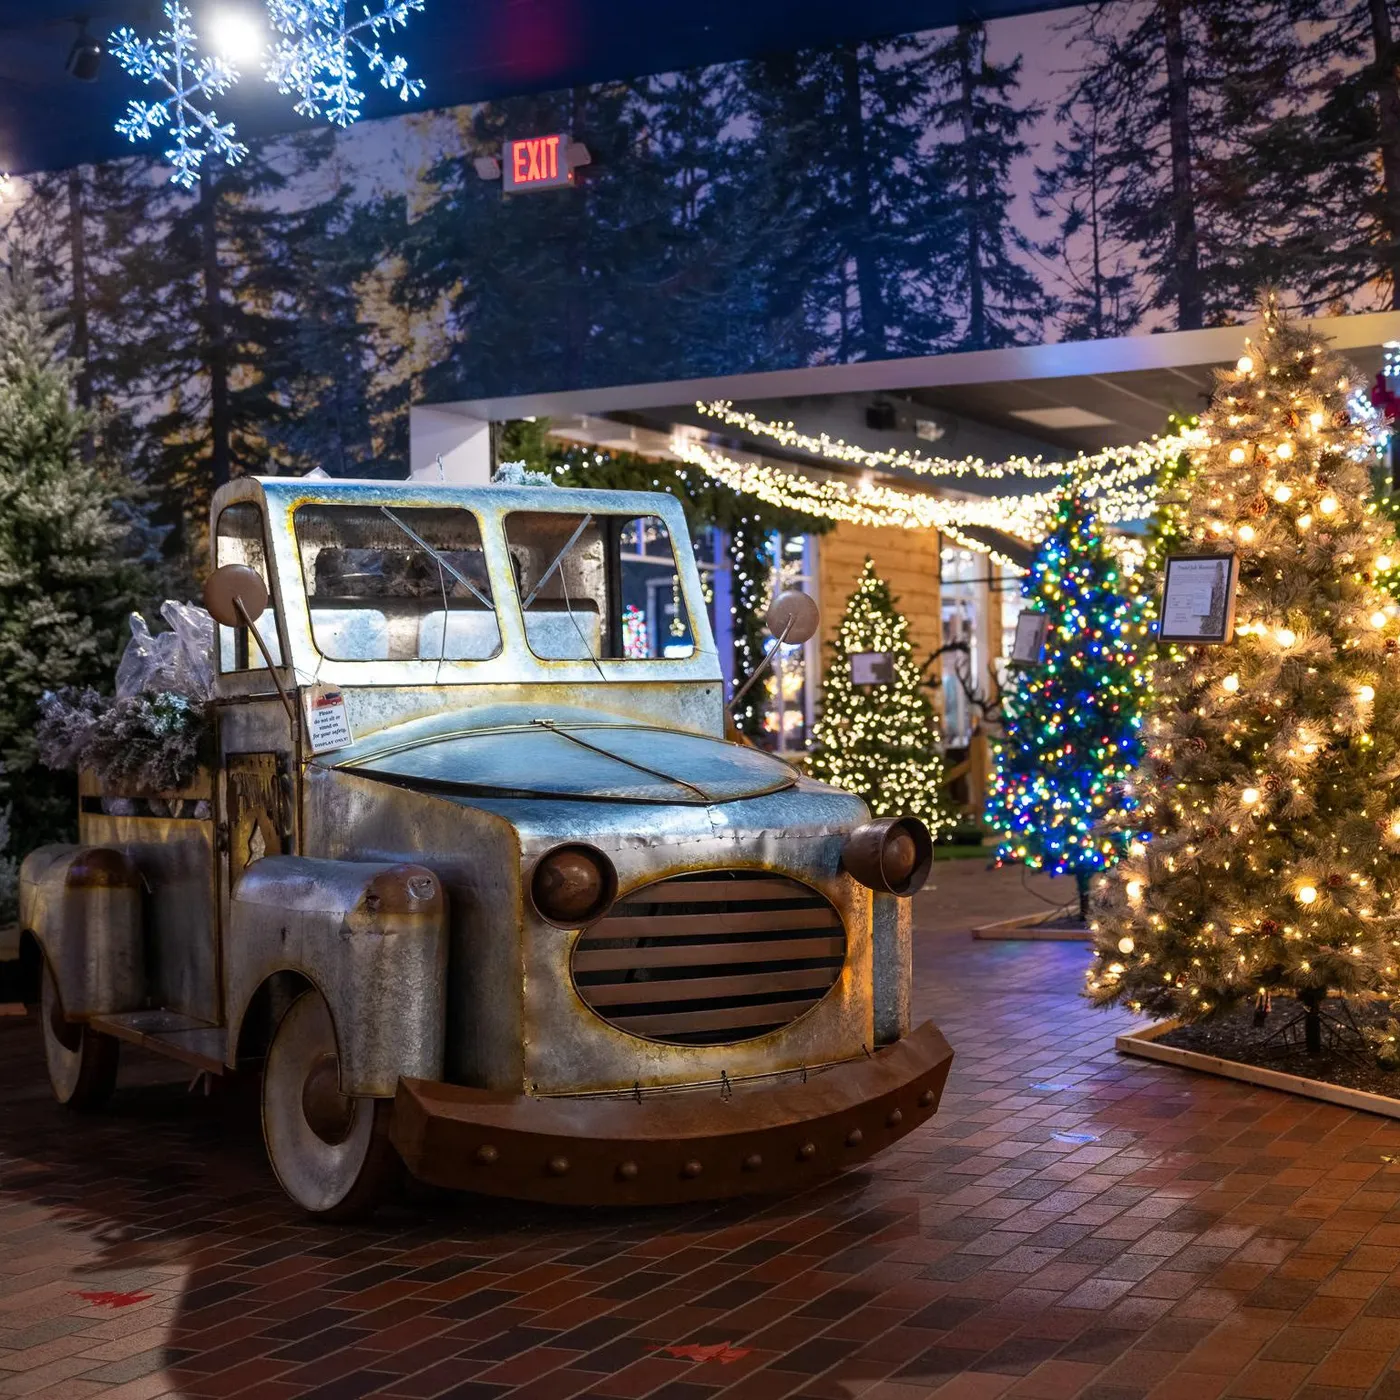
Rustic displays are one of the cheapest looks to fake. Thrift stores and Facebook Marketplace turn up die-cast and tin toy trucks for $10 to $25, and a can of matte brown spray paint plus a little sandpaper gives you the rust. Peel-and-stick forest murals start around $40 for a 6-by-8-foot panel, and a strand of warm white lights handles the rest.
22. The Baker Bear in a Red Apron, Holding a Tray of Cookies
It’s the bear’s face and posture. A figurine holding a tray is a nice idea; a baker bear leaning slightly forward like he’s actually offering you a cookie is a moment. Take away the tilt of the head and the open hand and you have generic seasonal merchandise. That tiny bit of character is what makes people smile before they even notice the lit tree behind him.
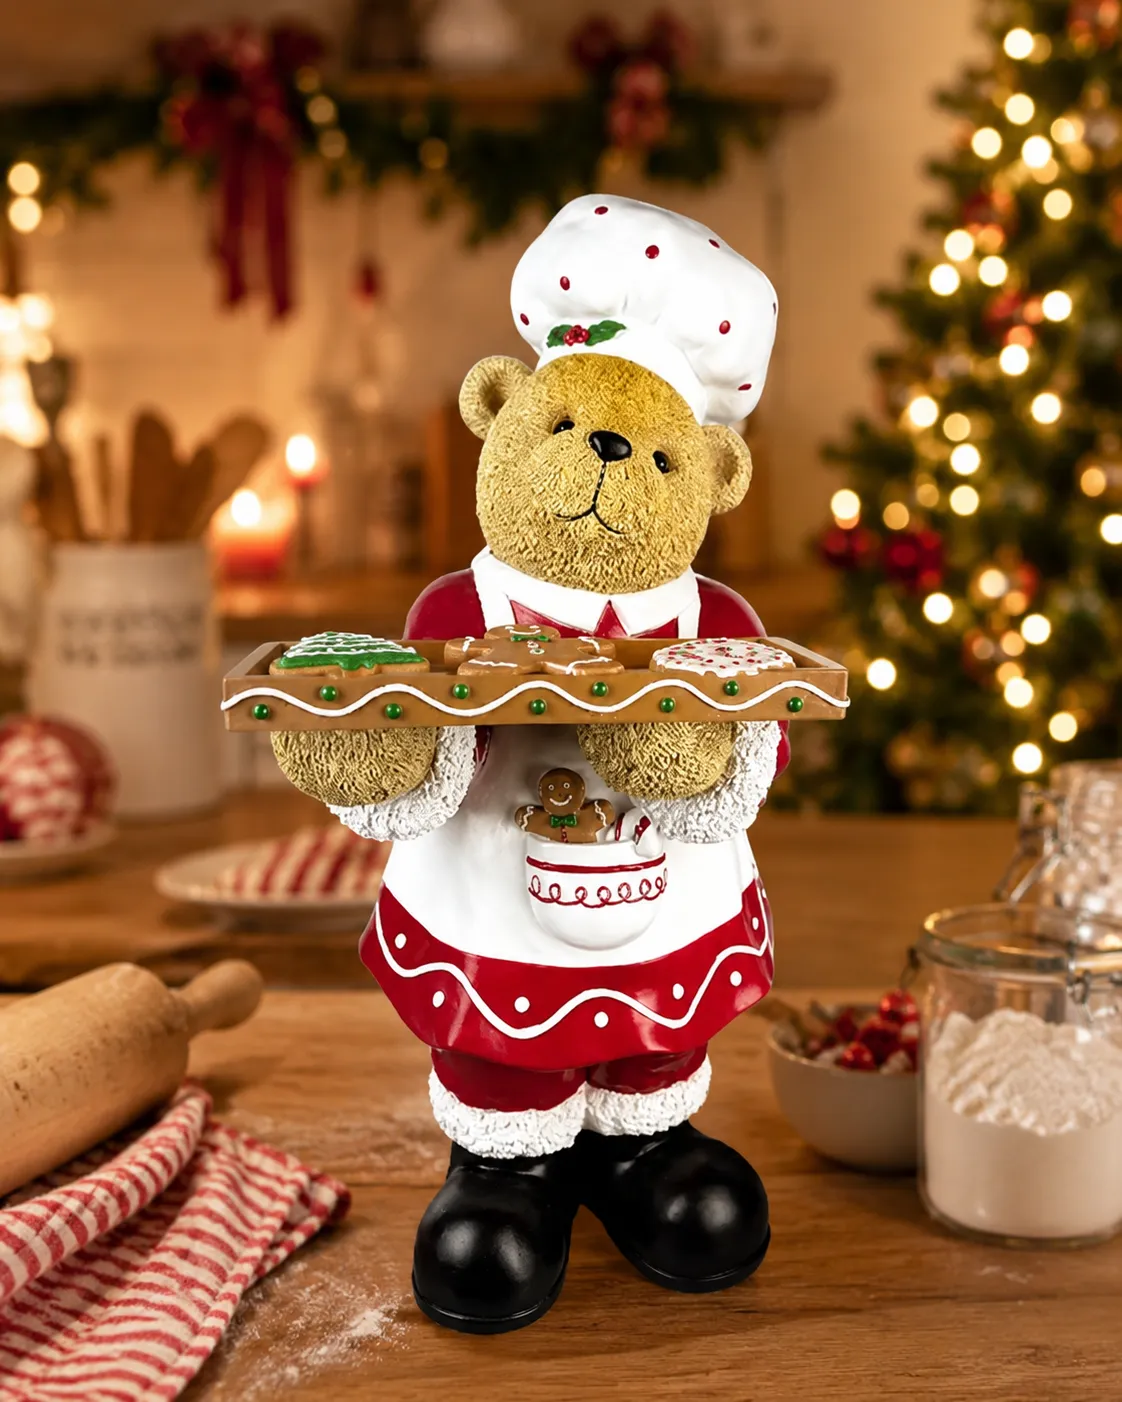
About 60% red and white, 30% warm brown wood and baked goods, and 10% gold and black accents. The brown is doing more work than it looks like — it keeps the vignette from turning into a candy cane explosion. Swap the wood counter for white marble and the same figurine suddenly feels cold and a little twee.
Resin figurines are low-maintenance but not maintenance-free. Dust with a soft brush rather than a cloth, because fabric snags on painted details, and keep them out of direct sun — red resin fades toward orange faster than any other color. Store in the original box with tissue wrapped around the tray hand if you want it to survive a decade.
23. Handmade Gingerbread Men in Bows, Aprons, and Twine Loops
- Air-dry clay or wool felt for 12 figures: $12–$30
- Acrylic paint and fine brushes: $10–$25
- Twine, ribbon, and small bows: $6–$15
- Heart, button, and snowflake embellishments: $5–$12
- Matte sealer or varnish: $6–$12

Total: about $40–$95 for a dozen handmade ornaments. Budget alternative: dollar-store clay, a kid’s acrylic paint set, and kitchen twine gets you to roughly $18 — 55% less, and honestly nobody can tell from three feet away.
If you’re making clay gingerbread men, roll to a quarter inch thick and punch the hanging hole before baking, not after — drilling a baked piece cracks it nine times out of ten. Bake at the temperature on the package, cool completely, then seal with two thin coats of matte varnish. Matte, not gloss. Gloss makes them look like plastic cookies.
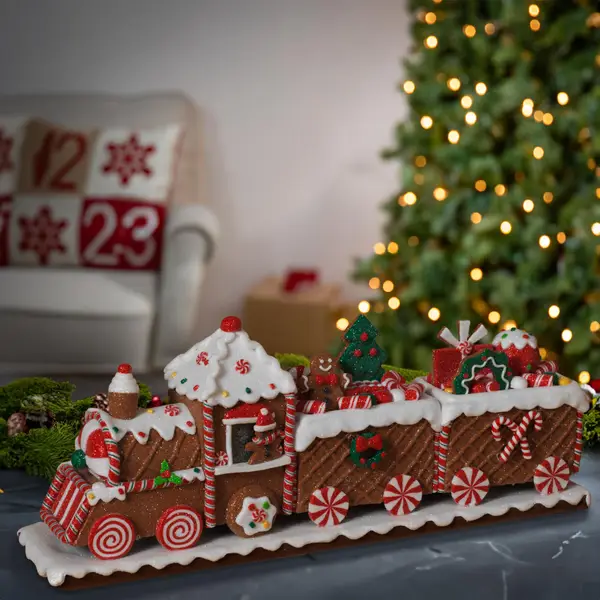
24. A Gingerbread Train with Peppermint Wheels and Icing Snow
- Bake or buy a flat gingerbread train base and let it cool completely.
- Pipe white icing along the roofline and windows, then stop — leave the wheels alone for now.
- Attach peppermint candies as wheels with a dab of royal icing and let them set 20 minutes.
- Sift powdered sugar over the top for snow, avoiding the wheels.
- Add two miniature figures on the platform before the icing fully cures.
About $18 if you bake from a boxed mix.
The peppermint wheels are the detail that ties a gingerbread train to the rest of a candy theme. Everything else on the train is brown and white icing — sweet, but generically Christmas. The wheels introduce the red swirl and make the whole centerpiece feel like it belongs on the same table as your tree.
Tabletop centerpieces need a table at least 36 inches wide and 30 inches deep, or the train crowds the plates. Keep it under 14 inches long for a four-seat table and go longer only on a sideboard. If your dining room is tight, scale down to a single-car version rather than shoving the whole thing to the table’s edge.
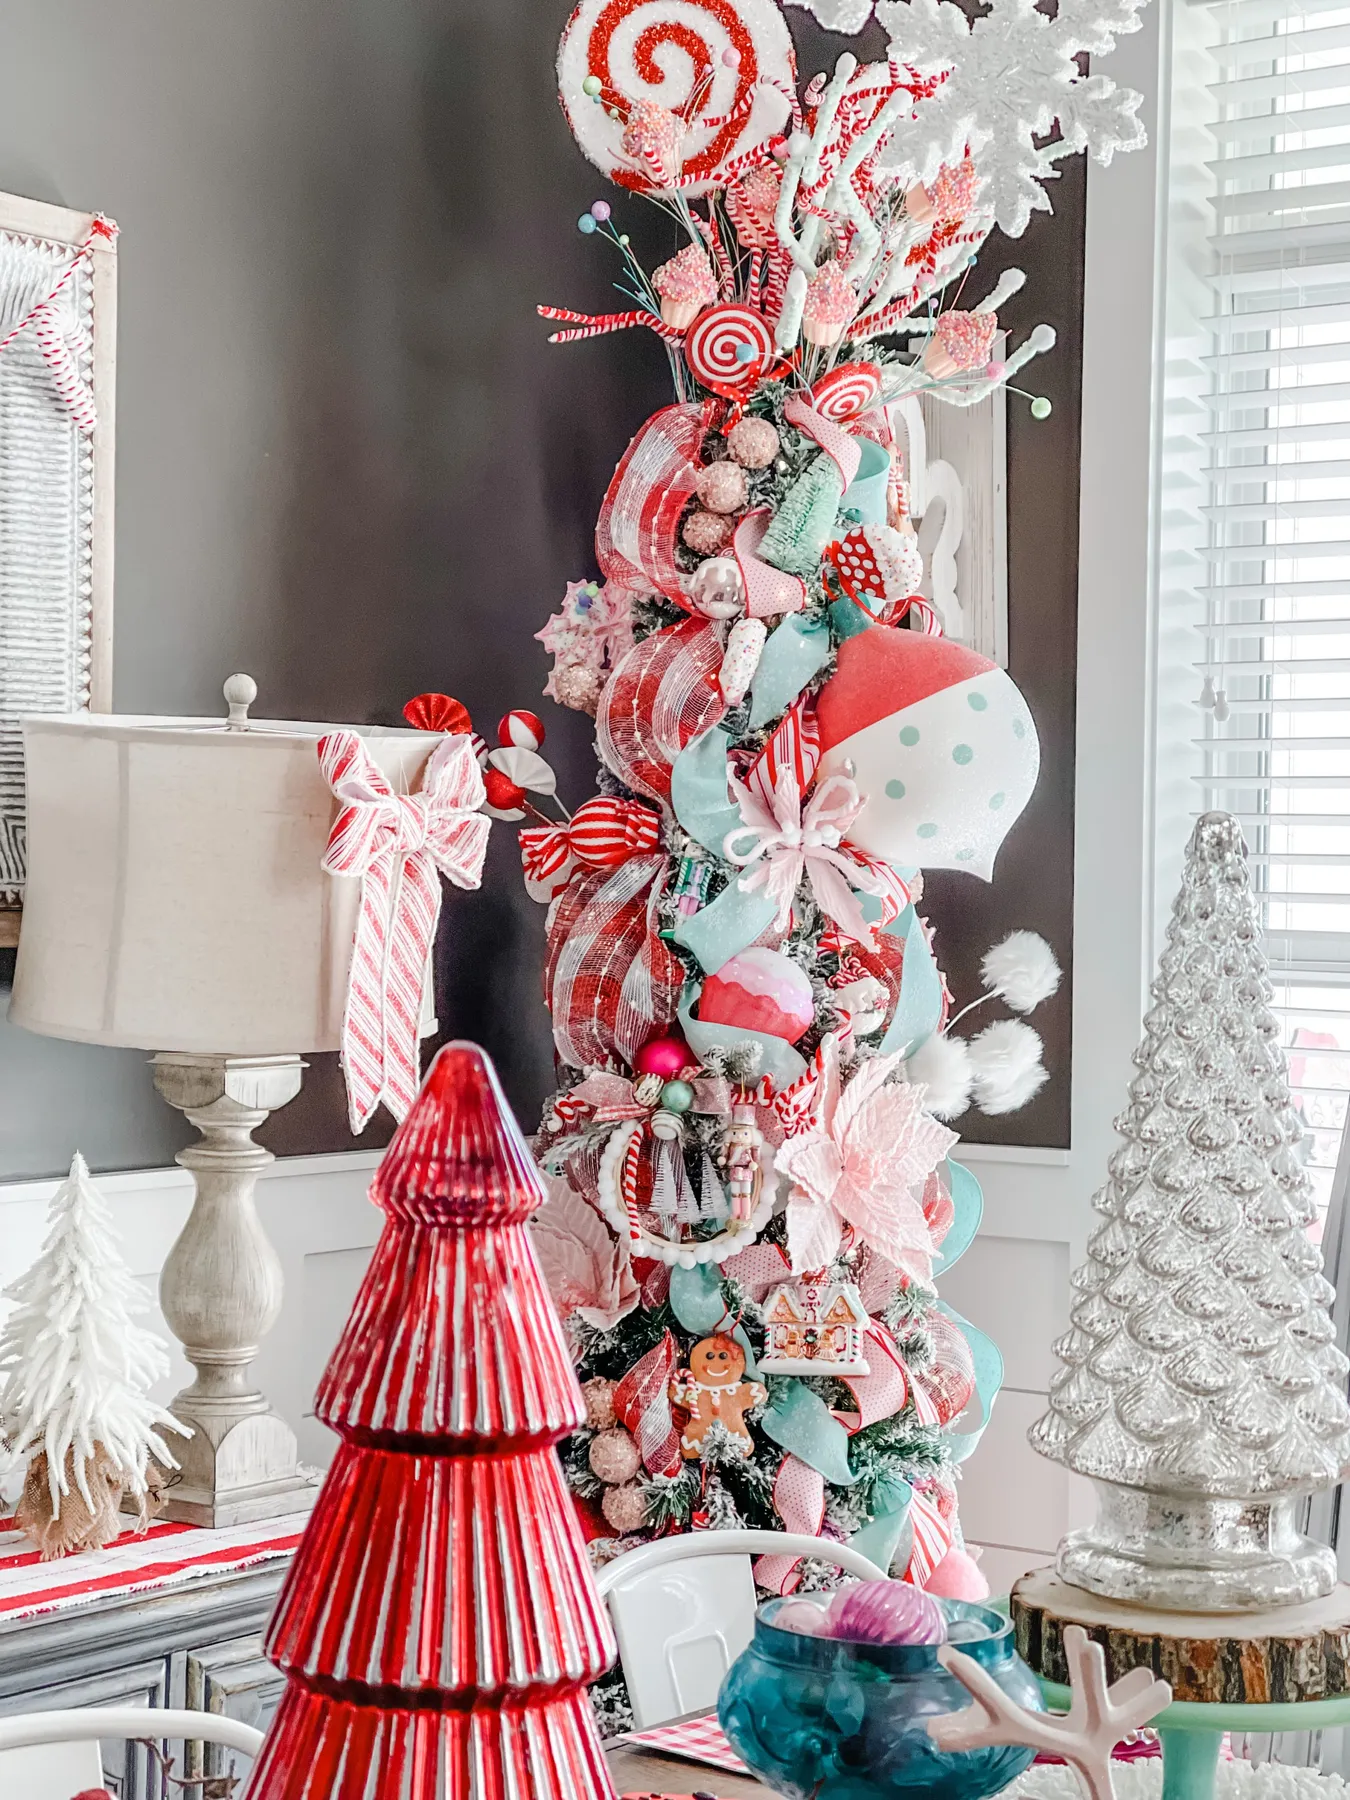
25. Red and Aqua Ribbons Cascade Down a Narrow Candy Tree
About 50% red, 25% aqua, 15% white, and 10% silver. Aqua is the wild card that makes this narrow tree feel playful instead of traditional, and it works because it’s paired with a heavy red majority — an even split would look like a nursery. Swap aqua for lime green for a retro read, or for pink for a sweeter one. The red stays put either way.
Wide ribbon is where candy trees get expensive: boutique rolls run $15 to $22 each and you’ll need three or four. Walmart and Michaels carry comparable 2.5-inch wired ribbon for $4 to $8, and the cascade technique is identical. The peppermint lollipop toppers in Idea #6 are another place to save — DIY those and put the money into ribbon instead.
26. A Peppermint Flower Ornament with Candy Cane Petals and Pom-Poms
The miniature candy canes tucked into the petal edges are what keep this from being just a big red flower. Without them, the ornament reads as a poinsettia in the wrong color. With them, every petal becomes its own candy cane pattern, and the swirls and pom-poms suddenly make sense as one family of shapes instead of a random assortment glued together.
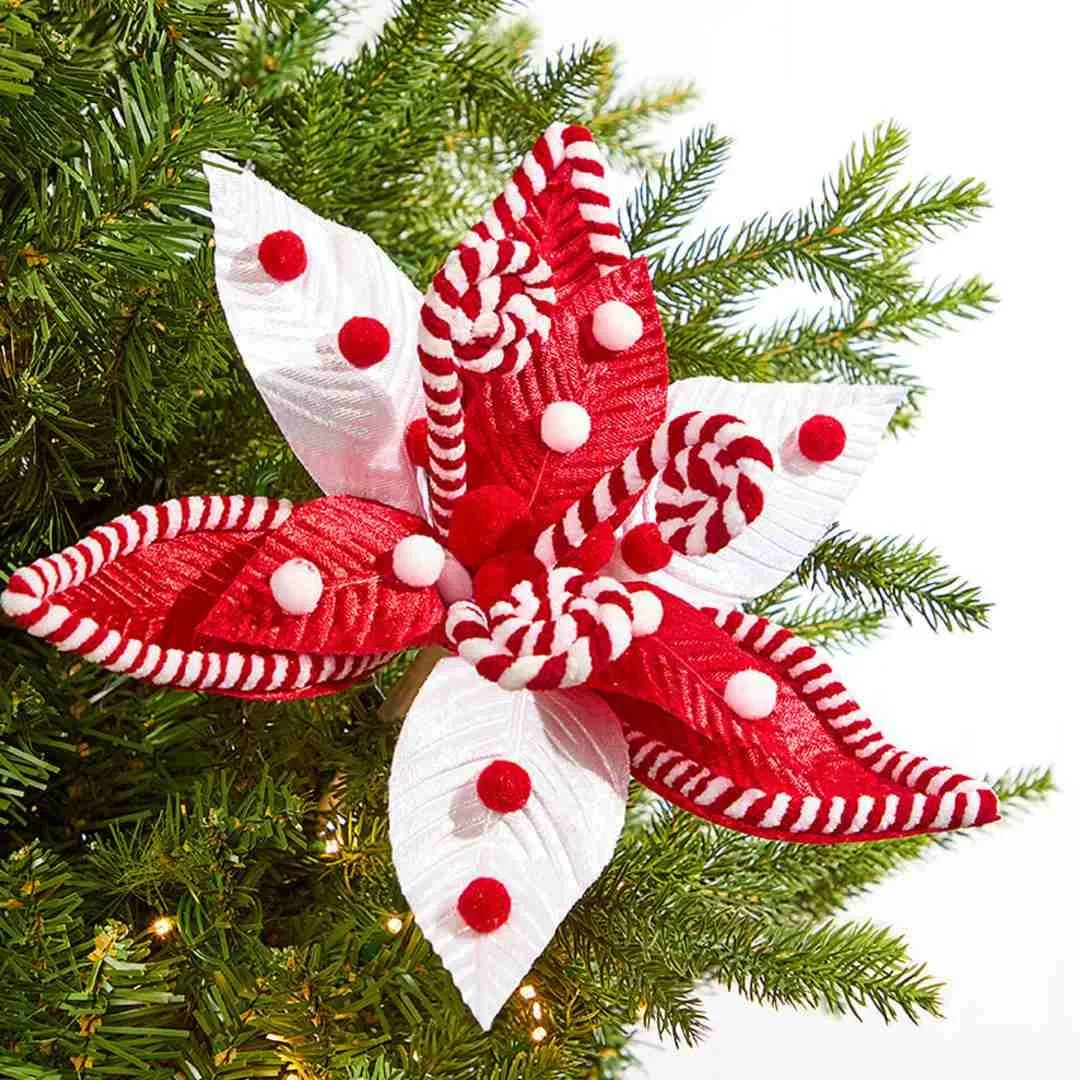
Hanging a large flat ornament so it reads correctly takes about fifteen minutes:
- Run a 12-inch length of floral wire through the cap and twist to secure.
- Choose a branch on the outer third of the tree, at least 6 inches in from the tip.
- Wrap the wire around the branch twice, close to the trunk side, and twist the ends.
- Add a second wire loop for heavy ornaments so they hang flat instead of tilting.
- Step three feet back and check — flat ornaments should face the room, not the ceiling.
About $5 in supplies.
27. A Vintage Illustrated Candy Cane with a Painted Bow
Illustrated, flat, slightly faded ornaments are having a moment as thrifters rescue box after box of mid-century Christmas decor. Part of it is nostalgia, and part of it is that flat illustrated pieces read clearly in photos, which keeps them circulating on Pinterest long after the trend peaks. Whether the full retro tree lasts is anyone’s guess — these ornaments never really go out of style.
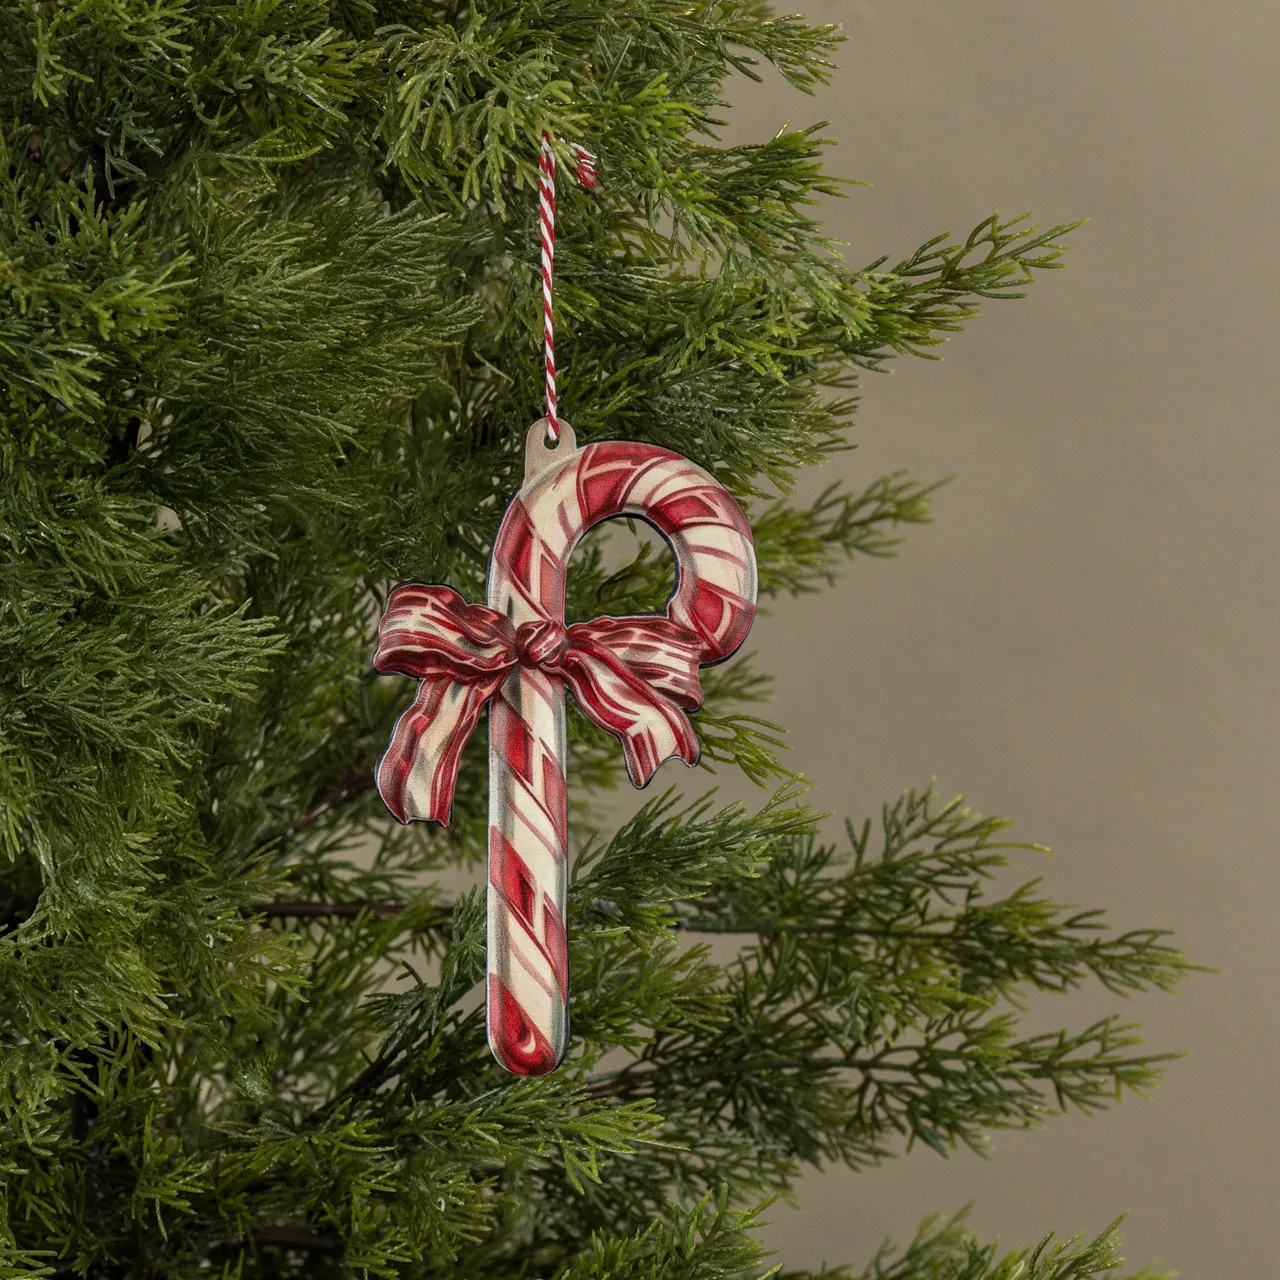
When mixing vintage flats with glossy new ornaments, aim for roughly three new pieces for every vintage one, and always hang the vintage pieces between 48 and 66 inches — the sweet spot where people actually look. Vintage paint is fragile, so swap metal hooks for ribbon loops, and never hang a 1950s piece in direct sun or near a fireplace.
28. Retro Glass Koalas, Lightbulbs, and a Pink Car on One Tree
It’s controlled chaos, and the thing holding it together is scale. Every ornament here is oversized and glossy, so a silver koala, a pink car, and a gingerbread house read as one collection instead of a junk drawer. The green branches supply the only calm surface in the whole arrangement, which is why the tree still feels festive rather than cluttered.
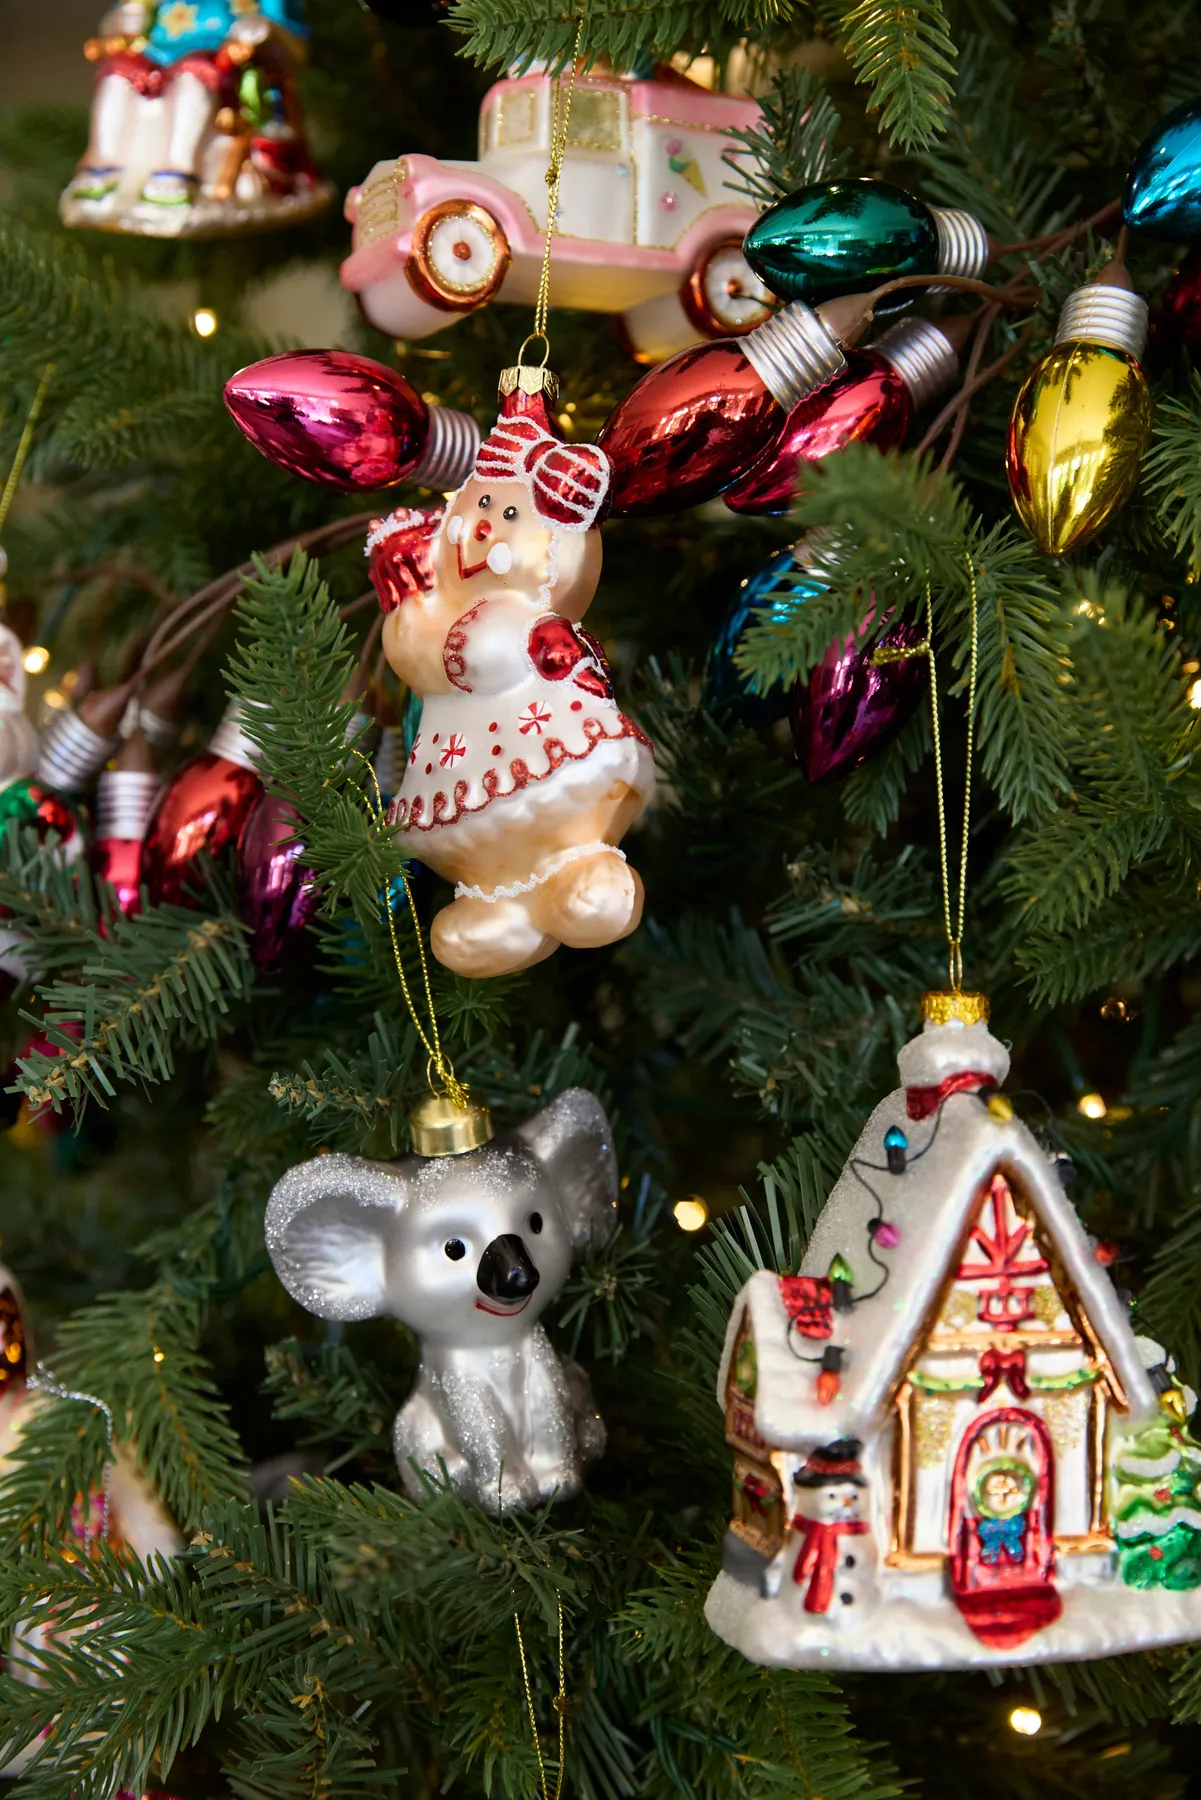
Roughly 45% green foliage, and then five or six accent colors sharing the rest fairly evenly — red, pink, silver, gold, yellow. Normally that’s a recipe for mess, but it works because every accent shares the same glossy glass finish and the same oversized scale. Change the finish and the whole thing collapses. Finish consistency, not color consistency, is the rule.
- Swap thin metal hooks for ribbon loops to protect the glass caps.
- Hang heavier figurative ornaments on inner branches where the branch forks.
- Space glass bulbs at least four inches apart so they don’t knock together.
- Wrap each piece in tissue and store in a divided box, not a loose bin.
- Photograph the tree before you take it down so next year’s layout is easier.
About 20 minutes and $8 in supplies.
29. HAPPY HOLIDAYS Sign, Buffalo Plaid, and a Peeking Gnome
Sign ornaments are one of the easiest things to fake. A wooden plaque and paint run under $10 at a craft store, and letter stickers skip the shaky hand entirely. Buffalo plaid ribbon is $3 a roll at Walmart, and gnome ornaments turn up at dollar stores every November. Total for a similar cluster: about $22 versus $60 in a boutique.

The HAPPY HOLIDAYS sign is what makes this tree a greeting rather than a theme. Red and green ornaments alone are just tradition; the sign tells you the tree has something to say, and it gives every photo a readable focal point. Everything else — the plaid, the shiny greenery picks, the gnome — is arranged to make that little rectangle of white pop.
30. The Red Flag Nobody Posts: When Peppermint Overwhelms a Room
Peppermint red is loud, and it throws warm light. A shelf of glossy red ornaments against a white wall will bounce pink onto the paint and make that corner feel several degrees warmer than the rest of the room. Before you commit to a fully red-and-white tree, tape a red and a white swatch side by side, turn the tree lights on, and look at it at 7 p.m. — not at noon when the sun is doing the work.
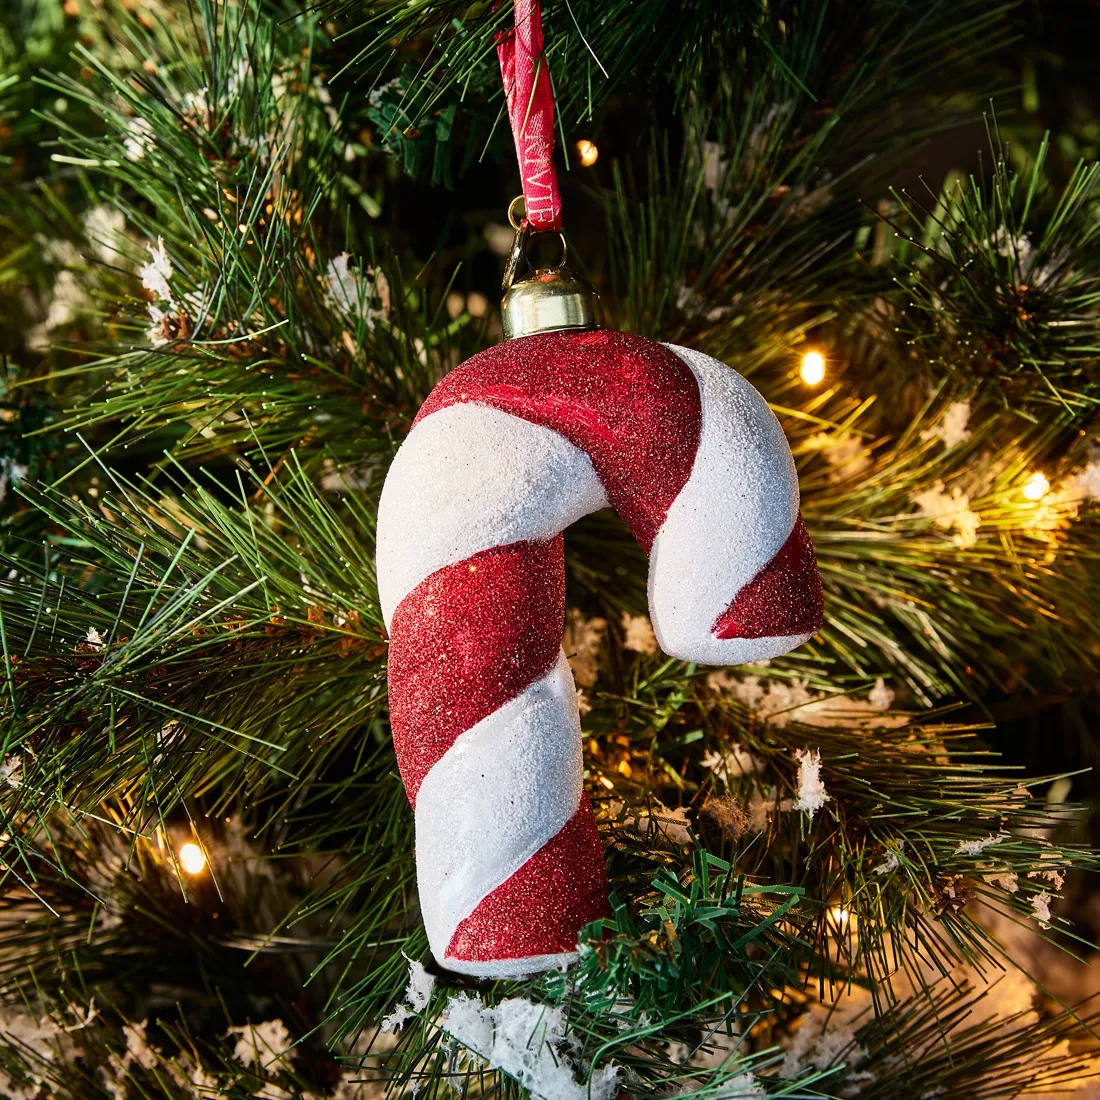
Quick checklist before you buy anything:
- Measure tree height plus topper, and the gap between tree and ceiling.
- Note which way your windows face — south light bleaches reds faster than north light.
- Count the ornaments you already own; most people have 30% of what they need.
- Confirm storage space before you shop a big sale.
- Set a candy-or-no-candy rule for kids and pets ahead of time.
If something still feels off once it’s up, our common mistakes section below walks through fixes that take about ten minutes each.
31. Three Glittered Gingerbread Cones Coated in Fake Icing
Glittered cones shed constantly, and the sparkle dulls as it goes. Two light coats of gloss acrylic spray before they hit the table locks in most of it, and a sheet of parchment underneath catches whatever escapes during the season. Expect to lose the sharpest sparkle after one holiday; resealing every second year keeps them looking nearly new.
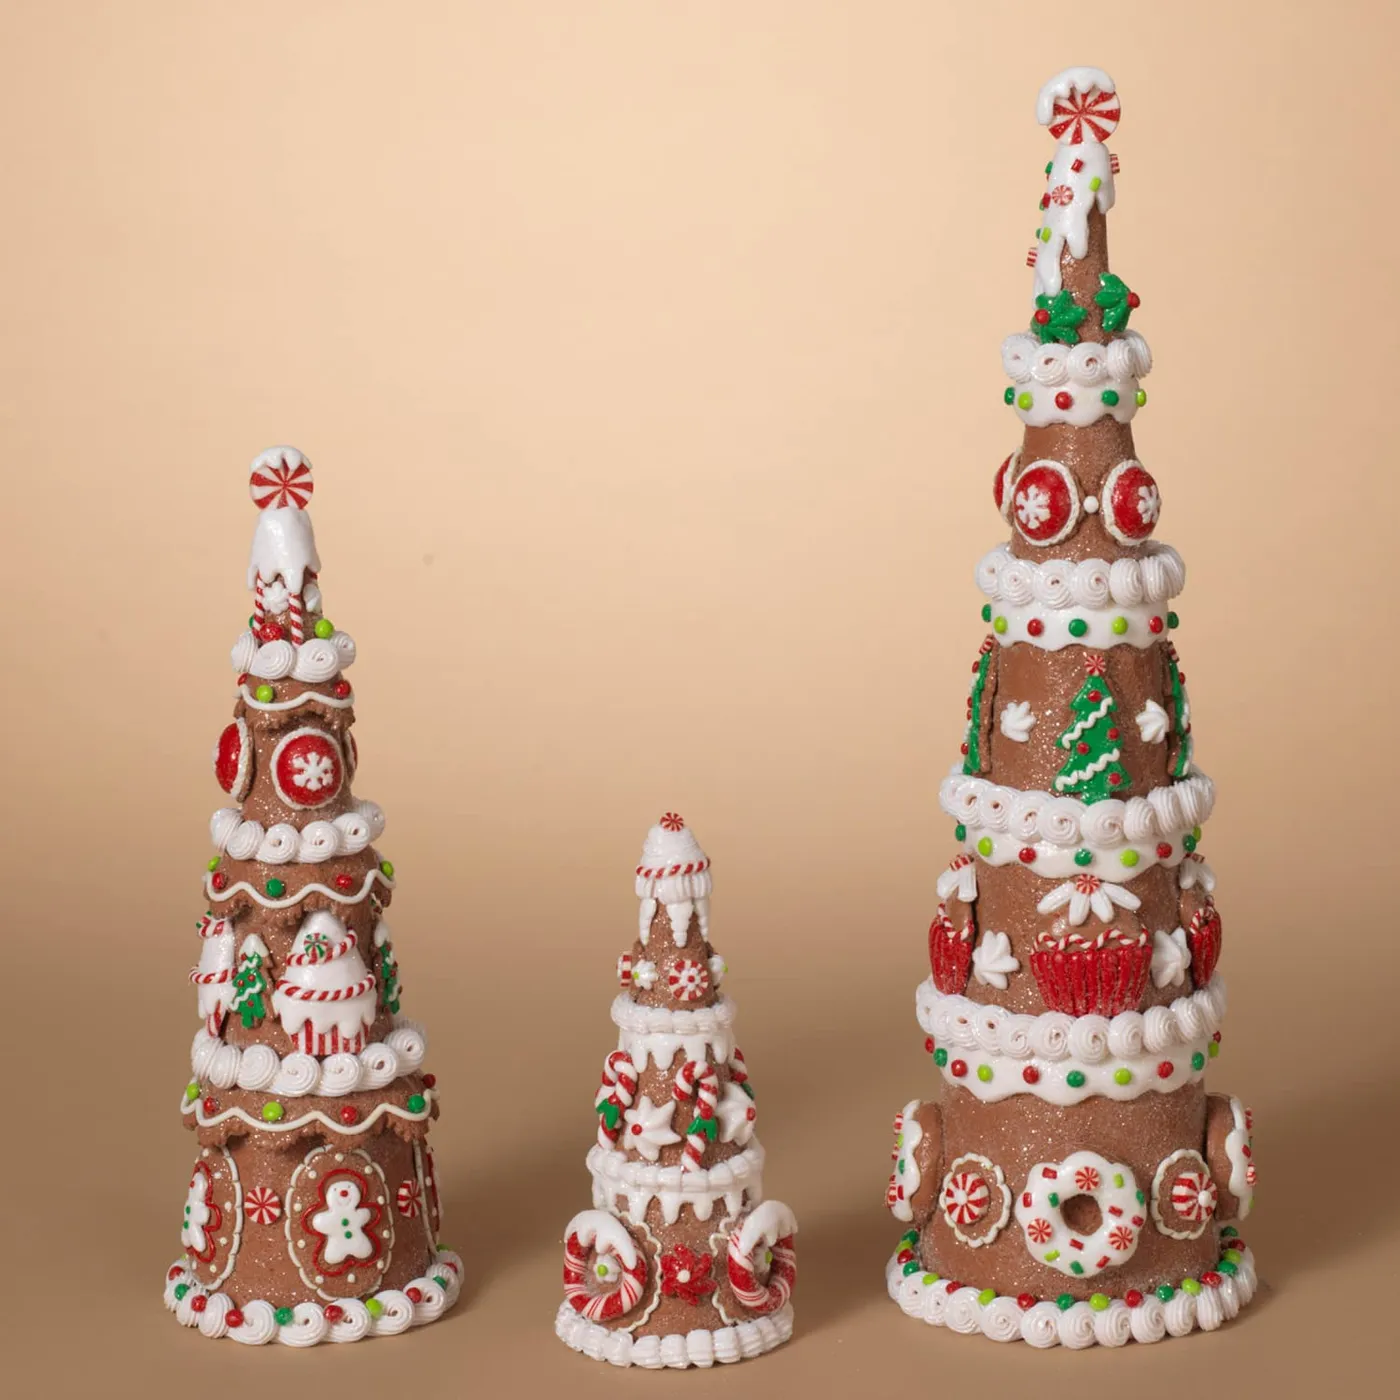
When sealing glitter, gloss beats matte every single time. Matte spray dulls the flakes into a grey haze, while a gloss coat keeps individual sparkles readable and makes the piece look wet and candy-like. Spray in two thin passes from about ten inches away, letting the first coat dry fully — one heavy coat will pool and leave cloudy patches you can’t fix.
32. Dessert-Cart Ornaments, Ice Cream Scoops, and Glitter Letters
This tree works because the mess is unified. Sprinkles, glitter letters, pastel pink, and turquoise could easily look like a six-year-old’s birthday party, and what saves it is shared scale and finish — everything is small, glossy, and slightly absurd. The gingerbread man and the dessert cart both nod to baking, so the theme reads as dessert rather than random toys.
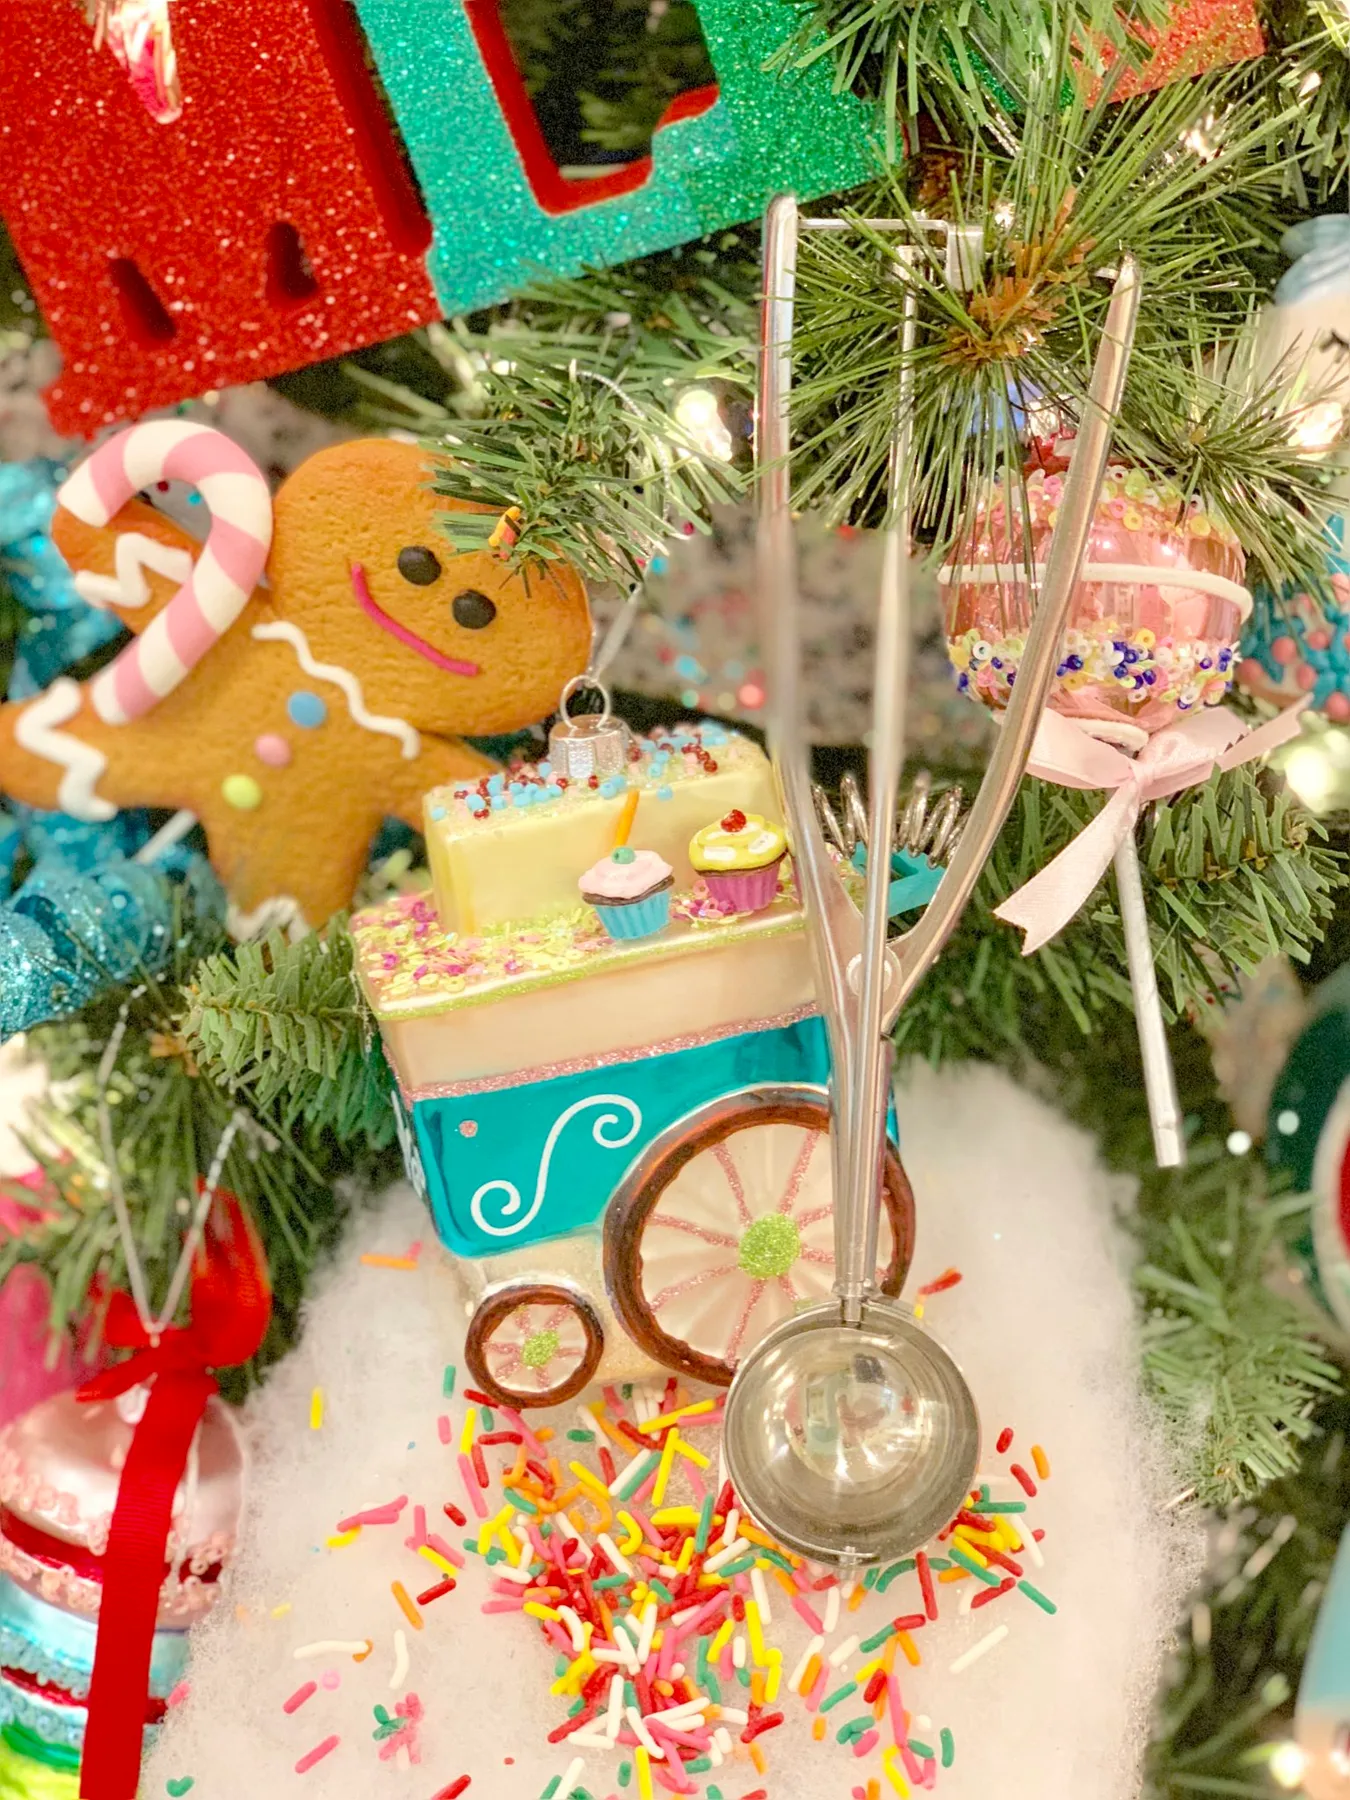
- Buy a jar of clay sprinkles, or cut your own from oven-bake clay.
- Mix sprinkles with a spoonful of clear-drying craft glue into a loose paste.
- Brush the paste onto branch tips and let it dry for two full hours.
- Shake off the excess over a sheet pan and reuse it next year.
- Add the glitter letters last so they don’t get swallowed by sprinkles.
About 20 minutes and $10 — a little goes a very long way.
33. A Crocheted Candy Cane with a Chevron Yarn Twist
Crochet ornaments are part of a bigger handmade revival that’s been building since 2023, and it shows no sign of slowing — people want decor with fingerprints on it. A crocheted candy cane is also the rare holiday project that’s genuinely beginner-friendly. One evening, one skein, and you have something nobody else on your street owns.

Roughly 70% dark green branches, 25% red and white yarn, and 5% cream for the hanging loop. Textile ornaments read quieter than glass, so they need a darker background to stand out — a heavily lit white tree would swallow them entirely. Swap the yarn for a deep burgundy and the same piece turns traditional English Christmas instead of candy shop.
34. Two Crocheted Candy Canes, One Red Yarn Loop, One Tiny Pinecone
The red yarn loop is doing more than holding the ornament up. Against dark green needles, that little hand-tied loop is the only bright line leading your eye into the piece — it’s the invitation. Swap it for fishing line or a metal hook and the ornament technically still works, but it stops looking handmade and starts looking store-bought.

One skein of red cotton and one of white runs about $6 total and yields six to eight ornaments; a single handmade crocheted candy cane sells for $15 to $22 on Etsy. If you don’t crochet, hunt vintage yarn canes at estate sales and thrift stores, where they often land in a mixed bag for $4. Either way, compare with Idea #33 for the chevron variation on the same shape.
One More Thing Before You Untangle the Lights
Whichever direction you go — a full candyland evergreen, a single crocheted candy cane, or a wooden tray of glossy peppermint swirls — the principle is the same: pick the one detail you love and let it repeat. You don’t need a bigger tree, you need fewer competing ideas on the one you already have. Start with a single idea from this list this weekend and let next December’s version of you be grateful.
📌 Save this to Pinterest so you can find it again when you’re standing in the ornament aisle with your phone in one hand.