You know that feeling when you walk a school hallway in December and one door stops you mid-stride — and it isn’t the fanciest one, it’s the one where somebody clearly cared? That’s what we went hunting for. We spent weeks combing through photos from Michaels, Amazon, Hobby Lobby, Target, and Dollar Tree to find 34 real classroom and entryway doors that actually work in a school building, with budgets running from about $5 to $150.
Inside you’ll find rustic evergreen, full Grinch energy, gingerbread, nutcracker stage scenes, candy cane stripes, and more paper-and-tape engineering than you can shake a glue stick at. The 2026 shift is toward doors built as small stage sets — layered, dimensional, often collaborative — rather than one flat cutout taped at eye level.
And stay until the end — we break down the most common mistakes that can ruin these looks. 📌 Save this to Pinterest for later — you’ll want to revisit these ideas.
1. Evergreen Wreath Meets Wooden Santa On A Dark Door
What makes this door work is restraint. The wreath carries the whole thing — evergreen and eucalyptus mixed, a scatter of red berries, then dried leaves tucked in low so the shape stays loose instead of perfectly round. Below it, the pale blue ‘Merry Christmas’ sign and the wooden Santa holding his little green tree read as a vertical stack rather than a crowd. Three pieces, one rhythm, no glitter. The dark wood door does the rest of the work by giving all that sage and red something deep to sit against.
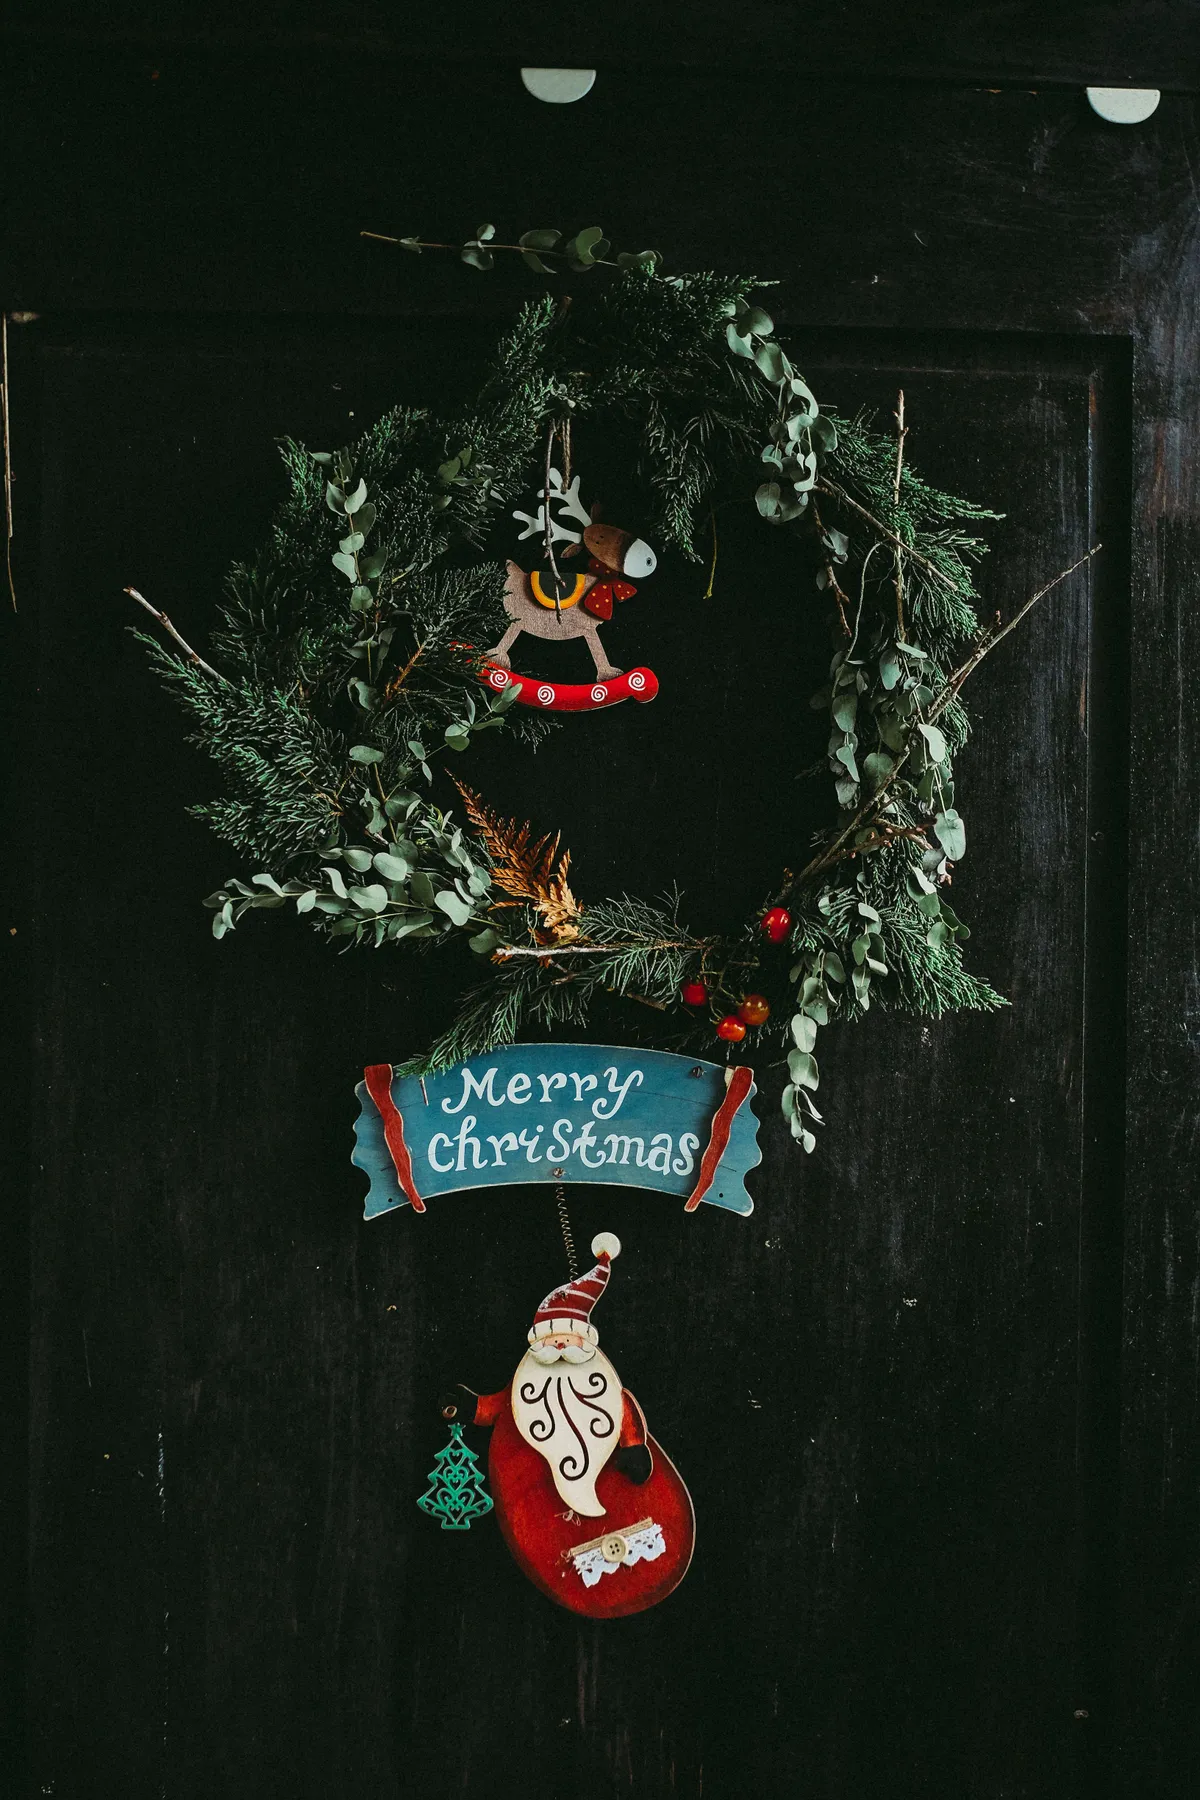
Hang the wreath so its center lands at eye level — roughly 60 inches from the floor, or dead center on the door’s window if there is one. Then leave at least 8 inches of clear door below your lowest hanging piece. People who decorate to the very bottom edge spend all of December kicking it loose. A removable hook rated for 5 pounds holds a wreath this size; anything heavier with berries and dried stems, and you want an over-the-door bracket instead.
2. Grinch Cutout With A Craft-Stick Heart On Black
Grinch doors have been a school hallway staple for decades, but the current version is softer — more craft-store than movie-poster. The shift is toward cutouts kids can help assemble: white paper snowflakes, small gold ornaments on ribbon, a paper wreath with a fat red bow. It reads nostalgic without being a licensed product, which is exactly why it keeps circulating on Pinterest boards year after year. This one isn’t going anywhere.
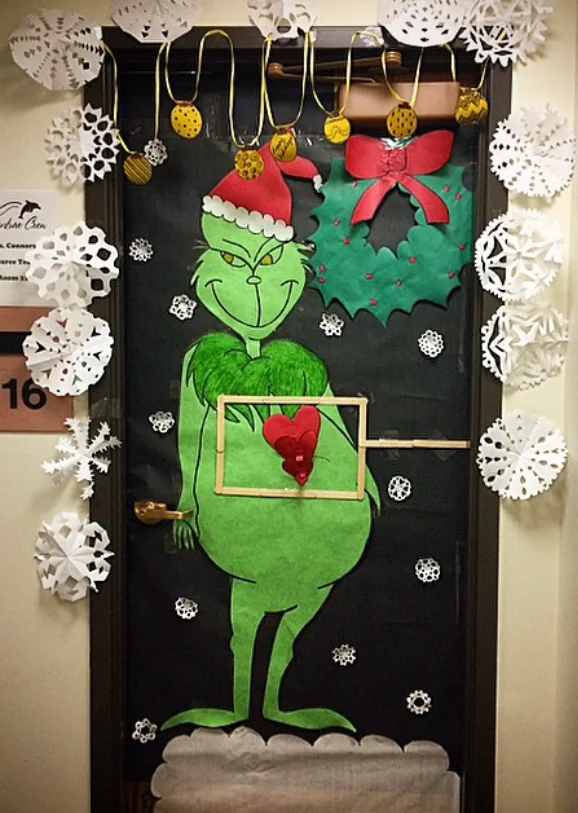
The craft-stick frame around the red heart on the Grinch’s chest is the detail that saves this door from being just another character cutout. It’s small, it’s slightly crooked, and it makes the whole thing feel made by a person rather than printed at a copy shop. Take it away and you have a green silhouette on a black door. Keep it and you have a story with a punchline. Build the heart first, then size the Grinch around it.
3. Layered Wood Snowman, Santa And Reindeer Door Hanger
Layered wood door hangers photograph badly and hang beautifully, and the trick is the hanging point. Use jute or paracord rather than ribbon — ribbon slips on a painted door and the whole piece drifts sideways by second period. Tie a loop that hooks over the door’s top edge, then add a small clear adhesive square at the bottom back of the hanger so it doesn’t swing every time the door opens. Two minutes, zero damage.
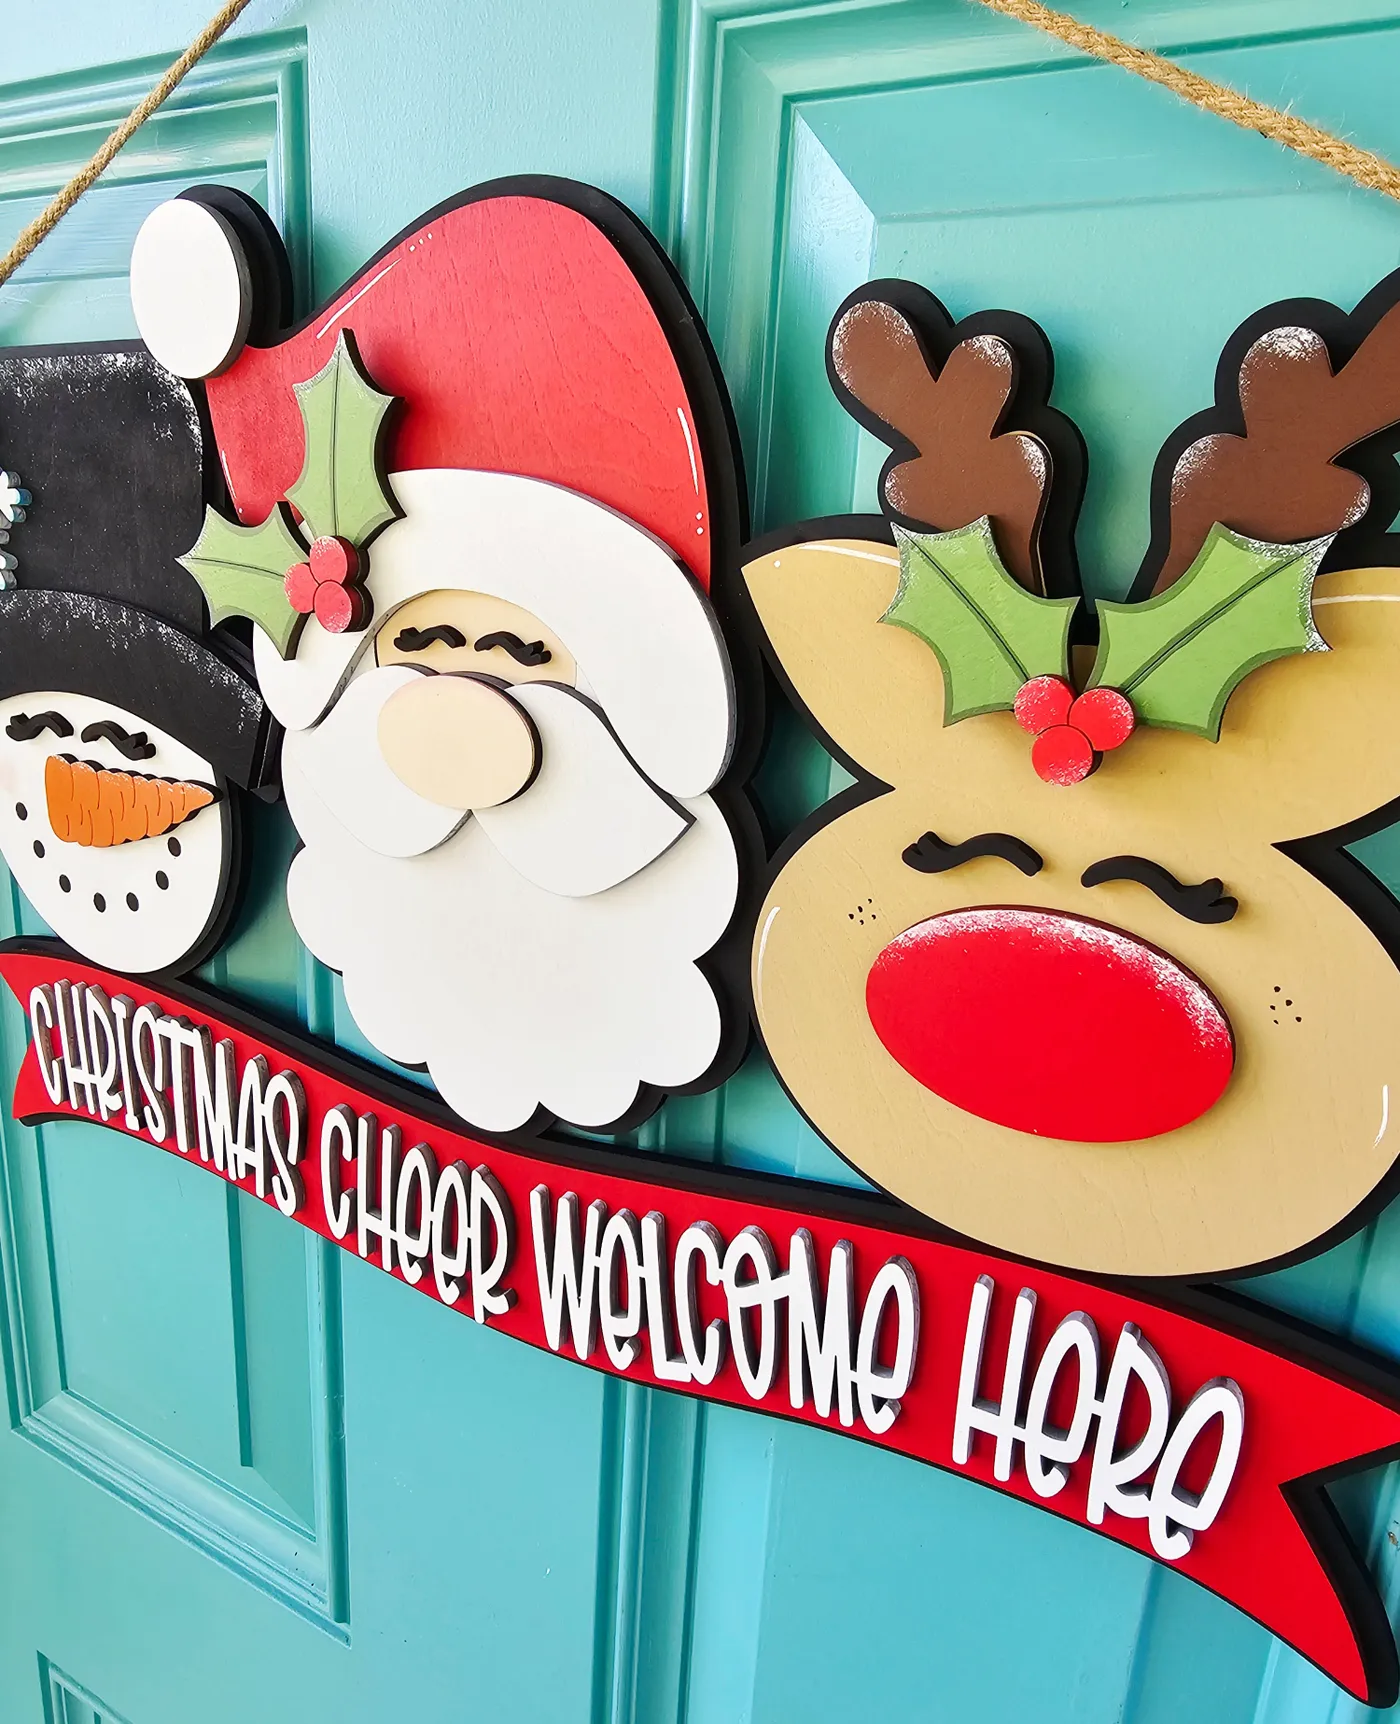
This kind of hanger wants a door at least 32 inches wide so the Santa, snowman and reindeer row doesn’t crowd the frame; on a narrow closet door it looks squeezed. It’s happiest between 42 and 58 inches from the floor, which puts the ‘Christmas Cheer Welcome Here’ banner roughly at a third grader’s eye level. If your door runs taller than 84 inches, add a second smaller hanger above to fill the empty upper third — compare with Idea #34, which stacks three nutcrackers for the same reason.
4. A Teal Classroom Door That Teaches Sign Language
Three things are happening on this teal door and they all support each other. First, contrast: cream paper snowdrifts against teal is a much smarter base than white-on-white, because the door’s own color becomes part of the design. Second, scale hierarchy — Santa is the biggest shape, the tree is medium, the hands are small and repeated. Third, repetition: those red and green hand cutouts march across the top like bunting, giving the eye somewhere to travel.
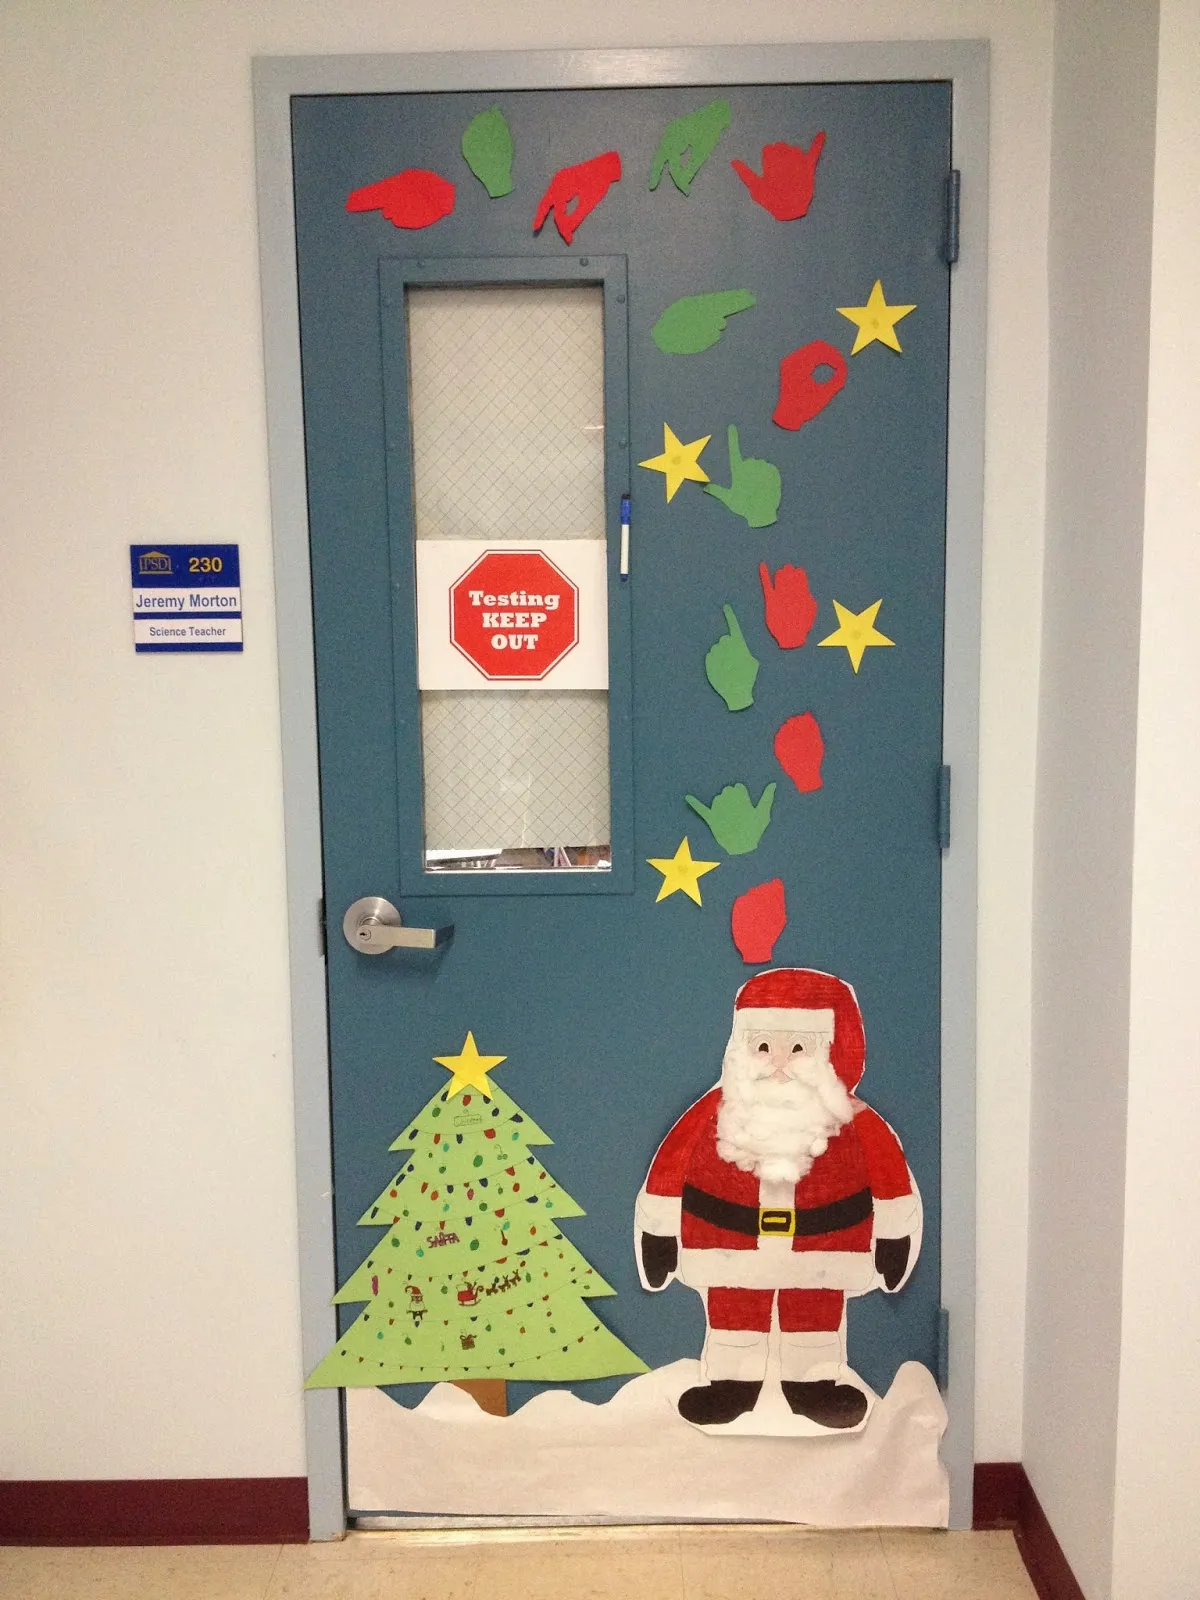
One honest caution: this door only works if the hands are actually readable. Sign language cutouts are easy to get wrong, and a hallway full of kids who sign will notice immediately. Check your handshapes against a real reference before you cut, and if you’re not confident, swap in one clear word — ‘peace’ or ‘joy’ — spelled out correctly. Also, teal plus red plus green plus yellow is a lot for a 36-inch door. If your hallway is already visually busy, drop the yellow stars first.
5. A Gnome Family Clustered On A Plank Door
The round wooden platform the two small gnomes sit on is the entire reason this door reads as a scene instead of a shelf of dolls. It creates a ground line. Without it, the big red gnome floats above two smaller figures with no relationship to them. With it, you get a family on a porch. That’s a six-dollar wood slice doing more work than the fairy lights.
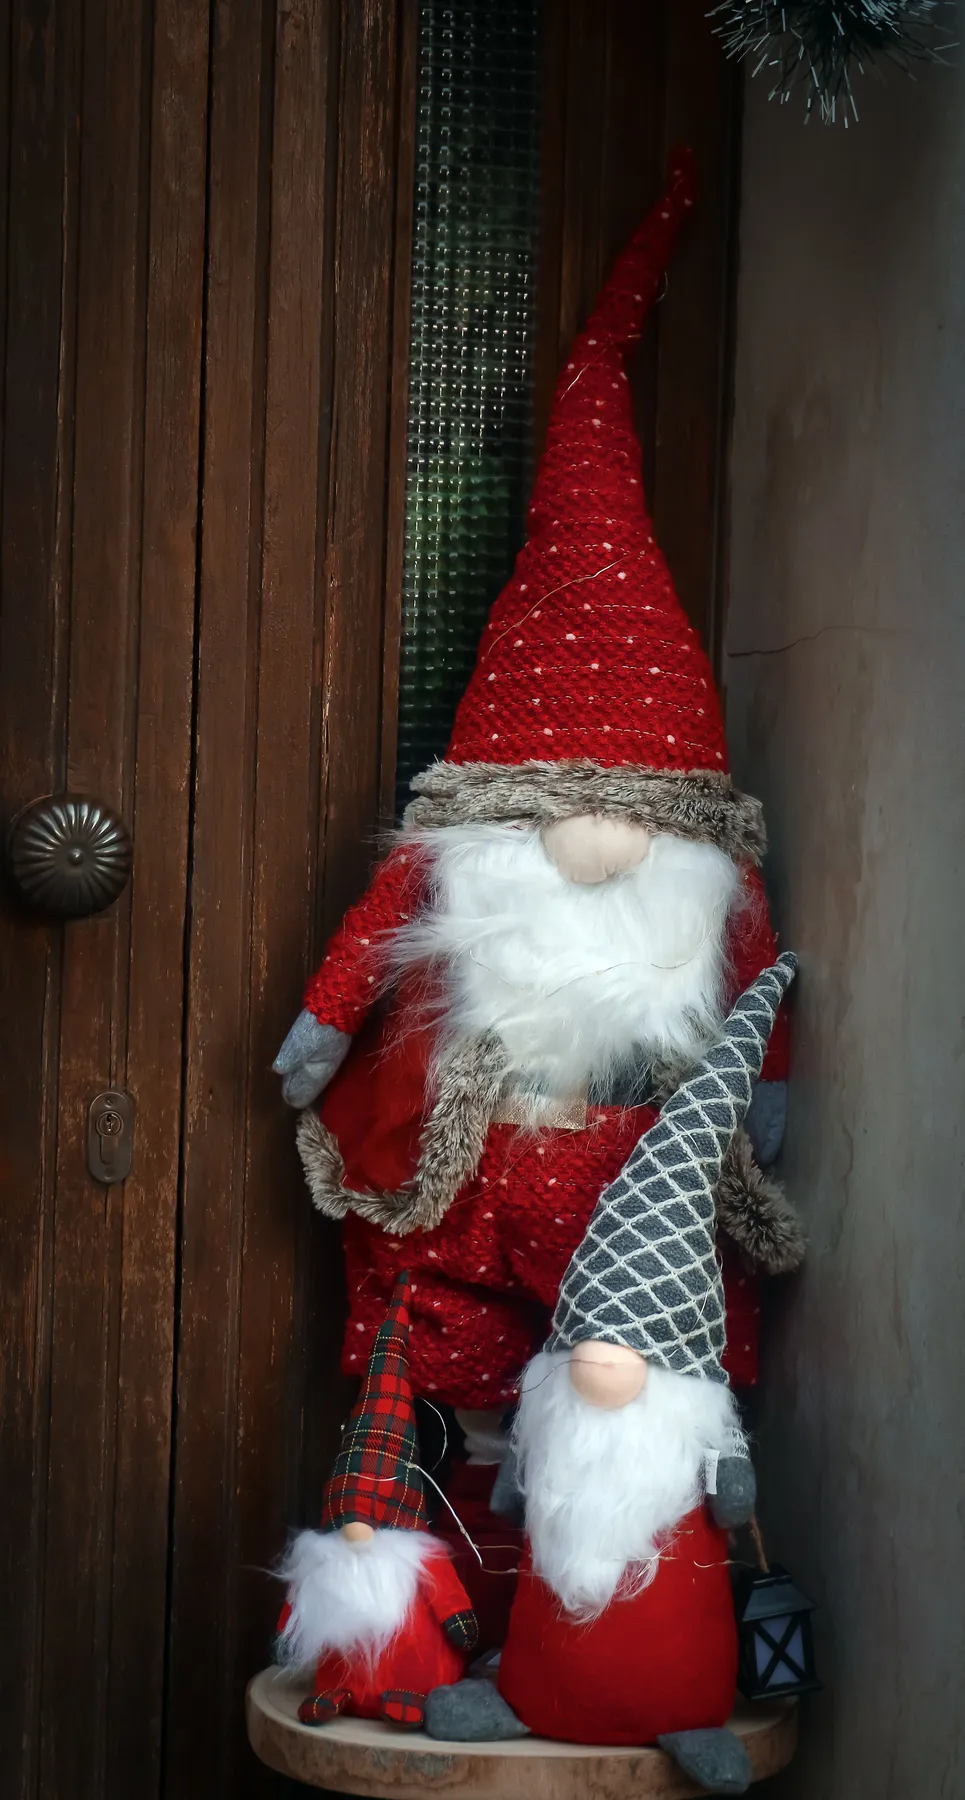
Faux fur beards and knitted hats are dust magnets, and a school hallway is a dust factory. Plan on a lint roller pass every Friday and a gentle hand-wash for the trim before you pack it away — machine washing will mat the fur permanently. The lights are the real maintenance item: battery packs last about three weeks of six-hour school days, so buy rechargeable AAs and keep a spare set in your desk drawer. Nothing kills the effect like half a beard glowing.
6. Diagonal Candy Cane Stripes With An Oversized Bow
The formula here is almost embarrassingly simple: 70% red and white stripes, 20% solid white breathing room, 10% red satin. That’s it. The diagonal angle is what keeps it from looking like a barbershop pole — horizontal stripes read as candy, vertical read as a tent, diagonal reads as motion. To swap the mood, keep the proportions and change the accent: silver instead of red satin for something cooler, or forest green if the hallway skews traditional.
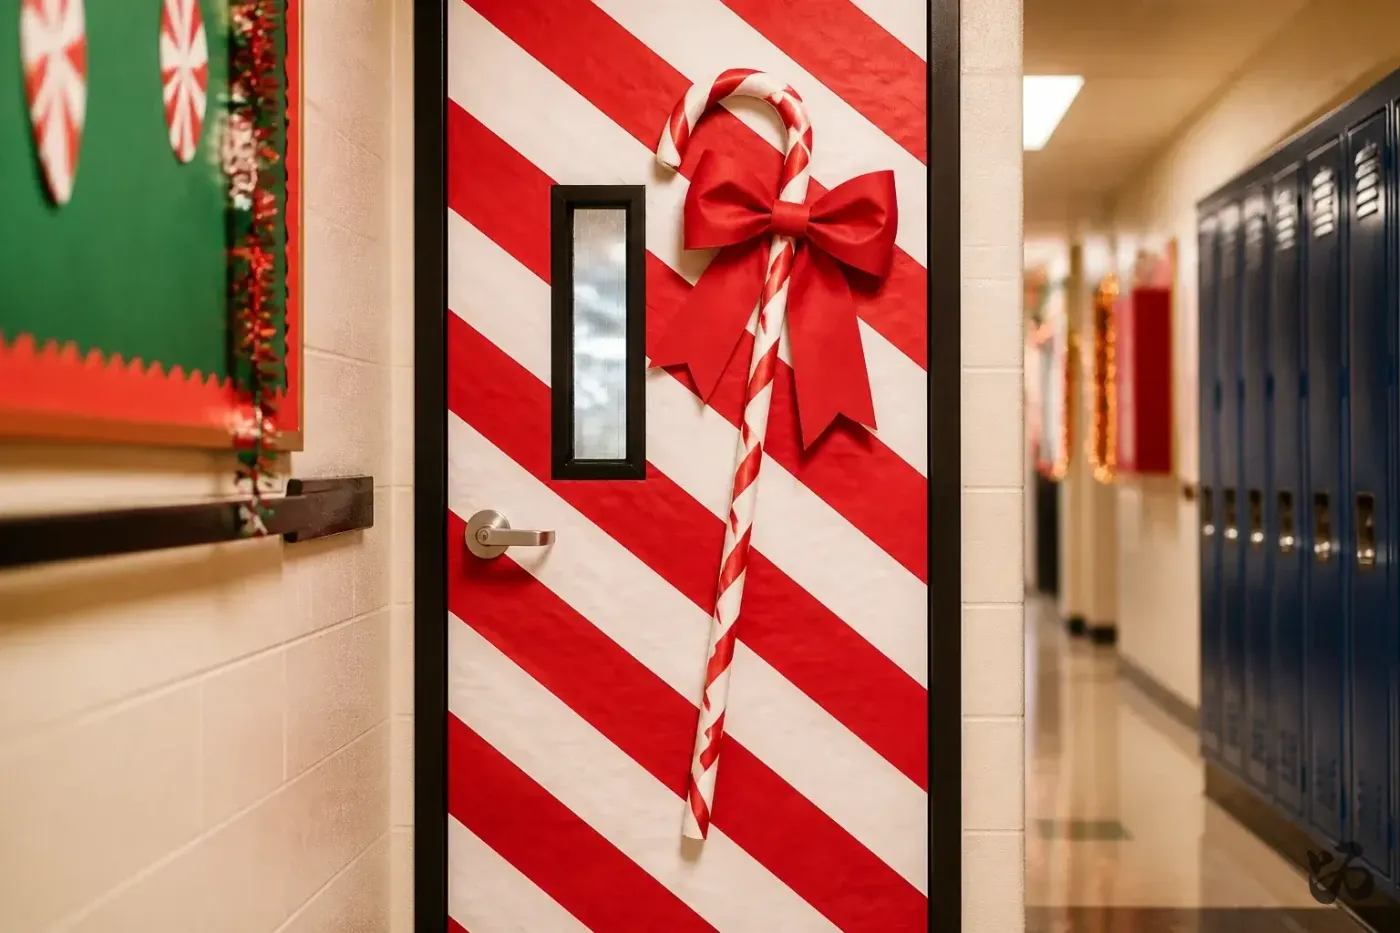
Cut your stripes on a 45-degree angle and keep them all the same width — 4 inches is the sweet spot for a standard 36-inch door, because five full stripes fit with room left at the edges. Use vinyl or wide washi tape rather than paper; paper lifts at the corners the first time the door swings. And hang the big bow in the upper third, not dead center, or the candy cane looks like it’s sinking.
7. Pink Paper Doors, A Craft Tree And A Paper Fireplace
Pink paper on a classroom door is a commitment. It shows every fingerprint, every smudge, every piece of tape that didn’t go on straight, and it fades unevenly if the hallway catches afternoon sun. Budget paper is thinner than you think — those 48-inch rolls tear at the corners within a week unless you overlap the seams a full inch and tape from behind. Go slow on install day and you’ll only do it once.
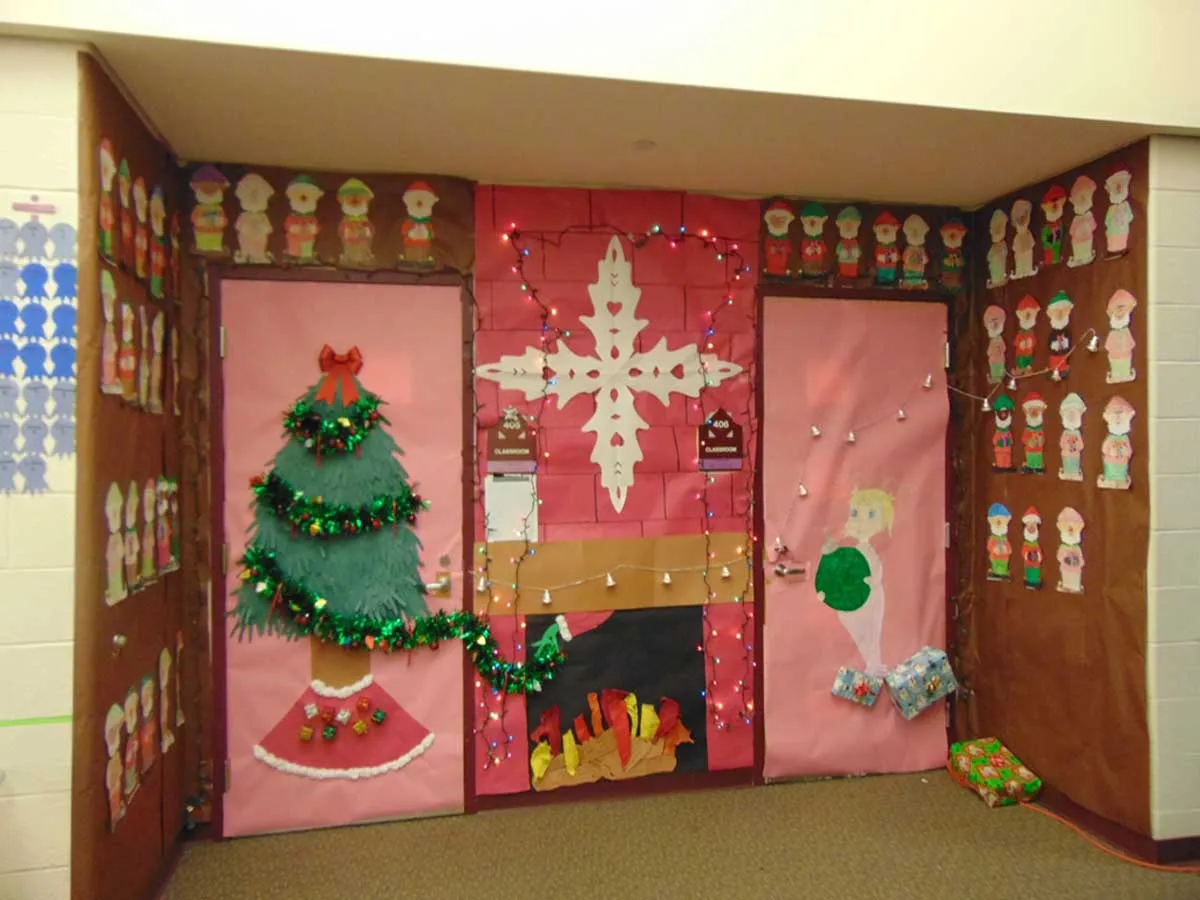
You can build this whole thing for under $40. Discount stores carry the pink and brown rolls, the paper chain strips, the bells and the string lights for the faux fireplace; big-box dollar sections cover the gift boxes. The layered green tree is four descending triangles of construction paper with tinsel hot-glued along the edges. Compare with Idea #24, which covers an entire hallway wall on roughly the same budget by going big instead of detailed.
8. Santa’s Workshop Storefront With A Striped Awning
The illusion works because of one architectural lie: that striped awning. Run it straight across the top and a flat green slab suddenly has a roofline, a storefront, a sense of depth. Everything below — the faux window with its wreath and red shutters, the ‘Santa’s Workshop!’ lettering, the candy discs — reads as signage under an awning. That’s theatre, not decoration, and it’s why kids stop in front of this particular door. The candy cane archways at the sides then frame the whole picture.
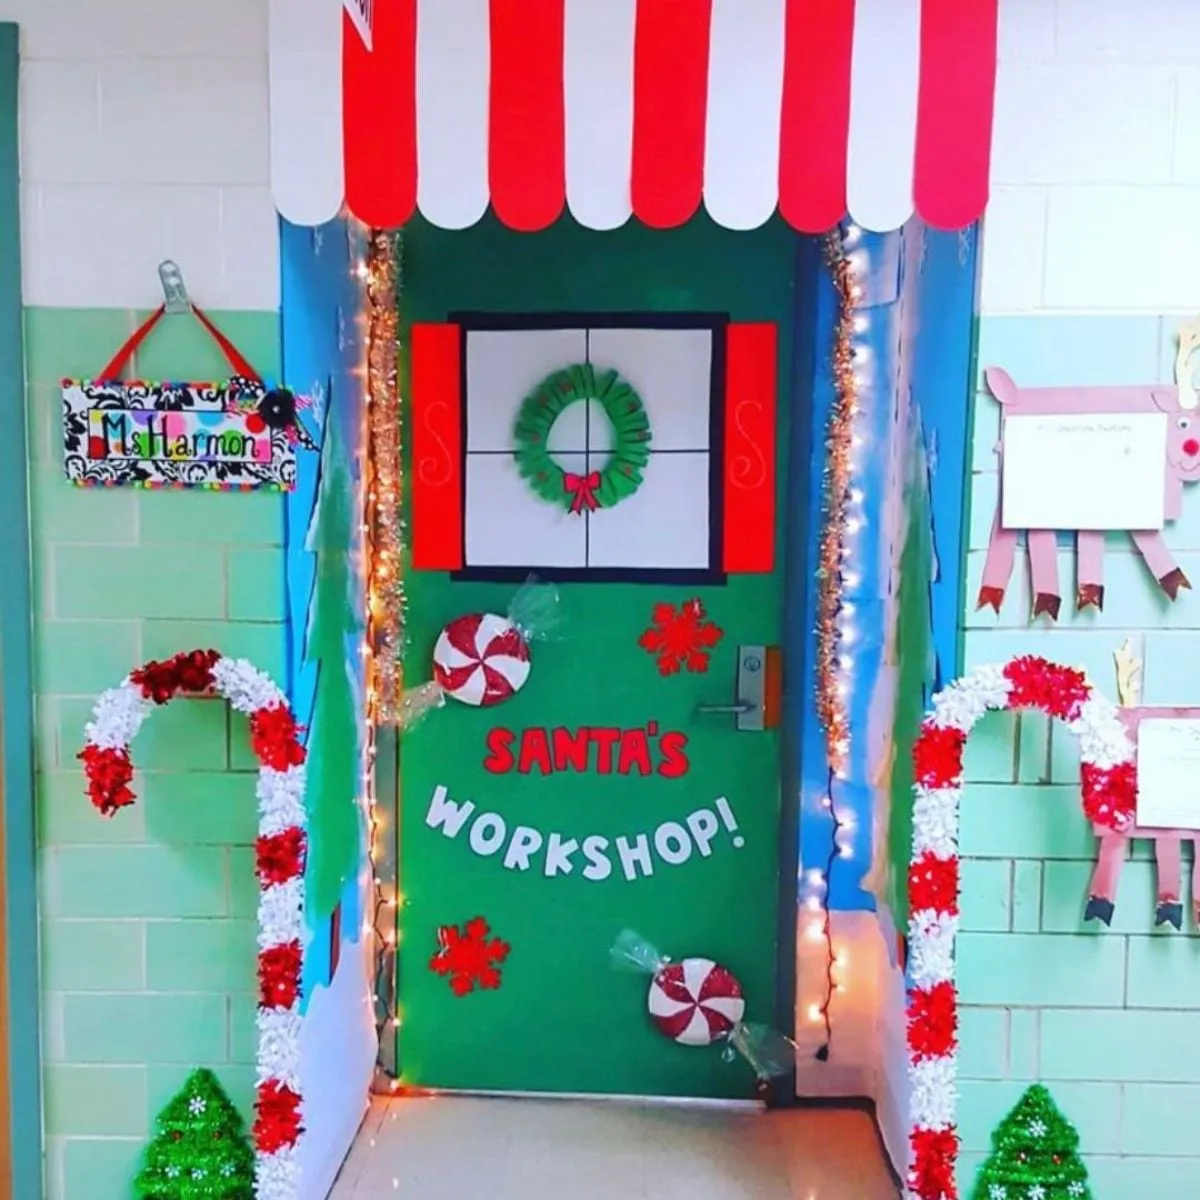
Build the awning on a foam core or cardboard strip first, then attach the whole unit with two over-the-door hooks so you’re not taping 30 individual paper pieces to a painted surface. Scallop the bottom edge with a 3-inch circle punch for a clean repeat. And check the door swing before you go wide — anything more than 4 inches of overhang on the sides catches the frame every time it opens.
9. Gingerbread House Door Wrapped In Peppermint Swirls
Brown kraft paper is the whole game here, so get that right first.
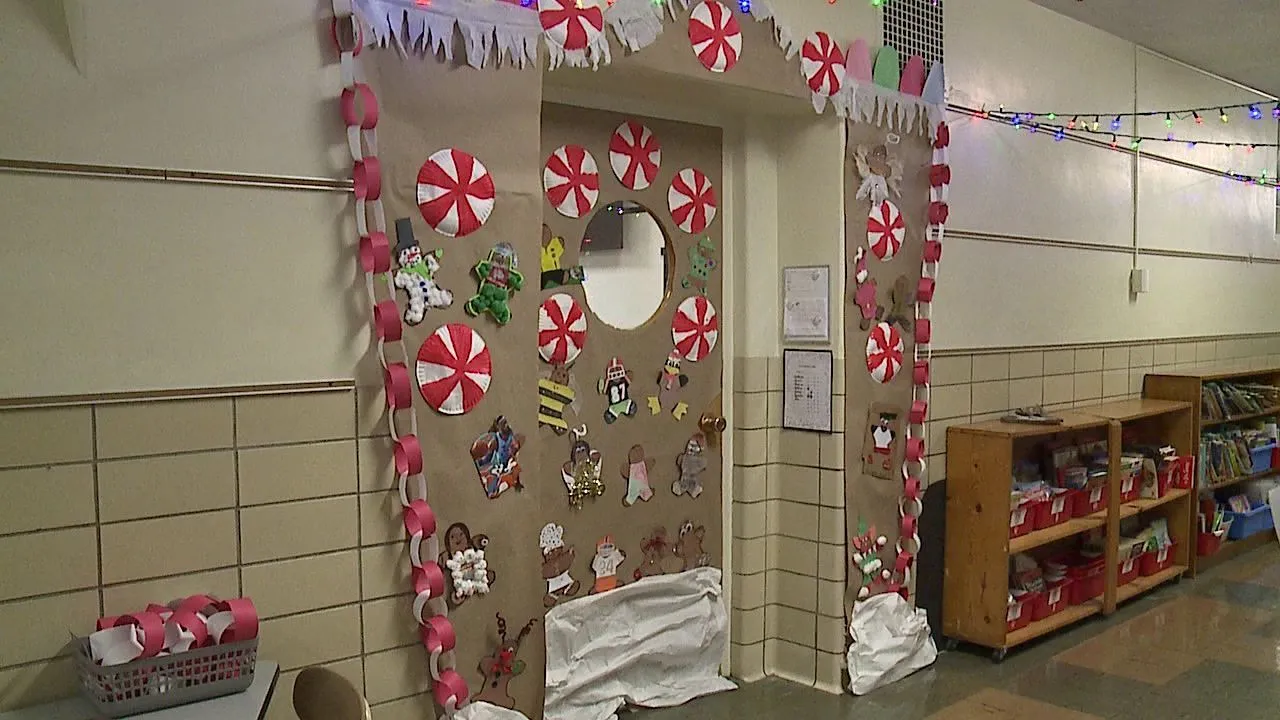
- Cover the door in kraft or butcher paper, overlapping seams by an inch and taping from the back edge.
- Cut a circle for the window and ring it with white paper ‘icing’ — a scalloped edge sells it.
- Hot-glue red and white peppermint swirls down both sides, spacing them about 6 inches apart.
- Drape the red and white paper chain in two shallow arcs, never a straight line.
- Finish with gingerbread people, snowmen and reindeer at varied heights so it reads as a scene.
About three hours with two people and roughly $25 in supplies.
The peppermint swirls are what actually make this a gingerbread house rather than a brown door with characters on it. They’re the thing your eye uses to identify the concept from 30 feet down the hallway, which is the real test for any school door. Skip them and the whole thing collapses into a craft-paper collage.
10. Baby’s Breath Wreath Against A Coral-Pink Door
The tiny white flowers are the one thing. An evergreen wreath on a coral door is already pretty — but baby’s breath, or anything that reads like it, turns a Christmas wreath into something that looks gathered that morning. It breaks up the solid green and gives the eye a texture to land on. Everything else here is deliberately quiet so this one detail can be loud.
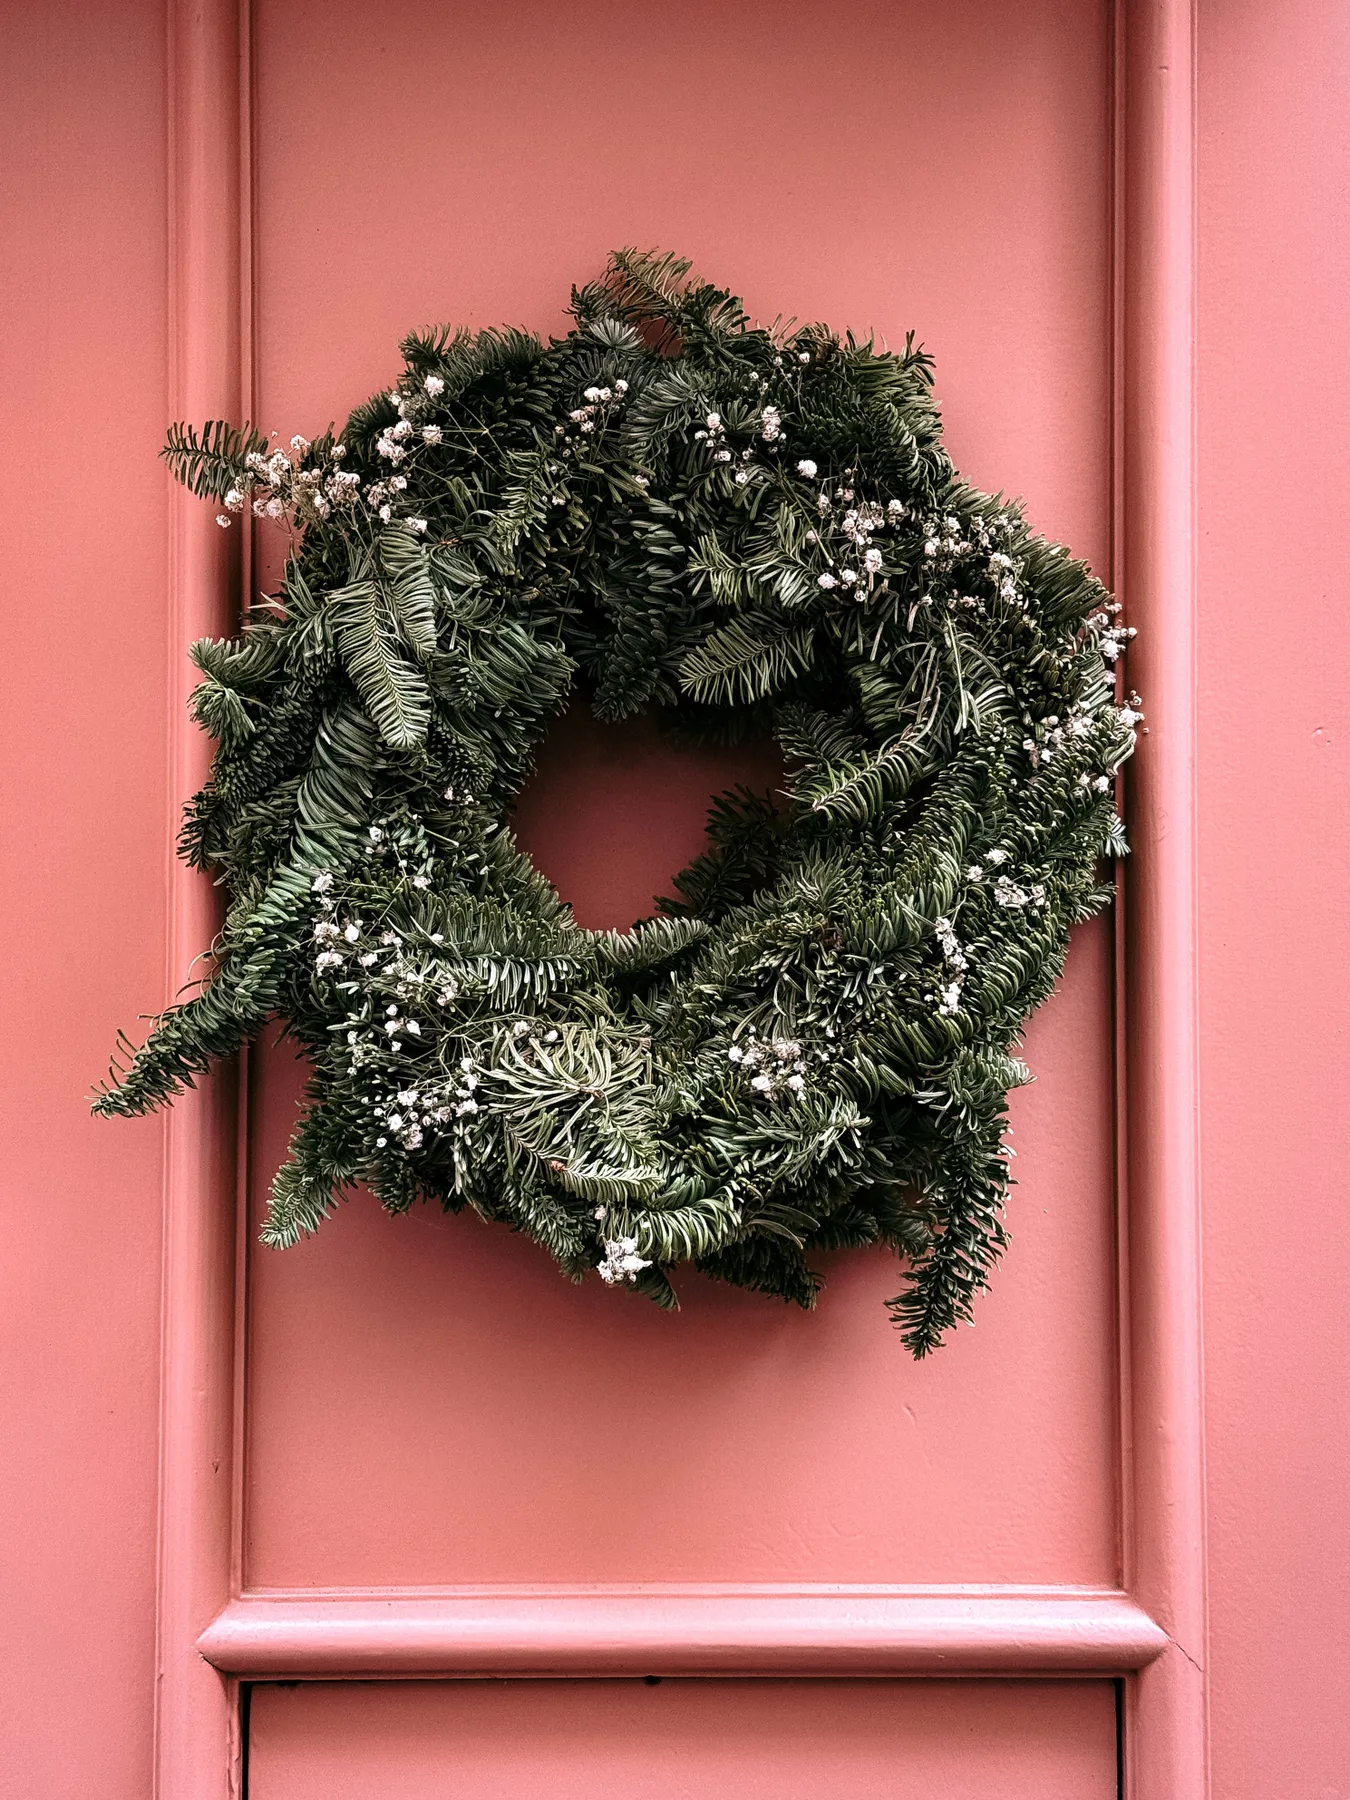
Coral, forest green and white — that’s a 75/20/5 split, with the coral doing most of the talking. It works because coral sits warm where green sits cool, so the wreath pops without needing a single red bow. Want the same effect on a different door? Keep the proportions and swap the door color: sage with cream flowers, mustard with white, or navy with pale pink. The wreath stays greenery either way; the wall does the color work.
11. A Grinch Fireplace Door Beside A Paper Tree Door
Two doors, two concepts, one hallway — and neither needs a big budget. The faux brick fireplace is a roll of brick-patterned paper plus a cardboard mantel built from a shipping box. The tree door is green butcher paper, paper ornaments and a gold bow from the gift wrap aisle. Both doors land around $45 total, and the student-faced elf cutouts cost nothing but copy time.
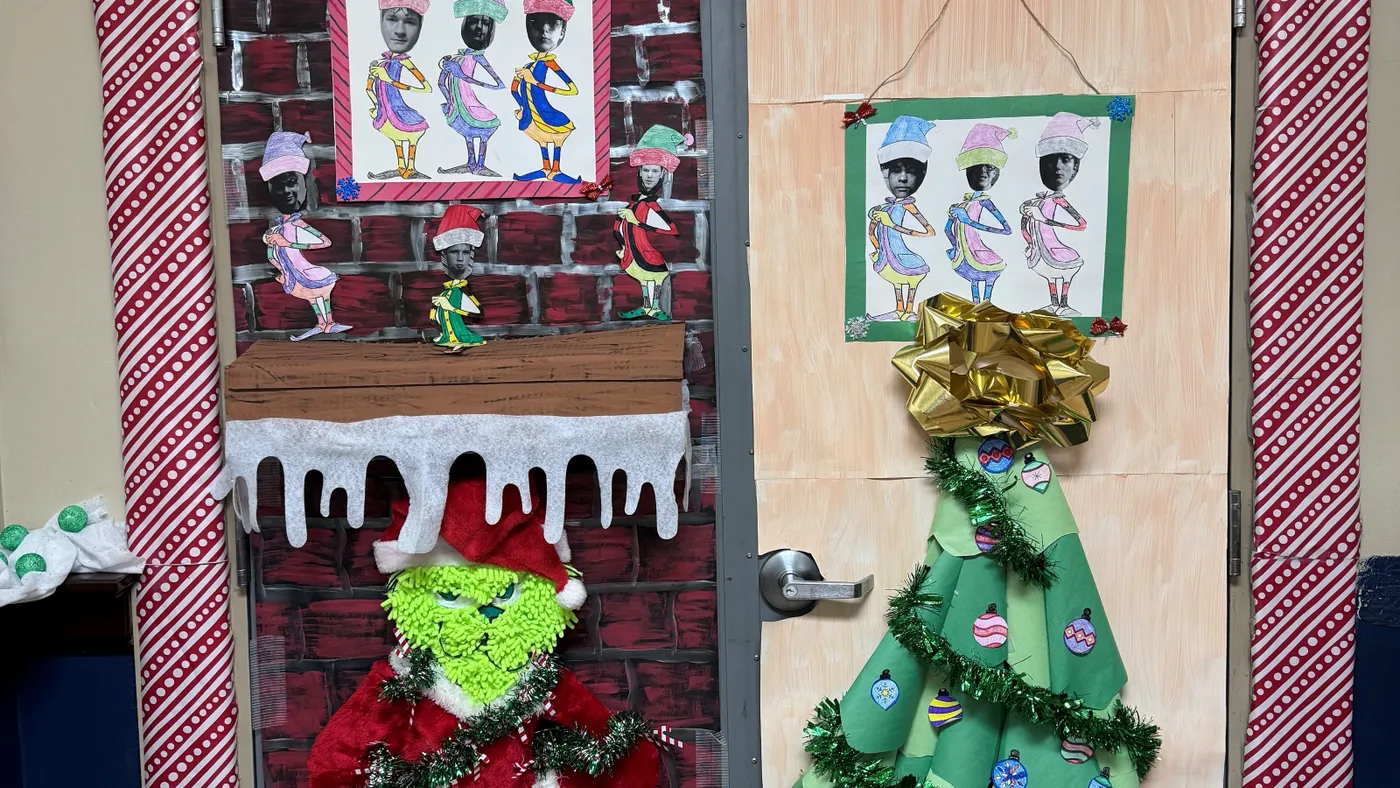
What makes the pairing work is contrast of energy. The fireplace door is warm and narrative — a scene with characters tucked in. The tree door is graphic and simple — one big green triangle with ornaments and a bow. Put two busy doors side by side and the hallway feels chaotic; put one busy and one calm together and each gets more attention. That’s a real design principle, not a happy accident.
12. Student Faces Turned Into Elves And Reindeer
Using student photos is the fastest way to make a door matter to the kids in your room — and the fastest way to create a problem if a family hasn’t given permission. Check your school’s photo policy before you print anything. Also: tape photos inside a paper frame rather than directly on the door, so you can pull them down at the end of the month without tearing faces off. Keep the tallest figures near the center or the composition tips sideways.
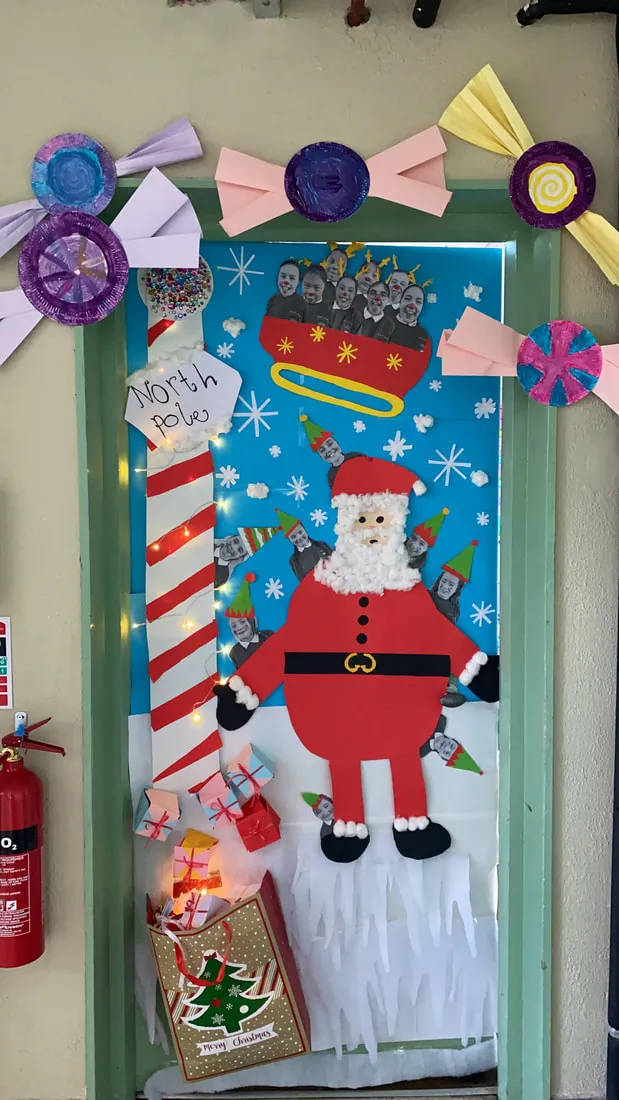
This door wants a full 36-inch width and at least 80 inches of height, because you’re stacking a Santa cutout, a snowflake sky, an icicle base and a North Pole pole with lights. On a shorter door, drop the icicle row and keep the gifts — the bottom third is the most droppable zone. Compare with Idea #32, a single-figure design that works on narrow glass-paneled doors where this one wouldn’t.
13. A Giant Red Ribbon Tied Around A Navy Door
The giant ribbon-and-bow door is quietly having a resurgence, and the reason is practical: it’s the one Christmas treatment that works on a beautiful door instead of covering it up. No paper, no tape, no residue. Navy plus red is the current version of the classic — a shade moodier than the candy-apple reds of a few seasons ago, and it photographs beautifully in low winter light.
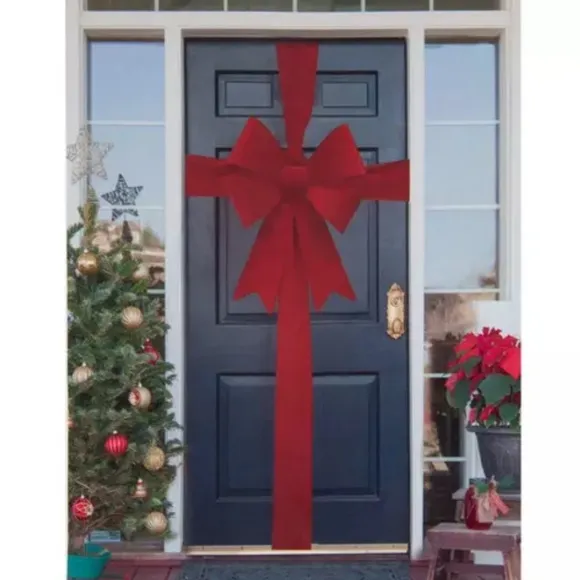
Use a fabric ribbon at least 6 inches wide and wire-edged, or the bow won’t hold its shape past day two. Anchor the vertical run with clear adhesive strips every 12 inches and let the horizontal band sit slightly below center — it reads more like a wrapped package that way. One 9-foot roll of 6-inch ribbon covers a standard door with enough left over for the bow.
14. Candy Cane Prop And Stacked Gifts On A Dark Door
The oversized candy cane leaning at the door is doing something subtle: it’s the only element in the composition that isn’t symmetrical. The gift stack is boxy, the sign is horizontal, the bow is centered — then this big diagonal stripe cuts across it. Without the candy cane, this door is a tidy arrangement. With it, it’s a display. Lean it at about 15 degrees and let the base rest past the door’s edge.
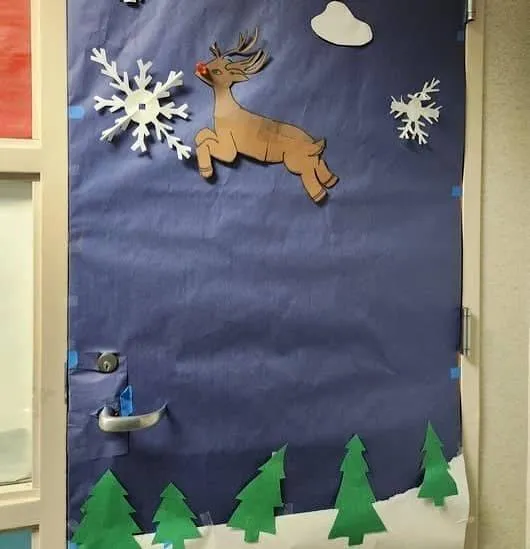
Everything here is buildable for under $50. The candy cane prop is a pool noodle or cardboard tube wrapped in red and white tape. The gifts are real boxes wrapped in last year’s paper, stacked three high with the biggest at the bottom. The greenery is a $10 garland and the bow comes from a single yard of ribbon. Compare with Idea #28 for a candy cane treatment that lives on the frame instead.
15. A Fabric Tree Hung With Periodic Table Ornaments
The tree shape is the only hard part; everything else is assembly.
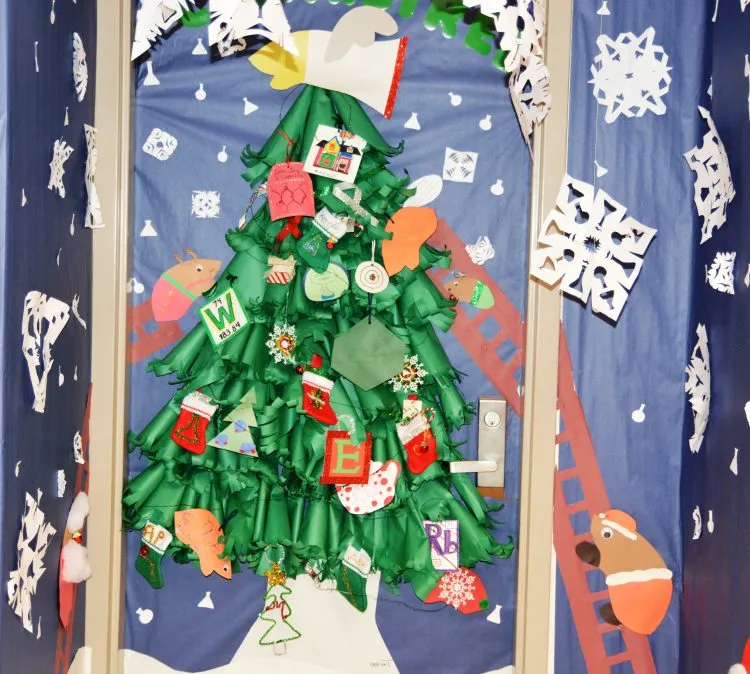
- Roll three or four sheets of emerald felt or craft paper into loose cones, then flatten them slightly.
- Stack them in a triangle, widest at the bottom, and hot-glue the joins from behind.
- Pin ornaments on with T-pins instead of glue so you can rearrange after the kids help.
- Layer the periodic table element cards near the middle — that’s the visual payoff.
- Back everything with light blue paper and scatter white snowflakes above and beside the tree.
About two hours and $20 if you’re using classroom supplies you already have.
Emerald, sky blue, navy and a shot of red — roughly 55% blue, 30% green, 15% red and white. The blues do the calm work and let the busy middle read as decoration instead of clutter. Swap the element cards for book titles or vocabulary words and the structure still holds.
16. Grow-A-Heart Grinch Door With Red Heart Cutouts
Heart cutouts with lines across them are meant to be written on, which is lovely — and a liability. Kids will want to add their own, and once three hearts are taped on crookedly the whole arrangement starts to slide. Decide in advance whether the hearts are yours or theirs. If they’re theirs, mount a small basket of blanks beside the door and let it get messy. That’s the better version anyway.
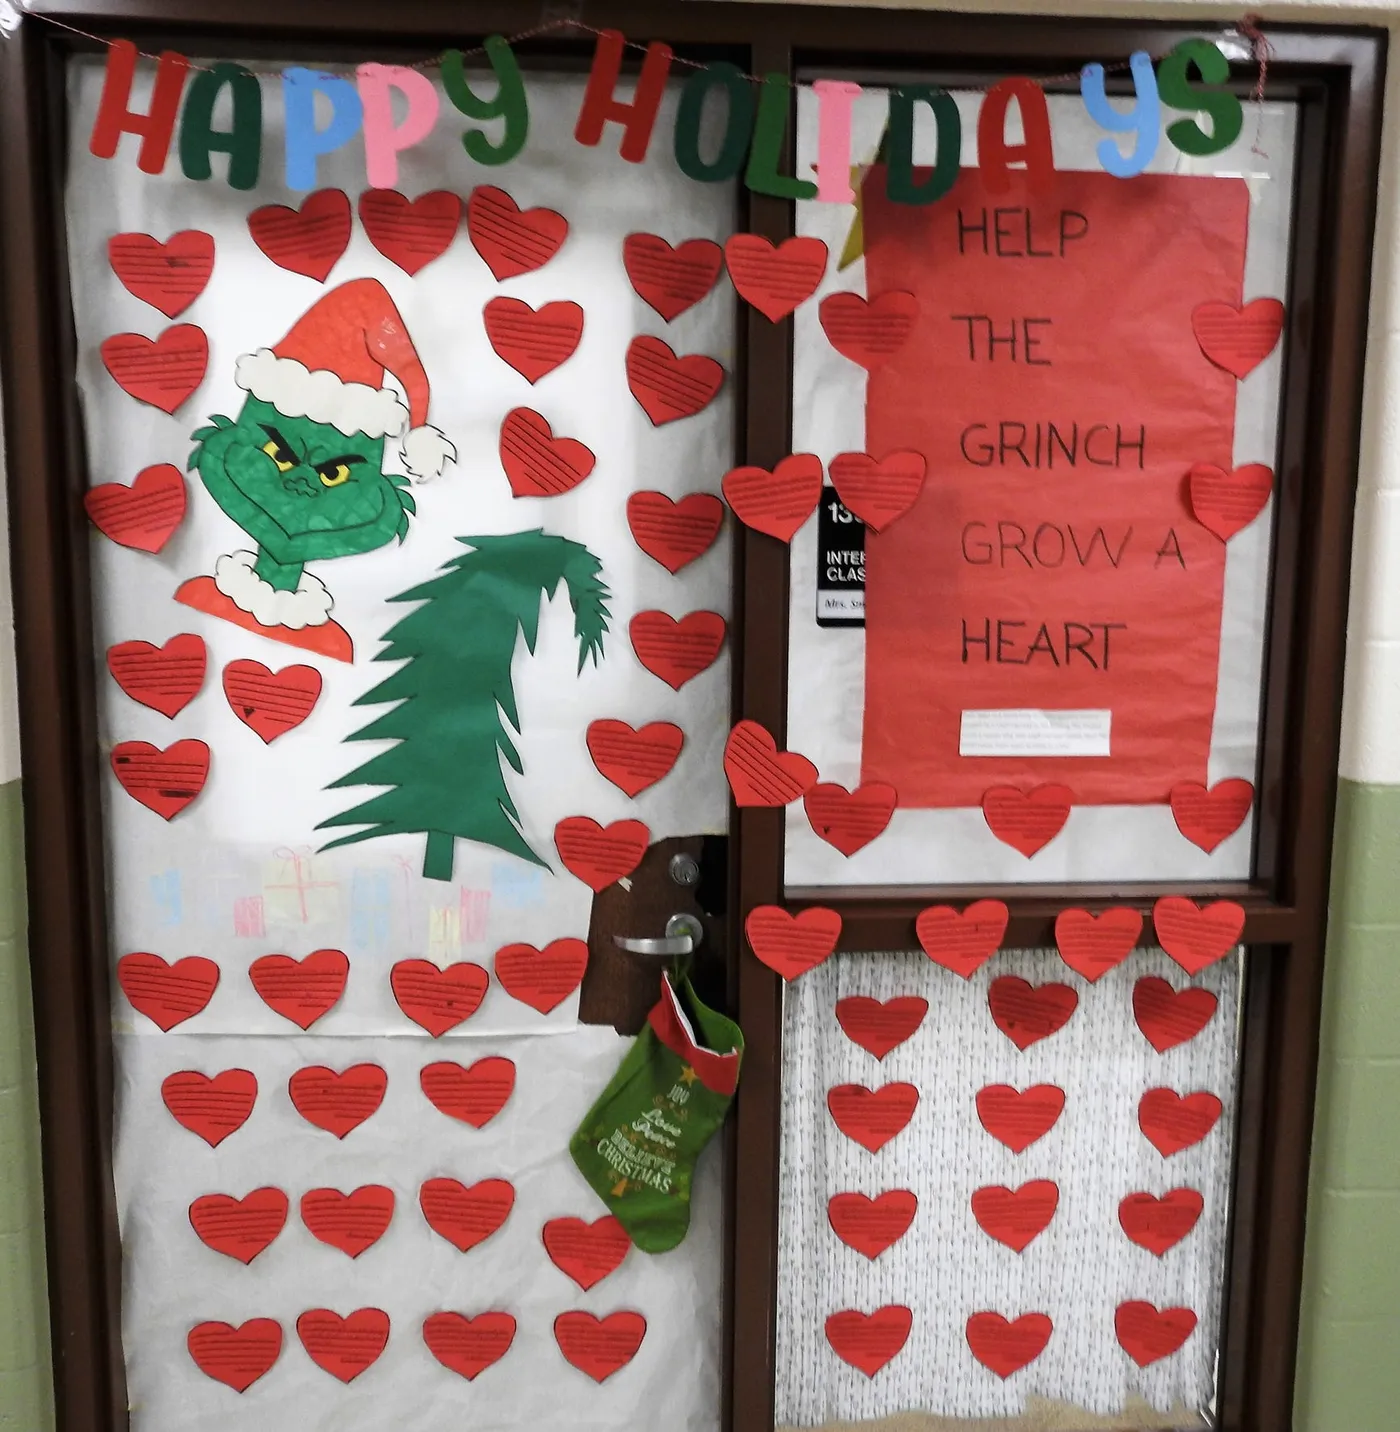
The scale relationship is what makes this readable from the end of the hallway. The Grinch is roughly twice the height of the tree, the hearts are small and numerous, and the banner is a thin horizontal anchor at the top. Big, medium, small, repeated — that’s the whole system. Note also that the background is white, not green, which keeps the green cutouts from disappearing into the paper.
17. Cascading Ribbons Beneath A Red And Gold Bow
Cascading ribbon looks effortless and is actually a math problem. Cut your ribbons in graduated lengths — 18, 24, 30 and 36 inches — and attach them behind the bow in alternating colors so no two neighbors match. Pin the bow itself at the top center of the door, not on the frame, or the whole cascade shifts when the door moves. A staple gun with 1/4-inch staples into a foam-core backing holds everything in place.
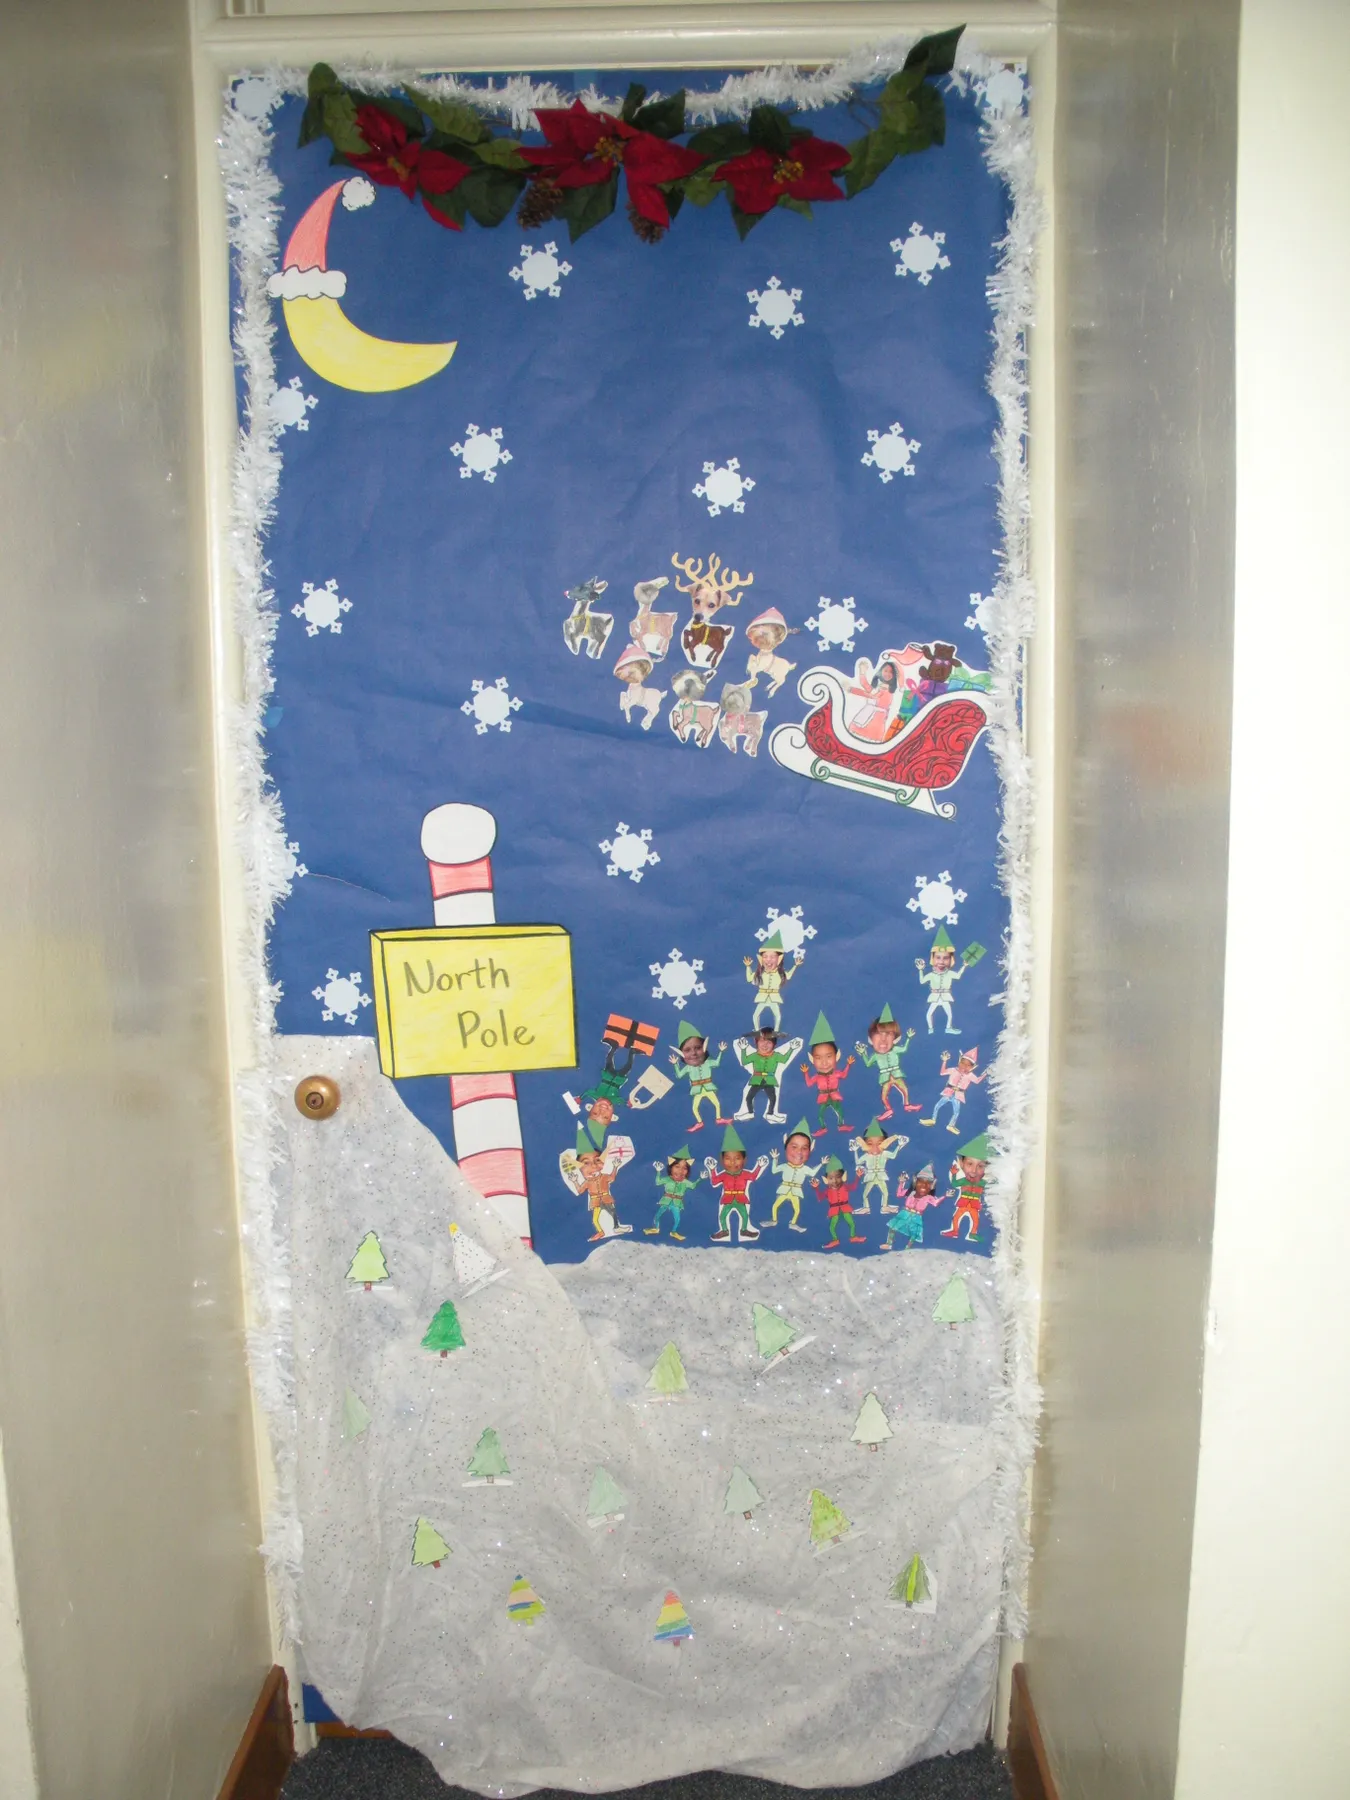
This is a high-maintenance door, and it’s worth saying so. Ribbon frays, gold balls tarnish, and fresh garland drops needles for a week before it settles. Mist fresh greens every other day and expect to replace them after about three weeks. Faux garland with a wired spine lasts for years and looks nearly identical from hallway distance — that’s the trade most schools make.
18. Let It Snow Letters Over A Faux Wood-Plank Door
Here’s the formula: 50% wood-tone base, 30% white and blue lettering, 20% snowman and snowflakes. The wood-plank paper is what makes this door feel different from every white-paper door in the building — it gives the whole thing a cabin texture. Swap the wood tone for chalkboard paper and the same layout reads as a cozy classroom instead of a ski lodge. Keep the lettering big and centered either way.
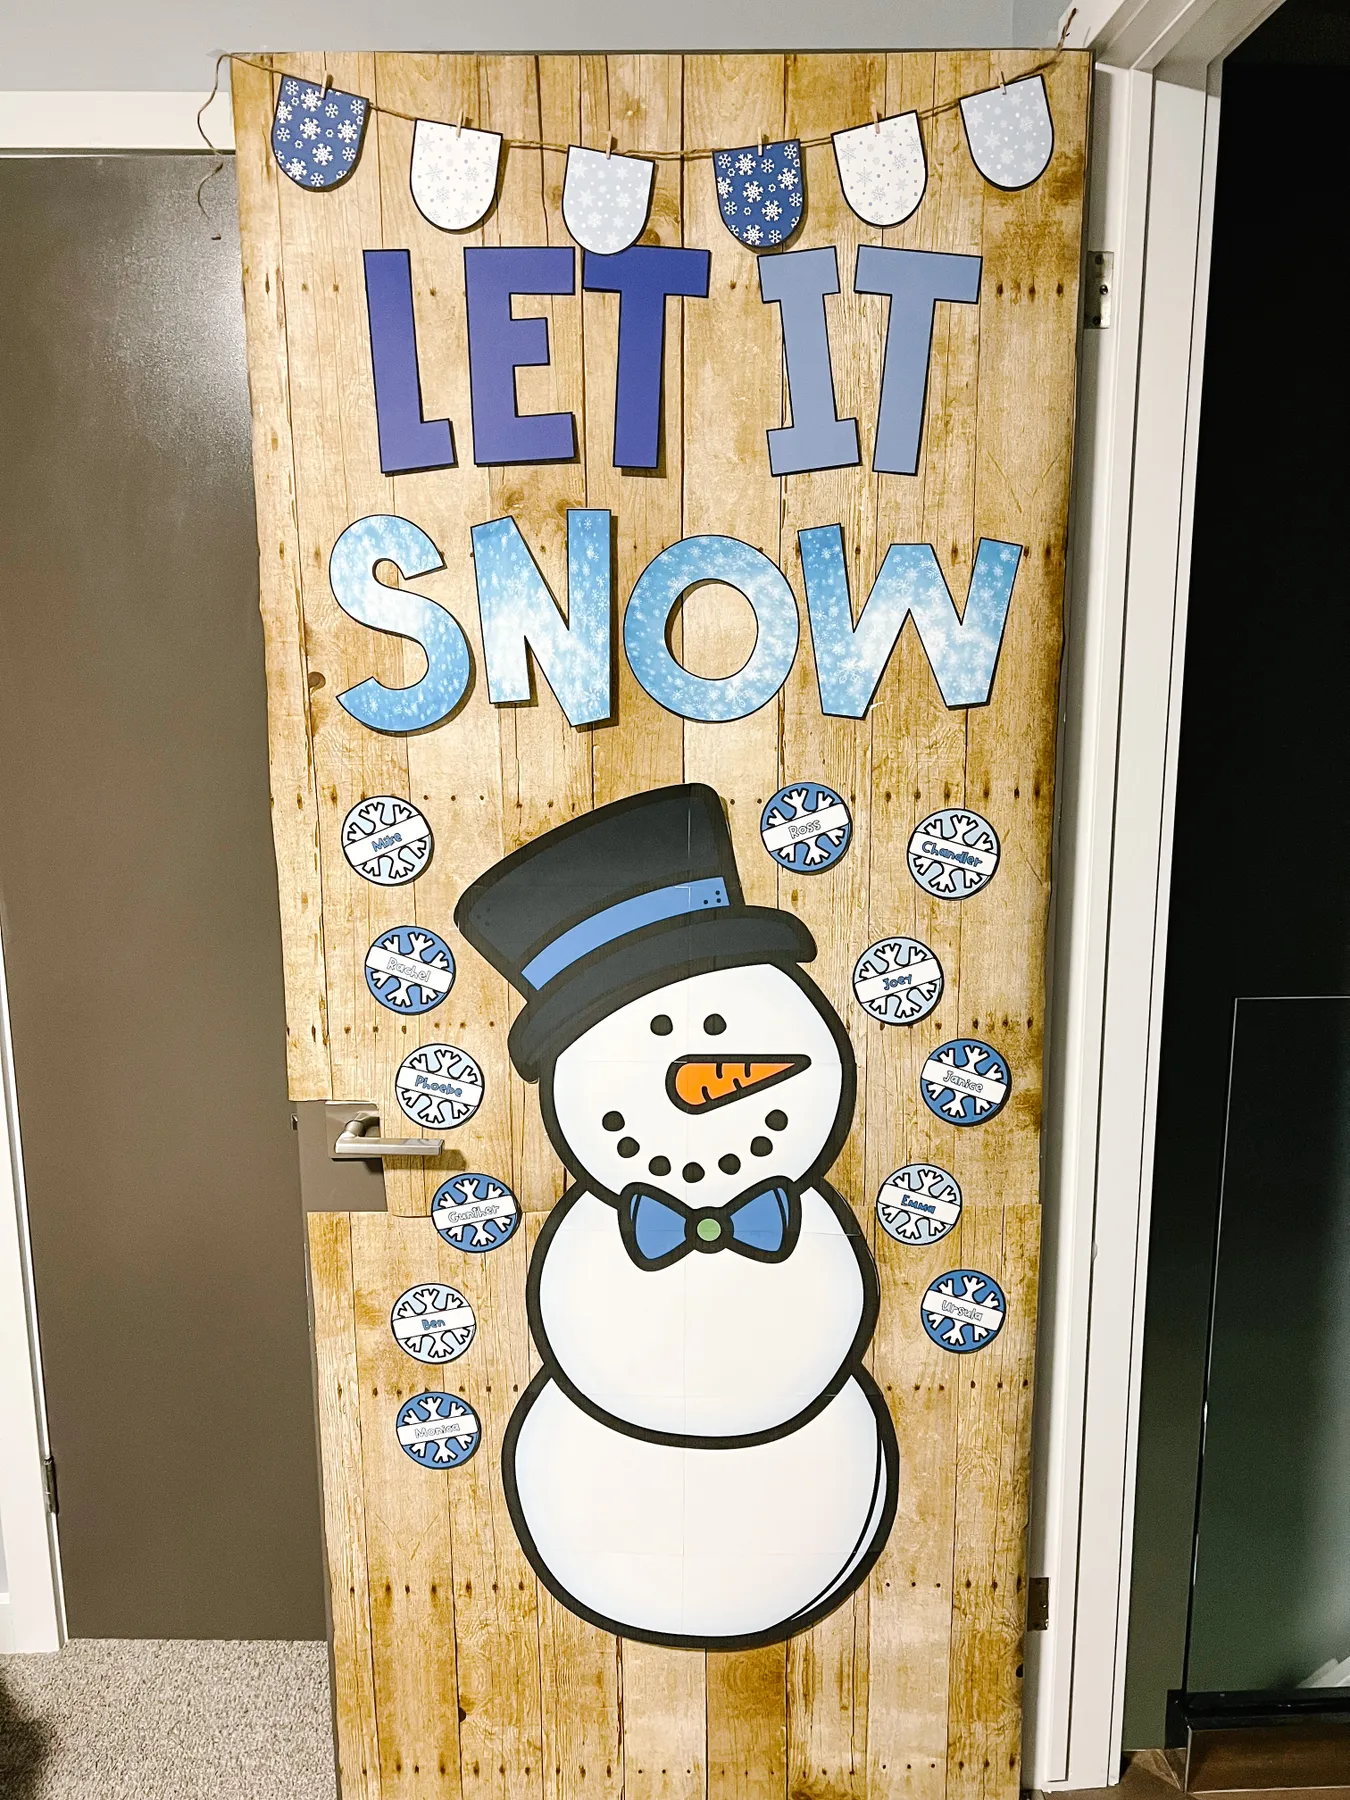
The named snowflakes are the secret weapon. Every circle with a kid’s name on it gives that kid a reason to drag their parents down the hallway at pickup. It’s the same psychology as a family photo wall — people look for themselves. Cut them 6 to 8 inches across, write names in marker rather than printing, and scatter them so the sizes vary.
19. Twin Wreaths And Lit Topiaries On Double Doors
Two wreaths, one garland, two lit topiaries — this looks expensive and mostly isn’t. Faux evergreen wreaths run $12 to $20 each at big-box stores, the garland is another $15, and the topiaries can be built from $8 cone forms wrapped with a strand of battery lights. The red bows are ribbon, not pre-made. All in, under $90 for the entire entry, and the wreaths come back out next December.
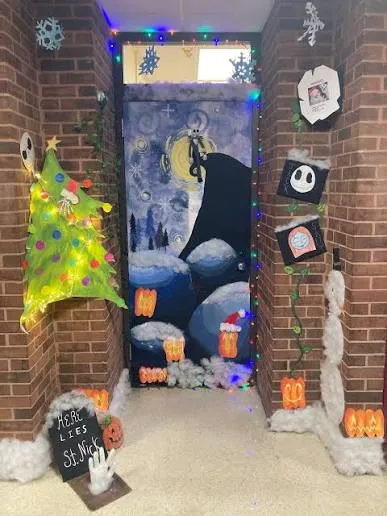
This is a wide-entry treatment: it needs at least 6 feet between the two doors and a ceiling height of 8 feet or more for the garland swag to clear head height. On a single door, use one wreath and skip the swag — a garland dipping below 78 inches gets bumped by every adult who walks through. Keep topiaries under 5 feet so they read as decoration, not obstacle.
20. A Paper Snowman And Glitter Snowflakes On Wood
The shape is easy once you know the order.
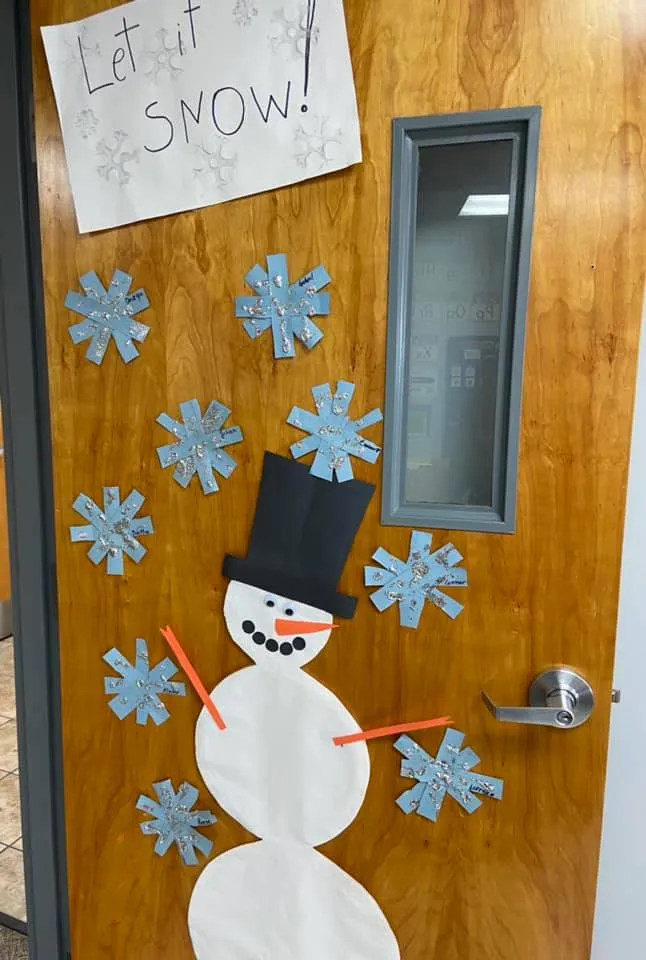
- Fold white cardstock in half and cut a wide snowman body — two circles joined at the waist.
- Cut the top hat from black paper and glue it so it overlaps the head by half an inch.
- Add a triangle carrot nose in orange and a curved smile in marker.
- Hand-cut six to eight snowflakes from light blue paper; a coffee filter works in a pinch.
- Brush the snowflakes with silver glitter glue and let them dry flat before hanging.
Twenty minutes, and most of it is drying time.
Paper on a wooden door is both the most forgiving option and the least. Forgiving because it’s cheap and easy to replace; unforgiving because tape residue on varnished wood can lift the finish. Use painter’s tape or removable putty, test a hidden spot first, and do the glitter step at home rather than in the classroom.
21. A Plaid Bow Tied To A Brass Knocker
A plaid bow this size needs structure or it flops. Cut two 18-inch strips and two 12-inch strips, fold each into a loop, and staple the centers together — then wrap a short piece around the middle to hide the staples. Wire-edged ribbon in a 2.5-inch width holds its loop shape best. Tie it around the knocker rather than through it, so the hardware still works and nobody has to untie anything to knock.
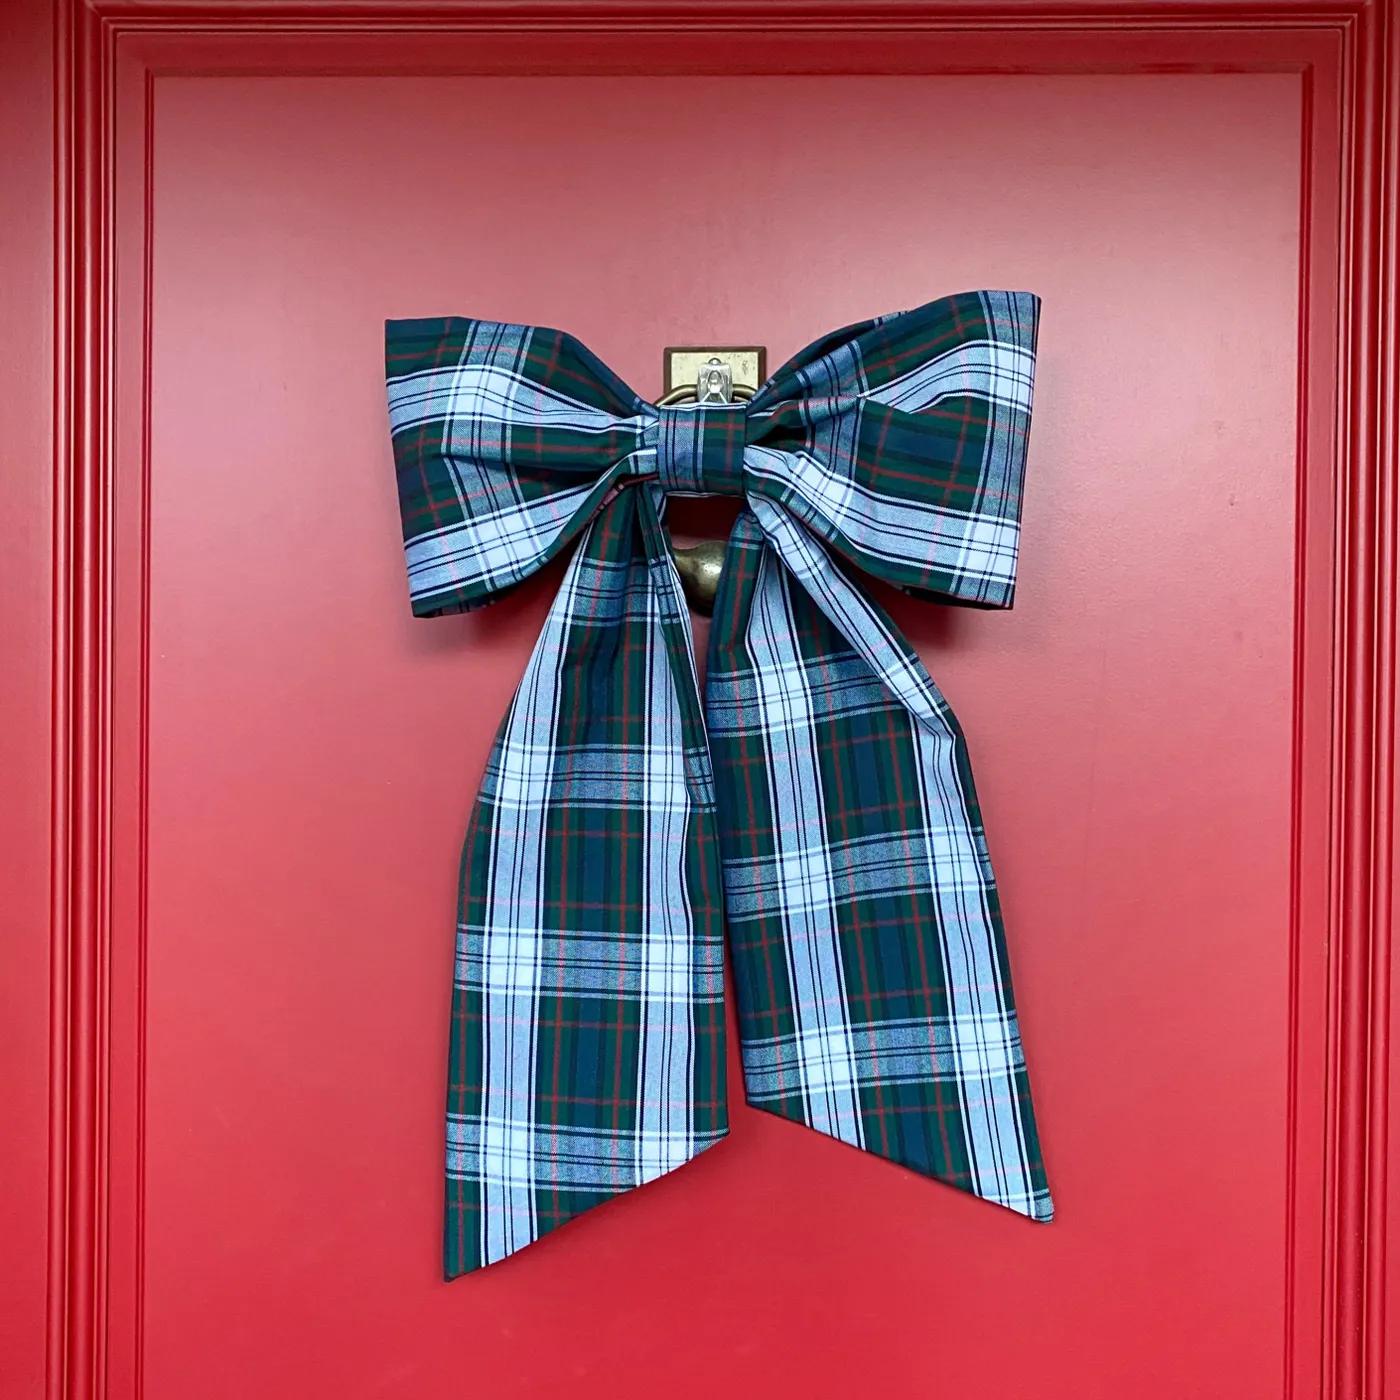
The whole design relies on color temperature: bright red door, dark green plaid, white and light blue lines. Red and green are complementary, so they vibrate slightly against each other, and the white in the plaid gives the eye a place to rest. Notice there’s nothing else on this door — no garland, no sign. One gesture, done confidently, beats five decorations negotiating for space.
22. A Brick Paper Fireplace Door With Mini Stockings
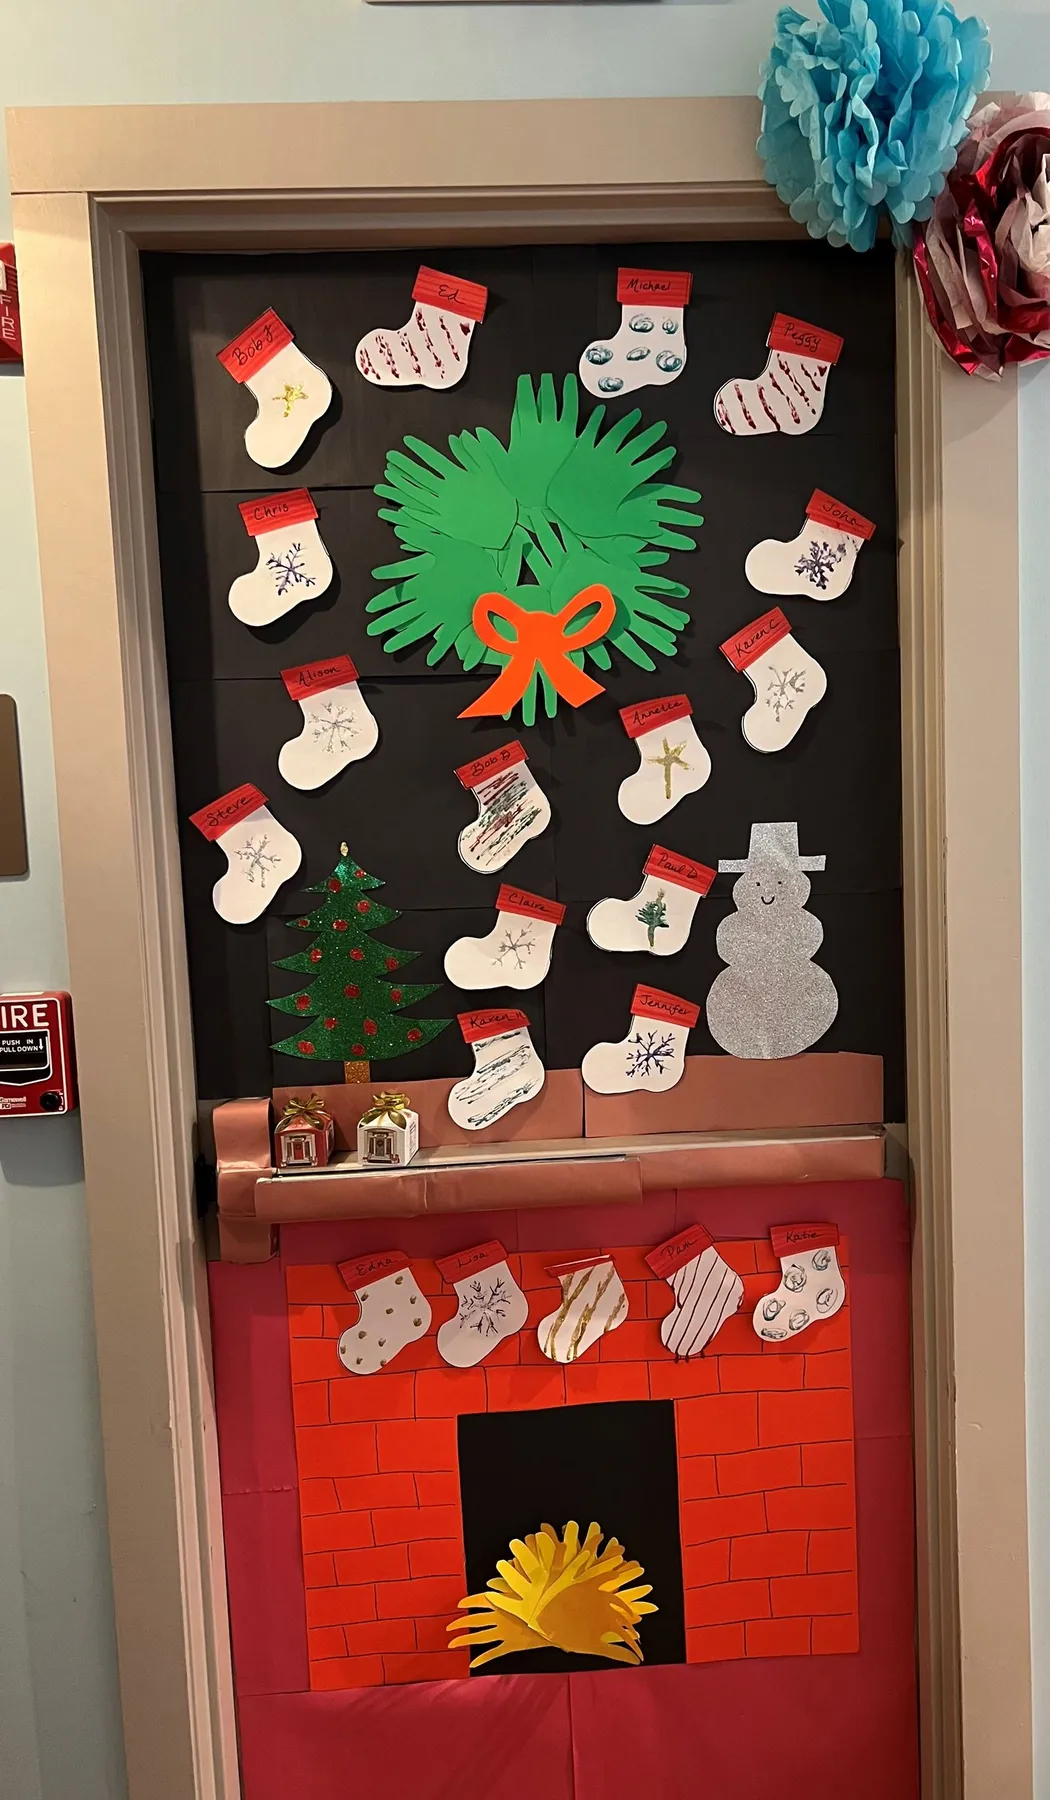
The tissue-paper flames are the detail that makes this door. Anyone can draw bricks on paper. But a faux fire with layered orange and yellow tissue catching the hallway light turns a flat door into a room you want to walk into. It’s also the cheapest part — about $3 of tissue paper and a glue stick. Build the hearth first, then work upward to the mantel, wreath and train border.
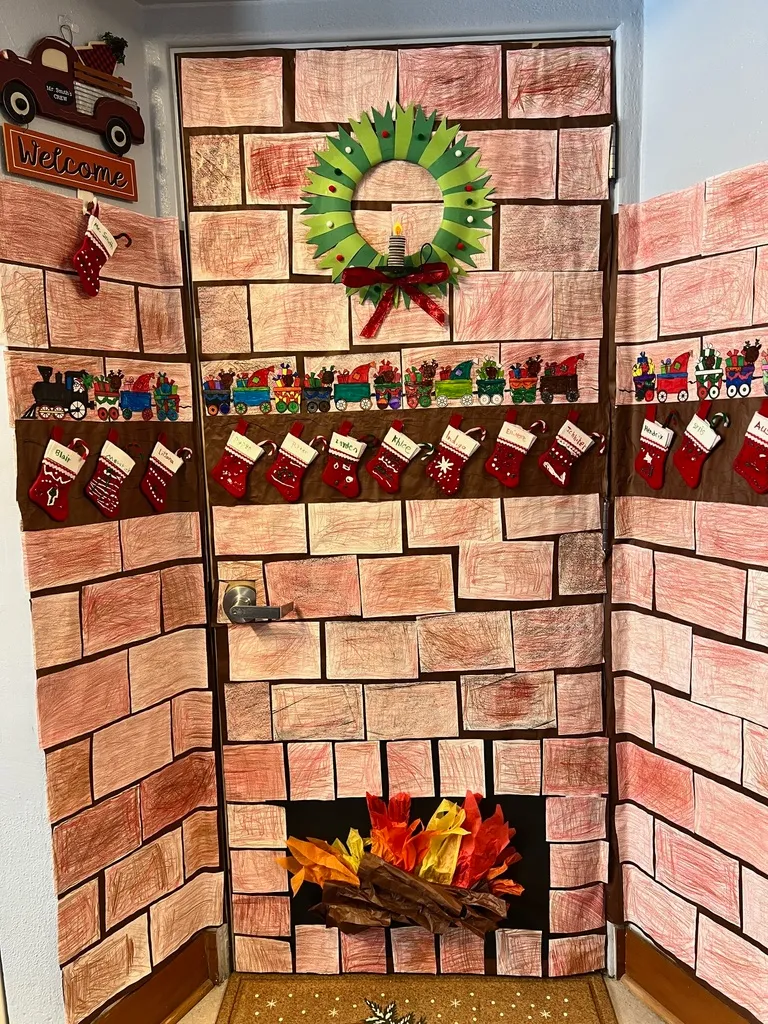
Brick-pattern paper runs about $10 a roll and covers one door. The mini stockings are cut from red felt squares at roughly a quarter each. The wreath is a paper plate with the center removed, wrapped in green strips, with a paper candle tucked in. Total project: under $30, plus whatever lives in the supply closet already.
23. Photo Ornaments On A Tree Door Beside The Grinch
This one’s for a wide door with wall beside it — the tree needs a full 36 inches, and the Grinch plus his gift pile wants another 30 inches of wall. It works in a hallway with at least 5 feet of clearance in front, because kids will stop and crowd. If you only have a standard door and no adjacent wall, see Idea #16, which keeps the Grinch concept contained on a single door.
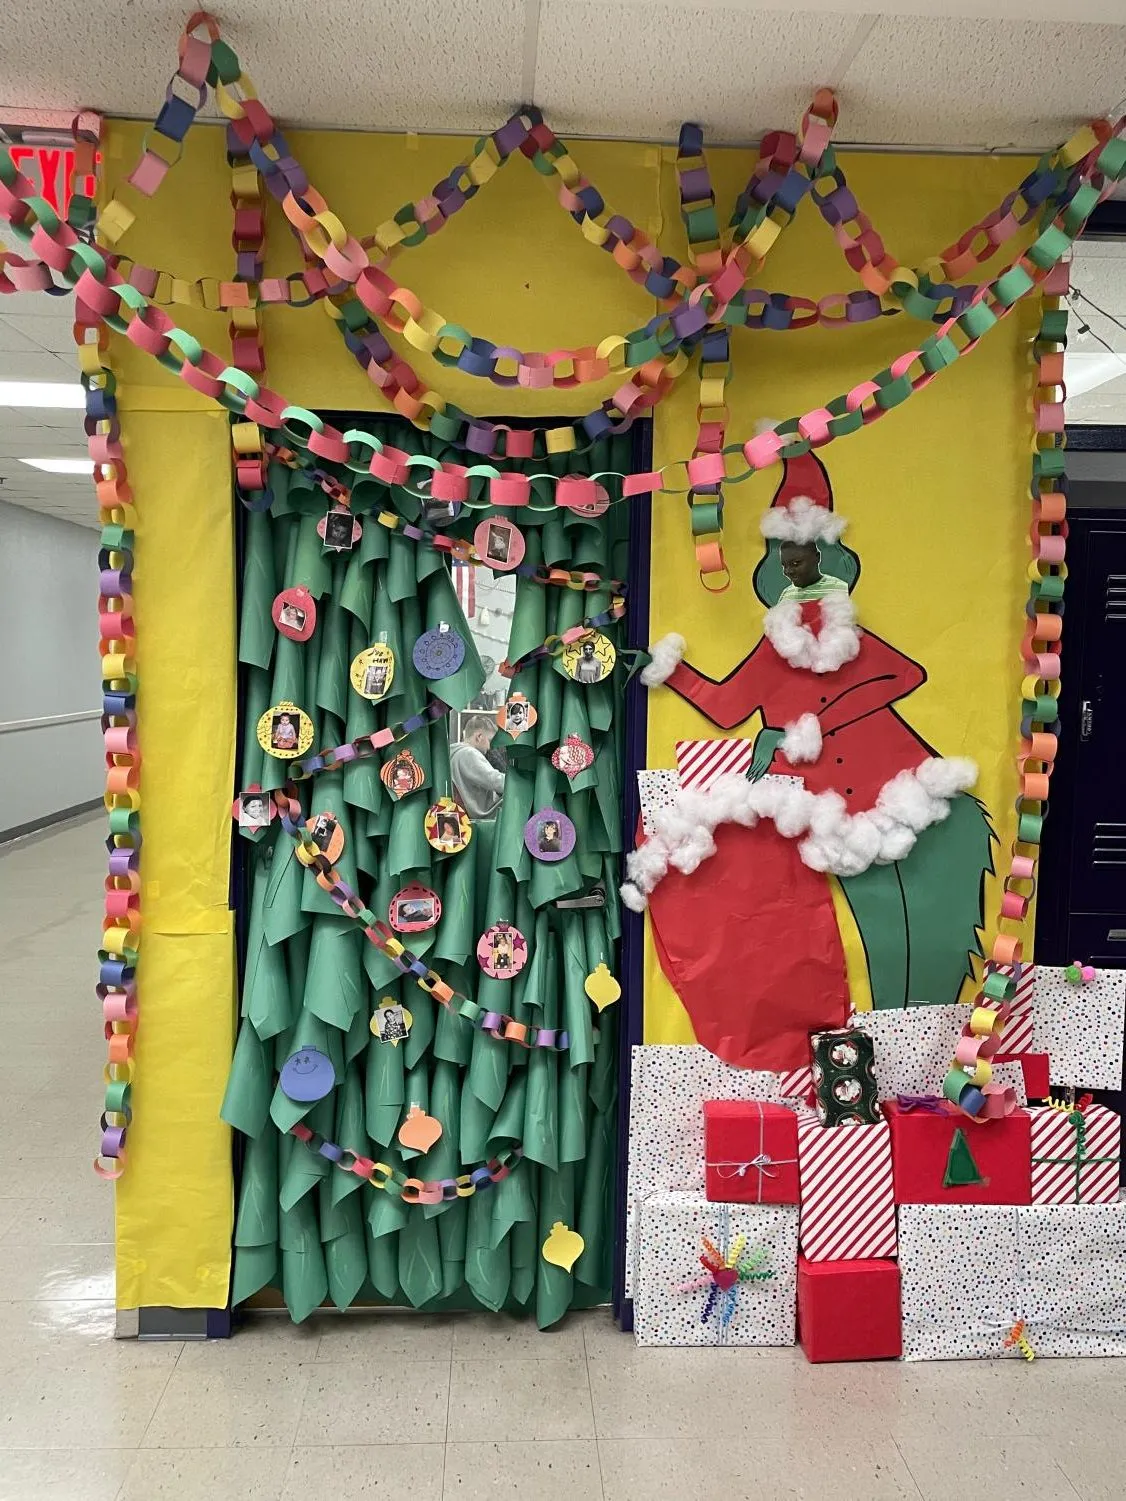
Yellow and green, with red and multi-color accents — about 60% yellow, 30% green, 10% everything else. Yellow is a bold base and it’s the reason the green tree reads so clearly; put that same tree on a beige wall and it goes flat. If yellow feels like too much for your hallway, white butcher paper keeps the same proportions and lets the paper chains and ornaments carry the color instead.
24. A Whole Hallway Dressed As Santa’s Workshop
Hallway-wide decorating used to be reserved for the teacher with the most storage bins. It’s more common now because paper rolls are cheap and printable templates have made the elaborate stuff accessible to anyone with a planning period. The whole-wall approach is also a practical response to something schools have done for years — turning December into a community event rather than a door contest.
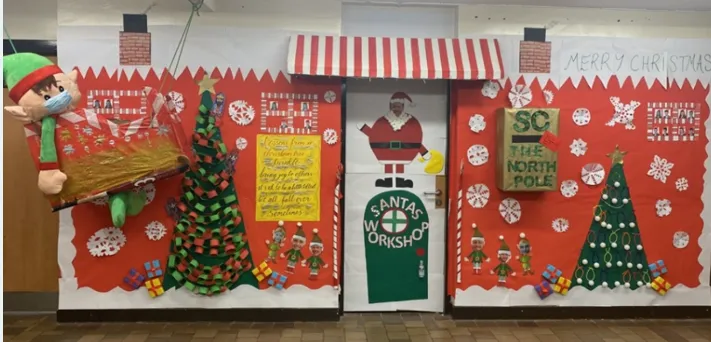
- Cover the wall in red paper first, then the door, matching seams at the frame line.
- Cut a scalloped white paper strip and run it along the bottom edge as snow.
- Build the striped awning as one unit on cardboard, then mount it above the door.
- Add the trees on either side, weighted at the base so they don’t tip.
- Finish with paper snowflakes at varied heights and the North Pole mailbox as the focal point.
Plan a full Saturday and roughly $60 in paper and tape.
25. Grinchmas Sign Framed By Striped Fabric Ribbon
Striped fabric ribbon framing a door looks fantastic and creates one specific problem: the door still has to open. If the ribbon runs continuously from frame to frame, the door won’t close without pinching it. Split the ribbon at the hinge side and attach it with adhesive hooks so it releases when the door swings. Test it before the kids arrive, not after.
Oversized candy cane cutouts read best when they’re at least 24 inches tall and positioned in the bottom third of the door, angled slightly inward. That inward angle draws the eye up toward the character and the sign. Angle them outward and the composition pushes your gaze toward the floor instead. Small thing, big difference in how the door lands.
26. A Handmade Nativity Under Metallic Star Cutouts
Painted paper backgrounds look incredible and are a nightmare to remove. If you’re painting on butcher paper, fine — pull it down and recycle it. If you’re painting on the door, don’t. Use a paper base taped at the edges and sealed with a light coat of matte medium so it doesn’t buckle. Metallic stars tarnish in humid hallways; foil board holds up far better than glitter cardstock over a month.
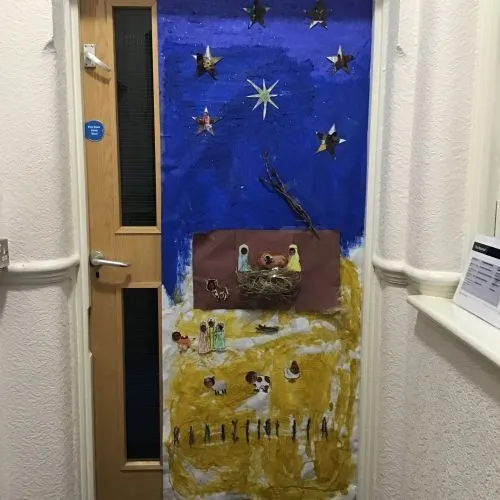
The stars are what turn this from a nativity scene into a night sky. There are maybe twenty of them, in gold, silver and white, scattered across the dark blue upper section with no obvious pattern. That’s the point — the randomness is doing the work. Place them in clusters of two and three with empty space between, and resist every urge to line them up.
27. A Tree Hanger Trimmed With Mahjong Tiles
This is a small-door treatment — it’s essentially a hanging ornament, so it works on a glass door, a narrow office door, or a door with a window you don’t want to cover. Keep it under 30 inches tall and hang it so the bottom clears the handle by 6 inches. On a standard classroom door it’ll look undersized; see Idea #3 for a layered wood hanger sized for a full door.
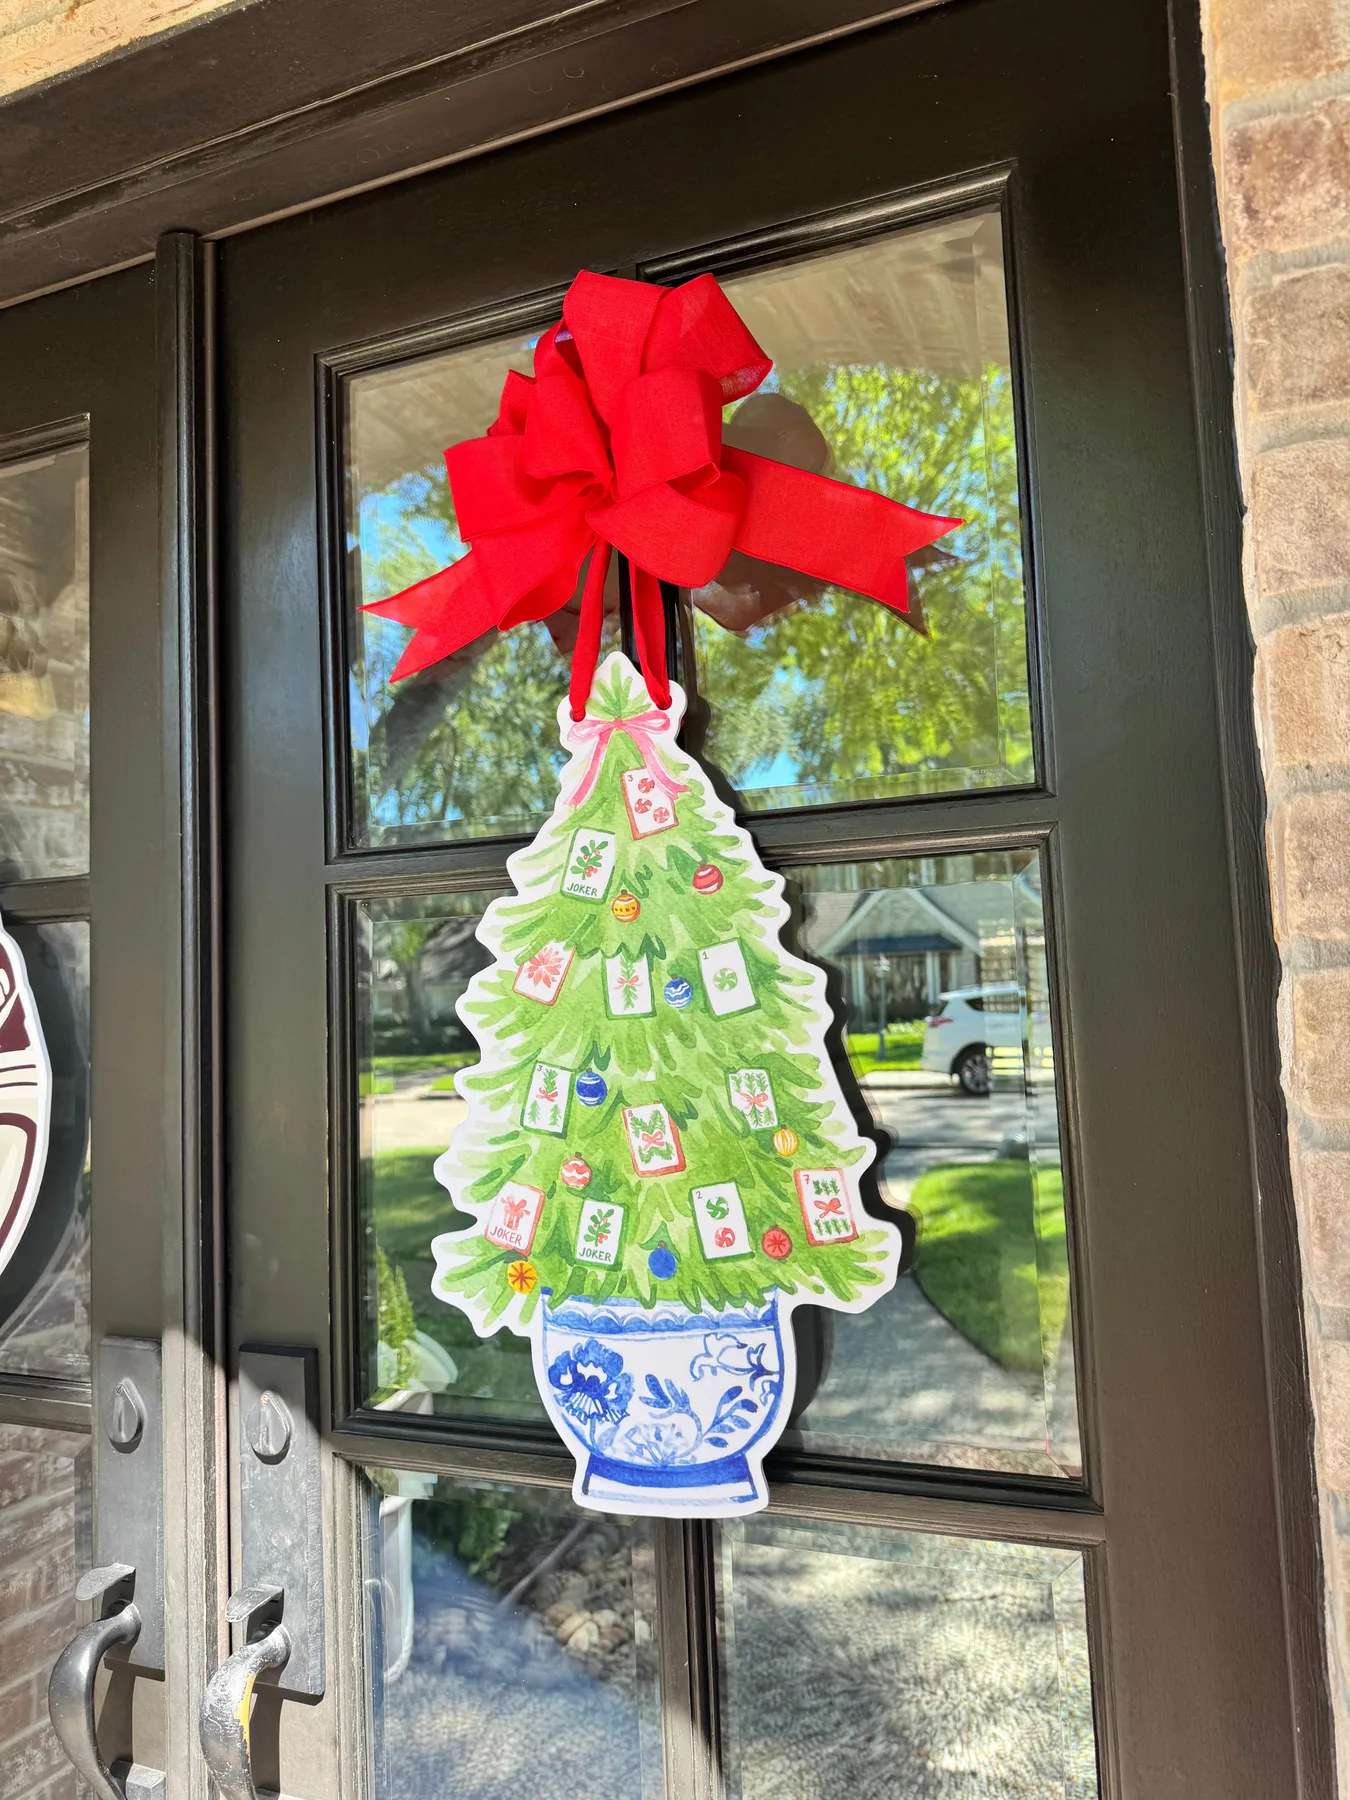
The charm here is the mismatch. A traditional Christmas tree shape hung with Mahjong tiles shouldn’t work, and it does, because the tiles are all identical in size and shape — they act like a pattern rather than a theme. The red bow at the top anchors everything and gives the eye an entry point. Repeat a shape and you can get away with almost any content.
28. Candy Cane Columns Framing Red Double Doors
Measure twice and the stripes do the rest.
- Measure each door frame and the arch above before cutting any paper.
- Cut red and white stripes to a consistent 3-inch width — wider on the arch, narrower on the frames.
- Apply stripes to the frames first, wrapping the edges around the back.
- Hang the wreaths at matching heights, centered on each door leaf.
- Drape the garland over the arch, attaching it with clear hooks every 18 inches.
Two people, about four hours, roughly $75 in paper, garland and wreaths.
Candy cane stripes on a frame only work if they’re continuous across the corner. Cut each stripe long enough to wrap the frame edge by an inch and press it flat — the seam disappears from the hallway sightline. Mitre corners at 45 degrees and use a straight edge, not your eye.
29. Triangle Paper Tree With A Vertical Merry Christmas
It’s a triangle stack: five green triangles, biggest at the bottom, each about 15% smaller than the one before. The orange star gives the composition its single warm accent — roughly 5% of total surface area, which is all a strong accent ever needs. Blue background, white snowflakes, green tree. Change the background to kraft brown and this exact tree reads as woodland instead of winter.
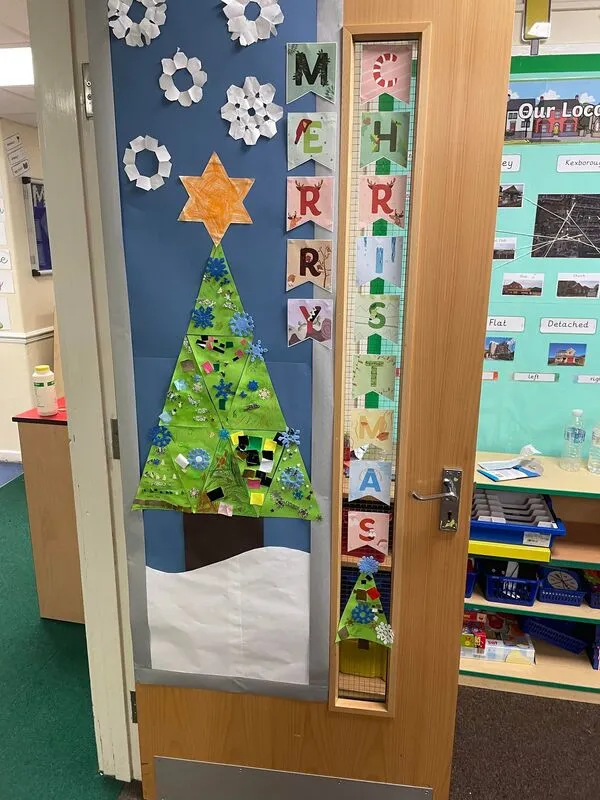
Vertical banners are tempting and tricky. This one crosses from the wall onto the door’s glass panel, which means it has to be split or it will tear the first time the door opens. Tape the wall section independently, leave a quarter-inch gap at the frame edge, and mount the door portion with static cling film. Small gap now, no repair job in January.
30. An Elementary Hallway Door That Stays Kid-Simple
- Paper roll (48-inch butcher or colored): $8–$15
- Construction paper and cardstock for cutouts: $6–$12
- Tape, glue dots, adhesive hooks: $5–$10
- Punches, scissors, markers (often already on hand): $0–$15
- One accent — ribbon, garland or string lights: $5–$20
Total: $24–$72 for a full door plus a slice of wall. Budget alternative: skip the accent entirely and build from the supply closet — you’ll land under $20.
Here’s the thing nobody tells first-year teachers: the school copier is your best decorating tool. Print cutout templates on cardstock, print lettering in a 400-point font on 11×17 paper, and tile your background pattern. A ream of cardstock costs less than one craft-store run, and you can do it during a planning period.
31. A Life-Size Wooden Nutcracker Guards The Entry
A painted wooden nutcracker this size can be made for about $35 with a half-inch sheet of plywood, a jigsaw and craft paint. Trace the shape in chalk first, cut generously, and sand every edge. If power tools aren’t your thing, an appliance-box cardboard cutout works for one season and costs nothing. The brick wall and the woven chair are doing most of the styling, and neither requires a purchase.
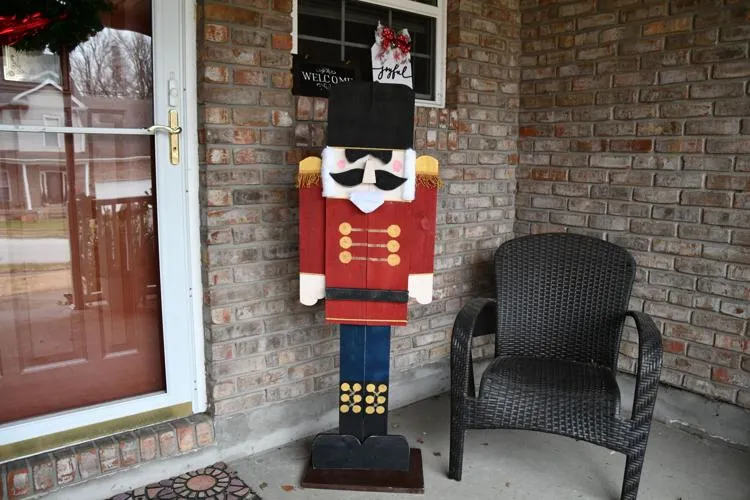
An entry like this needs at least 3 feet of clear width beside the door for a figure this large, and the nutcracker should top out around 4 to 5 feet — tall enough to be a statement, short enough not to block the transom. On a narrow entry, swap to a hanging cutout on the door itself, similar to Idea #32. Check that the door still swings a full 90 degrees before you commit.
32. A Chinoiserie Nutcracker Cutout In Blue And White
Glass-paneled doors show everything through the back — including the tape. Mount your cutout on foam core first, then hang the whole board from a single over-the-door hook using wide ribbon, so nothing is actually stuck to the glass. Keep the bow above eye level; a heavy bow tied at the frame will slowly pull the cutout down over the course of a month.
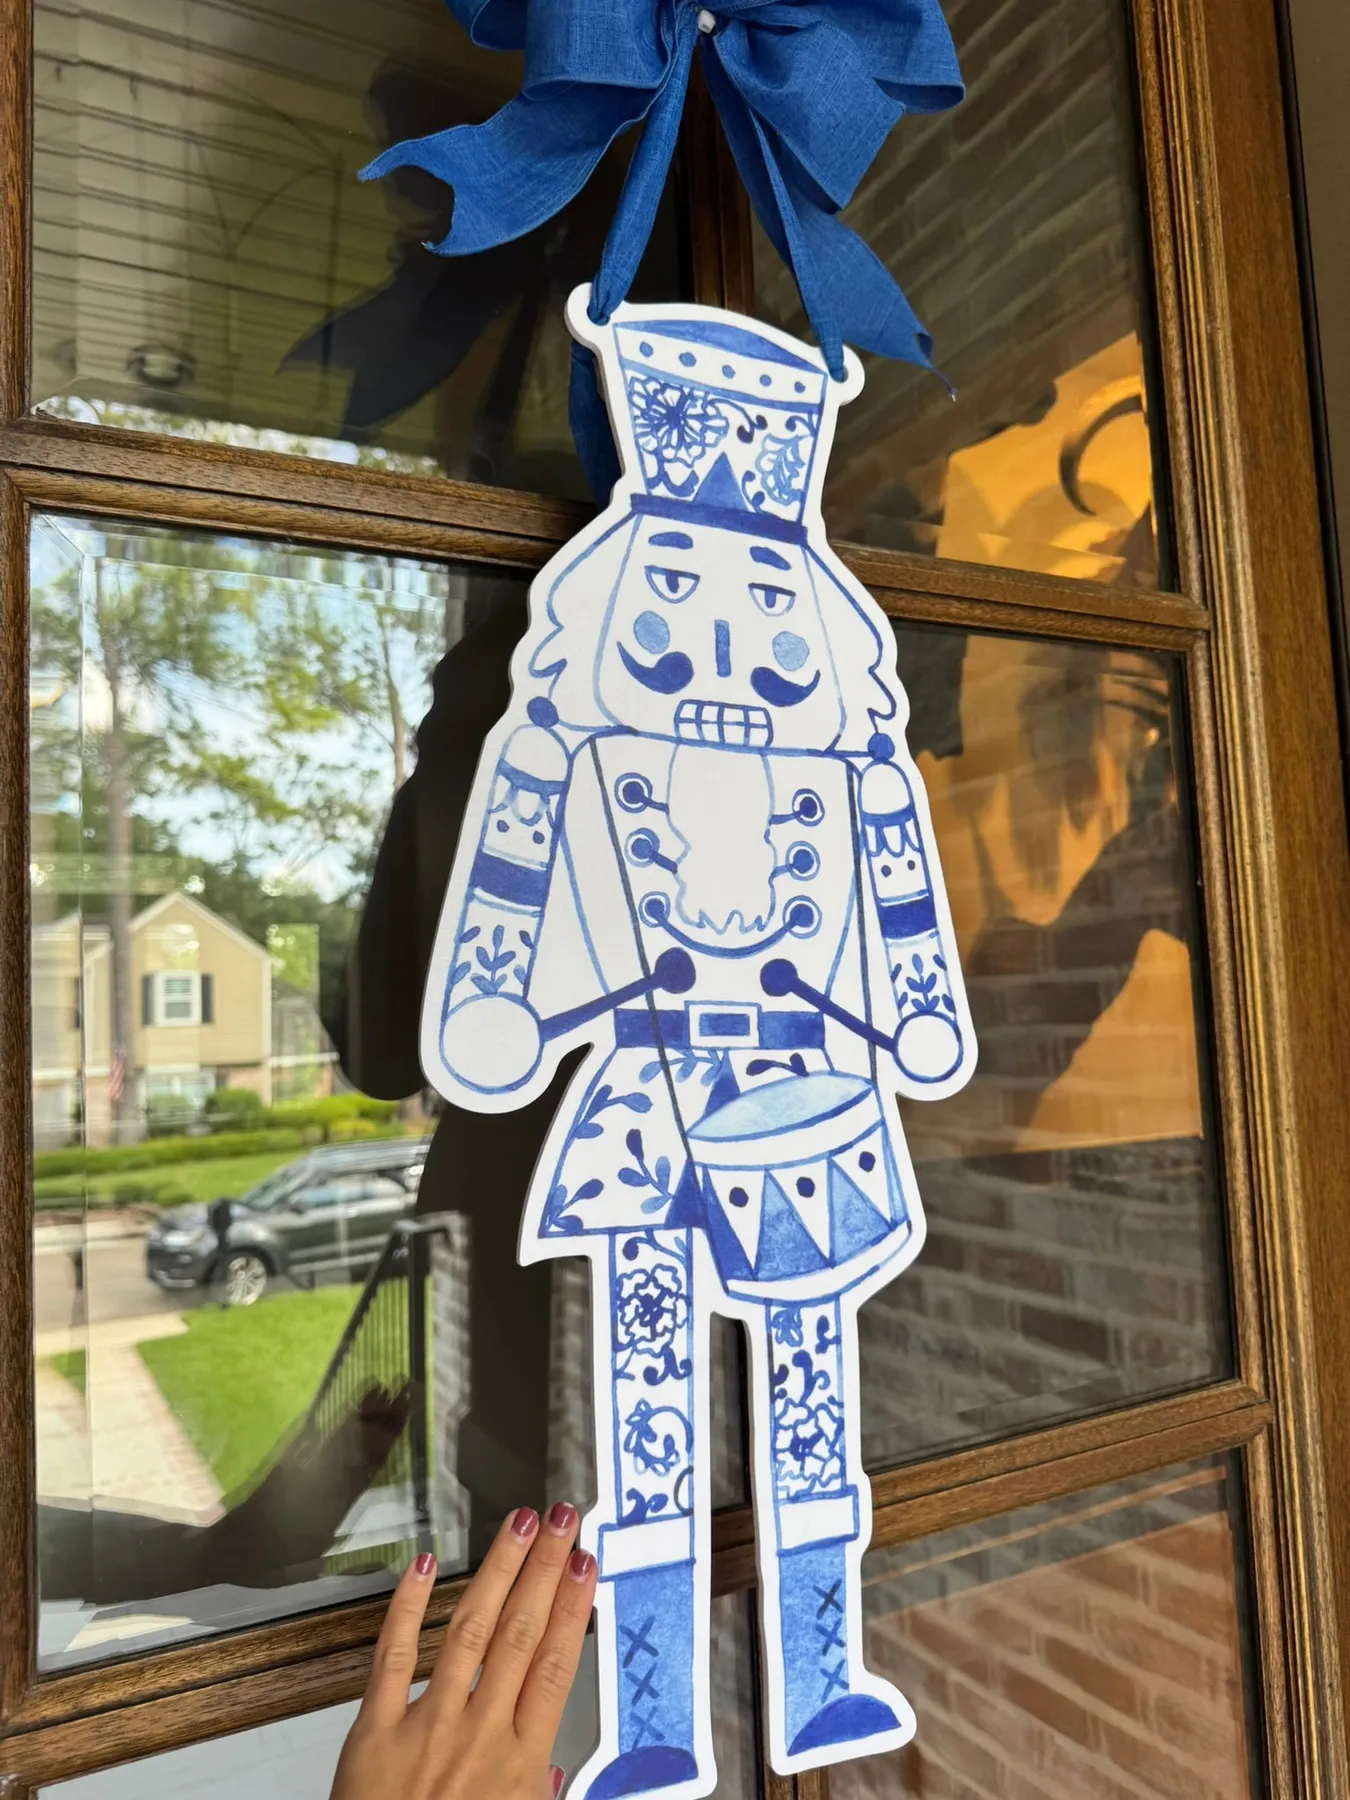
Blue and white Chinoiserie on a Christmas nutcracker is a genuinely unexpected pairing, and it works because pattern is doing the job color usually does. Look from ten feet: you read the nutcracker’s silhouette first, then the pattern resolves. That’s the test for any pattern-forward cutout — if the shape doesn’t hold up in silhouette, no amount of pattern will save it.
33. A Paper Nutcracker Stage Beside A Soldier Door
Two doors acting as one scene is the smartest thing here. The red paper curtains on the left give the ballet dancer, mouse king and gold star a stage; the right door is the Nutcracker himself, scaled up so the two panels read as a program and its star. Curtains are the cheapest way to create depth on a flat surface — they imply a frame, a foreground and a world behind.
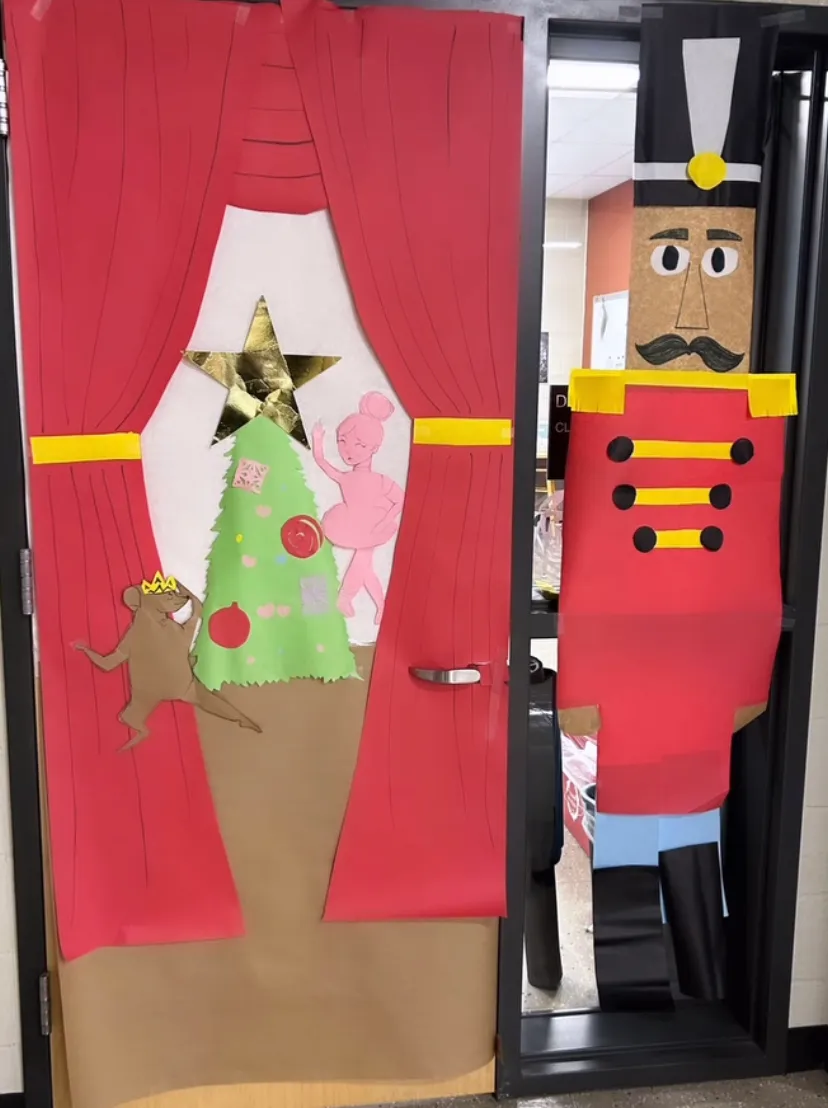
- Red and green paper rolls: $10–$20
- Cardstock for the dancer, mouse king and soldier: $8–$15
- Gold foil star and trim: $4–$8
- Yellow paper or ribbon tiebacks: $3–$6
- Tape, glue dots, adhesive hooks: $5–$10
Total: $30–$59 for both doors. Budget alternative: paint the soldier straight onto kraft paper with acrylics — around $12, and easier to size correctly.
34. Three Wooden Nutcrackers Under One Red Bow
Three figures on one hanger needs a weight plan. The center nutcracker should be the largest, and the two flanking ones no more than two-thirds its height — that’s what makes the group read as a family rather than a lineup. Hang from one centered point and let the side figures cantilever slightly outward; a rigid bar behind them keeps the whole thing from twisting.
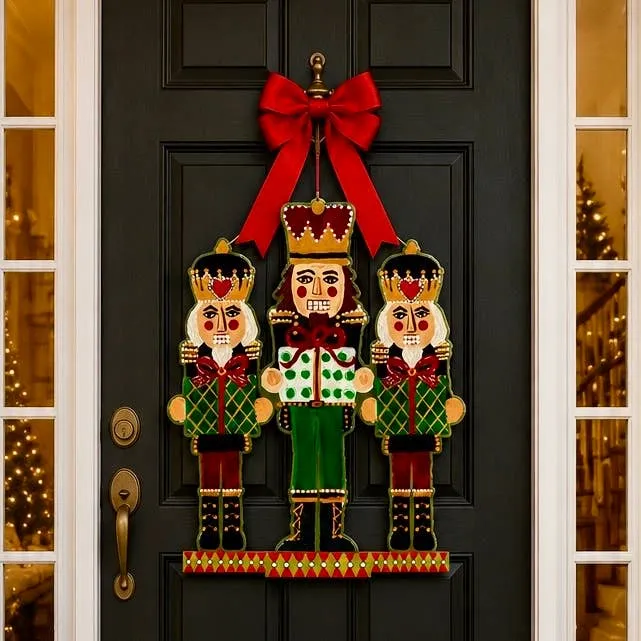
- Wooden cutouts (or a pre-made hanger): $25–$60
- Acrylic craft paint and sealer: $10–$18
- Wide red ribbon for the bow: $6–$12
- Patterned base board: $5–$10
- Jute or paracord for hanging: $3–$5
Total: $49–$105. Budget alternative: buy three flat wooden ornaments and mount them on a painted craft board for under $25.
Wooden hangers survive hallways, but paint chips at the corners where the piece meets the door. Seal with two coats of matte polyurethane before hanging and touch up with a matching paint pen in January. Store it flat between seasons — a year on a hook will bow the base board.
Your Door Is The First Hello
Somewhere in your building, a kid is going to walk past your door on a gray December morning and feel the whole day shift. That’s the actual job description here — not Pinterest perfection, just something made with care that people can feel from the hallway. Start with one door, one hero element, one roll of paper, and let it be slightly crooked.
📌 Pin your favorites now so you’re not scrambling the night before winter break.