You know that feeling when you finally find the ornament that looks exactly right — not the plastic bauble everyone else has, but something with flour still faintly in its texture and a ribbon your kid picked out? That’s the mood for 2026, and Pinterest has noticed: salt dough searches keep climbing while glitter-everything quietly cools off. We spent serious time browsing Etsy, Michaels, Target, and Hobby Lobby to bring you only what’s worth your attention this year, from $4 twine-and-cinnamon stars to $85 heirloom sets.
Below are 35 ideas — rustic farmhouse, vintage traditional, hand-painted playful, and quiet Scandinavian minimal — with budget and luxury versions compared side by side, so you can decide how much flour you actually want on your counter. And stay until the end — we break down the most common mistakes that can ruin these looks. Some links here are affiliate links, which means we may earn a small commission at no extra cost to you.
📌 Save this to Pinterest for later — you’ll want to revisit these ideas.
1. Cream Embossed Ornaments Tied With Green Gingham
Roll the dough between two 1/4-inch dowels or two chopsticks — that’s the thickness that keeps a 3-inch ornament from snapping at the ribbon hole. Anything thicker puffs and cracks in the oven; anything thinner turns into a potato chip by January. Bake at 200°F for two to three hours, flipping once, and let the ornaments cool completely on the tray before you touch them.
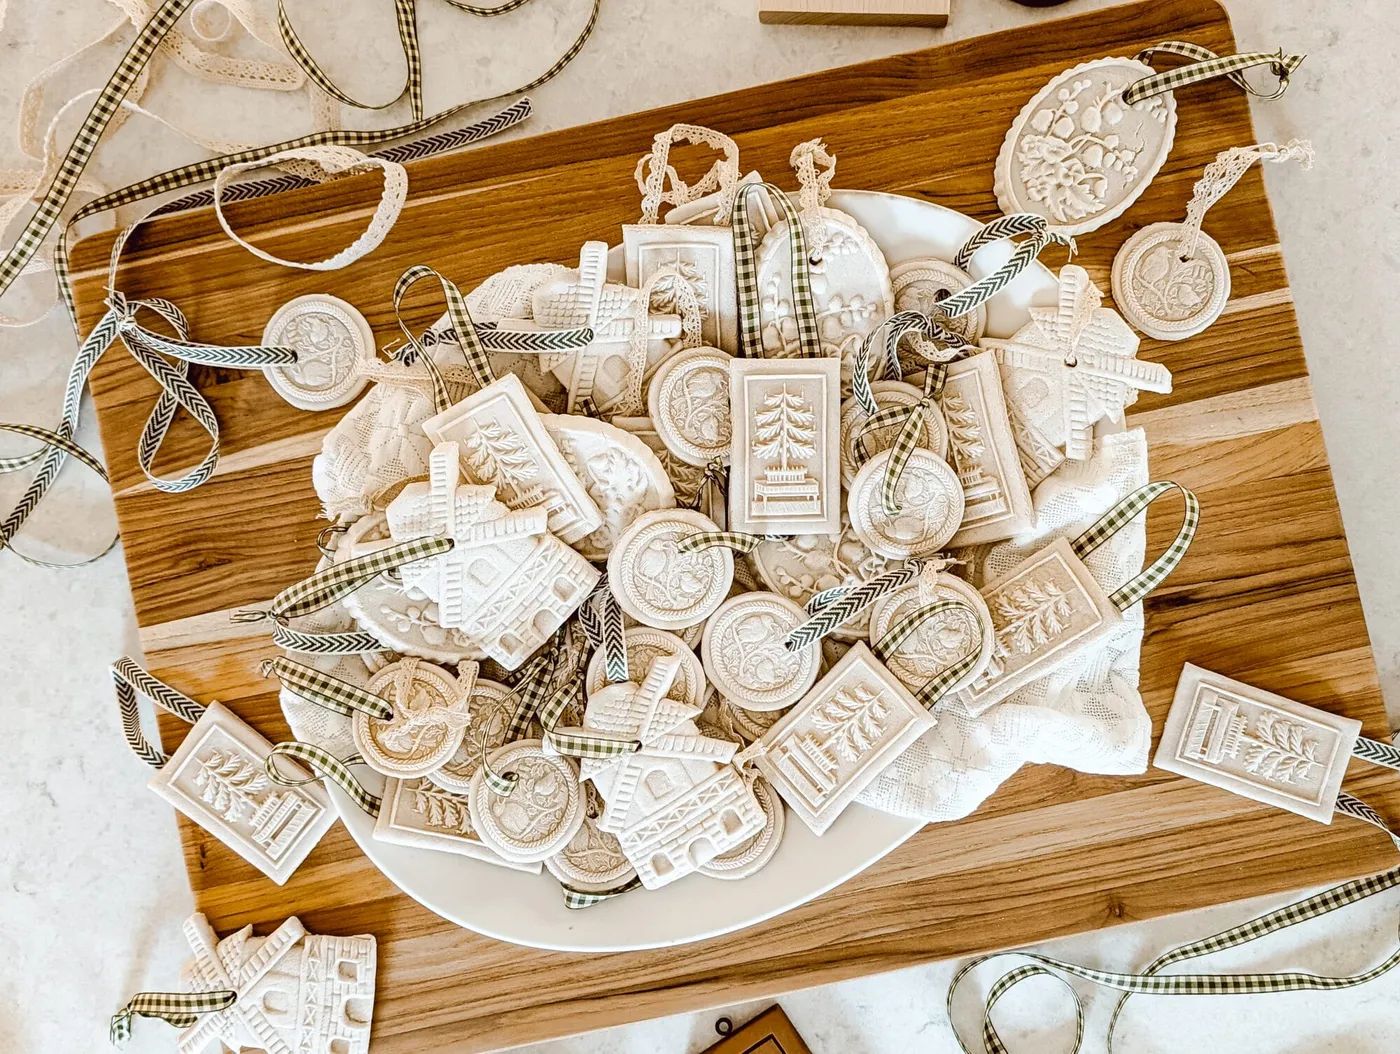
The magic here isn’t the dough — it’s the contrast. All that intricate cream relief needs something flat and matte to sit against, and the gingham ribbon does the same job in color: a humble woven pattern next to a fussy embossed surface. Then repetition does the rest. Twenty ornaments in four shapes read as a collection instead of clutter, and the pale wood board keeps the pile from going sweet-shop pink.
2. A Speckled Map Ornament With One Glossy Red Heart
Take away the glossy red heart and this is just a beige disc. That single raised, saturated, shiny element is what turns a map silhouette into a keepsake — it marks the place, literally, and gives the eye one spot to land on an otherwise speckled, low-contrast surface. Notice the red satin ribbon echoes it. If the heart is matte or half a shade off, the whole ornament goes flat.
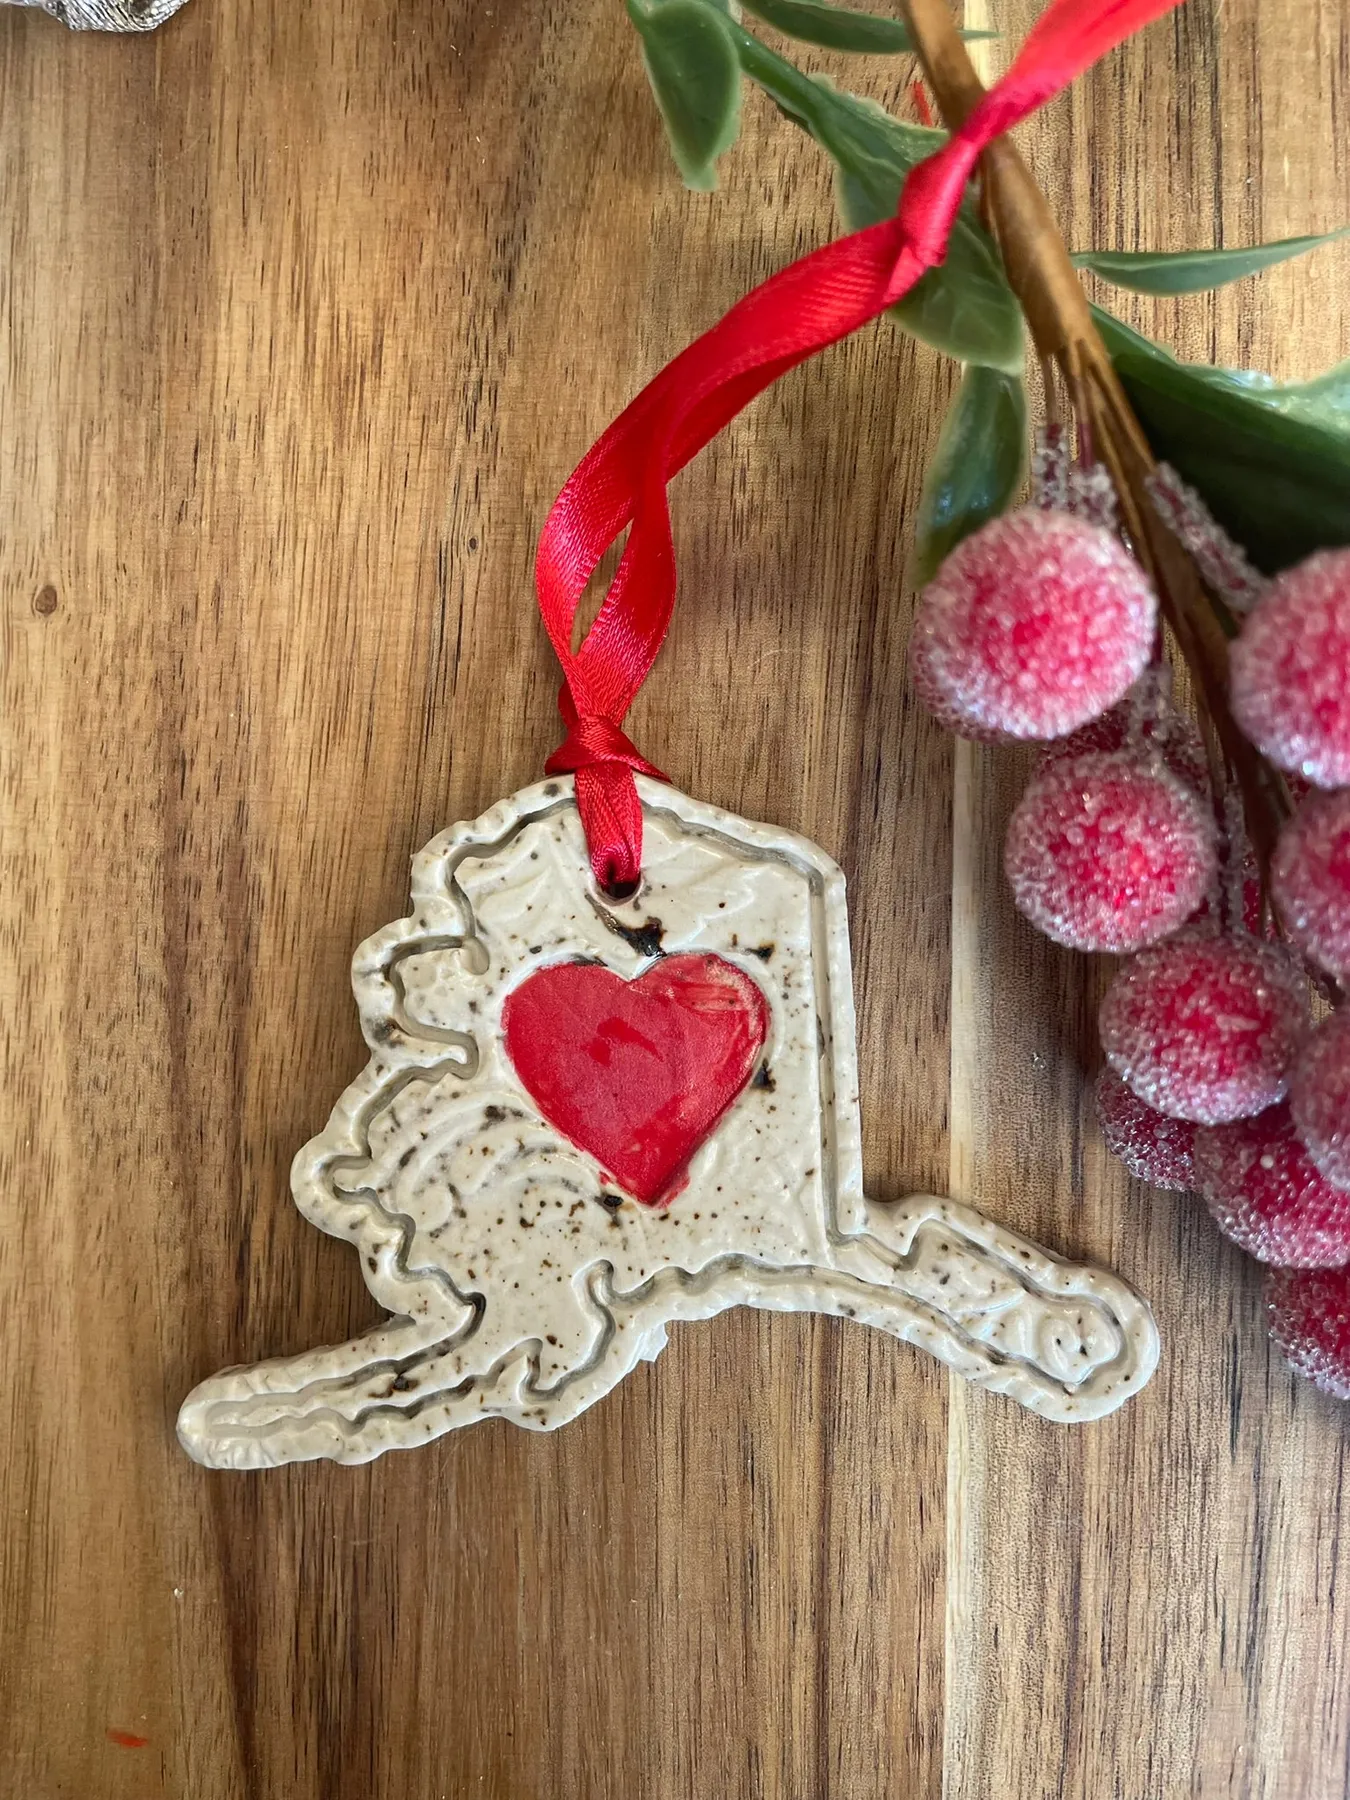
Custom map and state ornaments run $24–$38 on Etsy. Make your own for about $6: roll and cut a slab shape, poke the hole, bake, then press a small painted wooden heart ($3 for a bag of twenty at Michaels) into the wet dough before baking and speckle with a toothbrush and brown acrylic. Same sentiment, a third of the price, and the heart sits exactly where you want it.
3. Salt Dough Stars, Trees, and Candy Canes Straight From Nature
Bake and fully cool your shapes first, then:
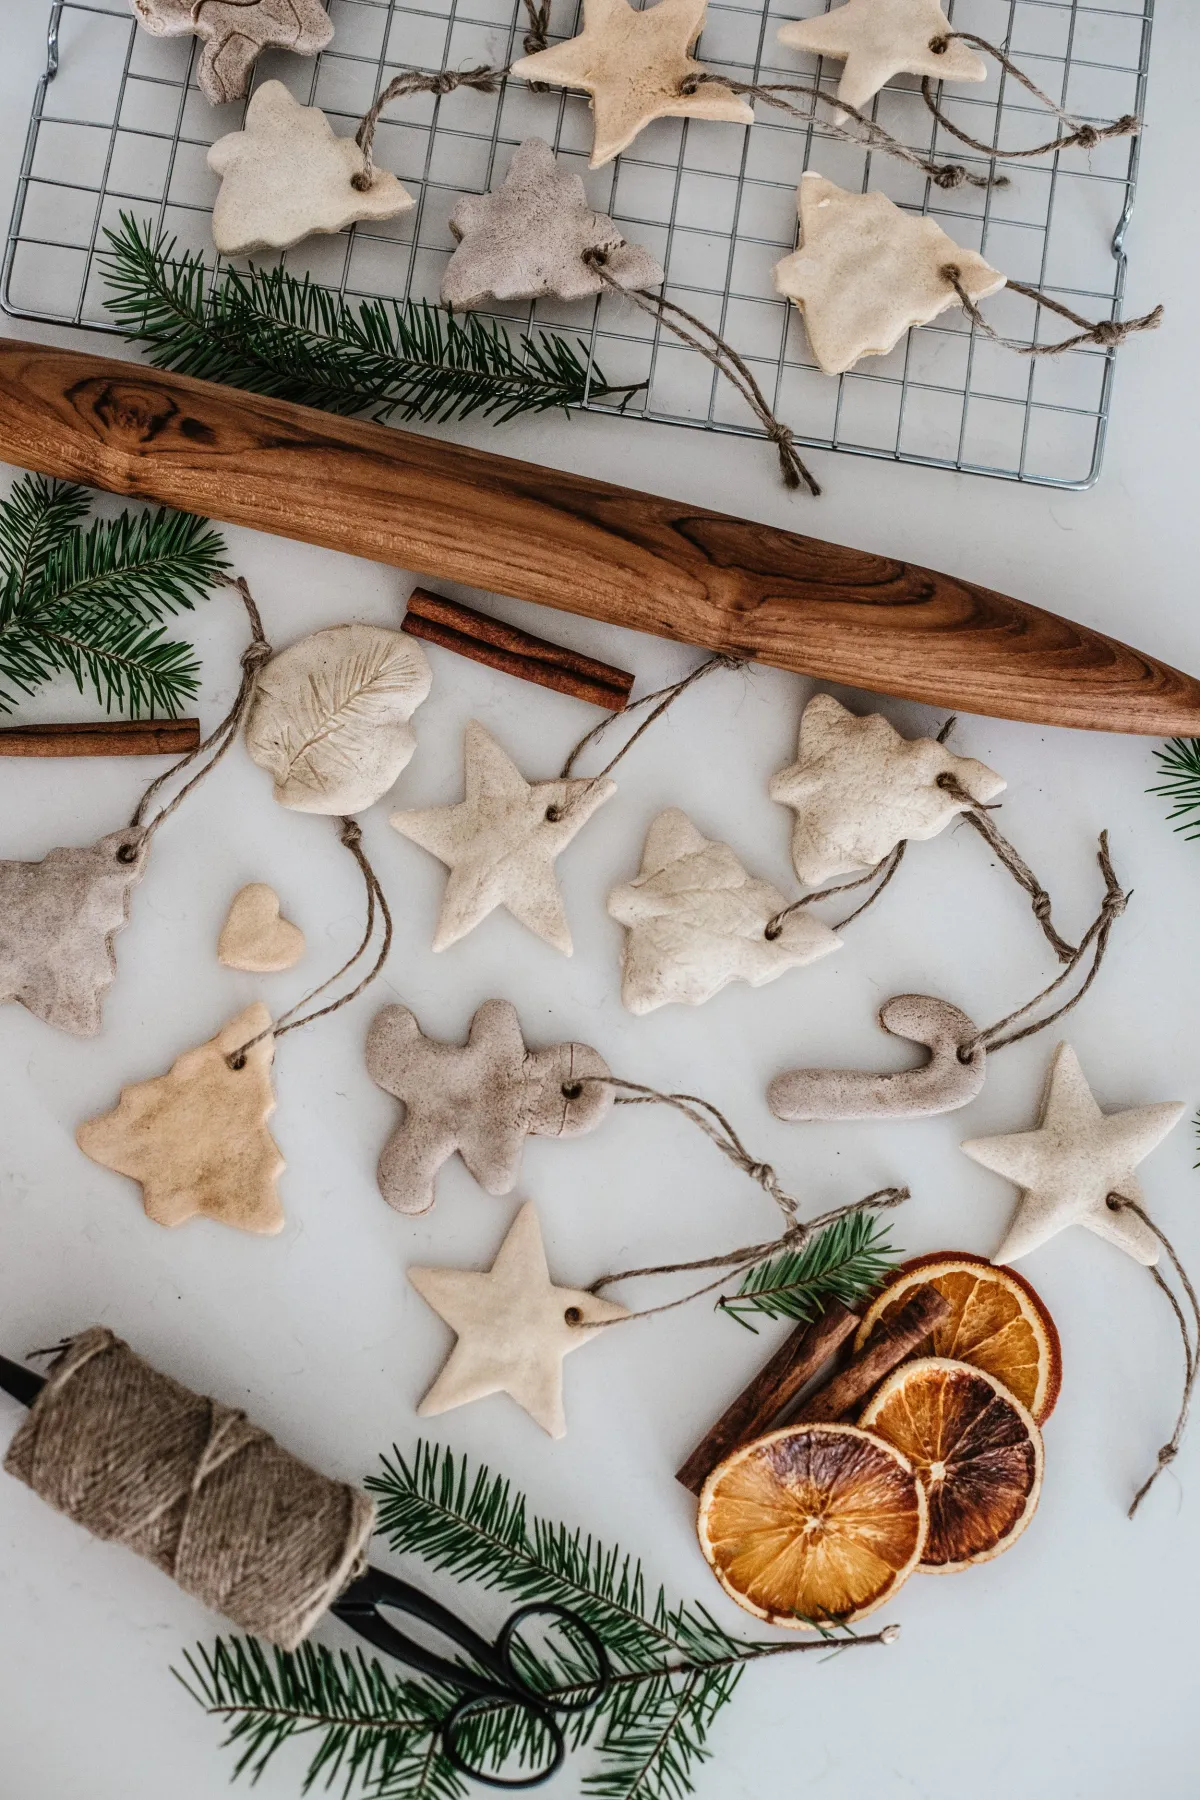
- Thread a 10-inch length of jute twine through the hole and knot it.
- Wrap the twine twice around a 2-inch cinnamon stick and tie snug.
- Tuck a dried orange slice behind the cinnamon and dot with hot glue.
- Finish with a small pine sprig tucked into the knot.
About 20 minutes for six ornaments, and under $10 in supplies if you already have the dough.
The working formula is roughly 70% pale dough + 20% warm brown from cinnamon, twine, and dried orange + 10% forest green. That keeps a natural set cozy instead of dusty. Swap the brown for cranberry red and you get a colonial Christmas; swap the green for eucalyptus gray and it reads Scandinavian. Just never let the accents pass 30%.
4. A Bottle-Shaped Ornament With White Piping Details
Pipe those white label details with a fine-tip squeeze bottle instead of a brush — you get a steadier line and better control in tight areas. Thinned acrylic (two parts paint to one part water) in a 0.5mm nozzle is the sweet spot. Work on a baked, fully cooled ornament, and let each layer dry 20 minutes before the next. If a line wobbles, wipe it with a damp cotton swab while it’s still wet.
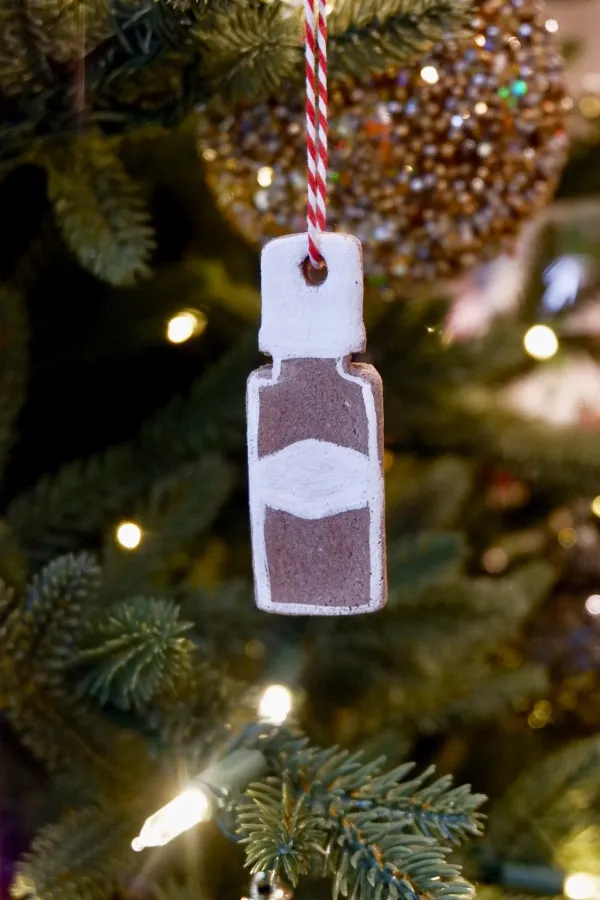
Dough tinted with cocoa or coffee for that bottle-brown shade bakes darker at the edges and can look scorched rather than rustic. Mix the color in, don’t brush it on later, and keep the oven at 200°F max. One more thing: white acrylic on unsealed dough absorbs and yellows within a season, so seal with matte polycrylic first. Compare with the naturals in Idea #3 — same instinct, easier execution.
5. The Tiny Textured Star You Can Hold In One Hand
A 2-inch star is the most useful size you can make: five or six clustered on one branch read as a single decoration, and a handful fills a bare 7-foot tree. Space ornaments at least 3 inches apart center-to-center, and use the small pieces to fill gaps in the bottom third where the tree is widest. Go bigger than 4 inches and you only need a dozen for the whole tree.
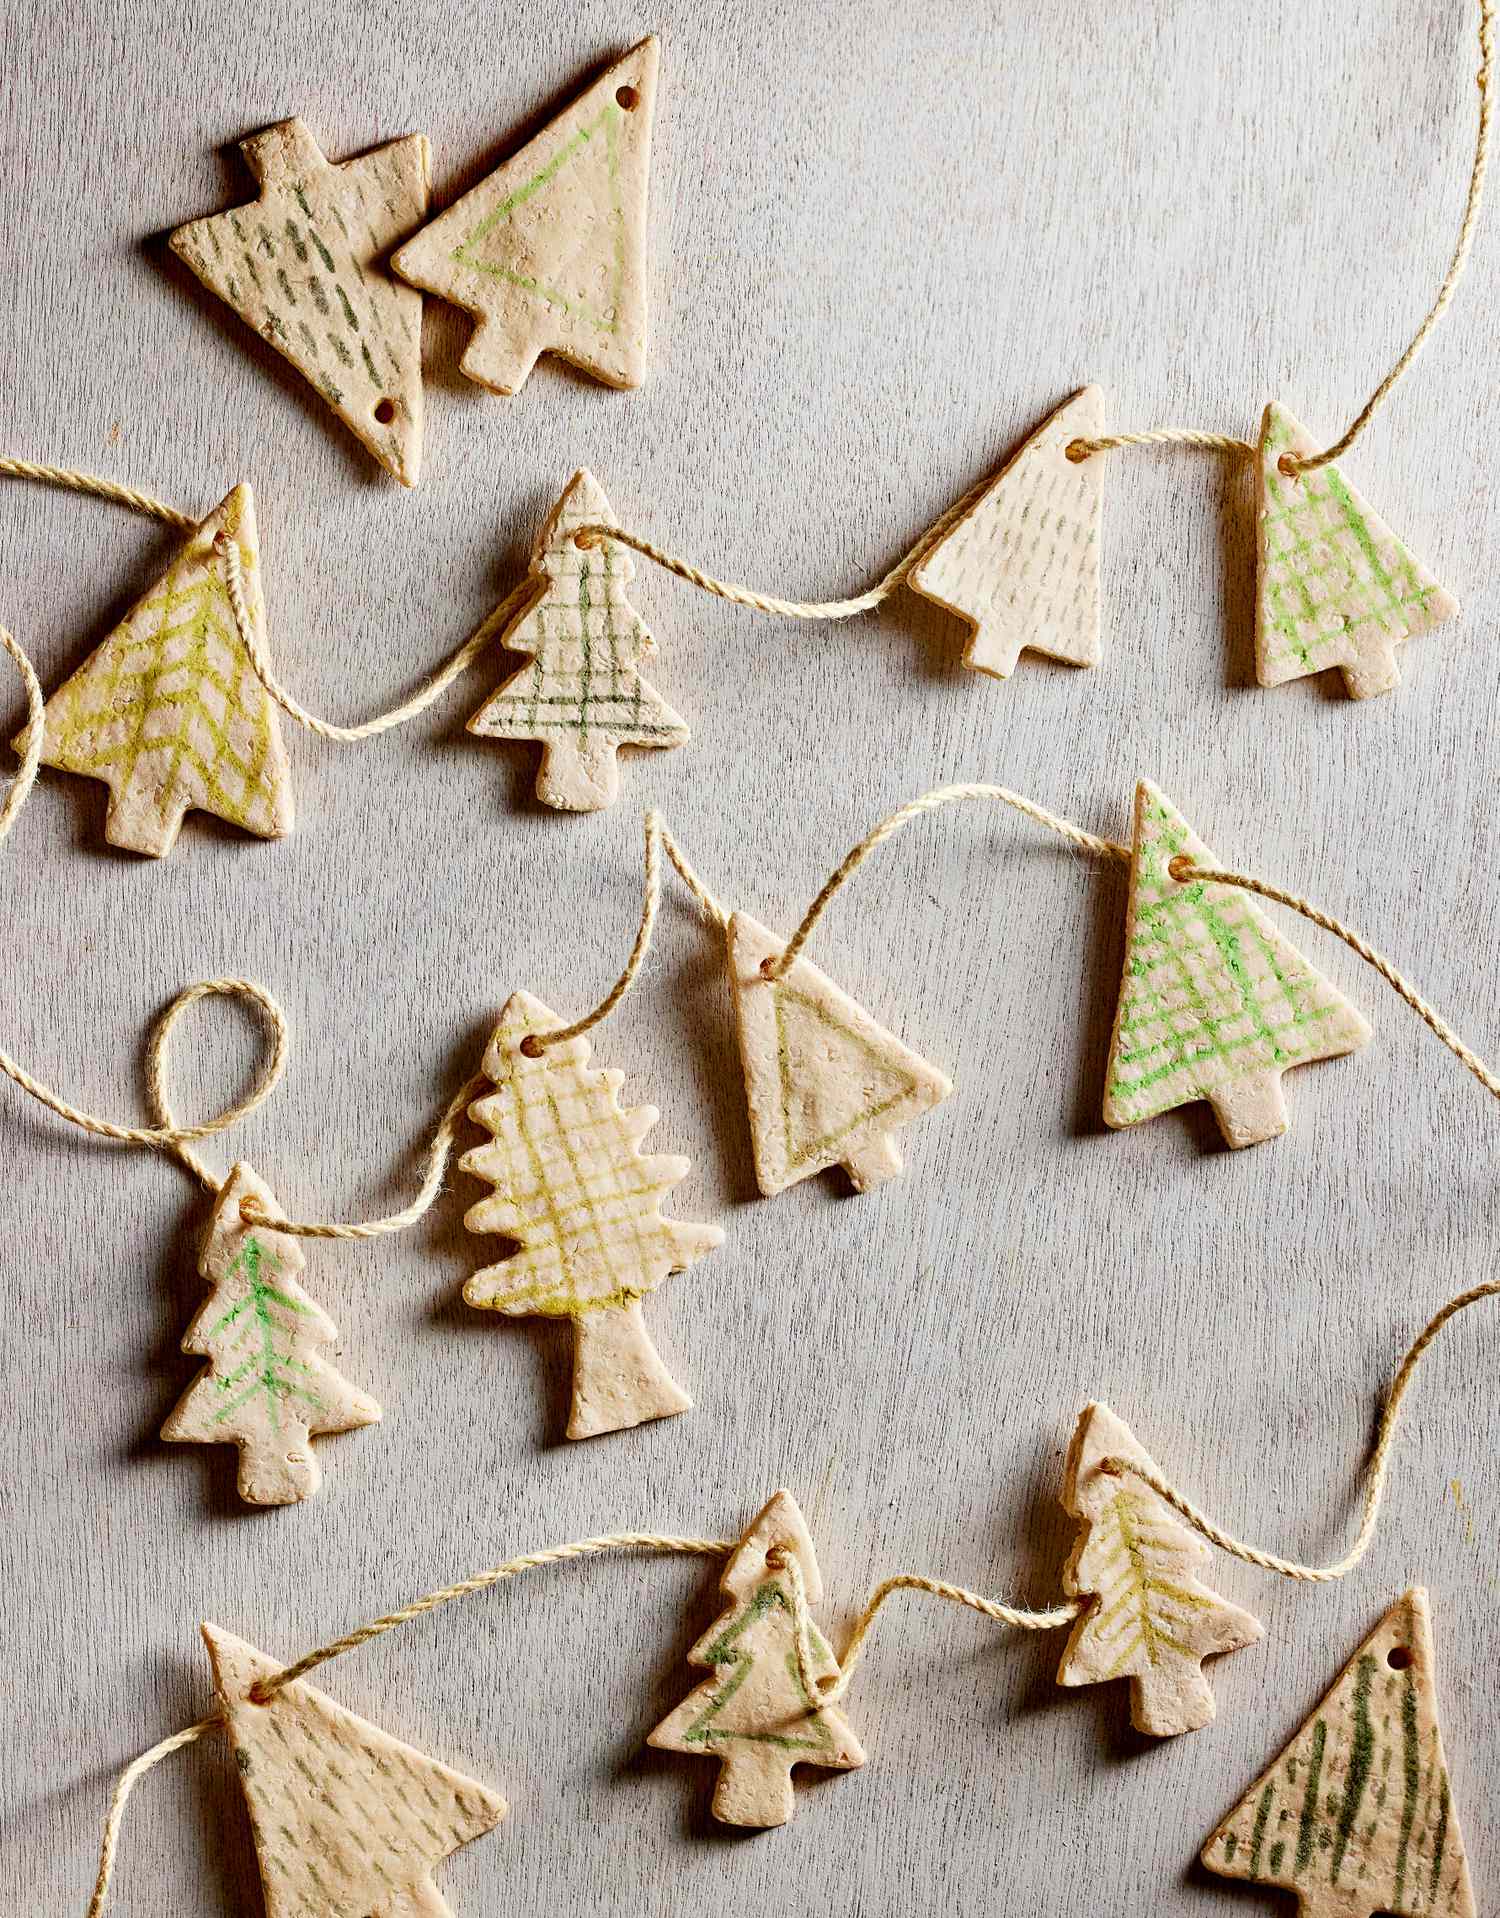
- Flour, salt, water: $2
- Thrifted rolling pin: $4
- Small star cutter: $2
- Jute twine: $3
- Matte sealer: $6
Total: about $17 for 24 ornaments — roughly 70 cents each. Budget alternative: skip the sealer and brush on two coats of craft glue thinned with water. Same protection, half the price.
6. Unbaked Cutouts on a Dark Speckled Counter
Whisk 1 cup flour with 1/2 cup fine salt, then add 1/2 cup water a tablespoon at a time until the dough pulls away from the bowl. Knead five minutes until smooth, wrap it, and rest 30 minutes — this is the step everyone skips and it’s why dough cracks. Roll to 1/4 inch and cut. Forty-five minutes start to finish, about $2 in ingredients.
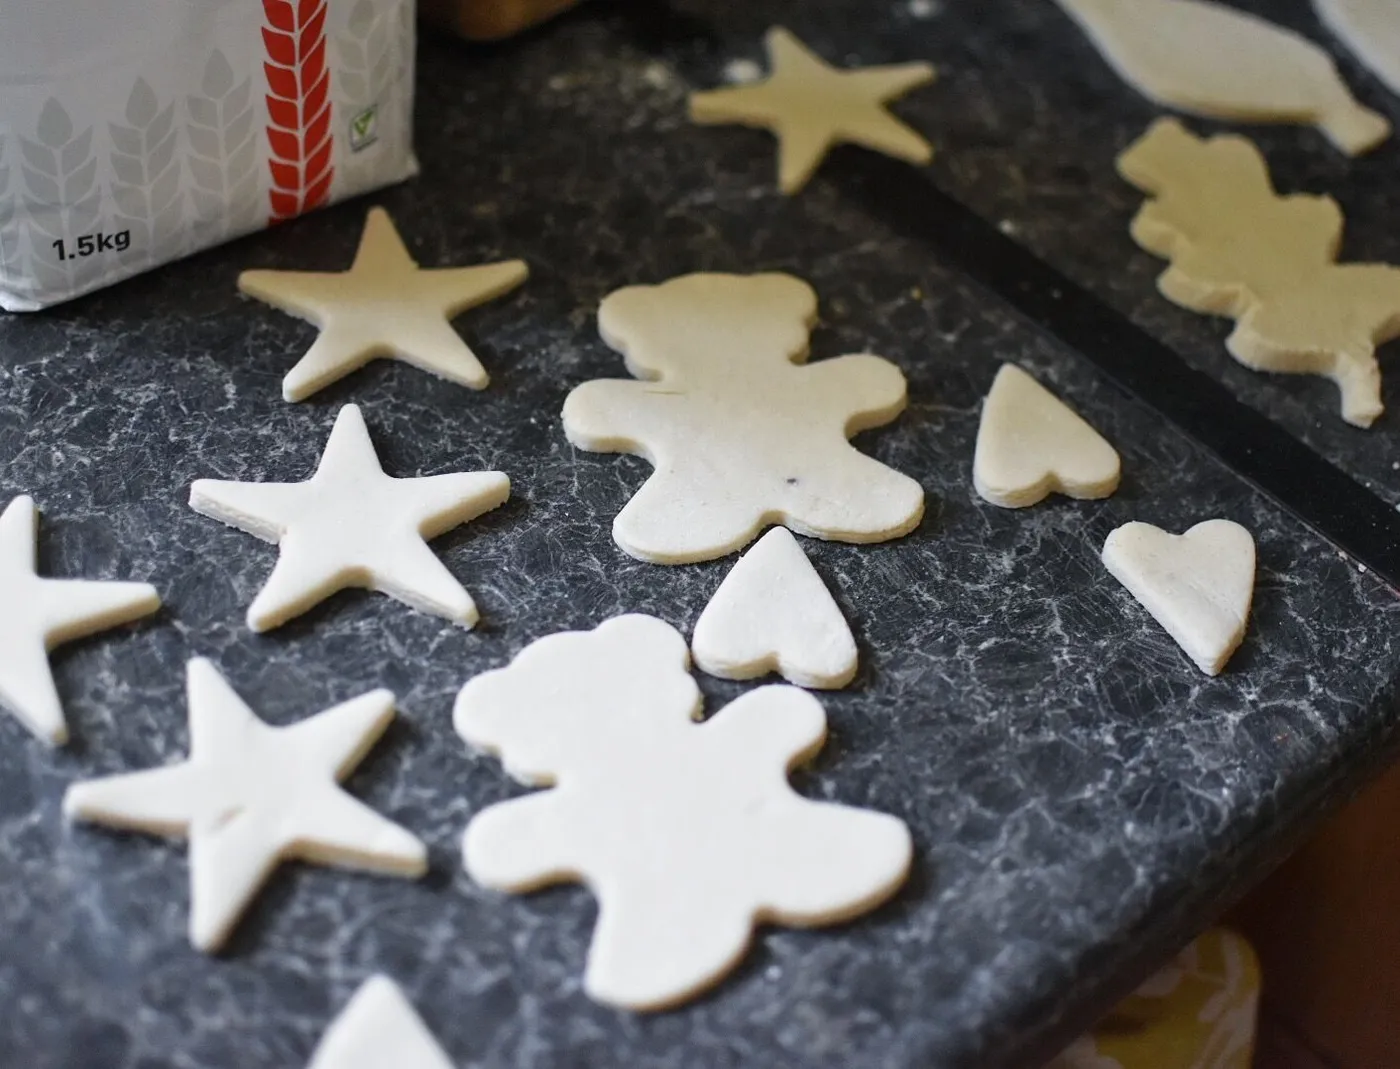
- Counter wiped dry and lightly floured
- Two dowel guides the same thickness as your target
- Hole punched with a straw before baking, 3/8 inch from the edge
- Baking sheet lined with parchment, not foil
- Cooling rack cleared before the timer goes off
7. A Hand-Painted Gingerbread Man Framed in Red
Paint in passes, not all at once: base coat the whole disc flat white, let it dry a full 30 minutes, then add the red scalloped border, then the gingerbread figure last. Three brushes handle all of it:
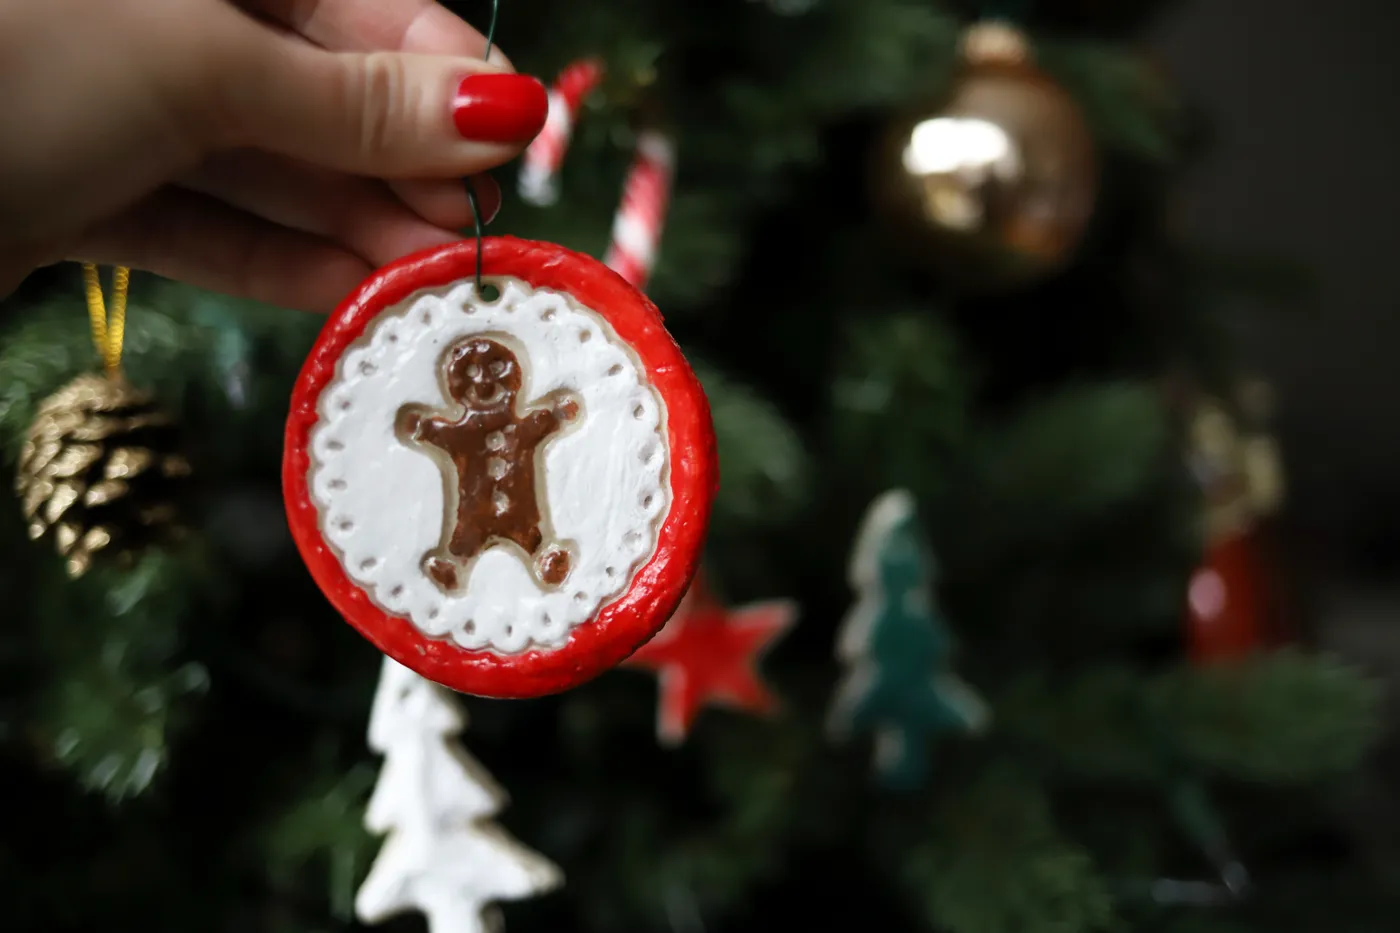
- 1/2-inch flat for the white base
- #4 round for the red border
- 10/0 liner for the face and buttons
Seal with matte polycrylic — gloss makes it look store-bought in the wrong way.
There are really only three colors in play: warm brown, white, and a red that leans tomato rather than burgundy. The white scalloped ring is what makes the brown figure readable — without that halo, brown on cream disappears at three feet. Try the same formula with navy replacing red and you get a calmer, slightly Scandinavian ornament. Keep the white ring either way.
8. Gingerbread and Stars Waiting on Parchment
Unbaked dough looks gorgeous and behaves badly if you rush it. Thick shapes puff in the middle and crack across the surface; thin ones curl at the edges. Roll everything to the same thickness, bake at 200°F, and start checking at 90 minutes — the gingerbread men take longer than the stars. Also, salt dough is not a cookie. It isn’t edible, and pets will absolutely try anyway.
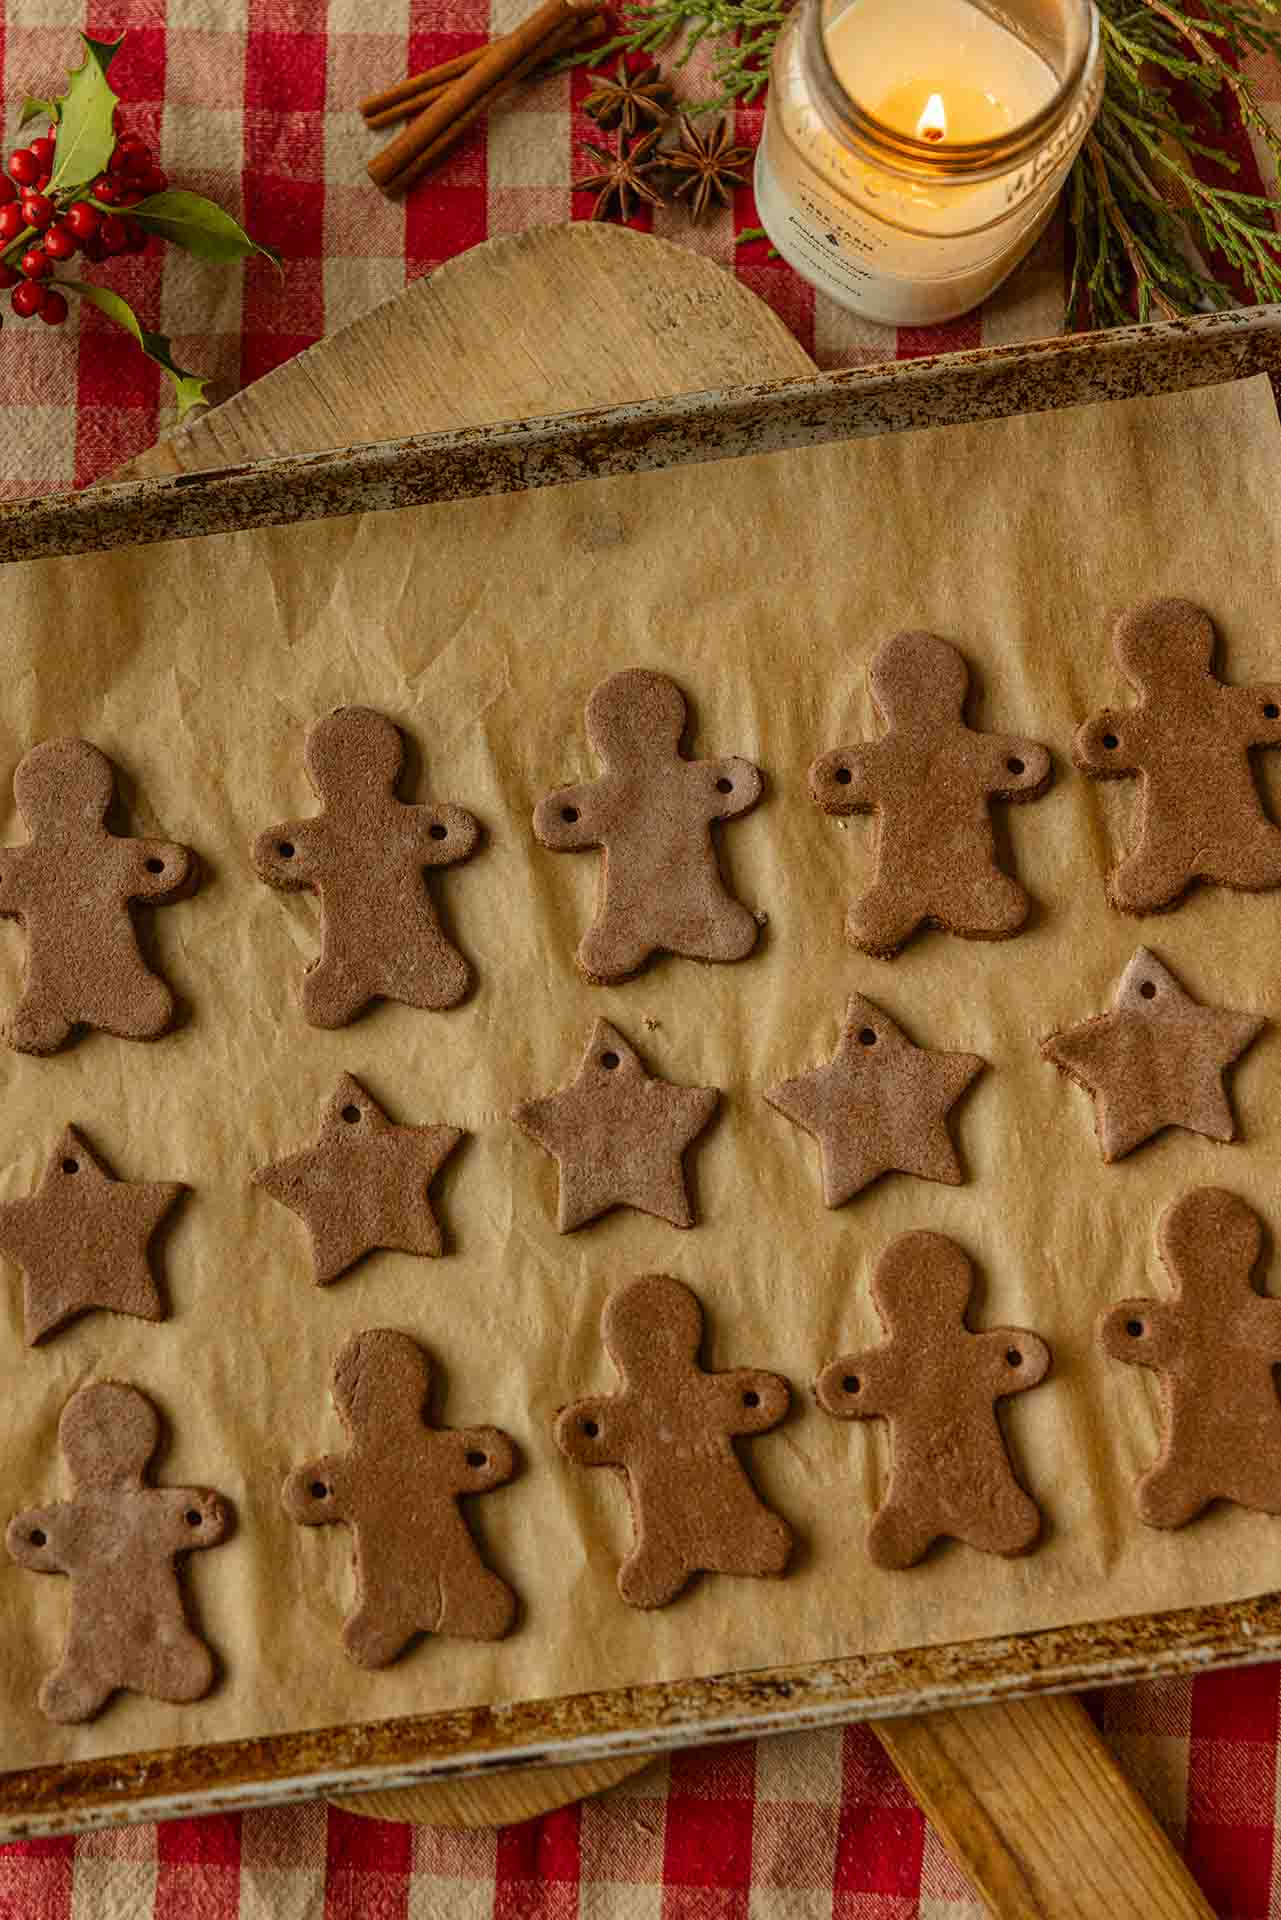
The flour-on-the-counter aesthetic is having a real moment in 2026 — boards full of parchment, cinnamon sticks, and half-finished projects are outperforming polished, styled tree photos. Some of it is the general drift toward slower holidays; some of it is people wanting something to do with their hands that isn’t a screen. Salt dough costs almost nothing, which is exactly why this trend has staying power.
9. Gingerbread Men Swinging on Red-Striped Twine
Debossed faces and buttons catch light differently than a flat painted surface — that’s why these read from across the room even though the color contrast is nearly zero. The red-and-white striped twine does the heavy lifting; it’s the only saturated note in an otherwise brown-on-green picture. And because the ornaments repeat one shape at slightly different angles, the tree looks collected rather than decorated.

Gingerbread men want the middle-to-lower half of the tree, where branches are strongest and you can actually see the embossed detail. On a 7-foot tree, keep them between 20 and 55 inches off the floor and space them at least 5 inches apart — the texture needs breathing room. Smaller 3-inch figures can drift upward if your tree is 8 feet or taller.
10. A White Snowflake Against Flocked Branches
It’s the twine bow. Not the snowflake — the snowflake is lovely and completely standard. A small, slightly uneven jute bow instead of a metal hook is what makes a white ornament on a flocked tree feel made by a person rather than unpacked from a box. Lose it and you lose the warmth, and a bow costs about eleven cents.
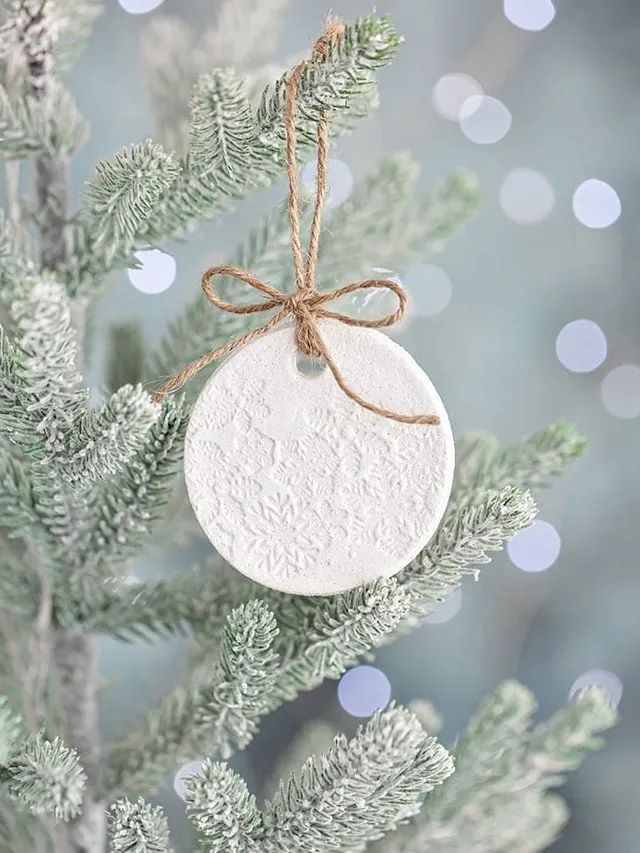
Unsealed salt dough attracts dust and holds it, and flocked trees shed. Blow ornaments off with a hair dryer on cool once a month during the season, and store them in a tissue-lined box rather than a plastic bin — trapped moisture makes them soft. If white powder appears on the surface, that’s salt leaching; wipe with a barely damp cloth and reseal.
11. Little Handprints Pressed Into Marble-White Dough
Skip the $30–$45 handprint kit. Press a child’s hand straight into a 1/4-inch slab, then cut a 3-inch circle around it with a cutter or a glass rim. Bake, write the year in fine-tip paint pen, seal. Six ornaments for under $8. The painted details in Idea #4 follow the same logic — a fine-tip brush beats a kit any day of the week.
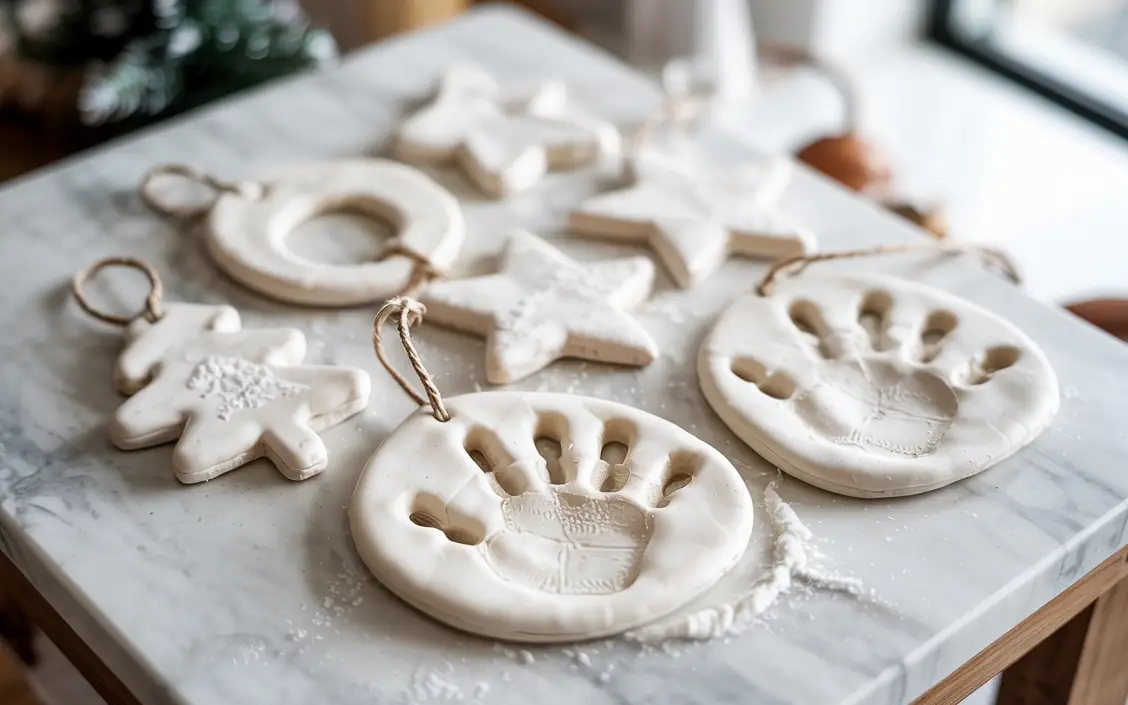
Press the hand firmly and evenly, then lift straight up; rolling the hand away drags the dough and blurs the print. If the impression comes out too shallow, dust the hand with flour and try again on a fresh spot. Always cut the circle after the print, never before, so you can center it properly.
12. A Star Wrapped in Cinnamon Sticks and Twine
Bake and cool the star, then:
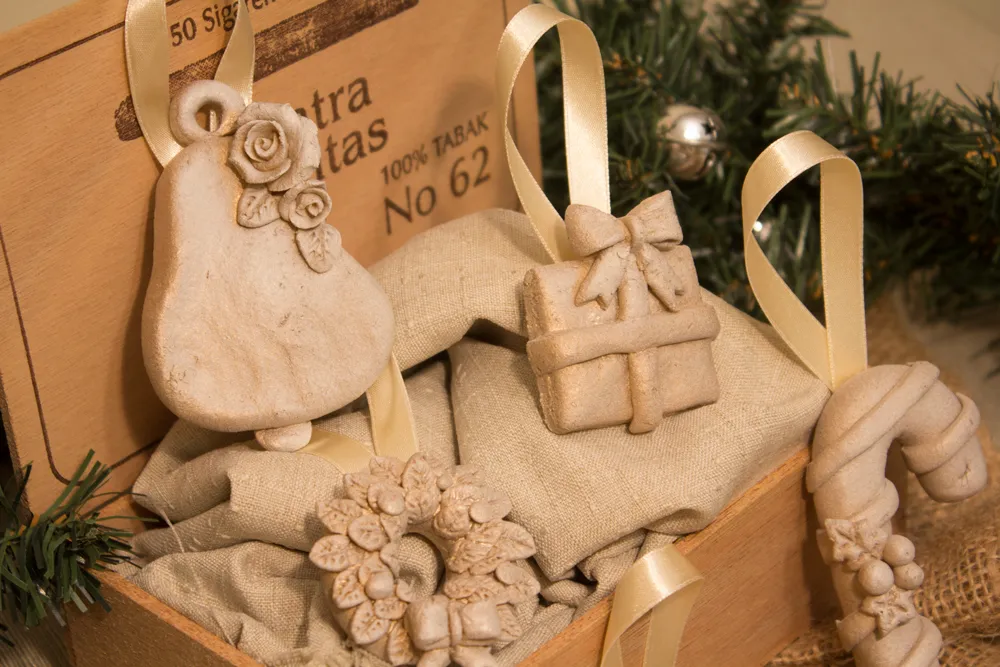
- Cut two 3-inch cinnamon sticks and lay them across the center in a loose X.
- Wrap jute twine around the crossing point three times.
- Tie a square knot at the back so it sits flat against the dough.
- Tuck a single green leaf under the twine and secure with a dot of glue.
- Thread the hanger loop through the hole and knot.
About 10 minutes per ornament, roughly $1.50 in materials.
The single green leaf is the whole point. Everything else — dough, cinnamon, twine — lives in the warm beige-brown range, cozy but monochrome. One small leaf pushes it from November into December. Rosemary, bay, or a tiny holly leaf all work; what matters is that one cool-toned note against all that warmth.
13. Red, White, and Gold Paint on Pale Wood
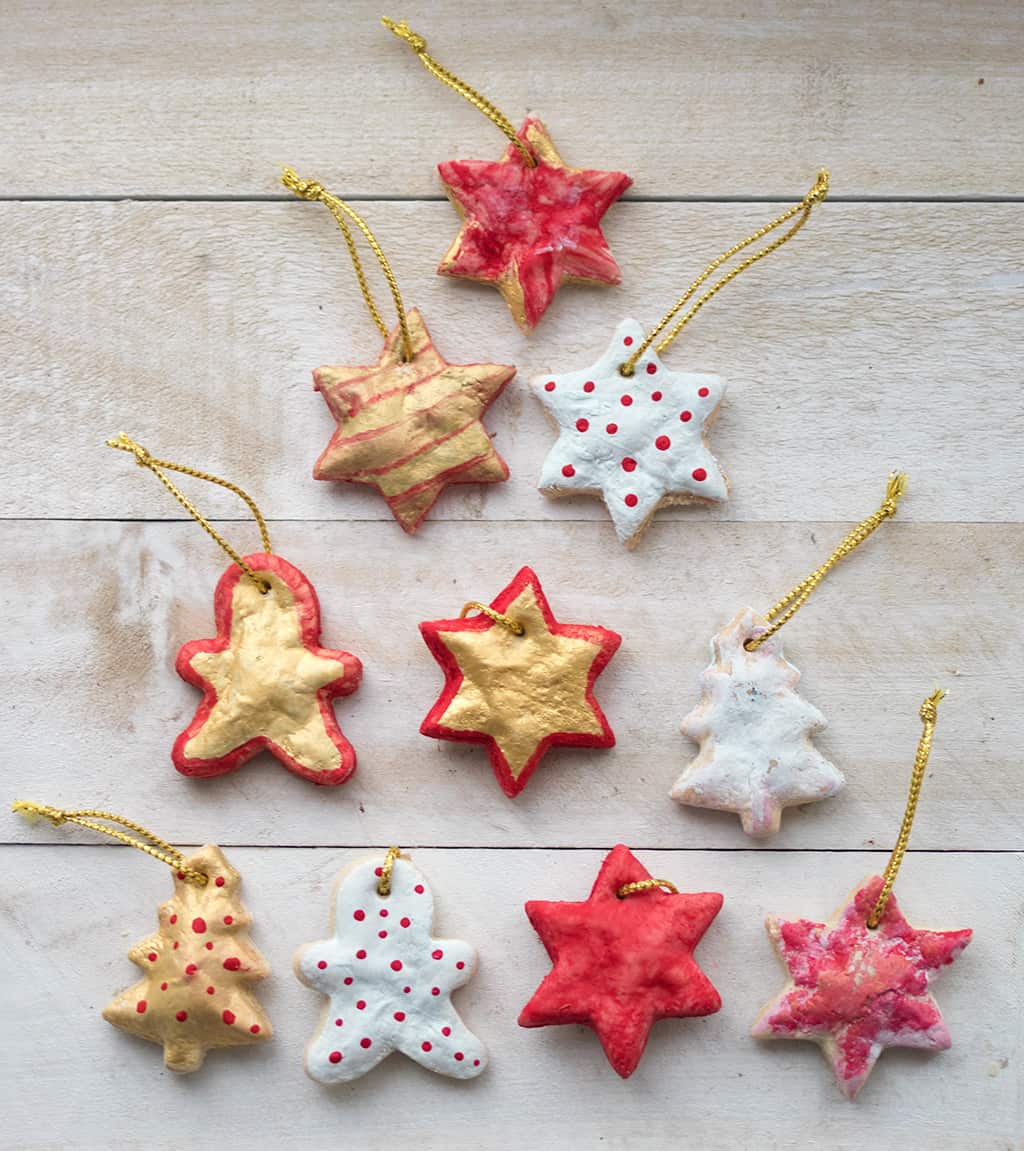
Roughly 60% white base + 25% red + 15% gold, with the gold confined to small areas — hanging strings, dots, edges. Gold is the easiest color to overdo on salt dough; past 15% it goes mall-ornament fast. The polka dots and marbled swirls are really texture pretending to be a third color, which is why this many patterns sit together without fighting.
- Dough ingredients: $2
- Acrylic paint set (red, white, gold): $9
- Gold cord for hangers: $4
- Assorted brushes: $6
- Matte sealer: $6
Total: about $27 for 20 hand-painted ornaments. Budget alternative: dollar-store metallic gold and cotton swabs for the dots — $3 total, and the dots actually look better slightly irregular.
14. Plain White Stars, Nothing Else
White on white works because of texture, not color. Every star here has a slightly different surface — some stamped, some with visible fingerprints — and that variation is the entire design. On a tree with colored lights they glow; on a tree with warm white lights they go soft and chalky. Both work. What doesn’t work is sealing them in high gloss, which kills the matte contrast.
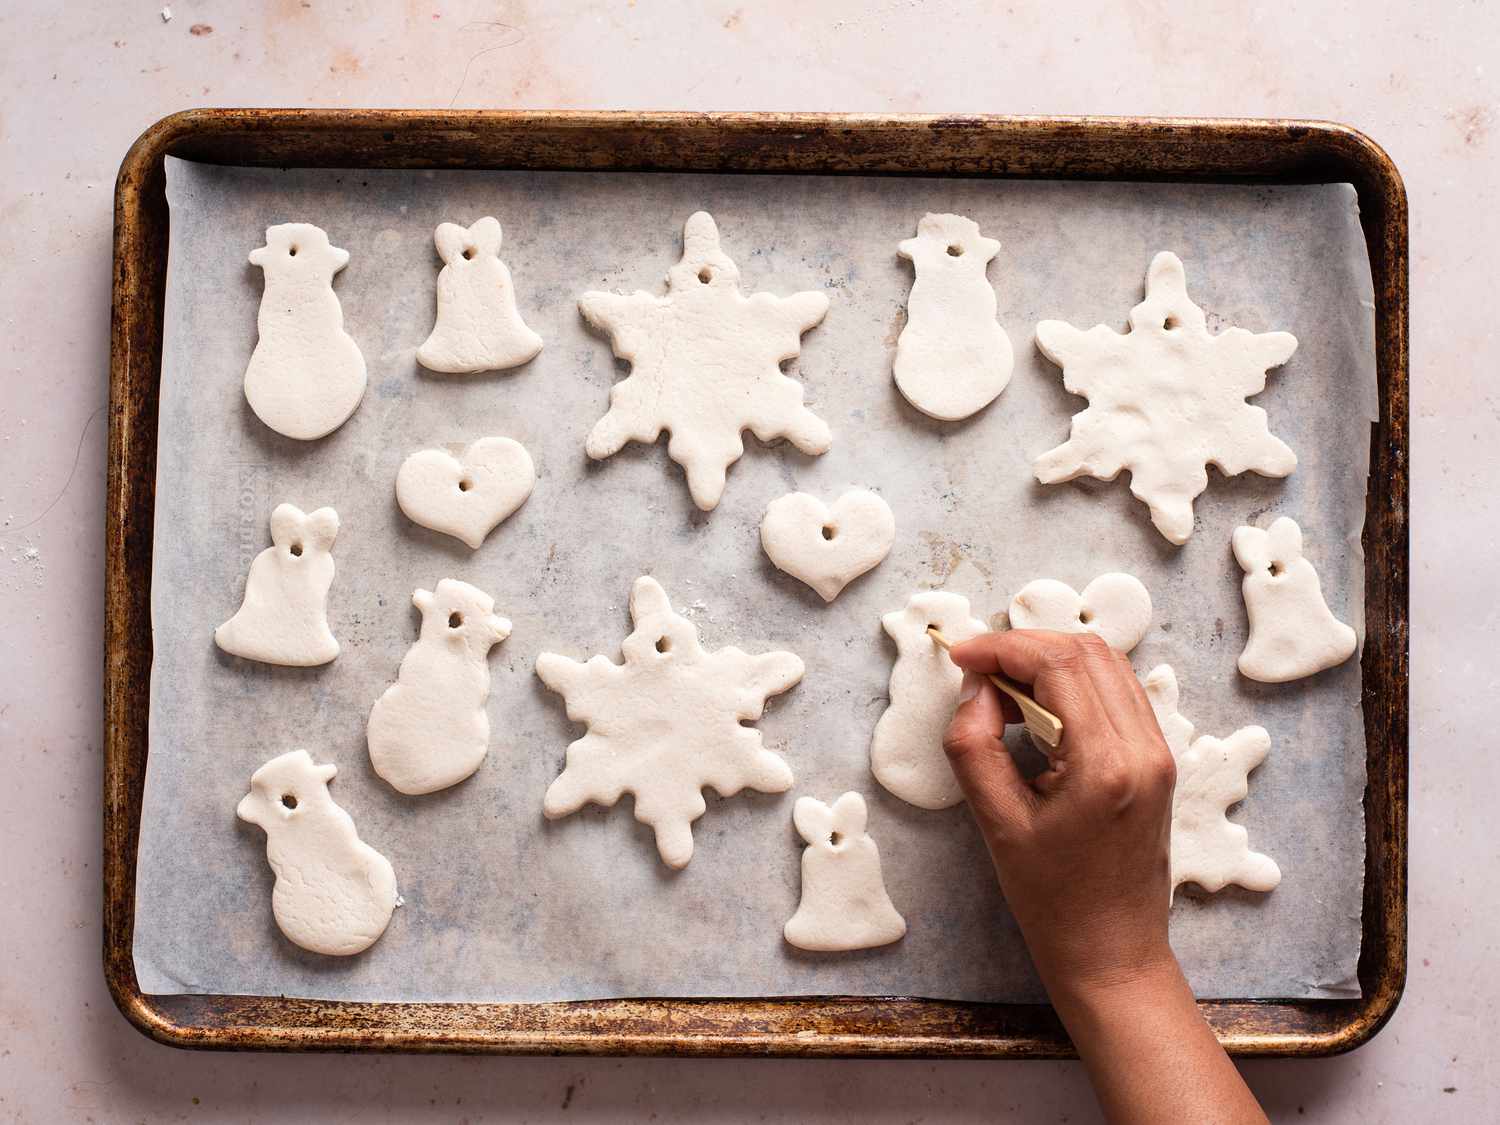
Matte white dough shows every handling smudge, and by season two unsealed stars pick up a gray cast from cardboard storage. Seal them, store them in tissue, and keep them away from candles and radiators — salt dough is hygroscopic and softens in humid air. A bathroom tree is a hard no.
15. Christmas Trees Made From Sea Glass
Bake and cool the tree shapes first, then:
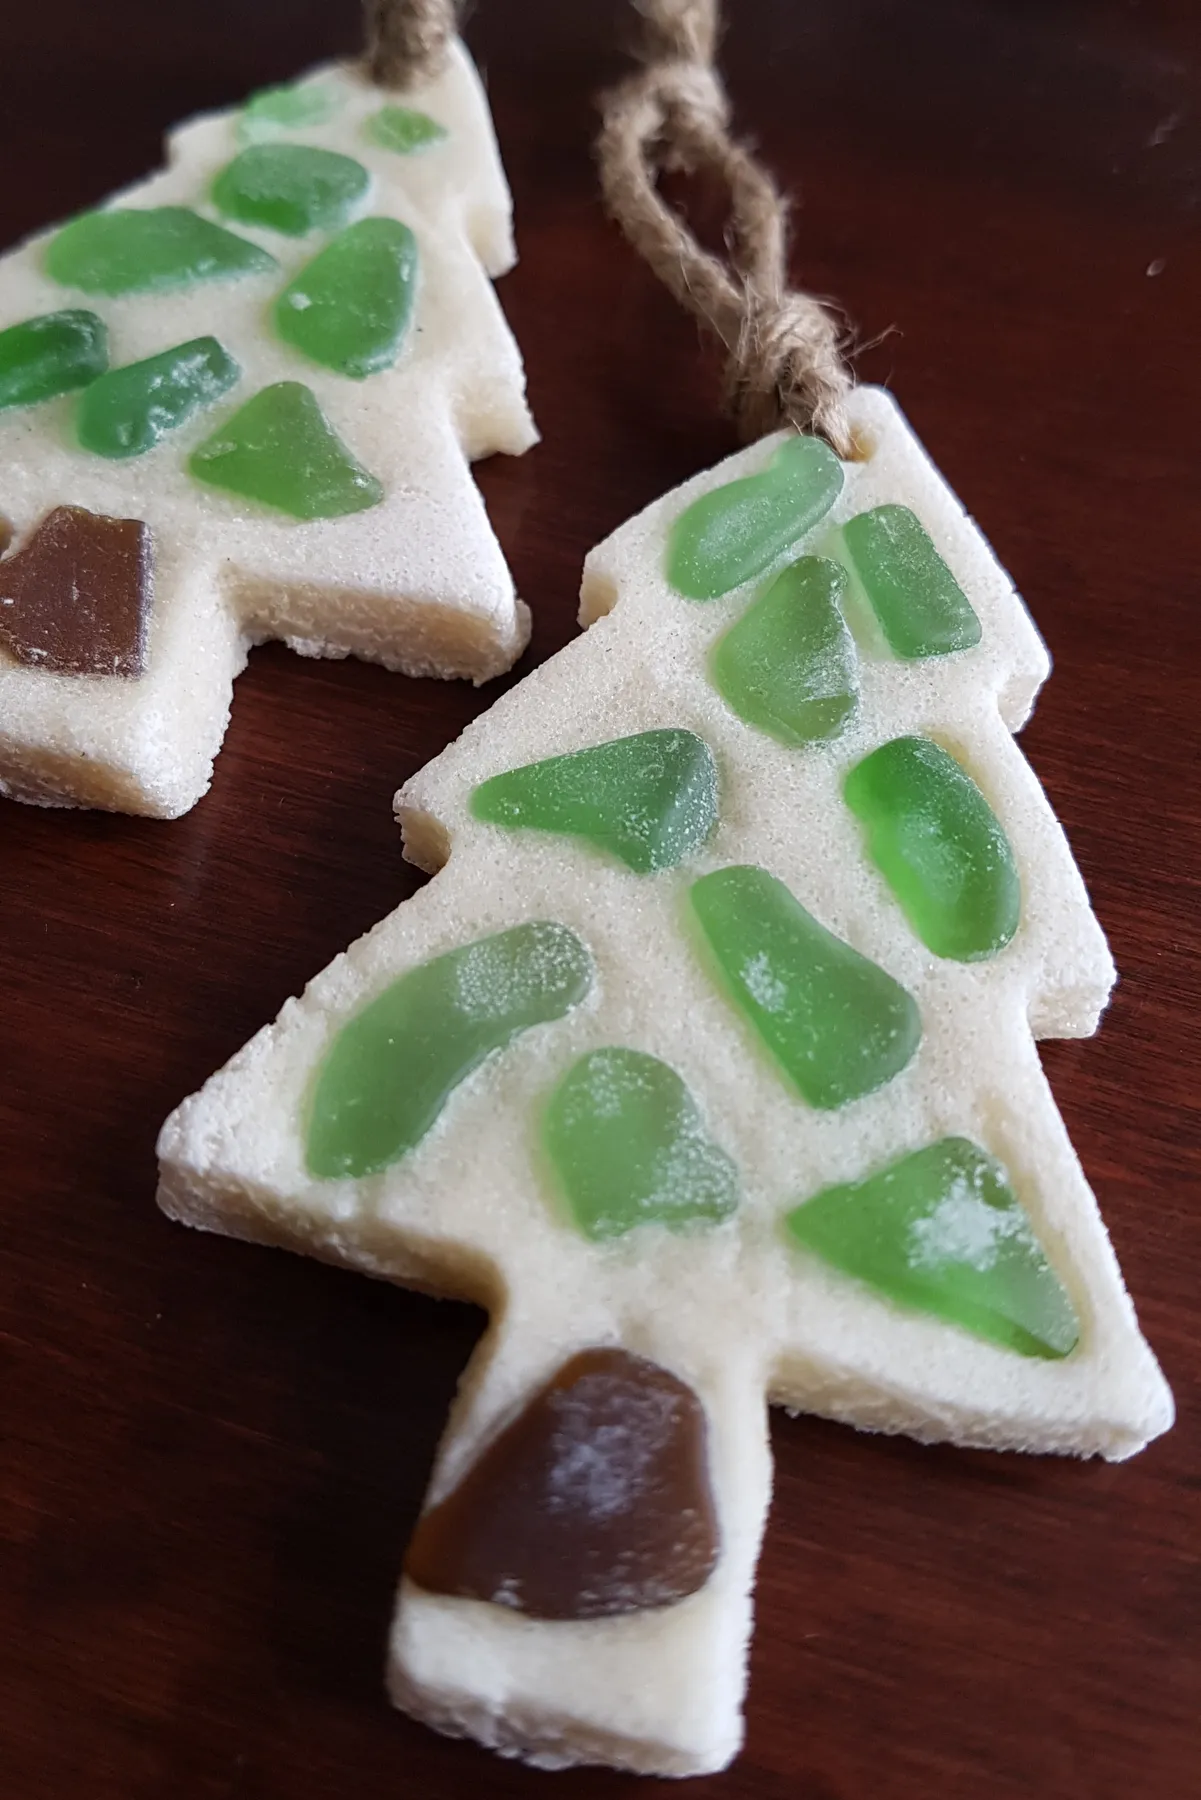
- Lay the sea glass pieces out on the dough before you glue anything.
- Sort by size — largest at the bottom, smallest at the top.
- Apply a small dab of E6000 to each piece with a toothpick.
- Press and hold 15 seconds, working top to bottom.
- Cure 24 hours flat before hanging.
Around 30 minutes for two ornaments; sea glass runs about $8 for a mixed bag.
Sea glass is heavier than it looks, and hot glue fails in cold garages and humid attics. Use E6000 or clear two-part epoxy and re-check every piece at the start of each season. If you lose a shard, green bottle glass from the recycling bin works fine — just sand the edge so it isn’t sharp.
16. A Rough Beige Snowman Under Warm Lights
This ornament works because it refuses to be neat. The granular, almost sandy surface and three embedded brown dots read as a face at a glance and as texture up close, which is the right order of operations for a tree ornament. A smoother snowman in the same palette would vanish among the lights — texture is what makes it visible in low light.
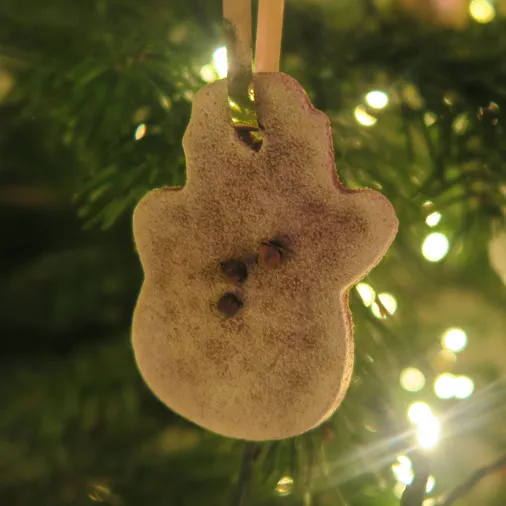
No kit required. A $2 bag of salt, a cup of flour, and a skewer for the buttons gets you a whole batch. The trick is working two tablespoons of fine cornmeal or sand into the dough for that grainy finish, then pressing chocolate-chip-sized balls of brown dough into the surface before baking. Eight ornaments for about $4. Comparable textured ornaments sell for $12–$18 each.
17. Small Hands, Cookie Cutters, and a Floured Table
Before the kids sit down:
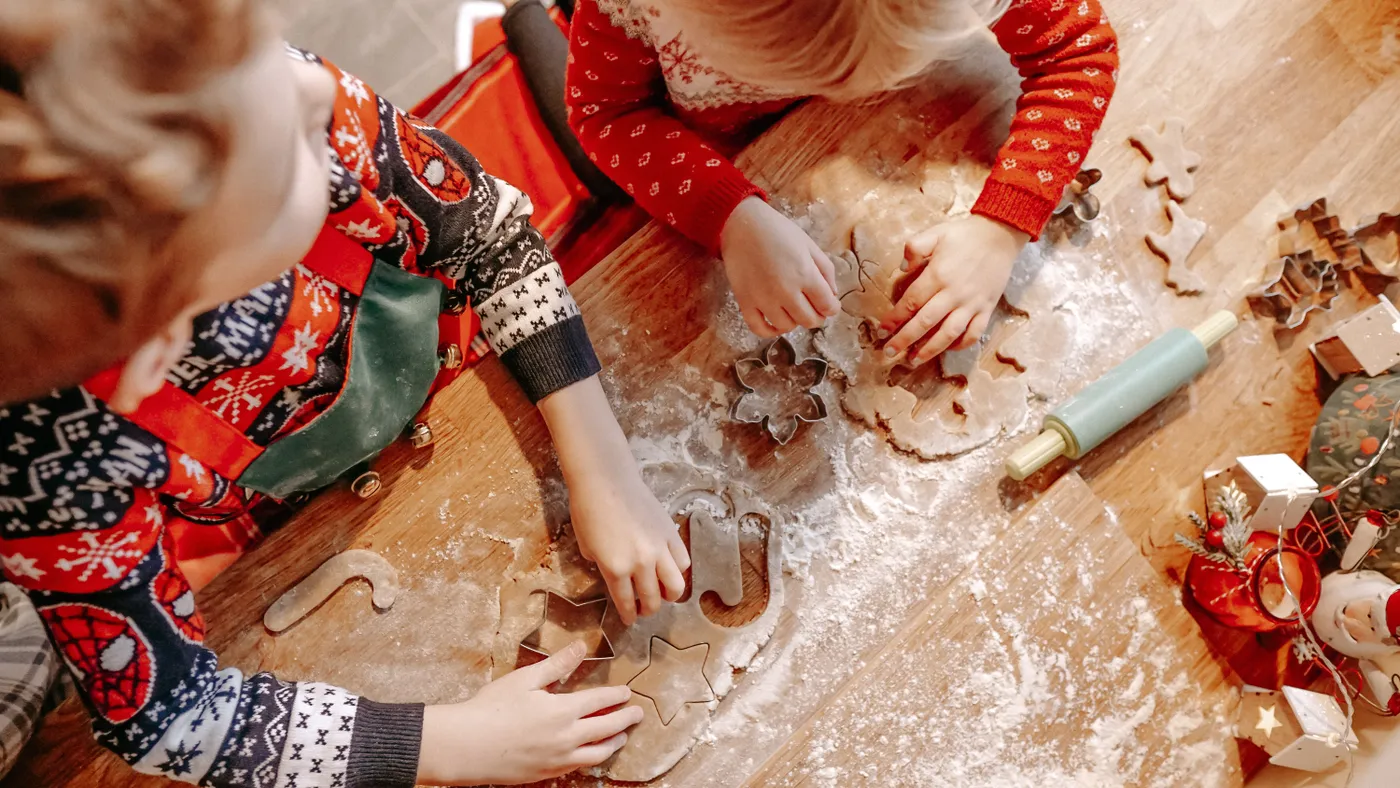
- Clear a low table and cover it with parchment, not a cloth
- Pre-roll the dough into two slabs so nobody fights over the rolling pin
- Set out only the cutters you actually want used
- Keep a bowl of flour for dipping, not sprinkling
- Have the baking sheet ready next to the work zone
Salt dough is salty enough to sting a paper cut and it is absolutely not edible, so move the snack bowl and say it out loud. Dough also dries out fast under small hands — keep the unused portion under a damp towel. Bake everything the same day; dough left on the counter overnight gets crumbly and weird.
18. Etched Trees, Stars, and Snowflakes on Veined Stone
One off-white plus one accent green, that’s the whole palette. The etched patterns do the work of color, and the veined surface behind them acts as a neutral gallery. Want a different mood? Keep the ornaments identical and swap the backdrop — a dark wood tray makes them rustic, a marble slab makes them modern, a red linen runner makes them traditional. The ornaments don’t change; the context does.
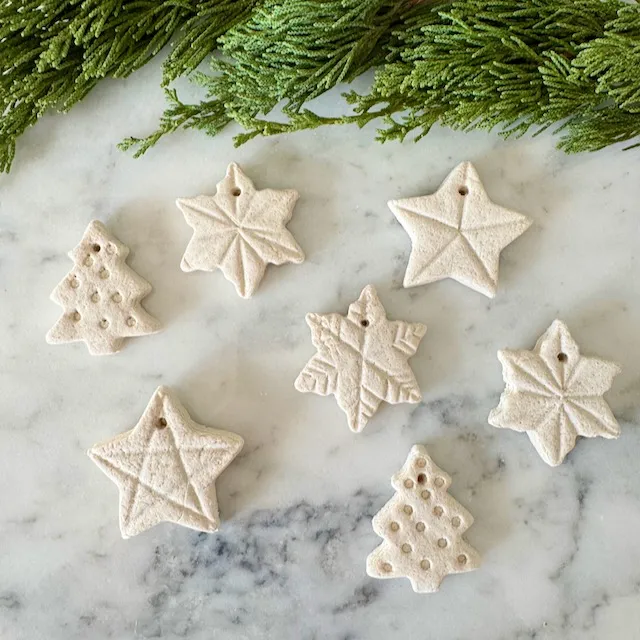
- Rolling pin: $8
- Small stamps for etching: $6
- Skewer for the dot pattern: $1
- Jute twine: $3
- Matte sealer: $6
Total: about $24 for a set of 15. Budget alternative: press the pattern with a marker cap and a fork instead of stamps — zero extra cost, and the imperfect impression suits the look better anyway.
19. A Brown Snowflake Painted White
Warm brown as a base is the smart move: any white you paint on top reads as snow because the contrast is built in. Start from a white ornament and paint white snowflakes and you get nothing at all. The brown also matches the shadow tones in pine needles, so the ornament settles into the tree instead of floating on it.
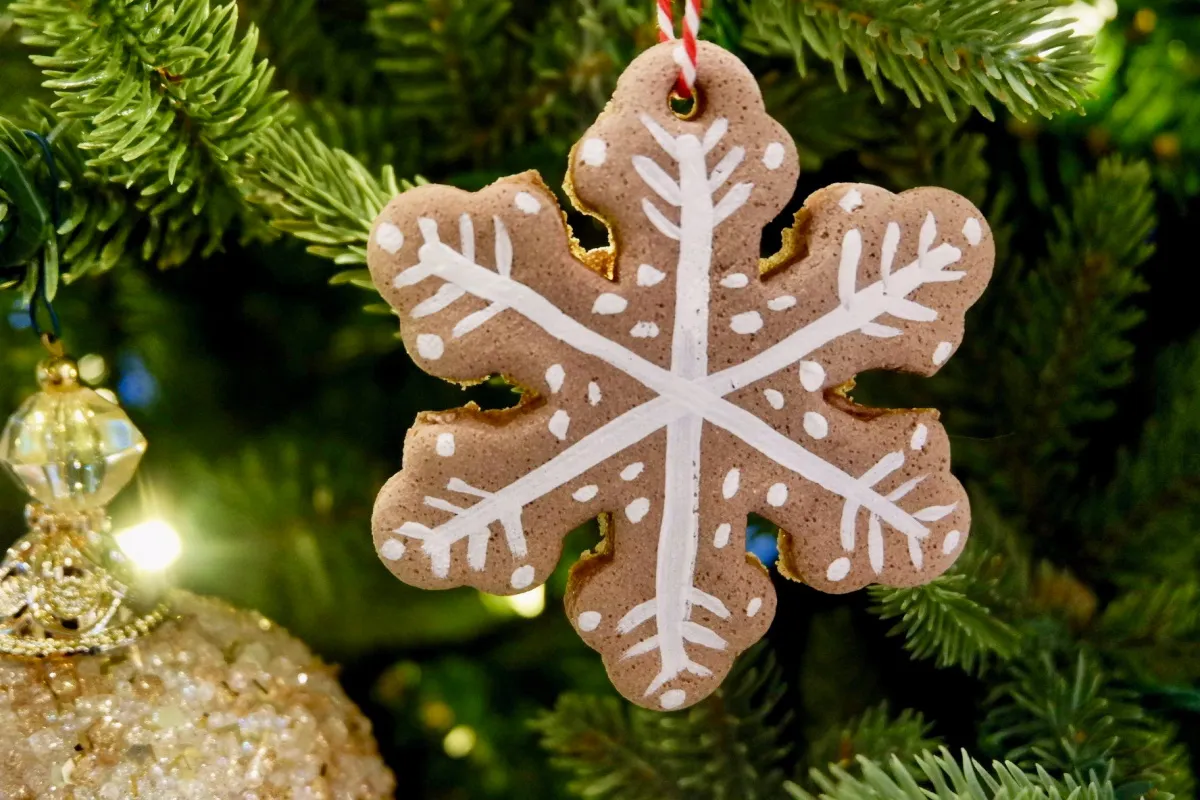
Work in thin, semi-opaque coats so the brown shows through at the edges of each stroke — that halo is what makes it look painted rather than printed. Three things matter:
- Load the brush lightly and wipe it before touching the ornament
- Paint the long arms first, then the short ones
- Let each arm dry before the next so you don’t smudge
Fix mistakes with a damp toothpick while the paint is still wet.
20. A Glossy Red Heart With a Cartoon Couple
The white glitter band across the middle. It’s doing structural work: without it, the two figures float on a red heart with nothing to ground them. That band creates a horizon line, which lets the couple read as standing at the top of the heart rather than stuck to it. Remove the band and the charm collapses into plain decoration.
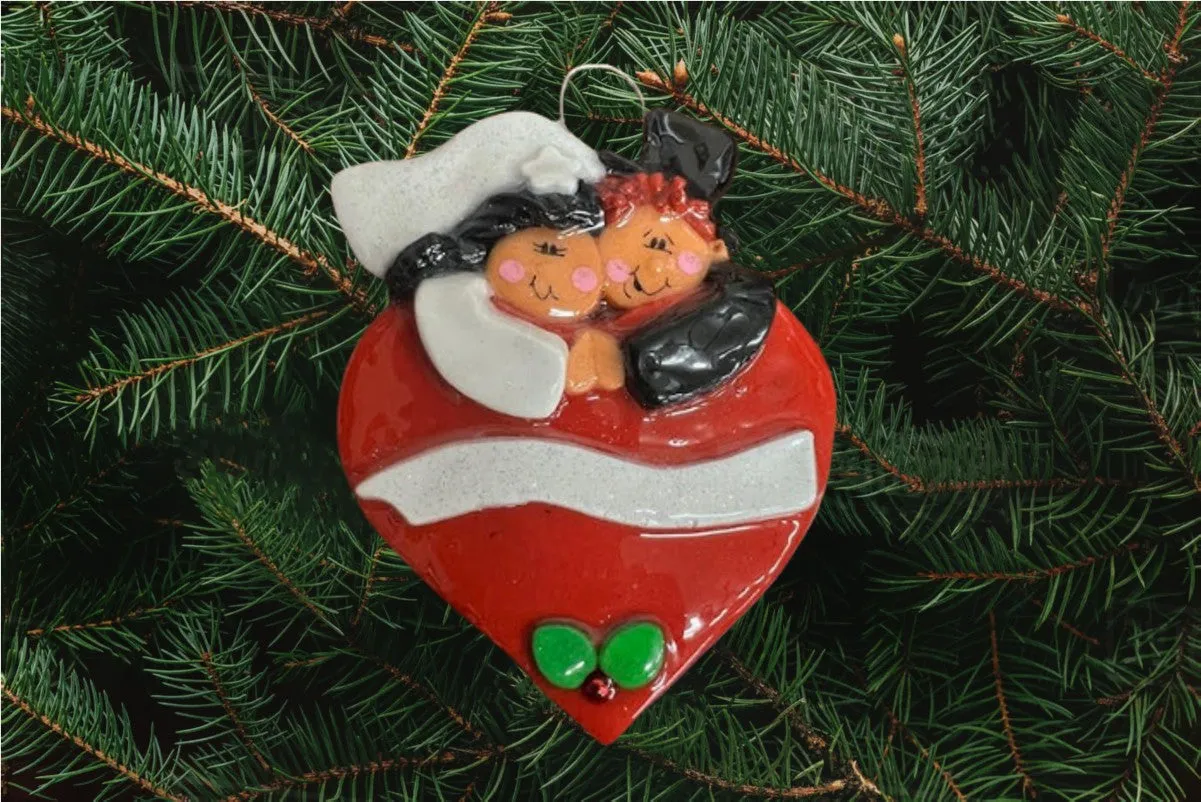
Personalized heart ornaments run $18–$30 from custom sellers. A blank glossy heart is $2 at a craft store; paint two coats of red enamel, add a strip of white glitter tape ($4 a roll that lasts years), and glue on a small clay or printed figure. Under $8 total. Same heart motif as Idea #2 — clearly 2026 is the year of the red heart.
21. Gold and White Ornaments on a Dark Wood Tray
Roughly 50% off-white, 35% gold, 15% natural brown from twine, tray, and pinecones. That’s a lot of gold, and it works only because the gold is patterned — snowflakes and stars — rather than solid, so the eye reads texture before color. Swapping in silver? Keep the same ratio. Going warmer with copper? Drop gold to 25% or the tray turns brassy.
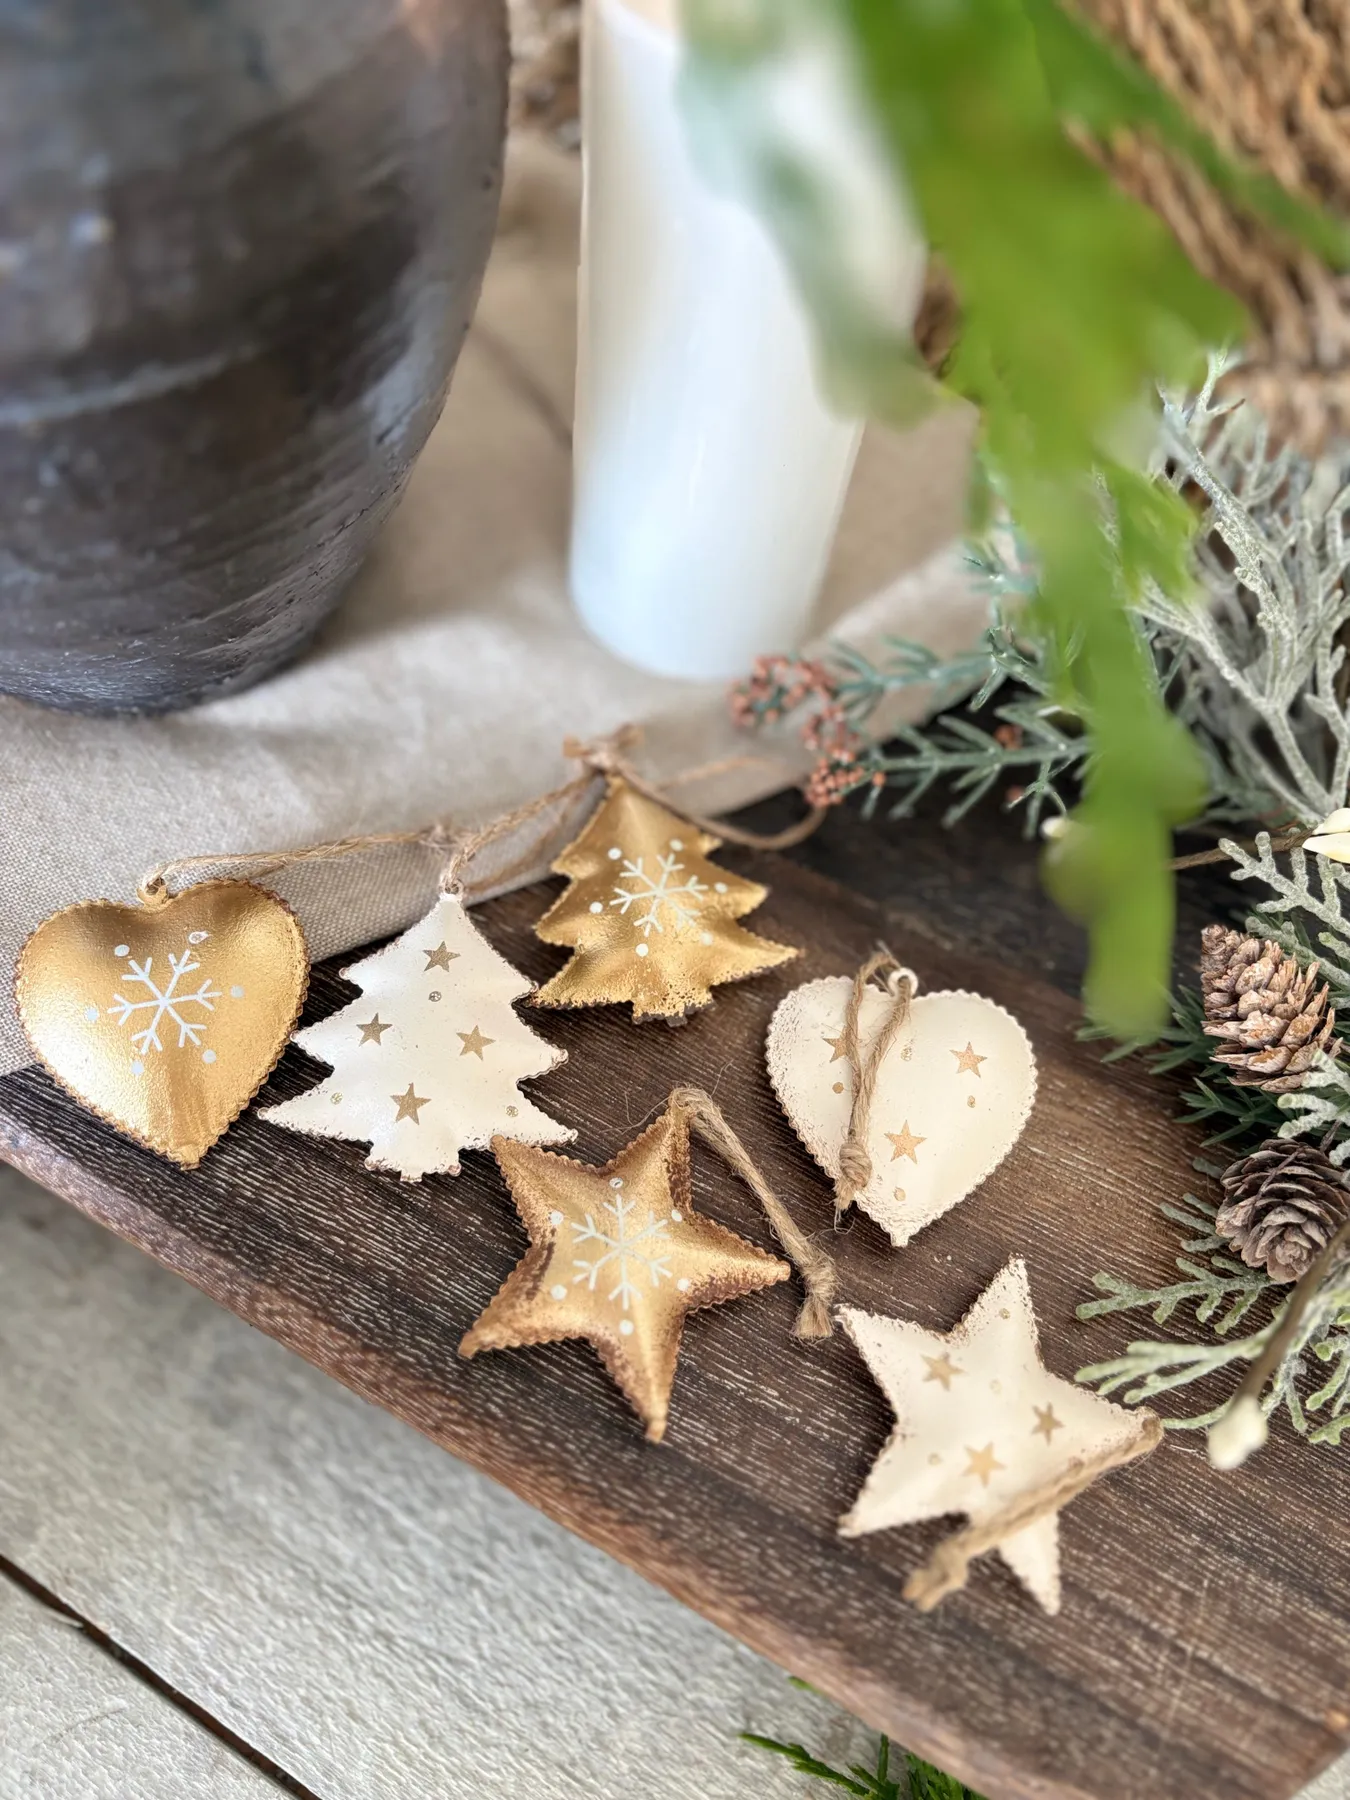
Metallic craft paint dulls with handling. Seal gold-painted ornaments with satin or gloss varnish — matte kills the shimmer — and lift them by the twine, never the painted face. If they start looking chalky, a thin coat of varnish brings the shine back. The linen underneath needs a shake-out once a season too.
22. Five White Snowflakes in a Gray Gift Box
If you’re gifting a set, box them in a shallow rigid box with shredded paper and wrap each piece in tissue — but leave the hanging string out and visible so the recipient knows it’s an ornament, not a coaster. A 6x6x3-inch kraft box holds four 3-inch snowflakes perfectly, and a strip of washi tape across the lid costs pennies and looks intentional.
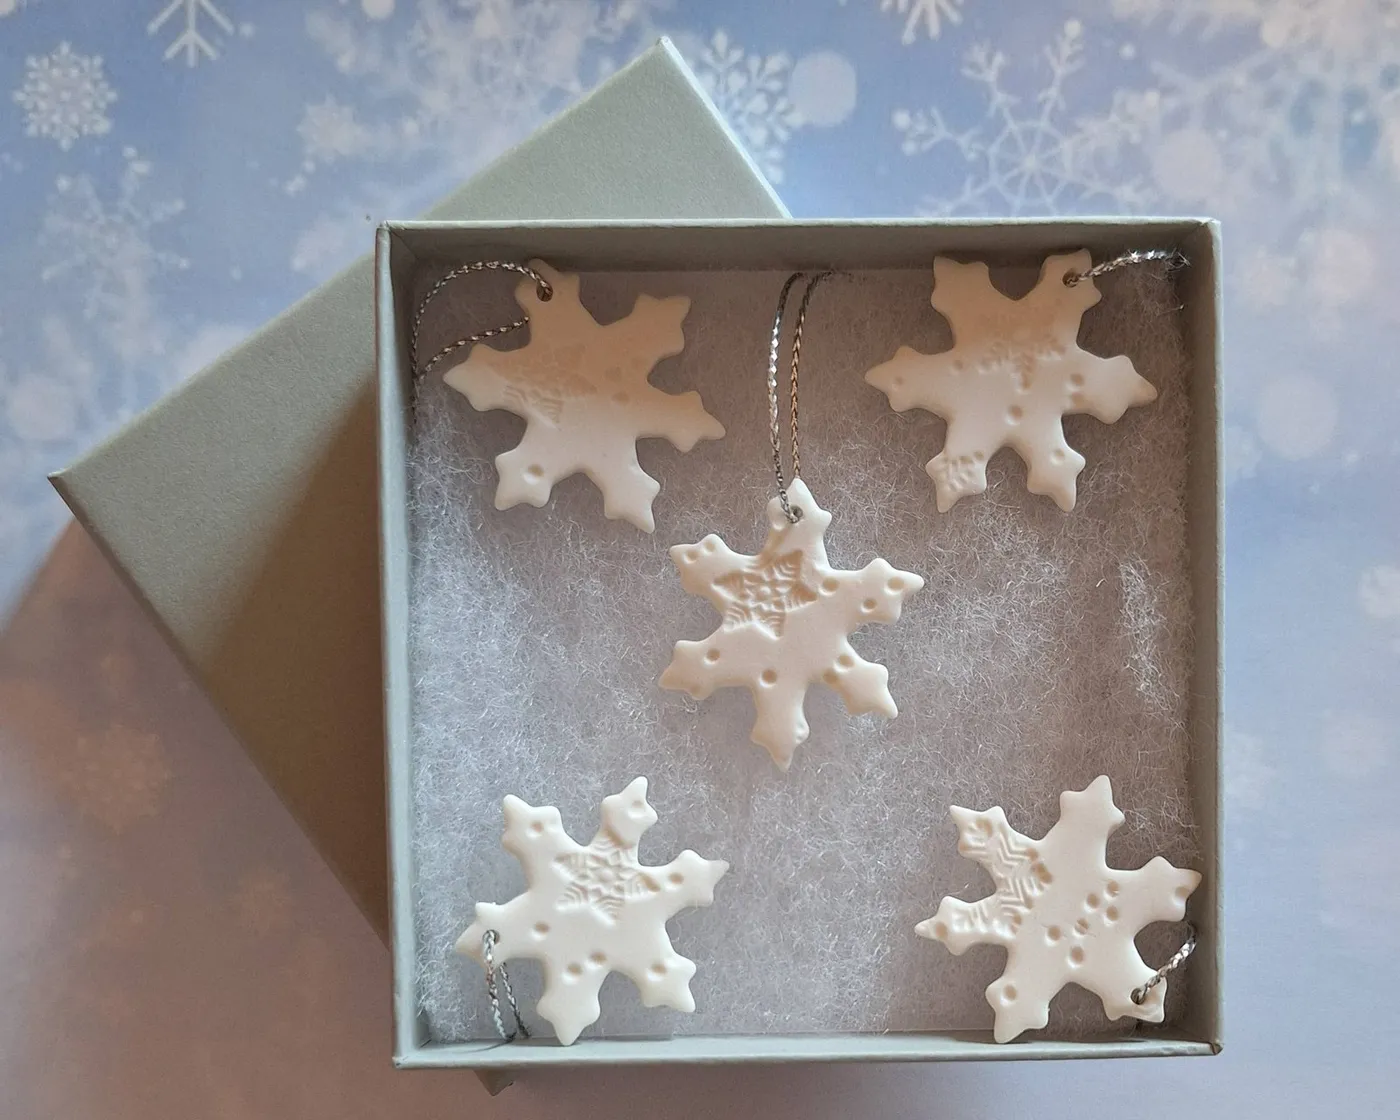
- Ornaments fully dry and sealed, not tacky
- Strings cut to 4–5 inches, no longer
- Box deep enough that the lid doesn’t press down
- Year written on the back in pencil or paint pen
- One kept back for your own tree
23. Brown Textured Ornaments With Pipe-Cleaner Hangers
The hangers are the personality here. Pipe cleaners, patterned ribbon, and two-tone twine cost almost nothing, but they turn identical brown discs into a scrappy, collected set. The distressed grey-blue surface behind them is deliberate too — cool background, warm ornaments, and one small red note from the advent calendar so nothing goes flat.
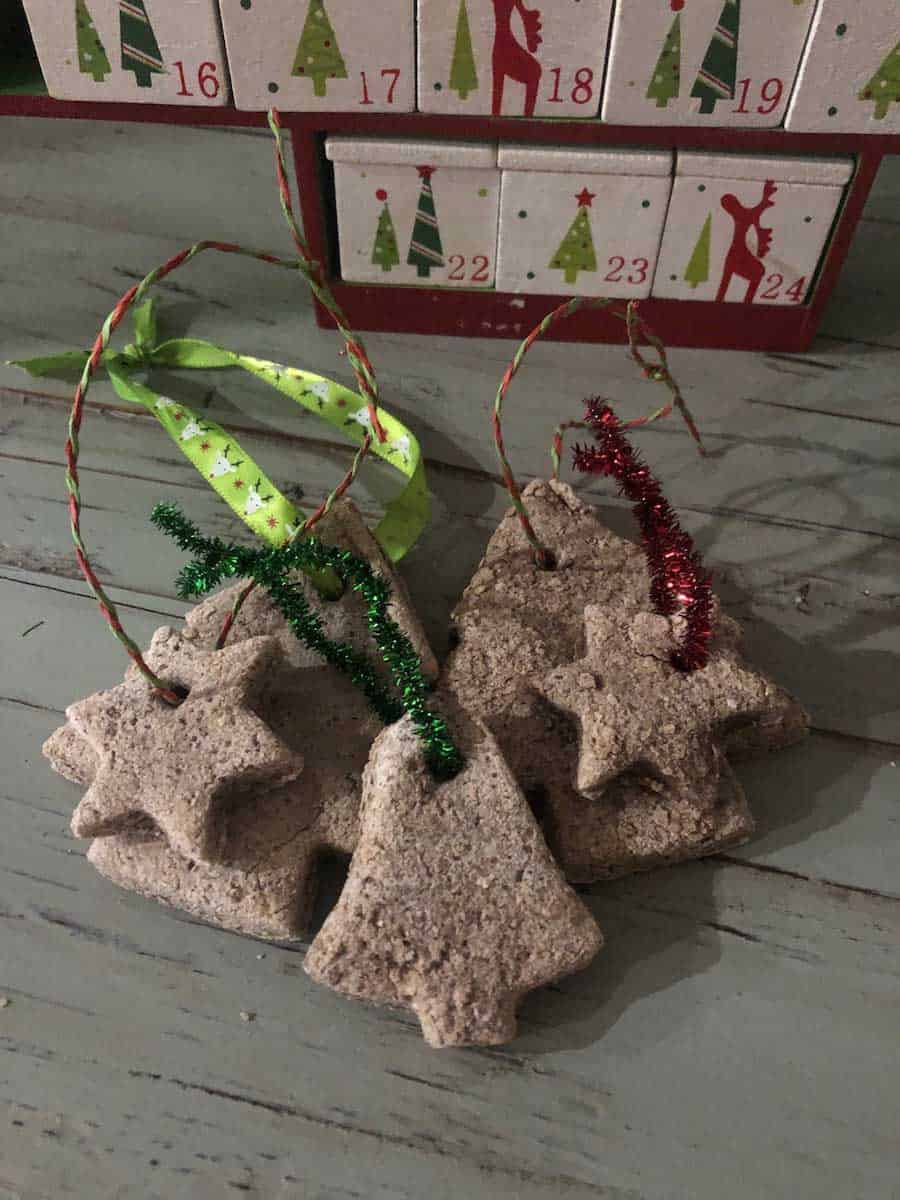
- Dough ingredients: $2
- Cocoa powder for the brown tone: $3
- Green patterned ribbon, 1 yard: $3
- Red and green twine: $4
- Multicolor pipe cleaners: $2
Total: about $14 for 18 ornaments. Budget alternative: cut ribbon from a thrifted holiday shirt, or twist two strands of leftover yarn together — free, and honestly more charming.
24. A Glittered Snowman With a Winking Face
Bake and cool the snowman, then:
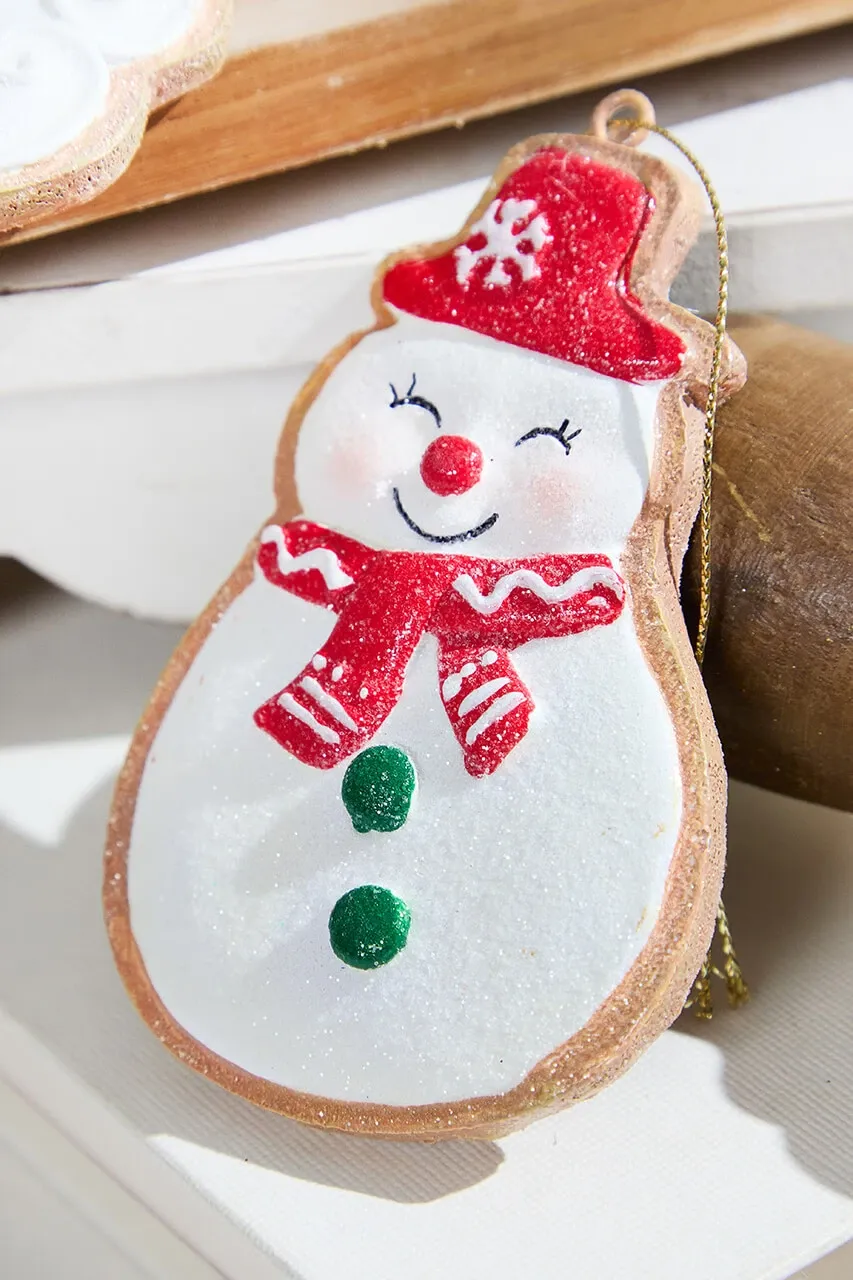
- Brush the body area with Mod Podge, avoiding the hat and scarf zones.
- Hold the ornament over a paper plate and spoon fine white glitter over it.
- Shake off the excess back onto the plate.
- Let it dry one hour, then seal with a second thin Mod Podge coat.
- Paint the hat, scarf, and buttons last so the glitter doesn’t grab them.
About 25 minutes per ornament plus dry time; glitter and glue under $8 total.
The wink. Not the glitter, not the hat — the wink. It costs one extra brushstroke and it’s the difference between a snowman ornament and an ornament with a personality. Everything else here is standard-issue sparkle. If you’re making a set for kids, vary the faces: wink, surprise, lopsided grin. That tiny bit of character is what gets kept for twenty years.
25. Embossed Ornaments Against a Textured Red Wall
Embossed details are dust traps, and matte brown dough shows every fingerprint. Dust with a soft brush, never a damp cloth — moisture softens unsealed edges. Store these somewhere climate-neutral; a hot attic will lighten the surface over a summer. Sealed with matte polycrylic, the color holds a decade. Felt and paper backdrops fade in direct sun, so keep the display off a south-facing wall.
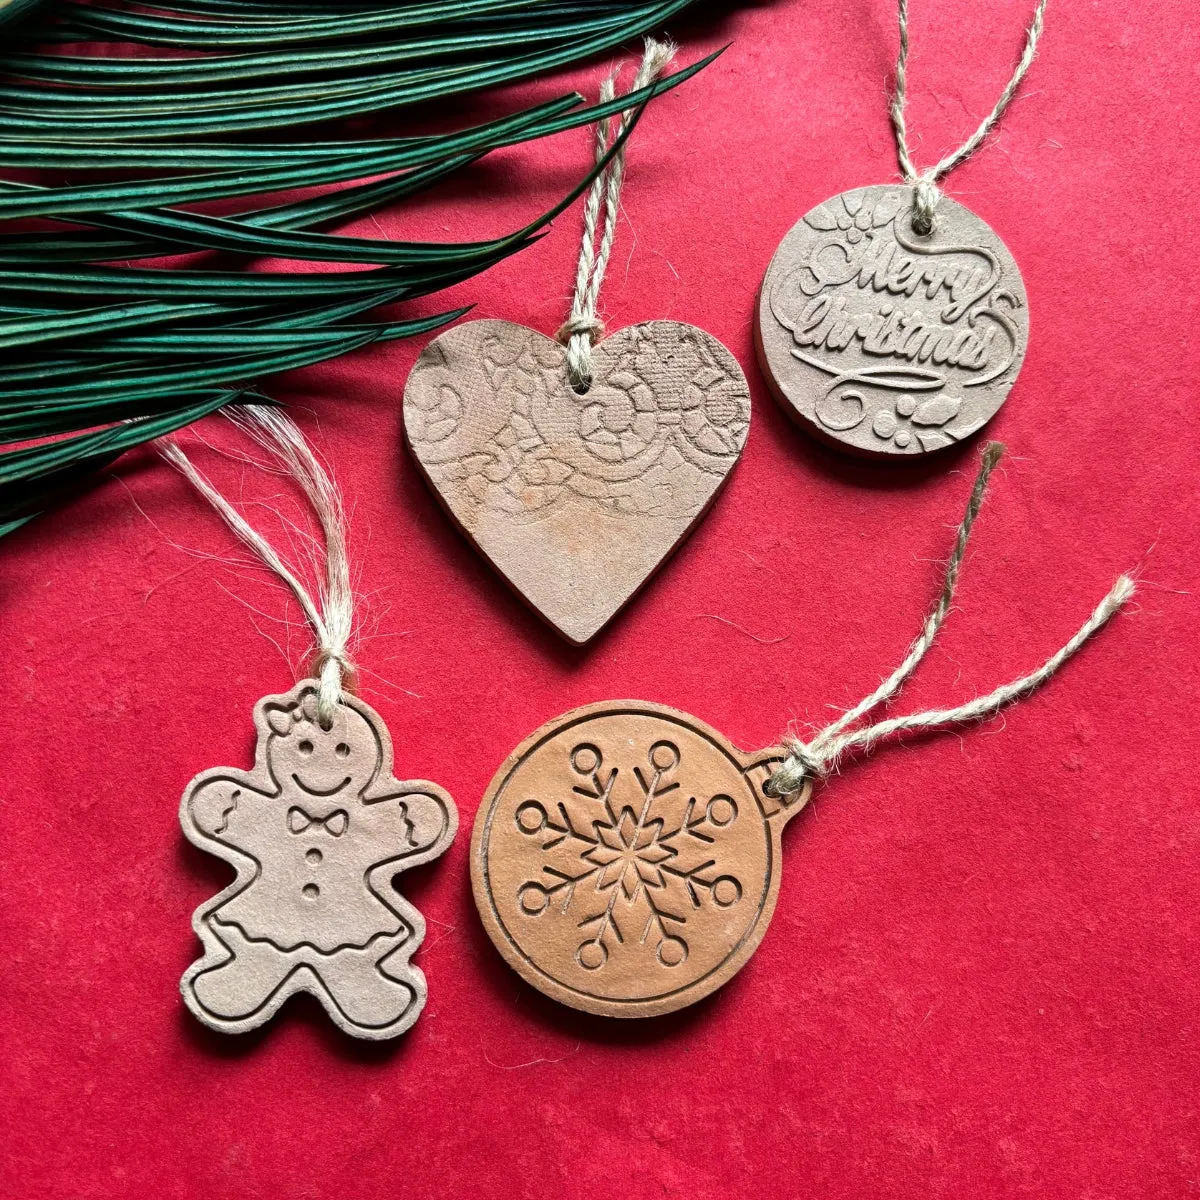
Emboss before you cut, not after. Roll the dough, press your stamp or texture mat across the whole slab, then cut the shapes — that way the pattern runs cleanly to the edge instead of looking clipped. And punch the hanging hole with a straw 3/8 inch from the top edge before baking; anything closer chips.
26. Dark, Powdered Ornaments With Gold Ribbon Woven Through
Roughly 80% dark reddish-brown + 15% flour-white dusting + 5% gold. That’s a gingerbread-cookie formula, and it’s the opposite of pale-and-pastel: less contrast at a distance, more depth up close. The gold ribbon reads as one continuous reflective line through the whole pile. If you’re swapping it out, use ribbon rather than string — you want a wide, flat note, not a thread.
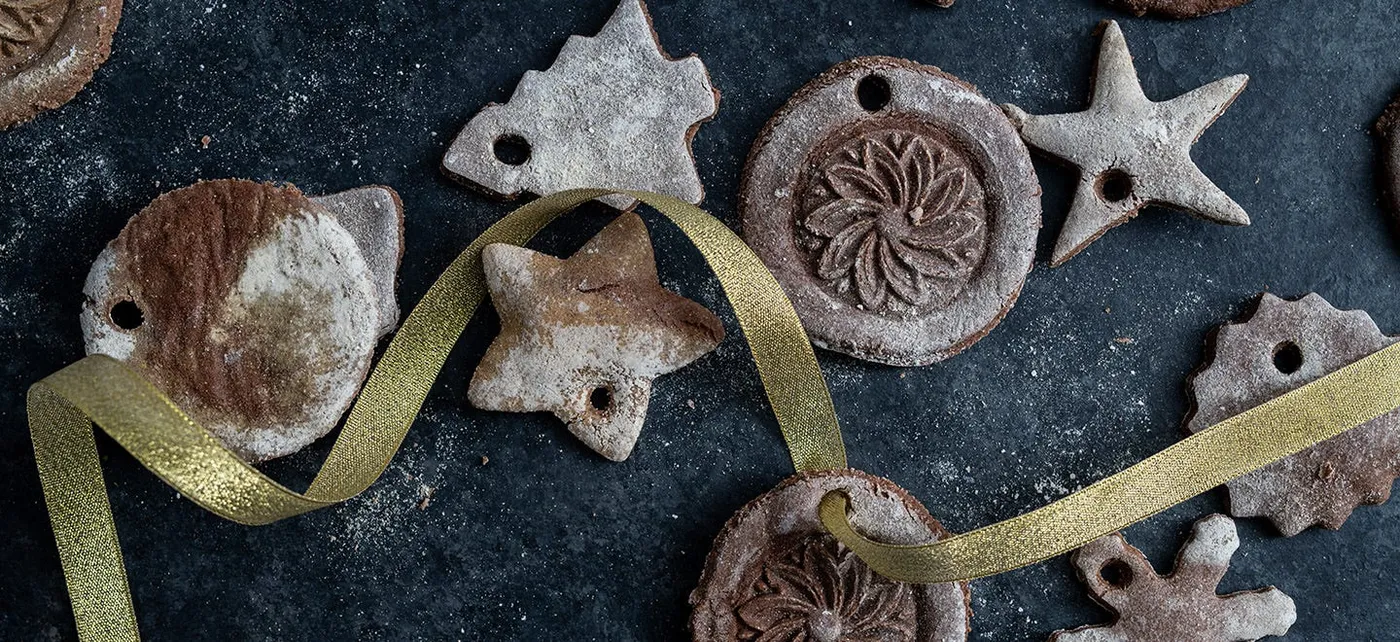
Cocoa-heavy dough browns unevenly and scorches at the edges if your oven runs hot. Buy an oven thermometer; this is the batch that reveals whether yours is accurate. And that white dusting is flour on some ornaments and a mold risk if they’re stored damp. Brush off the excess, and never stack these without tissue between them.
27. Cookie Ornaments Hooked on Candy Canes
Candy-cane hooks are the shortcut spreading fast this year because they solve a real problem: no string, no knot, no fiddling with a wire that pokes through. It’s the same energy as a clip-on earring. They photograph beautifully, and because the hook itself is decoration, plain ornaments suddenly look finished. This one’s a keeper.
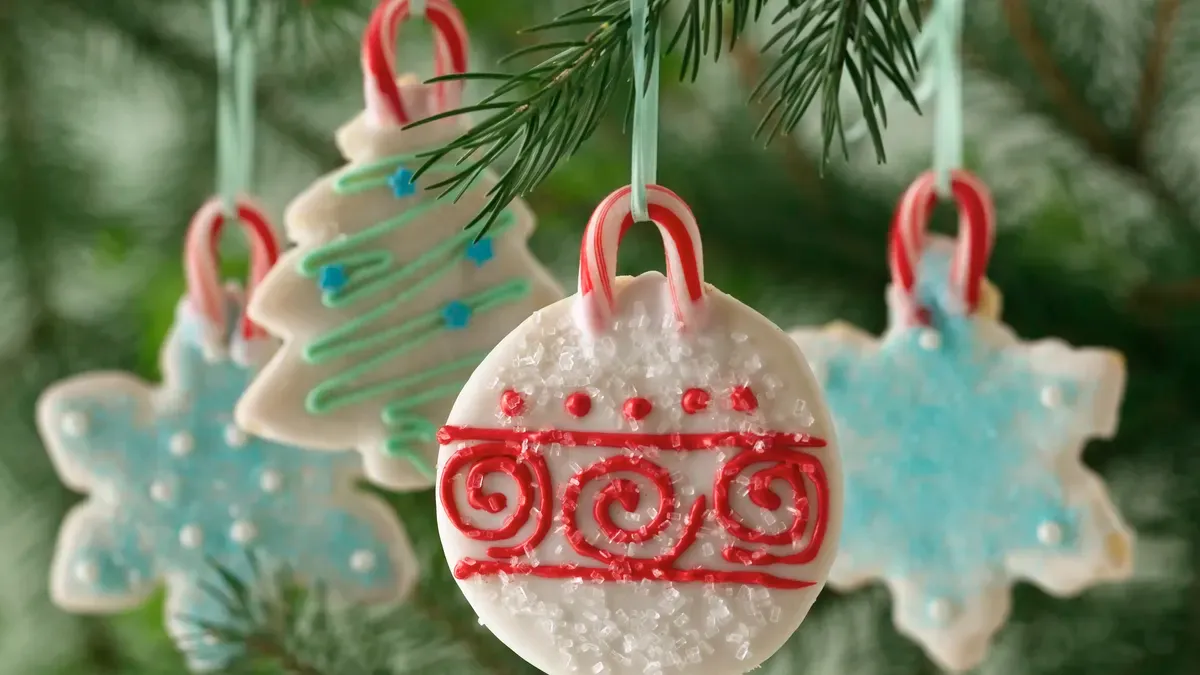
Once your shapes are baked and iced, and the icing has cured a full 24 hours:
- Snap a 2-inch piece off a candy cane.
- Hot-glue the curved end to the back of the ornament.
- Tie a 4-inch ribbon loop through the hook.
- Hang and adjust so the ornament sits level.
Fifteen minutes for six ornaments, about $3 in candy canes. Same unbaked starting point as Idea #8.
28. Thick Glitter and Thin Red Satin
Glitter ornaments with this much coverage run $8–$14 apiece at boutiques. DIY it: cut shapes from dough or buy plain wood cutouts ($5 for a dozen at Michaels), brush with Mod Podge, dump fine glitter over a paper plate, shake off, seal with a second coat. Under $15 for a set of twelve, and the plate catches the excess so you can pour it back in the jar.
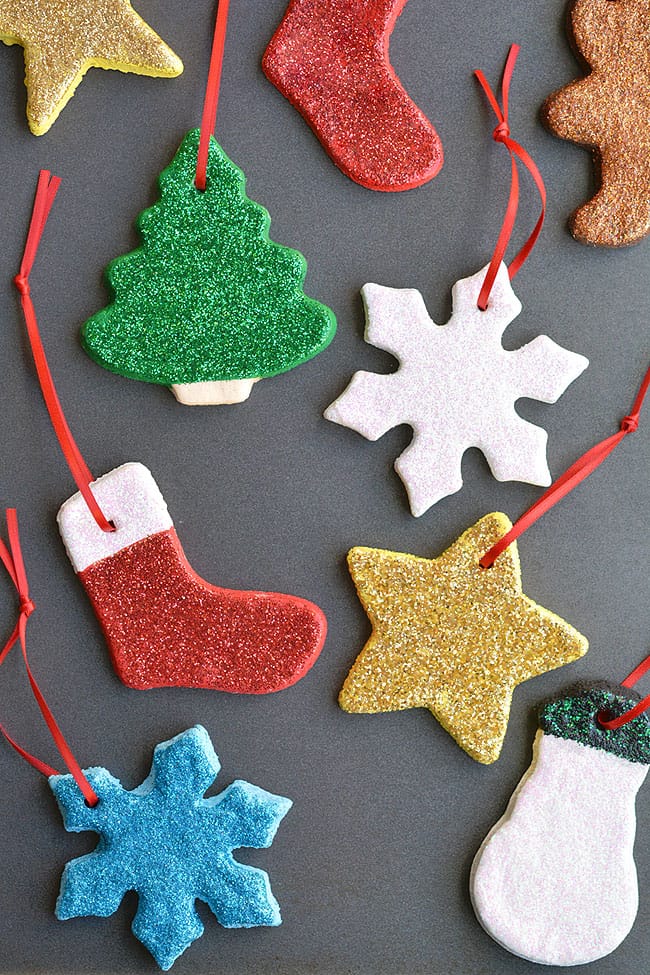
Glitter sheds — that’s the deal. Two coats of Mod Podge or a glitter-specific varnish and you’ll lose maybe 10% over a season instead of half. Red satin ribbons fray at the cut end; singe the tip with a lighter for two seconds or dip it in clear nail polish. Keep glittered ornaments away from velvet stockings unless you like permanent sparkle.
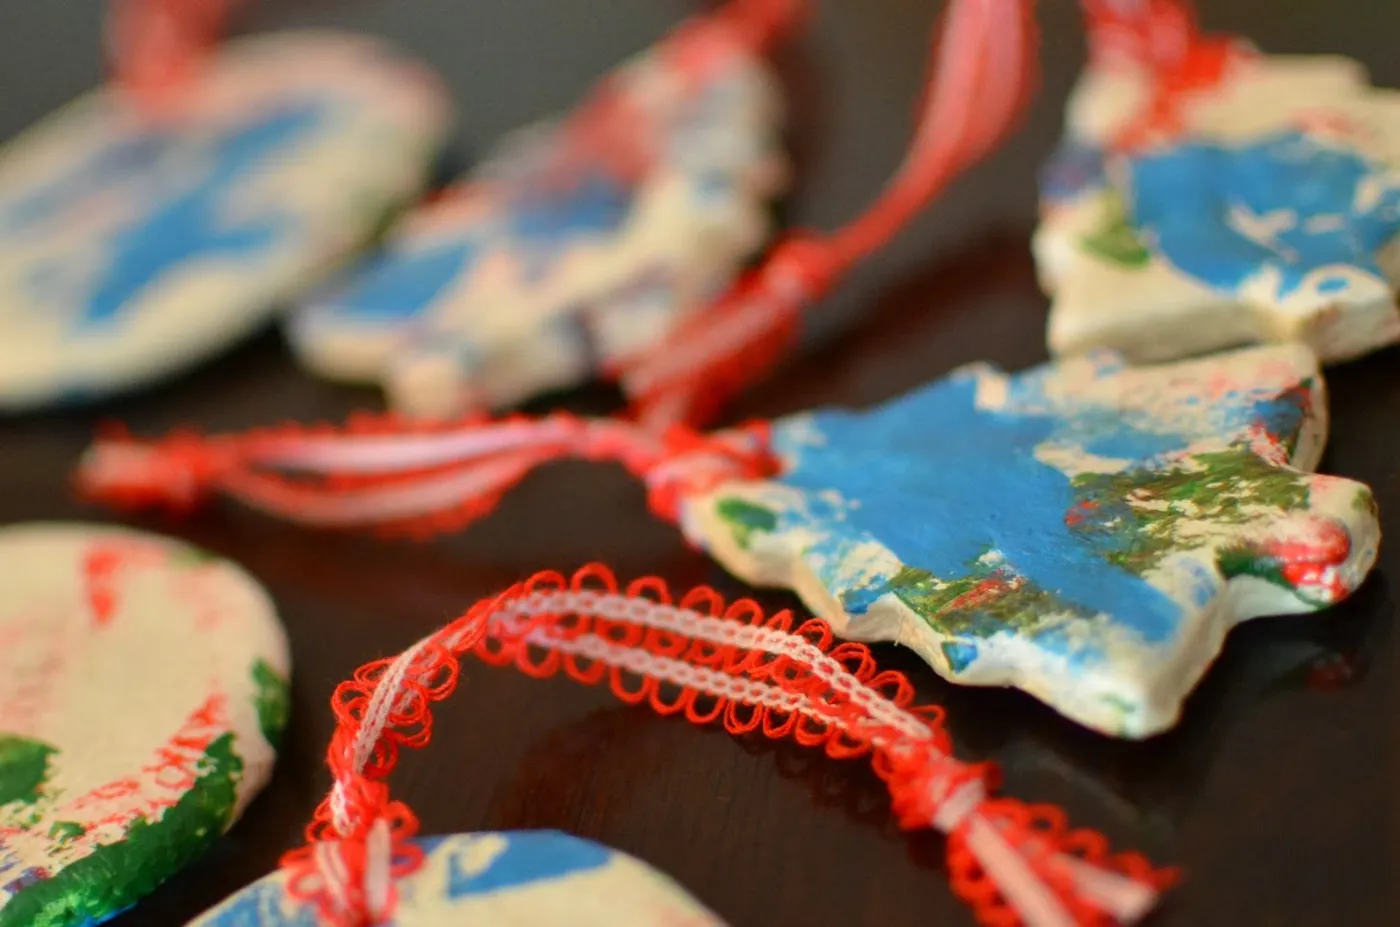
29. Broad Blue, Green, and Red Brushstrokes on Cream
Keep the strokes broad and confident — one or two passes, loaded brush, no fixing. Chalky off-white dough drinks paint, and overworking it turns everything to mud. The red-and-white lace-edged ribbon pulls in the other direction:
- One 1/2-inch flat brush for all three colors
- Let each color dry 15 minutes before the next
- Leave at least 30% of the cream base untouched
Nothing here is precious, and that’s the point. Abstract strokes of blue, green, and red on off-white read as a child’s painting — which is both the aesthetic and the emotional hook. The scalloped ribbon tips it toward handmade-with-care instead of craft fail. Messy paint plus tidy trim is the whole tension, and it’s why this works.
30. A Speckled State Shape With a Purple Heart
The raised heart in a completely unexpected color. Purple on a cream-and-rust speckled state isn’t a Christmas palette, and that’s exactly why it sticks. It marks a specific place for a specific person. Change the heart to red and the ornament goes generic; keep it purple because that’s her favorite color, and this becomes the ornament people argue over in twenty years.
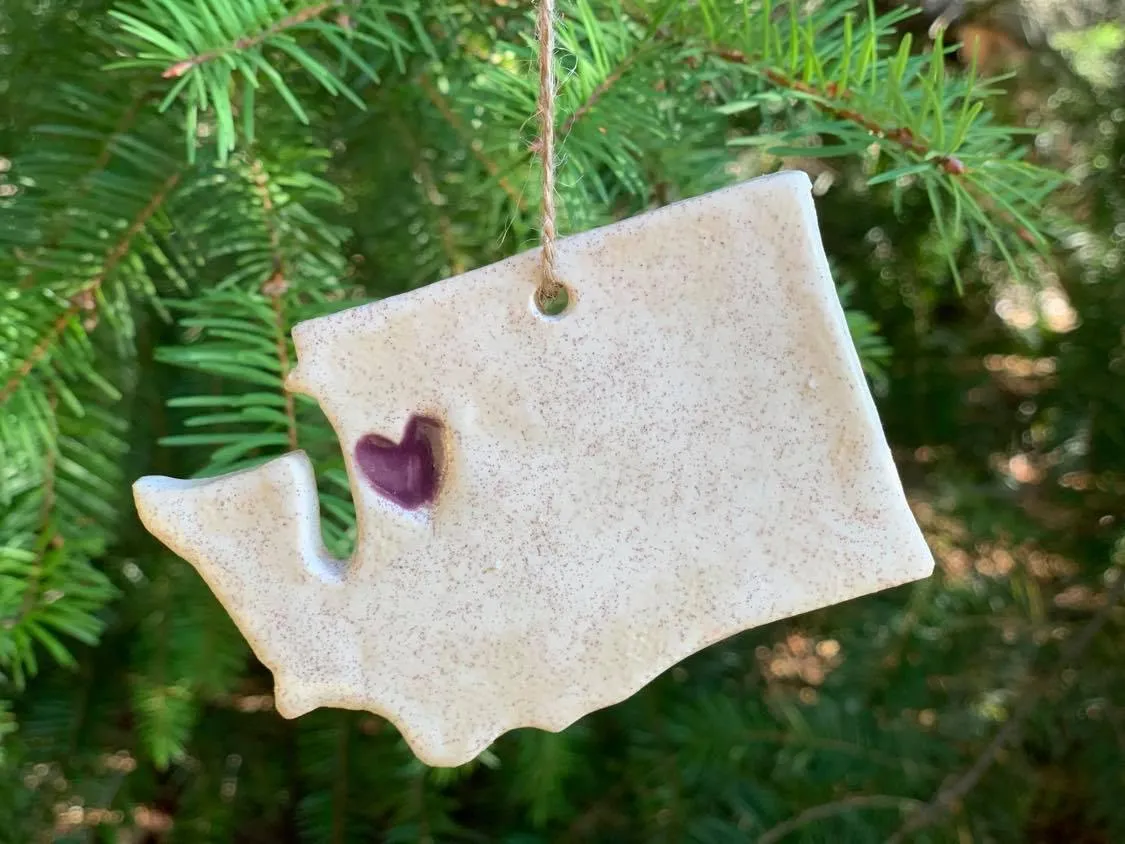
State and map shapes want to be at least 3.5 inches tall, or the border gets too thin and cracks at the hole. Give them a branch near eye level where people can actually read the silhouette. Making a set for a family scattered across three states? Keep them all identical in size — variety here just looks like you ran out of dough.
31. A Gingerbread Man Against Red Plaid Ribbon
Press the buttons in before baking rather than gluing after — use tiny dough balls as thread to anchor them, and they’ll never pop off in a storage box. And hang a single gingerbread man against a wide plaid ribbon instead of a bare branch: the plaid gives the eye a grid to read the silhouette against, which is why this styling looks far more expensive than it is.
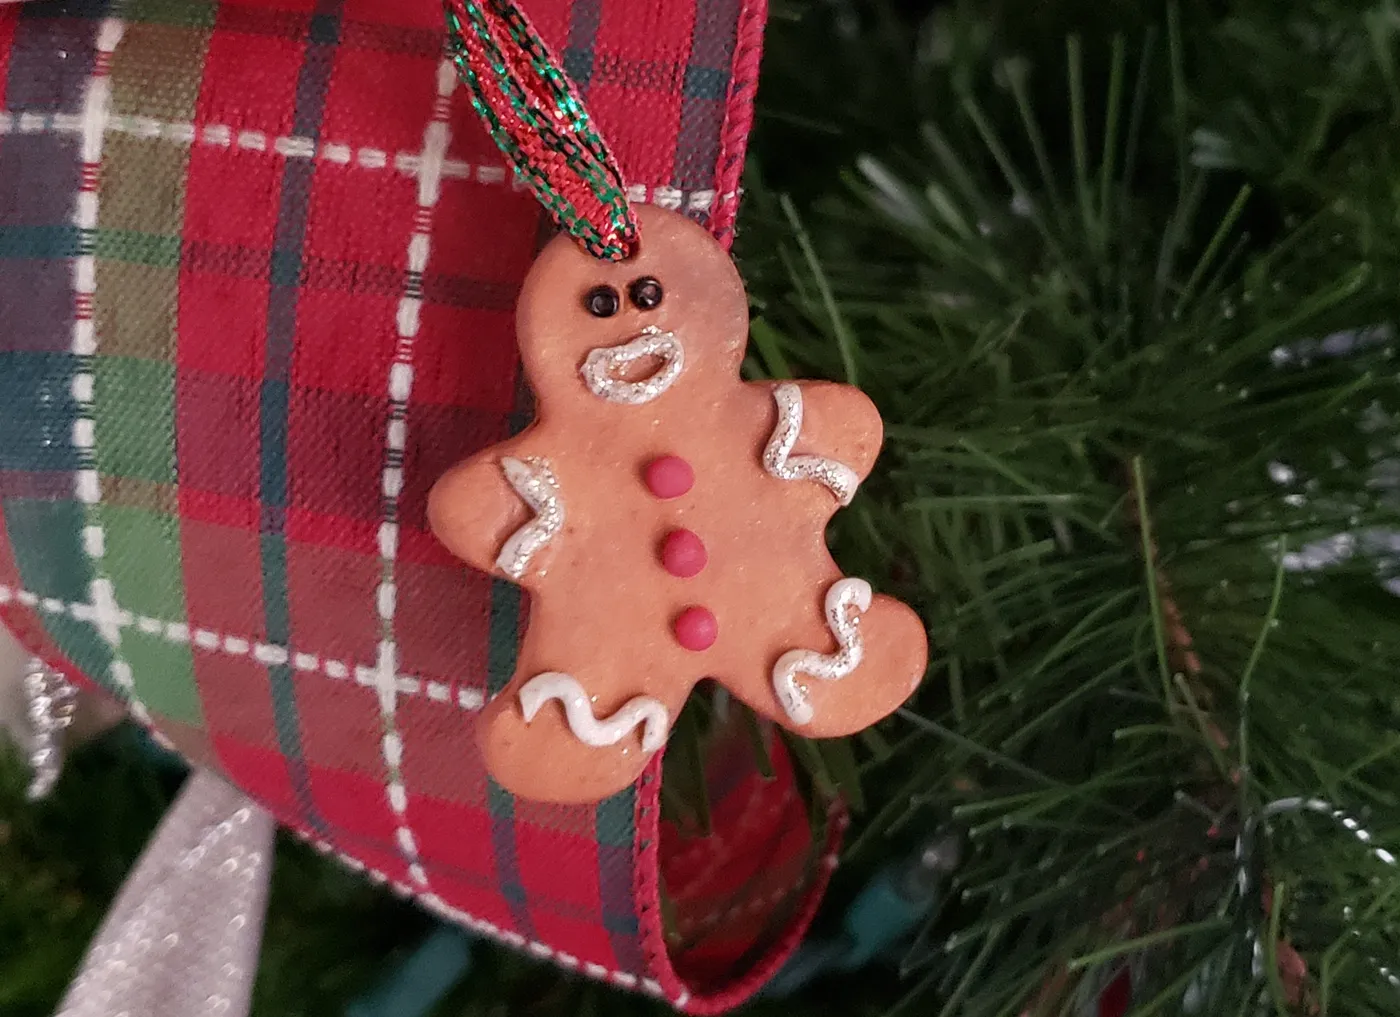
- Dough ingredients: $2
- White glitter glue: $5
- Red buttons, bag: $3
- Striped hangers: $4
- Matte sealer: $6
Total: about $20 for a dozen. Budget alternative: skip glitter glue and squeeze white puffy fabric paint in a zigzag for the frosting — $3, dries dimensional, and reads better from across the room.
32. Footprints and Handprints Turned Into Ornaments
Roll a 1/4-inch slab and press the hand or foot firmly, then:
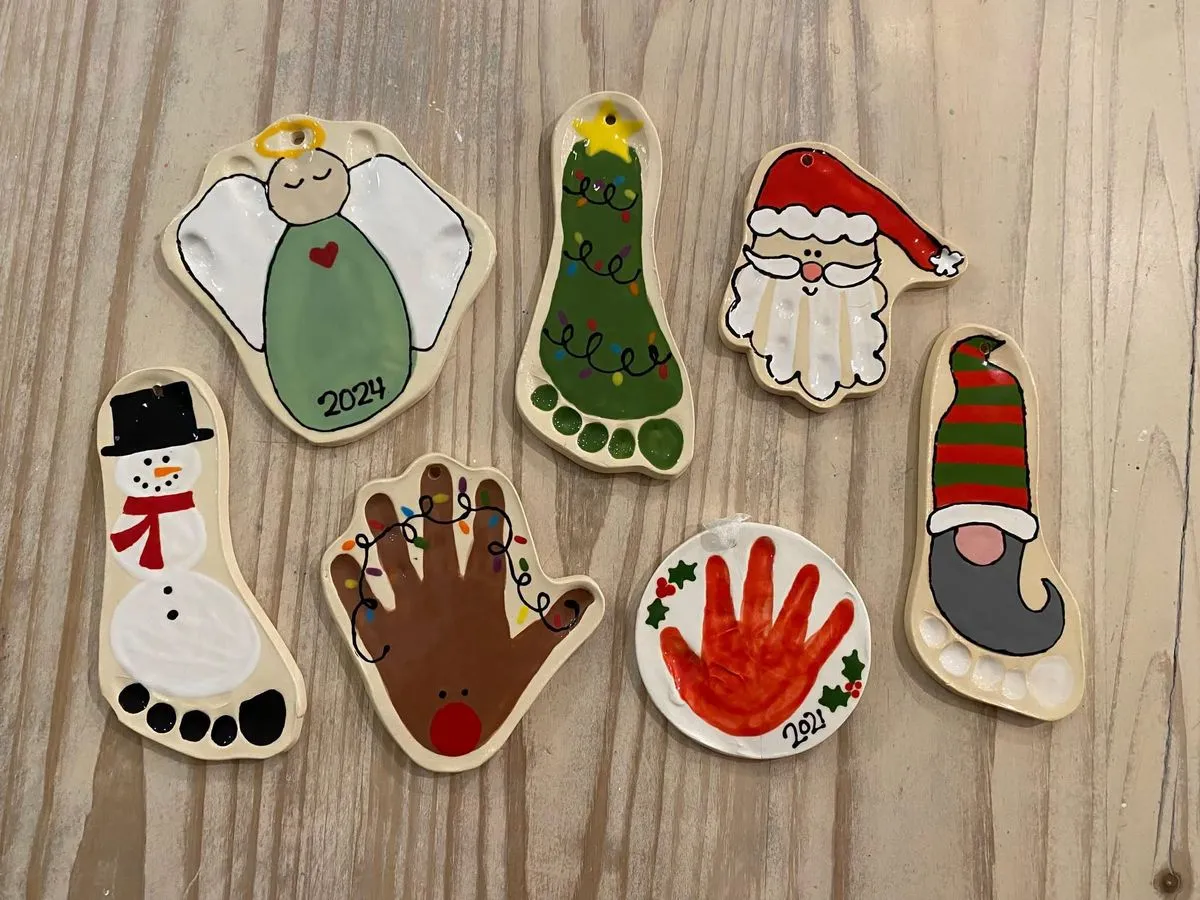
- Cut a circle or oval around the print, leaving a 1/2-inch margin.
- Punch the hanging hole and bake at 200°F until fully dry.
- Outline the print in black fine-tip paint pen.
- Add the character details — antlers, a hat, holly — in flat color.
- Write the year small, near the bottom edge.
About 30 minutes of painting per ornament.
Keepsake ornaments have moved from cute baby project to a genuine design category. Searches spike every November now, and the styles have gotten noticeably better — instead of a print slapped on a disc, people are turning prints into reindeer, trees, and snowmen with black outlines and controlled color. The result looks deliberate, not daycare.
33. A Cream Angel With a Heart Cut in One Wing
The heart cut out of one wing. It’s a ten-second detail with a skewer while the dough is still soft, and it changes the entire silhouette — a solid angel reads as a shape, a heart cutout reads as a message. Everything else here is tasteful and quiet: cream, white ribbon, no glitter. The cutout is the only reason you look twice.
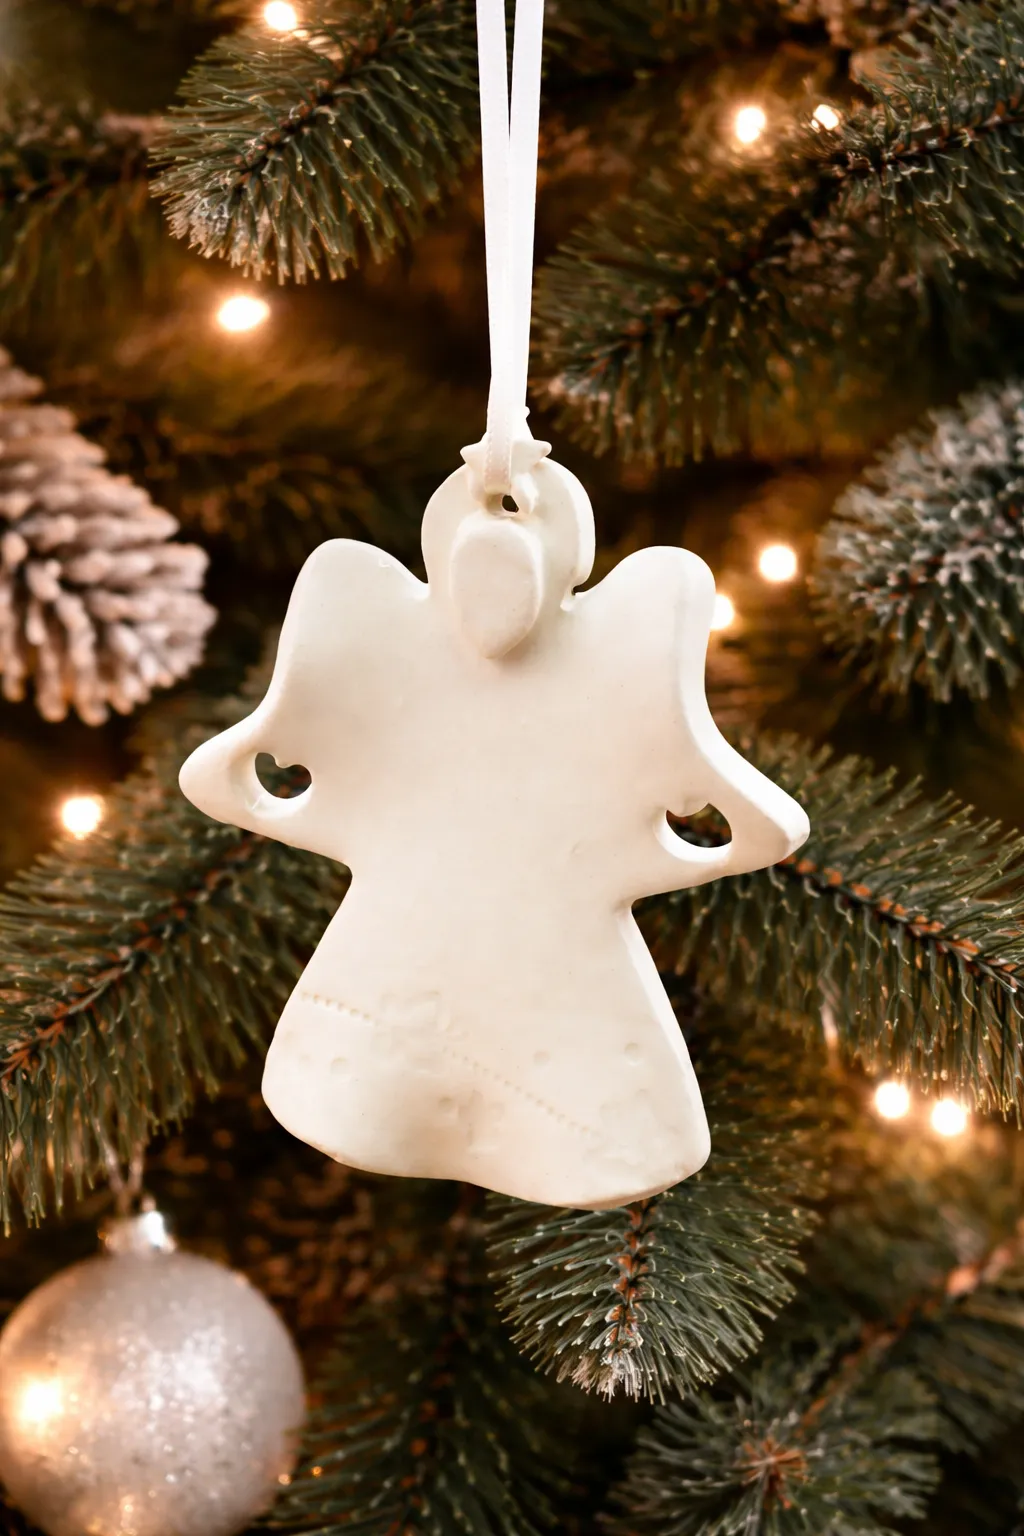
Cutouts are weak points. A wing with a hole in it cracks there first, especially if the dough thins below 1/4 inch around the cut. Keep the dough slightly thicker at those edges and seal both sides. Same caution applies to the twine bow in Idea #10 — small attachments are always the first thing to fail.
34. A Paw Print Disc and a Glittered Candy Cane
Personalized pet ornaments sell for $20–$35. A paw print is free if you have a dog and a scrap of dough: press the paw firmly, cut a 3-inch disc around it, bake, then write the name and year with a red fine-tip paint pen ($4). The candy cane is simpler still — twist two thin ropes of dough, bake, stripe with red glitter glue ($5). Eight ornaments, under $12.
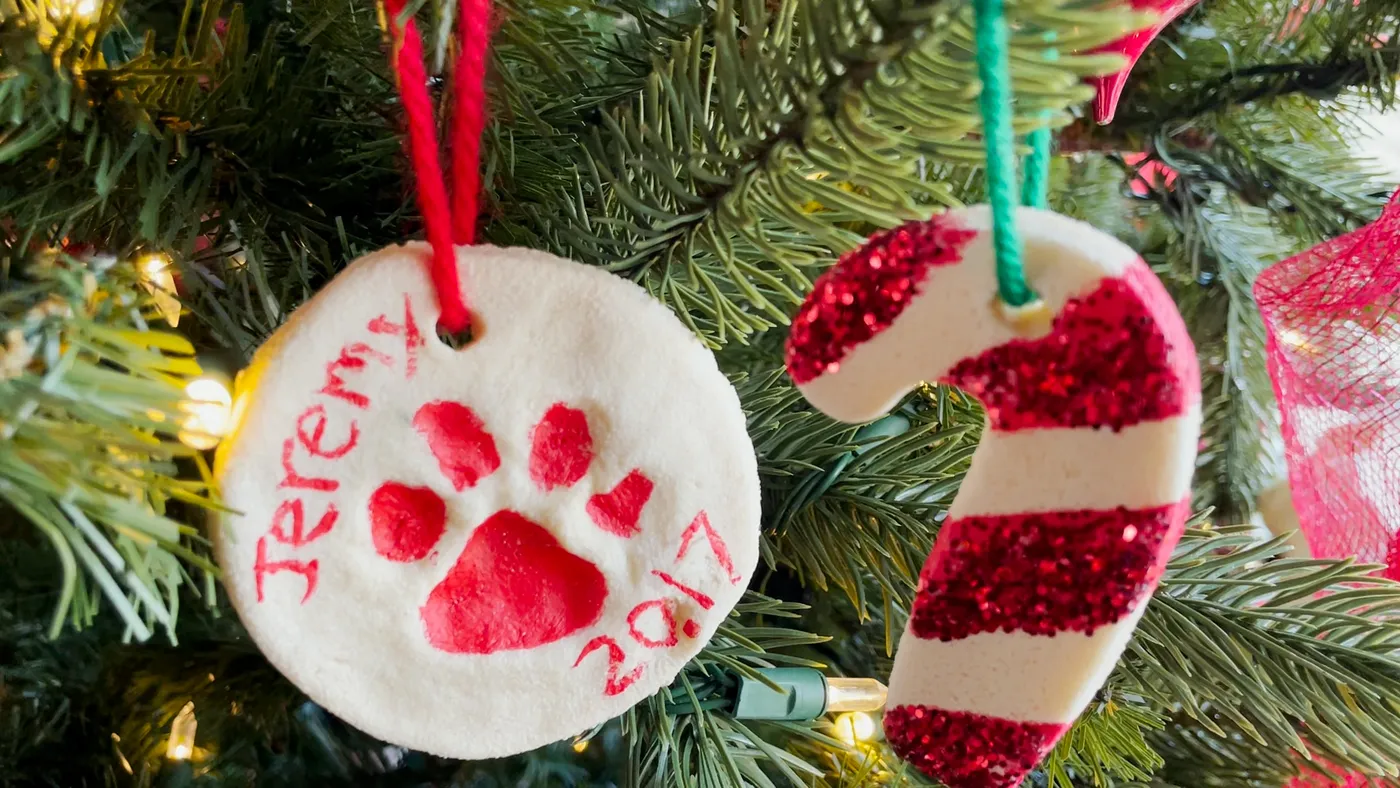
Paw prints in dough are adorable and slightly risky. Rinse the paw afterward, and don’t let the dog near the trimmings. Also, wait until a puppy’s paw is full-size before you commit — a four-month-old Lab’s print won’t match the dog you have in two years. Same rule applies to kids’ handprints, honestly.
35. A Hand-Painted Santa Among Mercury Glass
A hand-painted Santa face is high-detail and high-contrast sitting among reflective mercury glass, silver, and white spheres. That’s why it holds the eye in a crowded tree. The red-and-white striped string rhymes with the hat, too — the kind of small repeat that makes a tree feel styled rather than decorated. Same trick as the red border in Idea #13.
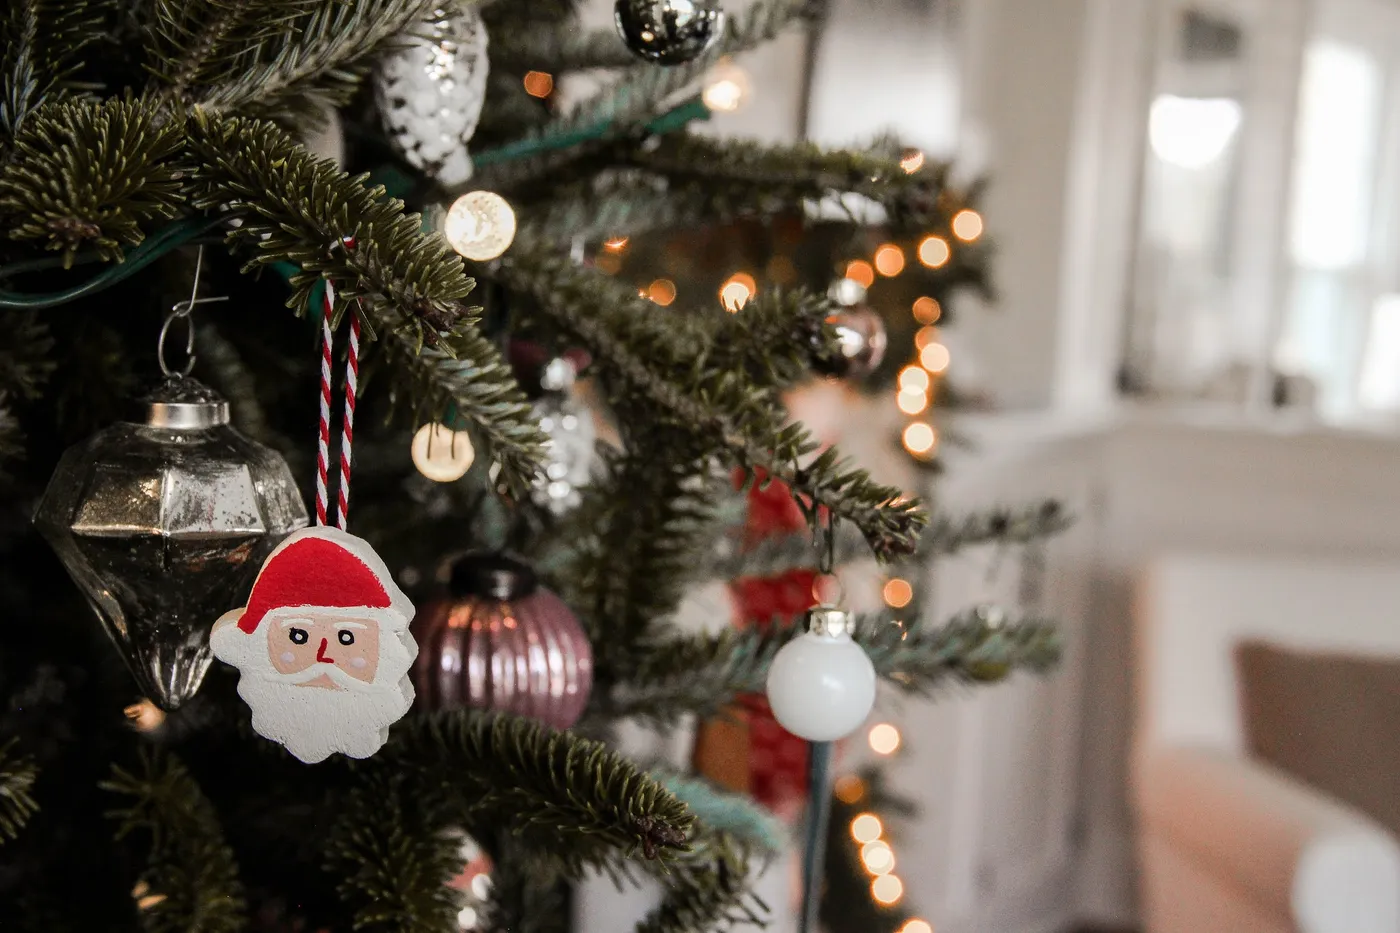
Roughly 70% green foliage + 20% neutral metallics + 10% saturated red and pink. It’s a classic traditional formula and it’s forgiving: the tree is the dominant color, ornaments are accents, and the metallics bounce string lights so the whole thing glows. Swap silver for brass and the mood warms up; swap red for burgundy and it goes old-world.
Flour, Salt, and a Little Patience: Your 2026 Tree Awaits
Honestly, the best ornaments on any tree are the ones that look like someone’s hands made them — slightly uneven edges, a fingerprint in the dough, a ribbon cut a little short. Start with one shape you love, bake it low and slow, and seal it properly so it survives to be argued over in twenty years. You don’t need a craft room or a budget; you need a cup of flour and an afternoon.
📌 Save this to Pinterest now — future-you, standing in front of a bare tree in December, will be very grateful.